So, last summer I bought five kimono-style dresses because I absolutely loved (and still do) the first green printed dress. I bought it at the last minute for a wedding reception, and I loved how the dress just flattered my figure and subtly highlighted my assets (my boobs). A woman’s rule of thumb: if you find a dress that flatters your figure and gives you confidence, you buy as many as you can in different colors or patterns within your budget.
 |
| THE YELLOW DRESS |
The first chance I got, I went back to the store and found the kimono-style dress on the clearance rack with several different colors in my size! Woot! Score! Yay! I scored a nice blue dress with a dark blue vertical stripe running down the middle, a solid purple, a solid coral, and a solid yellow. Normally, I stay away from coral and yellow but I had the PERFECT scarf and sandals to go with the dresses.
 |
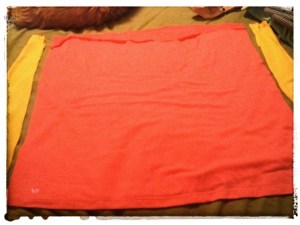
| THE CORAL DRESS |
I still love love love love the green printed dress and the blue striped dress, and I’ve worn the solid colored dresses a few times here and there over the past year. The last time I wore the purple dress, I realized I was no longer in love with the dresses because I became self conscious of my not-really-good curves. And I hate wearing spanx. I love their purpose, but I hate wearing them.
 |
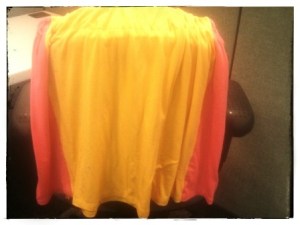
| YELLOW SKIRT ON TOP OF CORAL SKIRT |
Even though I scored the dresses for super cheap, I didn’t want to give them up. My original plan was to simply turn the solid colored dresses into skirts. Three dresses. Three new skirts. But then my creativity kicked in a notch, and I thought, “Color block.” I love the idea of color blocking, but I just don’t know if the style looks good on me. I decided to try a very simple color block method, using vertical side stripes.
 |
| SNIP SNIP SNIP |
So, I took the coral and yellow dresses and made a cut right below the elastic bustline. I then layered the yellow skirt on top of the coral skirt and simply cut a straight line about an inch or two away from the side seam down to the original hem line. I made the same cut on the other side of the two skirts. Carefully, I laid the body of the coral skirt (nickname: Montgomery November) elsewhere.
 |
| CORAL BODY WITH YELLOW SIDE STRIPS |
I took the two yellow side pieces from the yellow skirt and matched them to the coral skirt. So far so good. Working with the front coral skirt piece, I simply sewed the two yellow side pieces on each open end. I was so incredibly proud of myself when I saw the original hem of the yellow side piece and the coral skirt lined up perfectly! To see the yellow stitches and the coral stitches side by side just makes me happy.
 |
| SIDE BY SIDE SEAMS! |
Anyway, once the yellow pieces were attached to the front coral piece, I simply sewed the back coral piece to the open end of the yellow pieces. To finish off the skirt, I made a casing at the top of the skirt for a 1-inch elastic waistband – by far, my best method. Aaaaand my Montgomery November skirt is complete! Yay! And I love it! I love that the yellow pieces pop with the coral body!
 |
| NEW SKIRT NO. 1 |
Now, the biggest question I face: Am I able to wear this skirt during the fall and winter seasons? What if I paired the skirt with gray tights and a gray cardigan or sweater? Would that work? Without a doubt, I can’t wait to wear the skirt during the spring and summer months, but am I able to wear the skirt now?
 |
| NEW SKIRT NO. 2 |
For more details about me, my blog, and this post, click
here.
Jennifer Elliott

2 comments:
Firstly, I love you went out and bought the dress in every colour. This is something I say I'm going to do but never actually execute! Secondly, I still get excited when my seams line up too! I think you could use the tops of the dresses to make a tank with flutter sleeves :)
They look very neat for summer :-)
Thanks,
Eddie, EOD
Post a Comment