Hello again!
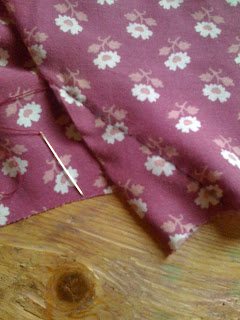
Some nights ago I decided to make use of all my fabric I have stashed away in my cupboards. (I literally have bags and bags of the stuff!) As usual I began my dress making plan far too late at night to begin it so I decided to wait another day before I got started, because rushing through it at night is never a good thing and I always work best after a good nights kip! So yesterday I got started on my dress! It took me the bones of about 6 hours but I did it, and I seriously love how it turned out! I wore it all day today too! I used vintage bedsheets kindly given to me from my boyfriend's mum, which I’m almost out of too!

I started out drawing the dress shape onto the fabric and making sure it was atleast 3 times my size. (its better than being too small!) Next I pinned the sides together and tried it on making sure it was the right shape, the large size wasn't a problem at the moment.

Next I took in the dress at the sides, quite a lot as you can see!

Then I pinned the taken in sides together and carefully stitched along the curves on the inside of the fabric. Leaving enough space for arm holes!

This is a rough shape of what you want your shift dress too look like!

Fold in in half to make sure both sides are equal.
NEXT, I made small darts at both sides of the bust line in the dress. I hope these images help!
Firstly I drew a line and made a crease. Your aiming to sew your straight line to your dotted line with a raised triangle of fabric poking out after.
Firstly I drew a line and made a crease. Your aiming to sew your straight line to your dotted line with a raised triangle of fabric poking out after.
 Pinch the fabric that is not to be sewn and sew along the fabric where the dots and straight line are drawn.
Make sure this is done on the inside of your fabric. It gives your bust that little curve that dresses need.
Next I hemmed the bottom of the dress neatly and sewed the shoulders carefully together and lastly, making a little peter pan collar to fit along the swooping neckline.
Aaaannnd... VOILA!


Sorry for the rather poor tutorial, but I forgot to take more step by step pictures! See more of this dress and my other creations here at my blog, www.scuzzface.wordpress.com. For a more direct link to this dress, click here.
XOXO


5 comments:
Loving your peter pan collar! It is a beautiful colour on you too. Well done
that is absolutely gorgeous! well done x
What pretty fabric!
Ooooh, I lurve the peter pan collar! I tried to do one and it was a disaster.
thankyou for all the lovely comments! The fabric was vintage bedsheets-so soft and lovely! And making the peter pan collar was really easy :)
Post a Comment