Showing posts with label making from scratch. Show all posts
Tuesday, May 05, 2020
T-shirt from the stash / scraps
I've had the stripe fabric I used for this t-shirt in my stash so long I don't remember where it came from - but it was an off cut and I only ever had enough for part of a t-shirt. The strips are navy, light blue and white, and I love the colour combination, but it was hard to find other fabrics that worked.
Then I started planning an Alabama Chanin t-shirt project with the two t-shirts above (more on that eventually) and the light blue t-shirt was a perfect colour match. I also had some scraps from a navy blue maxi-dress that I've been cutting up for years - and the plan came together.
The light blue t-shirt has a mysterious white-ish mark which I thought was bleach but it only shows on the right side. So I used the 'purl' side of the knit fabric on the outside. I can tell but I doubt anyone else will ever notice it's technically the wrong side. I took a close up photo but you can't tell in the photo either. The pattern is one I've been tweaking for a long time and this t-shirt has a slight high-low hem. Buttons on the neckline for fun.
I'm happy to have made something useful from items in my stash of refashions and fabric left-overs.
Happy refashioning!
Mimi
Labels:
making from scratch,
MimiMade,
scraps,
T-shirt,
T-Shirt Refashion
Sunday, August 12, 2012
It's Tunic Tune-Up Time
It started out something like this:
Now it was too small - pretty much everywhere... I found a scrap of similar fabric with red dots and made side inserts that traveled up into and through the sleeves:
But first I removed the sleeves because they were too narrow at the cap. I then re-cut the cap portion to fit, thereby making the sleeves shorter, but fuller:
To see me wearing this version, check out my post, "In and Out of Focus" at Project Minima.
You'll also find a mini tutorial on making a magazine clutch while you're there...
![]() | ||||
| tunic top 'B' made in an Asian-esque print |
![]() |
| view of red dotted side inserts |
But first I removed the sleeves because they were too narrow at the cap. I then re-cut the cap portion to fit, thereby making the sleeves shorter, but fuller:
![]() |
| view of side insert and under sleeve |
To see me wearing this version, check out my post, "In and Out of Focus" at Project Minima.
You'll also find a mini tutorial on making a magazine clutch while you're there...
Labels:
bags,
ladieswear,
making from scratch,
patterns,
project minima,
resize,
tops,
tutorial
Thursday, June 07, 2012
Summertime Wear In a Flash
All of a sudden it was summertime temps here in Chicago. So I whipped up a little something to wear in seconds flat out of fabric scraps I had laying around the house:
I just had a small amount of fabric, so I folded it in half and along that fold I cut a boat neckline. Make that a small cut - you can always go larger! Then I made a small stitch at the half-way point on either side perpendicular to the fold (in other words, where my arms would go through as supposed sleeves). That's it. I had an easy-literally-breezy crop top.
![]() |
| some semi-sheer stretch lace fabric |
![]() |
| like so. no need to hem anything cuz the fabric doesn't ravel |
Now for the bottom half: I had this summery sheer printed fabric scrap just laying there and I swooped it up and around my hips, tied it in a knot at my waist like a sarong. And that's it. Again, no hemming cuz I didn't feel like it - it was so darn hot.
![]() |
| floral sheer-ish fabric scrap |
![]() |
| turned into a sarong skirt tied at the side, waist |
Now if you want to see what I wore under it, or me modeling it...just click on my blog, Project Minima and scroll down to "Aloha Bohemian Hippie Chic(k)" on the Clothes Collage page.
And thanks for lookin'.
Labels:
ladieswear,
making from scratch,
project minima,
skirts,
tops
Tuesday, May 22, 2012
ReFashion Mash-Up
I wanted to show you guys how I've been mixing it up with the last 3 refashions I posted here: the platform shoe redo, the happy dress remake, and my made-from-scratch raspberry socks.
![]() | |
| the aforementioned happy dress, sock, and platforms show up together with my made from scratch vest and bloomers |
![]() |
| totally incognito in the happy dress with made from scratch pants & matching top, old red flats, and cat-eye sunglasses |
![]() |
| first time wearing the happy dress with my rehabbed lady boots, old pink anklets, red bangle, and dollar store red reading glasses |
To see even more variations on this theme, plus details, stop over at Project Minima by clicking here! And thanks for lookin'.
Labels:
dresses,
jackets/coats,
making from scratch,
pants,
project minima,
shoes,
tops
Friday, May 11, 2012
Beach and bath toddler's set DIY
Today I'm with a remake of a grown-up robe into toddler's beach or bath set: a little towel-robe and pants to match. Which can be worn in other occasion.
Original post @ Trash to treasure
Labels:
4polinka,
kids/childrenswear,
making from scratch,
pants,
tutorials
Saturday, April 14, 2012
Sock It To Me
Yea, I just made my first pair of sock, stockings, knee highs...whatevah. I sewed them, that is. Since I've been on this year-long shopping ban, that's the one thing I've had a bit of a craving for...so when I saw this tutorial for making your own tights, I was so on it.
One small catch was I didn't have enough 2-way stretch fabric in my stash for a whole pair of tights, so I opted for over-the-knee-socks instead.
I followed her idea of pinning the fabric while on my foot creating a inner side seam, but deviated from some of her suggestions to create a smoother fit.
For those of you following at home, here's some important points (or lessons I learned):
1) make sure your fabric has 2-way stretch and that the stretchiest part is going around your leg, i.e. is parallel to the top of the sox. Otherwise you won't be able to get it on and off the ankle/heel area. (I did that the first time...not paying attention...tsk, tsk.)
2) use your machine's stretch stitch on a small setting, or zig-zag at a narrow width and smallish stitch. (I found out that my old sewing machine had a cam just for stretch stitching and used it for the first time in 20-some years!! better late than never...)
3) once you have it pinned and ready to sew, make a paper pattern so you don't have to do the on-the-foot-pinning every time you want to sew a sox! (I did it for sox #2!)
For more details check out Project Minima
![]() |
| I know, it doesn't look like much just laying there... |
![]() | ||||
| But check out this leg shot...woo-hoo! Not only do they fit perfectly, but it was so easy. |
For those of you following at home, here's some important points (or lessons I learned):
1) make sure your fabric has 2-way stretch and that the stretchiest part is going around your leg, i.e. is parallel to the top of the sox. Otherwise you won't be able to get it on and off the ankle/heel area. (I did that the first time...not paying attention...tsk, tsk.)
2) use your machine's stretch stitch on a small setting, or zig-zag at a narrow width and smallish stitch. (I found out that my old sewing machine had a cam just for stretch stitching and used it for the first time in 20-some years!! better late than never...)
3) once you have it pinned and ready to sew, make a paper pattern so you don't have to do the on-the-foot-pinning every time you want to sew a sox! (I did it for sox #2!)
For more details check out Project Minima
Labels:
accessories,
ladieswear,
making from scratch,
project minima
Friday, April 13, 2012
Cute apron refashioned from curtain
I took one gingham curtain with two tie backs
and transformed them into this cute apron
You can read more about it here
Labels:
apron,
Little Blue Mouse,
making from scratch
Saturday, March 10, 2012
Reversible Vest #2
![]() |
| View of one side of the fabric... |
![]() |
| ...and view of other side of the fabric |
This time I worked on a vest where all the fabric scraps I used were reversible.
To make this work, I learned how to sew flat felled seams from a easy-to-follow tutorial here
![]() |
| Back with fabric pieced...looks good? |
![]() |
| ...and inside view |
The scrap I had for the back was so small, it had to be pieced.
Same with the collar - that was in 3 tiny pieces I stitched together!
(I think it's okay)
I used bias tape to finish off all the edges - making my own continuous strip of bias tape from an 18" square of fabric - based on a tutorial I found here
![]() |
| my hand-made bias tape finishing! |
See Project Minima for more stuff!
Labels:
ladieswear,
making from scratch,
project minima,
tops
Thursday, March 01, 2012
Four Refashions from Erica
Things have been busy on the Recycled Fashion front lately. I have been participating in the recent ProjectUpcycled contest over at TShirtDiaries. I know some other very talented Refashion Co-op members were also involved in the contest..
I made it to the finals (vote on your favourite here) here are some projects which I put forward for the contest:
Big paisley shirt refashion (over exposed image, sorry)
And a petticoat from a thrifted slip and cushion cover


My last and final refashion, a 60's inspired dress, made from a curtain I got from a market.


My last and final refashion, a 60's inspired dress, made from a curtain I got from a market.
Thursday, February 23, 2012
Vested
I rediscovered some pattern pieces I had cut out for a vest a long while ago and never sewed together - 3 of them actually.
![]() |
| mess 'o fabric cut for 2 of 3 vests |
Now it was a wee bit small, but easily adjustable I thought...(ah huh)
Along the way I decided to make it reversible rather than line it...(sure, why not)
![]() |
| inside view of reversibility |
Thought it would be cool to have pockets on both sides...(yea, wouldn't it) And how about making my own bias tape for the arm holes while I'm at it...(no problemo)
![]() |
| close up view of pocket, bias tape & tiny ties |
I did have fun mixing and matching all the fabric possibilities. The vest is a great way to use up small scraps that I love, that aren't big enough for much else.
![]() |
| front |
![]() |
| back |
A feat of engineering (for me, anyhow) in figuring out reversibility with pockets, mitering bias tape, and getting the ole' loop turner happening - but it's all good.
Especially now that it's done.
Visit Project Minima to see Side B of my Reversible Vest
Labels:
ladieswear,
making from scratch,
project minima,
tops
Monday, January 16, 2012
Steampunk Skirt
I had a dance to go to this weekend that had a steampunk costume theme. So I took a fitted black sheet and some white lace curtains to make a bustled skirt. The most amusing part was using one of the fitted corners of the sheet to be the actual bustle.
The tutorial/pattern I used can be found here.
My blog write-up can be found here.
The tutorial/pattern I used can be found here.
My blog write-up can be found here.
Labels:
making from scratch,
Seeks,
skirts,
tutorials,
womenswear
Thursday, December 22, 2011
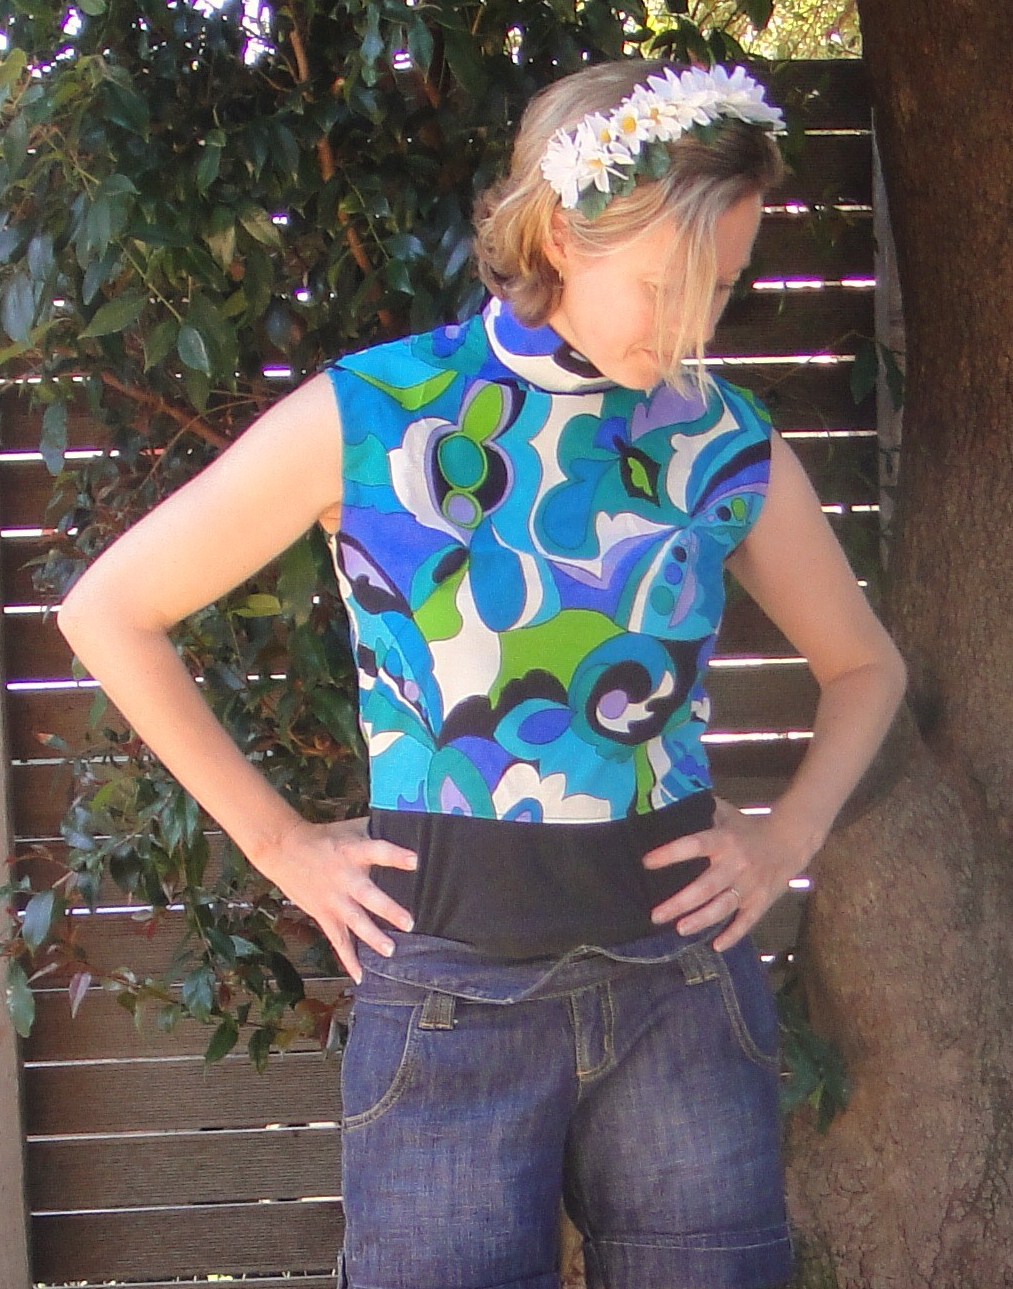
Pucci Crop Top
Using a 60's dress pattern Simplicity 5132 found on the side of the road, and a piece of pucci-style fabric from the op shop costing less than a dollar, I've made a crop top..


More here
More here
Monday, December 05, 2011
Kimono Style Dress
I was very excited to get a Japanese Pattern Book in the mail and figure out how to create my own pattern from the diagrams as well as grade the size to fit. (still working on that)
![]() |
| Kimono Style Dress |
I made some deviations along the way since I had only so much fabric in my stash
which ended up being a good thing, I think.
| detail of neckline facing |
I used a gray camouflage-like cotton print for the basic dress and a weird silver metallic fishnet fabric for the see-thru overlay they suggested for the front and back panels. I never thought I would ever use that silver stuff, but it actually made the boring gray camo cloth look interesting. But...it was also scratchy at the inside neckline so I made a facing from some silky jersey fabric in an op-art B&W print. I had just enough of this scrap to cover it.
| detail of sleeve lining |
Another alteration with the sleeves, they were kinda wide at the end and I thought they needed some lining, but I didn't have enough of any one fabric to do so, so...I just went with different B&W and/or gray jersey scraps for each sleeve - a camo version here and a leopard-esque one for the other.
| detail of hem as piping |
And finally, not enough fabric left for a hem, so I added a 1+ inch strip of another B&W jersey print to the bottom and sewed it on like piping. In fact, I sewed all the jersey pieces as if they were piping - so a bit of the fabric shows on the right side of the dress, if you get my drift...
See Project Minima for the second version of Kimono Style Dress using my old flannel sheets!
Labels:
dress,
ladieswear,
making from scratch,
project minima
Tuesday, November 08, 2011
Ode to a Grecian Slip
I needed a slip to wear with this semi-transparent dress I made previously - and found a scrap of black nylon/ chiffon in my bin. It just sort of came into being as I was working on it.
I took the piece of fabric and sewed it down the sides so I ended up with one long tube leaving the selvedges free at the top and bottom. (yea, no hemming or facings necessary!) At that point it seemed easier to just make a full slip rather than a half one, so on I went. Keeping the only stitched seam going down the middle of the back, I left a kick slit opening at the bottom. I finished the seam edges I just made because the material ravels like crazy, plus its see-thru.
I had just enough wide black elastic stretch lace and used that to gather the waistline. Then I added two lace shoulder straps to the bodice and just let the top drape, Grecian-style. I had extra black lace leftover where I had attached it at the front bodice, so I twisted it around to create a teeny tiny rose at each strap and hand sewed it in place. That's it. Visit Project Minima to see the lingerie I made to go with it!
Monday, October 31, 2011
It's a Wrap
![]() |
| Skirt created from a single piece of fabric - no sewing! |
![]() |
| Detail of tied knot in front - but could be worn on side or even the back! |
I put it on and wore it that evening with a pink silk slip, my taupe silk and lace top, and my taupe tank top under that. woohoo. See Project Minima for all these refashions.
![]() |
| Detail of skirt "hem" which is just the frayed edge of the fabric |
Labels:
ladieswear,
making from scratch,
project minima,
skirts
Thursday, October 27, 2011
DIY Tie-Dye Wrap Blouse
Based on a vintage advert for "wrapped cloth" in the LIFE Archives, Whitney, who blogs at freshlygiven, created her own DIY wrap blouse from her grandmothers old skirt, and wrote a tutorial on her blog so I decided to give it a go myself..
DIY Wrap Top


.jpg)