Showing posts with label ladieswear. Show all posts

Friday, October 26, 2012

Skirt From a Sweater... Second Time's the Charm


This is my second attempt at a sweater skirt. My first one was a flop, but I did learn a couple of valuable lessons along the way. And knowing is half the battle, right?

Lesson number one: When sewing a sweater, it is MUCH easier to work with a fine gauge knit than a chunky sweater. The first sweater I tried to work with was made of a thick cotton yarn that easily fell apart when I cut it.

Lesson number two: Sweaters tend to stretch when you sew them. I was able to prevent the stretching by increasing my stitch length.  I also used a "straight stretch" stitch for this project, which is one of the stitch settings on my machine.


This is where it all began.  I found this large men's sweater and intercepted it just before it was sent to the goodwill. Score! I also used the sleeves of a stretchy knit shirt to make the waistband.

For more details on this transformation, hop on over to my blog. Thanks for reading :)


Sunday, August 12, 2012

High Low Maxi Skirt

Let's face it, when it's in the nineties or over one hundred, a maxi skirt is HOT, HOT, HOT!
So I decided to turn this Tie Dyed Maxi Skirt made earlier this summer into a High Low Maxi Skirt.


This little trick made all the difference in the world when it came to staying cool in a maxi!


You can find the "how to" at The Renegade Seamstress

Hope you're staying cool where ever you are!
Beth


Anthropologie Inspired: The Collection Necklace

From one pile of broken jewelry . . . 


. . . to one Anthropologie inspired eclectic necklace . . . 


See more details on my blog.

It's Tunic Tune-Up Time

It started out something like this:
tunic top 'B' made in an Asian-esque print


Now it was too small - pretty much everywhere... I found a scrap of similar fabric with red dots and made side inserts that traveled up into and through the sleeves:

view of red dotted side inserts

But first I removed the sleeves because they were too narrow at the cap.  I then re-cut the cap portion to fit, thereby making the sleeves shorter, but fuller:

view of side insert and under sleeve

To see me wearing this version, check out my post, "In and Out of Focus" at Project Minima.
You'll also find a mini tutorial on making a magazine clutch while you're there...


Tuesday, August 07, 2012

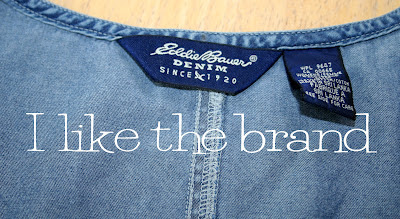
Eddie, Eddie, Eddie, What were you thinking?


Shesh Ka Bob, Eddie! 
What were you thinking? This dress is so unflattering! No wonder someone dropped it off at the thrift store. They probably laid it on the doorstep, rang the doorbell and ran. :)
But at least you chose some great lightweight stretch denim so it had some promise.


I cut out the middle, resized it to fit better, added some ruffles and changed the sleeves to make this dress much more fun. I think Eddie needs to get out more on Saturday nights.


Come on over to the Renegade Seamstress to get the full details on how to make this dress.
Enjoy your day!
Beth


Monday, August 06, 2012

Valerie's Vintage Dress Refashion

Lucky me!!!
I've always been so fortunate to have assistants who also become my friends. Valerie is no exception! She joined our team last January and I'm thrilled to have her with us.
Valerie calls herself Seamstress Interruptus. So appropriate considering she is the mother of not one, but TWO sets of twins!
That being said, I felt very honored that she felt inspired enough by my 1960's Mad Men Inspired Dress Refashion post to take some of her precious time to try this herself. 
Since she doesn't have her own blog, I thought I'd share her refashion with you.
She started with this vintage dress she found at a yard sale. 


Fit her somewhat like a potato sack. But the fabric is fantastic!
 So she refashioned it into this:


I think her new dress is so flattering and beautiful on her.

You can see exactly how she did it here at The Renegade Seamstress
Enjoy your day!
Beth

Back to School Refashion


It's that time of year again.....
Being a teacher, everywhere I go I'm asked the same question.
Are you ready to go back to school?
Well, sort of.....
My school clothes are ready at least.
This has been the summer of sewing for me.

I found this skirt and top at the thrift store. 
Both were WAY too big for me.
 And there was a bleach hole near the top of the skirt.


So quick as a wink I started cutting.


I added some quarter inch elastic fit to my waist around the top by sewing and stretching at the same time. This creates a gathered waist.

And now I've got another Back to School Outfit.


I'll go get my classroom ready just as soon as I feed my chickens. :)

I'd love a blog visit from you. 
Come see some how I refashioned the shirt and more refashions at The Renegade Seamstress


Wednesday, August 01, 2012

Tom Binns Inspired Colorful Cameos

Tom Binns necklace


While these pieces are very beautiful, they just don't fit into my budget.  
So I created my own  - - - >


This is so easy to do.  All you need is a cameo, some nail polish, and a chain or bead necklace.


This was one of mine before painting.
Paint the cameo with nailpolish colors of your choice.  I used a toothpick to help get the nailpolish in the little nooks and crannies.
Attach to a chain or beads and your necklace is ready to go!

See more photos on my blog.

A DIY Pencil Skirt Refashion


I'm a sucker for anything blue and white so when I saw this thrift store skirt, it was a "must have" item!
But it just didn't do much for me in the hip department.


So, I cut away the fabric from the waistband.


Cut off the excess fabric.


Sewed a new side seam.


Added a casing at the waist for elastic and wah-lah.....


A new summer skirt!

The full photo tutorial can be found here at 


Sunday, July 29, 2012

Let's Shift Again

I originally made this shift as a mini long, long ago (needless to say, it no longer fit):
my old mini shift...

For this time around, I opened up the side seams and removed the sleeves to recut them to fit.  I added side inserts of an electric blue fabric scrap I had on hand:
with blue side inserts and...

I also added some length to the sleeve hem and dress hem with that electric blue fabric, using it all in the process:
sleeve and hem extensions...
But I still wanted pockets.  I spied - on top of my blue scrap pile - this perfect Hawaiian print!  (yes, I have my small scraps of fabric in bins by color):
...plus big ole patch pockets!

I had just enough for two big patch pockets.  It made the dress and I very happy! 

To see me wearing it, check out Project Minima at Let's Shift Again.


Friday, July 27, 2012

Lace On Lace Top


This little lace top was made from this XXL thrifted $2 top:


and this lace collar, left over from a previous re-fashion:


See more details on my blog.


back

Wednesday, July 25, 2012

Shirt Dress Refashion + An Easy Boxy Sleeve Fix

This dress was a $1 garage sale find - bought mainly because I liked the color.
A few snips and new hems and here's my dress now:

Something I'm much more likely to wear~

I removed the sleeves and shoulder doo-dads.  Re-hemmed the sleeve openings and then chopped off about 6 inches and hemmed the bottom.

But I was still left with really boxy shoulder/sleeves.


Luckily there's a really easy fix for that

Before and After

See my blog for a quick tutorial for this shoulder fix