Showing posts with label T-Shirt Refashion. Show all posts

Friday, May 27, 2022

Reducing the punishment pile


Do you have those refashion items that don't work but you can't quite let go?  This is one of those: I like the colors, but it was all wrong when I put it on (length / fit / style).

It's been in my maybe one day pile for a long time.


Then one day when I was fossicking in my maybe pile that top and this striped one fell together.  They shouldn't work because one is raspberry and the other grape and grey but they look the same colour when they are together by some weird alchemy. 

Meant to be?  Maybe, and maybe not.  The neckline on this one is alarmingly stretched when wearing so there was one way for them to go together.


I messed about with options and then cut them apart for sewing back together better.


Which is when the 'fun' started. I cut the raspberry one / top part to my block pattern for knits exactly.  But when I tried it on it was way too big.  Did I stretch it all out of shape trying it on? Nope, checked against the pattern and it was fine.  I safety pinned it on me to where it needed to go and that was about 8cm (3in?) each side.  Unbelievable.  I split the difference and took it in 4cm each side and that seem right next time I tried it on. 


Then this - little did I know that the stripes were mismatched by 5 between one side and the other.  Disguised on the original version but it would have been obvious against the block colour.  Did I give up (when I should have)? NOooooo, I cut one side open, pinned every second stripe and sewed the striped section together - with wrong sides together. <Sigh>.  Unpicked and sewed them together again.  Then I had to finagle that sharp point at the bottom side seam, still matching the stripes.  So. Much. Time. Then I stitched the top and bottom together perfectly aligned.  Then I set in the sleeves...  


...and tried it on and hated it.  I dunno, maybe being tortured during the sewing process means I was never going to like it.  I can't put my finger on it.  I added the neck band and I'm going to donate it and hope it makes someone else happy.  It's looks fine on Gabby there.


Lessons learned: 1. I don't have to save everything.  2. When it stops being fun, stop and do the next thing.


I hope your up-cycling is going well, now and in future.  May it always be fun.

Mimi

Tuesday, September 14, 2021

Useful if unspectacular alteration


Bear with me, this is very difficult to show in photos as it's not a massive change.


I like viscose t-shirts because they drape really well, and this one is in a favourite colour.  But over time the neckline stretches out until I spend all day faffing to cover my bra straps and keep it in place. 


You can see how stretched out it had become. I finally had enough and was thinking of completely replacing the neckband.  But I couldn't match the colour.  Then it occurred to me the existing neckband was stitched in such a way it was effectively a casing.  So I very carefully unpicked where the neckband was sewn together on one shoulder and threaded through 6mm elastic. 


I had to use a large eye needle for knitting, and sew the elastic down to itself in a loop after I put it through the eye.  The neckband is too narrow for a safety pin.  It has stretched the fabric a little, and I did need to arrange the gathers once I'd finished.  I sewed the neckband back together and good to go!

I hope you found this useful and happy sewing!

Mimi

Saturday, February 20, 2021

Something new, something old

 Last year I started a lot of refashioning projects I just didn't finish because... I suppose I was preoccupied with other things.  So this year my word for the year is FINISH.  


And nothing compels me to finish like a hard deadline - we're expecting a new arrival between now and the end of March (not me but another close family member).  So, a finished refashion at last!  Two old t-shirts were cut up to make two new baby rompers.  The orange one was a previous refashion / tie dye I did with the Mamma-to-be a very long time ago and I kept because the colour was so good.  The pattern is this baby onesie or bodysuit from Small Dream Factory


It all went swimmingly right until the very end.  The applique went well too - Mamma's a fan of that long running BBC TV series and the orange background just needed it.  And then I applied, or attempted to apply, the poppers and they were bad.  Really bad.  They were so misshapen when applied they didn't close but removing them (I removed one) damaged the fabric.  Mega grumpy face.  I ended up applying hook and loop over the top but it was all a bit messy.  All the fault of the cheaply made poppers.


And then, while I was taking the photos, a better solution occurred to me and now it's a t-shirt.  I've cut out one more of the navy to be bound in orange and I'll use popper tape this time (now I've seen it, so much simpler).

Happy refashioning and finishing!

Mimi

Tuesday, May 05, 2020

T-shirt from the stash / scraps


I've had the stripe fabric I used for this t-shirt in my stash so long I don't remember where it came from - but it was an off cut and I only ever had enough for part of a t-shirt.  The strips are navy, light blue and white, and I love the colour combination, but it was hard to find other fabrics that worked.


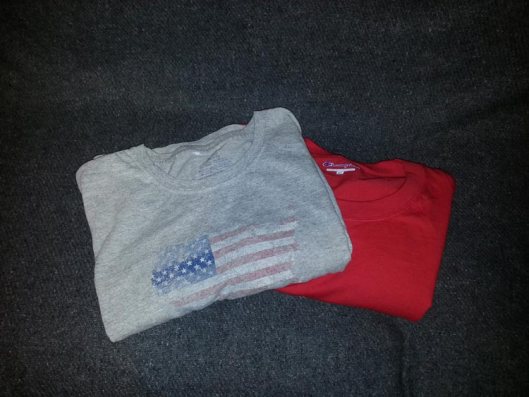
Then I started planning an Alabama Chanin t-shirt project with the two t-shirts above (more on that eventually) and the light blue t-shirt was a perfect colour match.  I also had some scraps from a navy blue maxi-dress that I've been cutting up for years - and the plan came together.

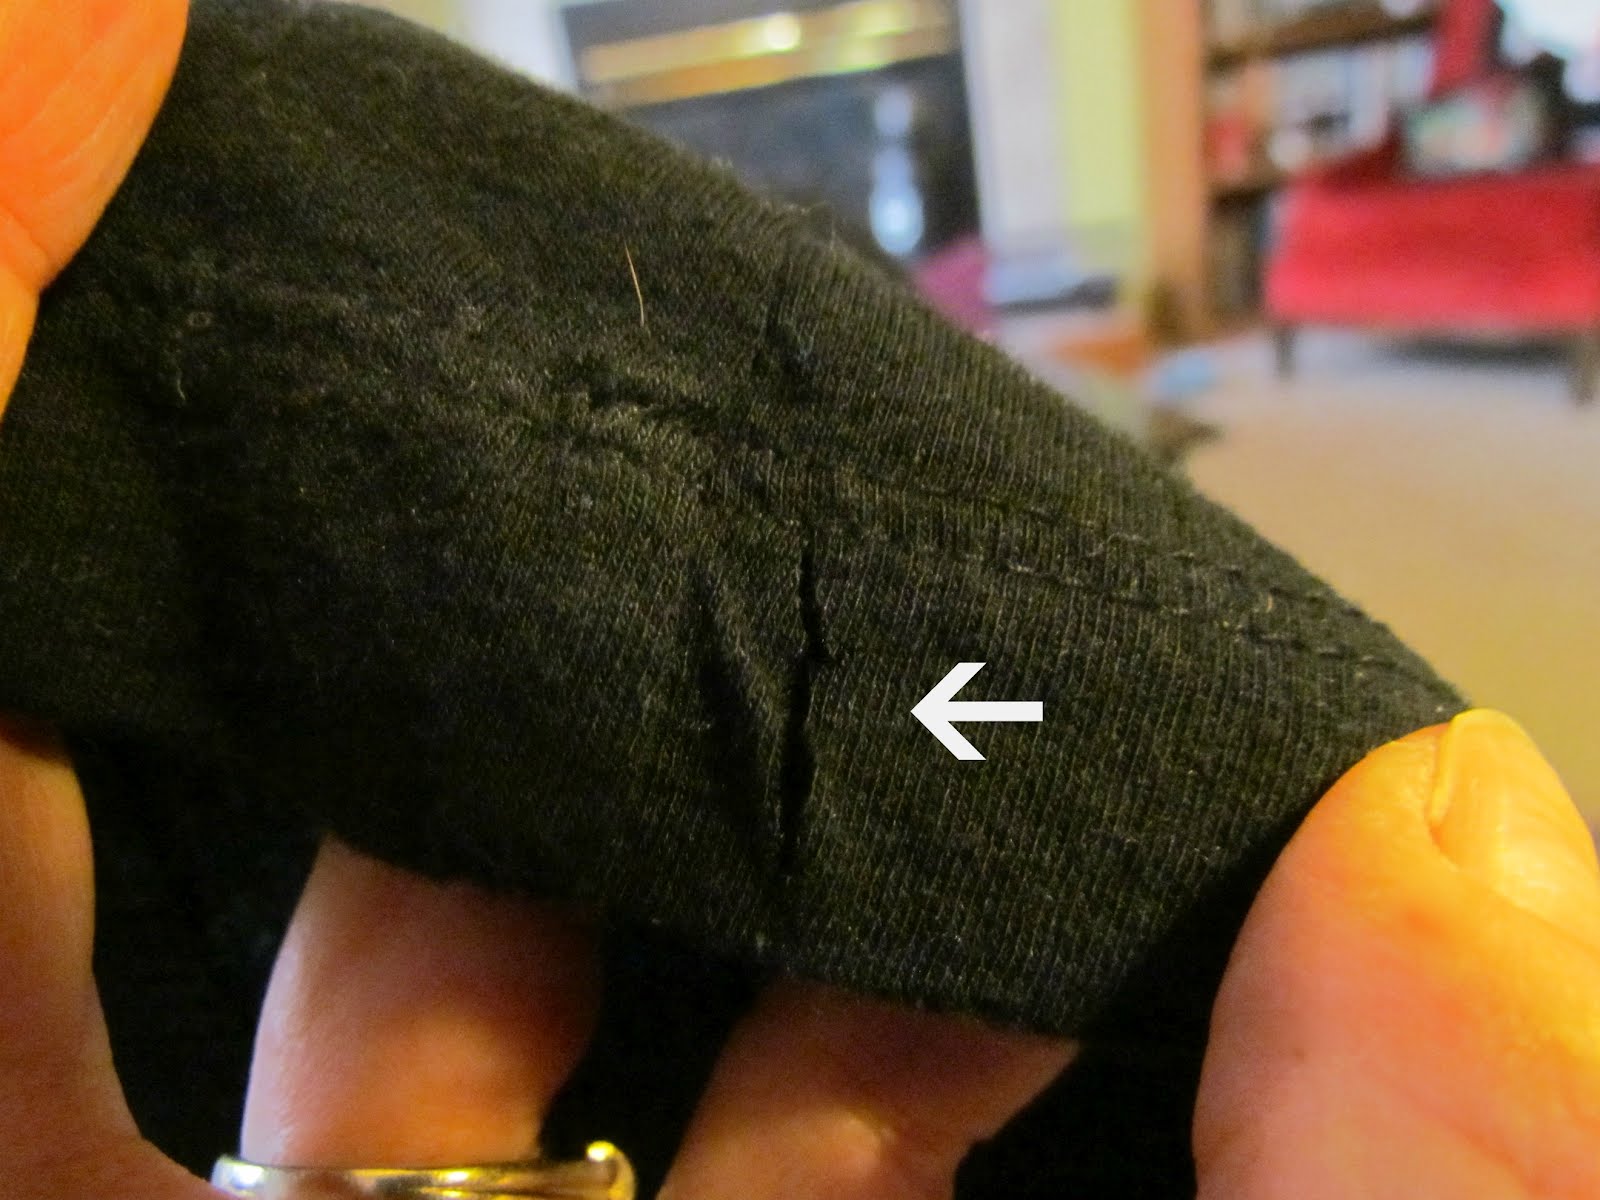
The light blue t-shirt has a mysterious white-ish mark which I thought was bleach but it only shows on the right side.  So I used the 'purl' side of the knit fabric on the outside.  I can tell but I doubt anyone else will ever notice it's technically the wrong side.  I took a close up photo but you can't tell in the photo either.  The pattern is one I've been tweaking for a long time and this t-shirt has a slight high-low hem.  Buttons on the neckline for fun. 


I'm happy to have made something useful from items in my stash of refashions and fabric left-overs.

 Happy refashioning!

Mimi

Sunday, May 27, 2018

2 wins and a fail

I'll start with the fail, because that's the way my pictures uploaded.  I wanted to change this oversized, shapeless t-shirt into something that would suit me better.  I trialled a few other t-shirts because it was clear from the start I was going to need some extra fabric.


Got out my TNT t-shirt pattern and messed about a bit... 


 And ended up with this fail.  It's not an epic fail, more a 'meh' fail.  I just don't like it on.  I like the colour combo.  I like the sleeves a bit, apart from the cuff (but I could cut that off).  But, for some reason, it turned out much wider than it should have given I've used the pattern before.  It's also too short and the band at the bottom is just wrong.  This is going to be the problem for me re-fashioning t-shirts - they're always too short to start with.  So if I don't like different bands at the bottom I'm going to have to do some more thinking... back into the re-fashion pile for now.


On to the 2 x wins - sorry, there are no 'before' pictures.  What can I say: a sunny day, a few hours free, I was setting up the dye pot and away with never even a thought to 'before' photos.  These were done in the same navy dye pot at the same time.

The first one was a white t-shirt gone a bit dingy. I scrunched it up and wrapped it with rubber bands until it was a tight ball and threw it in the dye pot to mature.  Voila - stormy sky t-shirt.

The second one was a jumper that has been dyed at least twice before, both previous times a reddish maroon, which have washed out unevenly over time.  It was originally beige.  Now it is a purple, with a completely unplanned but awesome marbled effect from all those previous dye jobs.

Happy re-inventing!

Miri


Sunday, April 09, 2017

Transformation de tee-shirt

Voici la petite transformation d'un tee-shirt que j'affectionne particulièrement et que j'aimerais continuer à porter :


Comme il s'agissait de l'agrandir un peu et de lui mettre des manches, j'ai utilisé un sous-pull dont le coloris est identique.

Et voilà ce que cela donne :


J'ai même pu conserver la petite fantaisie qui se trouvait sur le tee-shirt !
Et si vous voulez en savoir plus c'est ici .

A bientôt, bisous,
Elisa Elisa 

Saturday, February 04, 2017

Re-defining successful sewing

Thanks fellow re-fashioners for your posts where things didn't go quite as planned!  I'm glad I'm not as alone as I thought.  I haven't posted as I've had a series (and I'm not counting how many) of refashion fails.

And I kept trying to make them work, but sometimes you just have to call it a day, or your sewing time is sucked away for weeks (or months).  Here's a couple of fails (and I was a bit erratic with the before photos):


Looks okay right?   You've no idea how hideous the refashioned t-shirt really is on me - and there will be no photographic evidence.  I forgot to take photos of the three t-shirts I used making this, but I'm sure you know what t-shirts look like anyway.  But I did get a lot of practice on my overlocker (serger) and even followed the instructions in the DVD to make really neat circular seams - see how tidy that looks?  There's a join in the middle of that sleeve insertion.


I also copied a sleeve from a RTW top and it's very flattering, at least at the bottom - but turns out you can't put a shaped sleeve-head into a straight armscye and end up with something without weird folds...   Maybe it will be just right for someone else but if not, I still learned a lot.

Part 2 - that scarf.  It started out as a skirt that just needed a lining and a new zip, but then something about it started bothering me.  See if you can spot the problem (it's disassembled here already).


I thought I was just being picky, so I asked a few friends and family if it was obvious and turns out even blokes could spot it.  The fabric had been cut out without considering the nap - all hearts except for one back panel that's upside down.  No problem I thought - I'd since found a very similar skirt with the pattern right way all around so I could repurpose this one into an infinity scarf.  I love the way they look - but then I forgot how much I hate having things close around my neck.  I can't stand wearing it and it's too short as a standard scarf which I do wear.  But it's useful to know what you don't like as much as what you do - I'm putting this on the "not for me" list with bolero jackets, polo necks and raglan sleeves.  Sew and learn eh?

Until next time - happy (and successful) sewing!

Mimi

Wednesday, February 05, 2014

Refashion a Faded T-Shirt Into a Heart Cut-Out for Valentine’s Day

Valentine's Day is coming up so I wanted to remake myself a t-shirt to commemorate the day. The original design doesn't matter, but I thought that the faded-out part actually made the final result nifty. I don't think I'm going to wear this on Valentine's Day date-night because it's too casual, but I'll be sporting it all day!


I used one faded-out t-shirt that didn't fit right, and a man's XXL t-shirt that I grabbed from Salvation Army for $2:


Head over to my original blog post to see how I refashioned a t-shirt into a heart cut-out for our day of love.

Saturday, October 27, 2012

Teeny Weeny Baby Tees!

I've been a bit slow off the mark to start doing any baby sewing - I'm 23 weeks pregnant now, and February suddenly doesn't seem so far away! I decided to start this week using this free baby t-shirt pattern, some mens t-shirts, and some of my precious garage sale fabric (a lady gave me three big suitcases full for $50!). 

Two baby tees cut out from men's tees. 
One tee made from scratch, with a men's tie added!
All three tees totally finished!

The Jack Skellington tee & the Batman tee were cut out from op-shopped men's t-shirts, with knit fabric added as ribbing to finish the hems. For the Tie tee, I cut the tie pieces out from an actual men's tie so that they would fit on the tiny t-shirt. I finished the hems with navy knit fabric for ribbing. For more info, check out my blog!

Friday, August 03, 2012

A Skirt from Two Shirts

Somehow I managed to find two identical shirts at the thrift store on two separate trips that were months apart. I had worn the first shirt until it was starting to stretch out and so I snagged its twin as a backup. Only, it wasn't quite identical....it was actually a size smaller than my original and slightly tighter than I liked. But the color and fabric was so pretty, I decided that someday they would come in handy and put them away for a rainy day. 


This week I finally hit upon the perfect project for them. By fashioning a waistband from the sleeves and a skirt from the front and back panels, I created this swishy, comfy skirt. I'm in love with the deep raspberry color! My camera just didn't do it justice. :P


Green Eggs and Ham T-shirt Refashion


My husband was giving away this old t-shirt that had a couple of bleach marks here and there and I decided it was perfect for a pair of overalls for my 8 month old.


I added a pair of vintage braces.


And here's the result.


You can see more over on my blog.
Thanks, Sharon at 365Crafty

Tuesday, July 24, 2012

T-Shirt to Girls Pinafore Dress

A few weeks ago I had my first try at refashioning something for kids (in honour of the fabulous Max California, who was celebrating the birth of her new daughter)! I made a small womens t-shirt into a girls pinafore style dress. Here's the shirt I started with:


Here's the way things started to come together:


And here's the final product!


Unfortunately I don't have a little girl to model for me, but I think you can get the idea still. If you're interested in the tutorial I wrote, you can find it here.

Thursday, June 28, 2012

Men's XL to Maternity Tshirt

Hey everyone!

I'm Mikelina from Mikelina Makes

This is my first posting on refashion co-op. I've been spending so much time here getting great inspiration that I thought it was time to reciprocate!

My first baby is due in November and we couldn't be more thrilled however I am so disappointed with the selection of maternity clothes. What's wrong with women feeling sexy and awesome while bumpin'? Nothing!

And that, my dear friends, is what sewing machines are for.

This is one of my favourite maternity tops now. I wear it all the time!


Wednesday, March 28, 2012

How to add a drawstring waist to a too big top - a no sew project


This project started out with this thrift store Ann Taylor jersey top. It was a little big and baggy (and unflattering) at the bottom - probably a size larger than I would normally wear. To remedy the fit, I grabbed my scissors and some rope and added a drawstring waistband.

Here it is now:


To add a drawstring waistband to an existing top, simply cut a small slit through one layer of the hem at the side seam, like this:


Cut a length of rope or ribbon long enough to go around your waist and tie. Pin a safety pin to one end of the rope and thread it into the opening that you created - it will go into the casing made from the hem. Thread it all the way around and out the other side. And that's it - no sewing involved!
Note: This works best with fabrics that don't fray, like jersey, since you are not finishing off the slit.

www. mytwobutterflies.blogspot.com

Thursday, March 15, 2012

T-Shirt Upcycle


Here's a very simple little T shirt upcycle.  For full tutorial, please stop by my blog, Seams Sustainable.
Thank you all for looking at my work!

Thursday, March 08, 2012

Intro and few recons

Hi ladies! :)
First of all thank you very much to the blog staff for letting me post, I'm very excited. I've stalked this blog for a very long time and it was about time I gained the courage to complete the application.
Anyway, I think you'd like to know a bit about me now! My name is Elisa, 23, from Italy. I own a blog called "Rock 'n Roll stops the traffic" where I share my crafty projects (or favourite founds around the web) and a bit of my personal life.
My first reconstruction date from 2009, when I did this:


yup, an umbrella refashion XD It was just the start to several other surgery (you can click on each pictures to go to my posts and read more about it)..


Lately I've been working a lot with different materials but the constant inspiration from other bloggers and the tons of refashionable stuff I've lying around my place are a huge spur that can't be ignored, so I decided to get some work done.
I also have some other refashions ready to get posted and I hope in your suggestions and criticisms that I'm sure will help to improve my work.

Lima :3