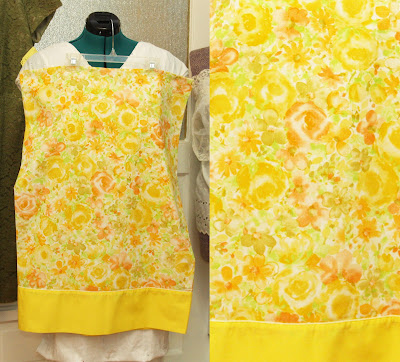
Step 1: Wash, dry, and iron a pillow case.

All pressed up and ready to go!
Step 2: Cut the top seam off the pillow case, about 1/4 to 1/2 inch.
Step 3: Fold the pillow case in half lengthwise. Cut armholes in a gentle curve approximately 2 inches in from the side and 3-4 inches down from the top. (I used the remnant from a previous pillow case dress as a pattern.)
When you unfold the pillow case, you'll see the basic shape of the dress. (See below, far right.)
So far, so good...
Casing the joint.
Step 5: Cut two 6-inch pieces of 1/4 inch wide elastic. Run one piece of elastic through each casing, securing each end with pins to hold it in place.
Getting there...
Step 6: Sew along the edge of the casing, securing the elastic. I like to use a small zigzag stitch, but a straight stitch works too.
Zigzag lines exaggerated for effect. Don't use long, wide stitches.
Step 7: Cut two 30-36 inch strips of 1/2 inch, double fold bias tape in a coordinating color. Secure the bias tape to the edges of the arm holes with straight pins. There should be about 6-10 inches of excess bias tape on either end of the arm hole. Do not cut this off! They will be the straps of the dress.
Step 8: Starting at one end of the bias tape, sew along the edge of the bias tape, securing the bias tape to the pillow case and closing the open side of the bias tape straps.
Step 9: Tie knots in the ends of the bias tape and tie the pieces of bias tape together to make the straps. Embellish with pockets, bows, buttons, fabric yo-yos, etc.
I used 1/4 inch, double fold bias tape in this photo, and do not recommend it. Such a pain to sew.
Step 10: Donate to Little Dresses for Africa! (Or Little Dresses for Haiti, but these are going to Africa.)
Many thanks to the ladies in my class! Yesterday was a lot of fun, and I'm glad I had the opportunity to meet them. Together, we made five adorable dresses for little girls in Africa. Didn't they do a great job?
The fab five!
Five little dresses and one little purse.
I'm already looking forward to my next class. What should our next project be?
Tip: You can find a lot of really great vintage prints at thrift stores. I picked most of mine up for $1 or less, which is a great deal.
Such cute prints!


5 comments:
These turned out just adorable! Great job. And what a worthy cause! :)
~Jen
These turned out just adorable! Great job. And what a worthy cause! :)
~Jen
Congrats on your first class, and kudos to you for supporting such a great cause.
God Bless
Christiana
sewamusing.blogspot.com
Well done teaching your first class! I've been wanting to give this little dresses project a try myself, such a great idea
Erica, Editor on Duty
Those ARE adorable. I notice you didn't wear your today. What's with that?
Post a Comment