Showing posts with label Saint Salvage. Show all posts

Saturday, May 17, 2014

Quickie DIY: Vintage Earrings Refashion to Fringe Cone Earrings

I found this cute pair of vintage cone shaped pierced earrings at one of my favorite local thrift shops: Kathleen's Closet. Their sales support the Community Food Bank of NJ. I love finding bargains that help the Food Bank and other helping organizations.

I bought this pair with the plan of using this as part of a DIY.


I had these fringe beads sitting in my stash... they turned to be perfect for this quickie DIY. I bought them last year on clearance from Michaels.


I selected the brown, black, red and silver fringe bead strands because they were the only duplicate colors. I took them off the chain, and separated them; one for each side.


I took a gold tone head pin and threaded it through the top of each cone.


I threaded the beaded strands onto each head pin.


Then, I curled each wire and trimmed them.


Last step... I bent the wire back up into the cone.


Here I am, modeling my new creation. Not bad for about 10 minutes of hands-on time.

Sunday, March 30, 2014

Quickie DIY Marc by Marc Jacobs Top Refashion

I bought a Marc by Marc Jacobs top through an online "previously loved" threadflipping clothing website. My size. Love the colors. I can wear it with lots of things I have in my wardrobe. Figure flattering.


It came in, and it looked great. The "girls" look fantastic, but the arms... Meh... the elastic and sleeve length was not great. So, out came the seam ripper. 


No more elastic..... So much better. I love it now!


Saturday, March 15, 2014

Quickie Refashion: The Silk Animal Print Button Front Top


I'm sorry for not posting for a while. A lot has been going on in my personal life.... I got a new day job at a local utility company. I love it! 

Anyway..... This is my latest refashion. It's a "quickie" that anyone can do. It's "August Silk" 100% silk button front top that had two front pockets. I got it at a local thrift shop for $4. Men usually have shirt pockets. I don't like them because they make my ample "girls" look weird, and the pockets gape open.

Here's the before, complete with my male ginger tabby, Mookie in the background. 


Here's a close-up of the top with the pockets. Look... the pattern on the pockets don't even match the shirt. They look really "not-so-good".


Here's the after, with the pockets removed. Much better, and very appropriate for my day job. All I did was take my trusty seam ripper to the seams that held down those offending pockets. It took no more than 10 minutes to do.


Tuesday, January 21, 2014

Upcycle Sweater Sleeves into Boot Socks

Here's how to upcycle a sweater's sleeves into boot socks.
I chose this sweater because the ruffles don't sit correctly on me when I wear it as a cardigan, but the sleeve ruffle will be great for the top of a boot sock.
This is a project that needs few supplies. Gather:
1. The donor sweater
2. Coordinating thread
3. Seam ripper
4. Hand sewing needle
5. Straight pins or safety pins
6. Material of your choice for the soles of the socks ( I used small men's socks folded over.)


Turn the sweater inside out and locate the seam where the sleeve is joined with the rest of the sweater. 
Take the seam ripper, and carefully use it to cut the seam open. Use care during this step, because one false move, and you get unraveling! 


Try on the sleeve (soon to be sock) to see how it fits. This is also very important, because you need to see how the bottom (was the arm/shoulder seam area) suits your foot.

This is where you decide if you want to turn this into legwarmers, or socks. I decided to make socks.

****If you want to make legwarmers, fold over the bottom edge to make it even. Pin it. Turn it inside out, and adjust and repin it so that the folded-over part is on the inside. Sew it up and trim the edge as needed.*****


Line up the material you plan to use for the sole. 
I used my husband's short socks and folded them over after cutting the elastic cuff off.  


Pin the material so that the sole hole will be completely filled with the new material. 
Place a small drink bottle inside to make your hand-sewing easier.
Blanket sew around the outside (right side) of the sock.


Turn the sock inside out and repeat the process to make sure that you have a strong seam.


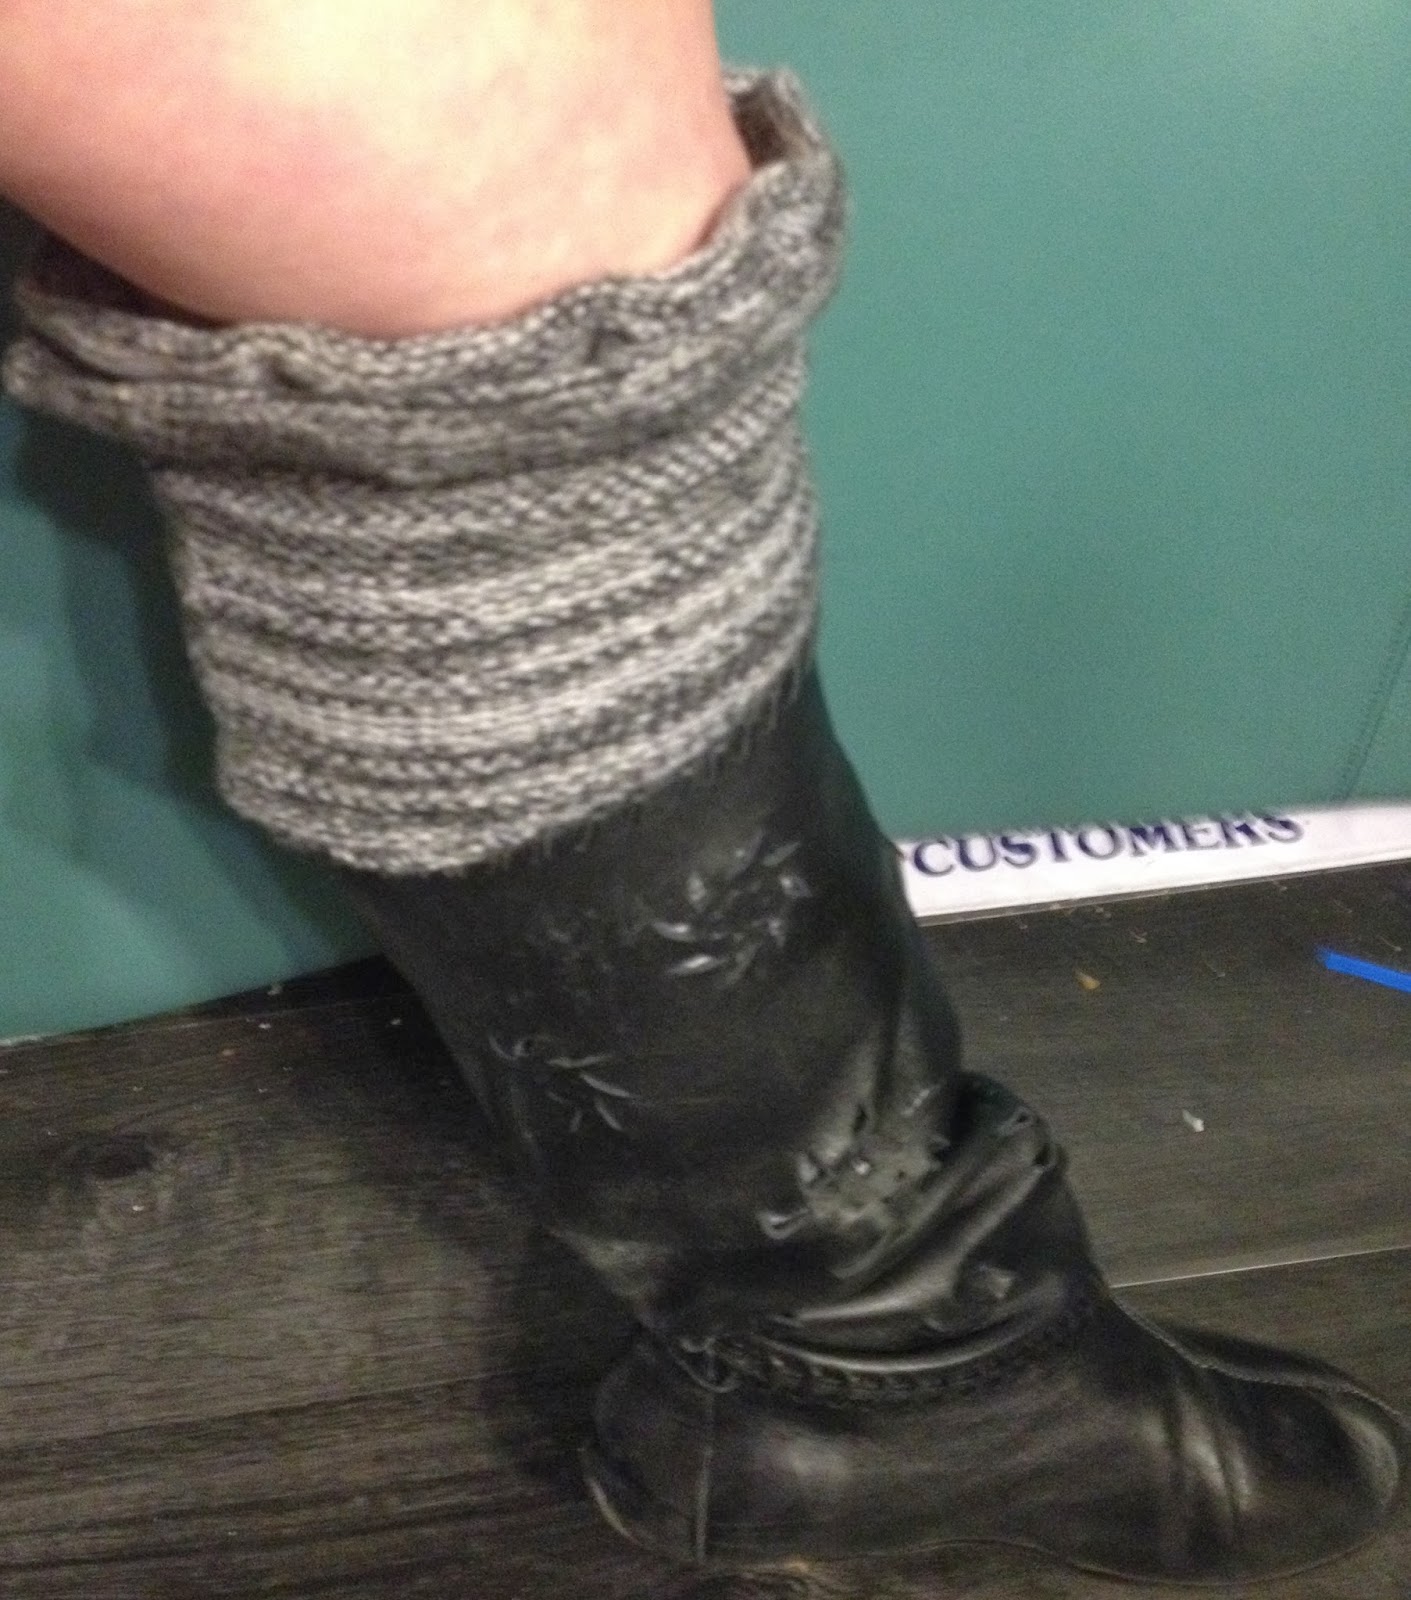
Last step.... Turn the sock right side out and wear it. 


Ah.... warm and stylish!

Friday, November 29, 2013

Accidentally Felted Wool Sweater Upcycled to Felted Neck Warmer

This striped wool scarf used to be so long that I could wrap it around my neck four times with plenty of extra hanging down. 


This was one of the items "saved" from our house fire in May. It came back to me from the dry cleaners measuring a paltry 10" wide X 36" long. 


Waaahhh! What to  do? So, after some thought and brainstorming, I decided to still use it.


I folded it over into thirds lengthwise, so that the seam would face my neck. Then, I pinned the entire seam, so I could hand sew it as straight as possible.


I used a blanket seam on the outside of the scarf seam (what would become the "right" side of the scarf). This is the side that will touch my neck and clothes. 


Then, I turned it inside out, and blanket stitched it again, to make sure that the project would be nice and strong and maintain its shape.


Then, I turned it right side out and pressed it on the "wool" setting.


This is what it looks like after ironing. I did my best to keep those stripes as straight as possible.


Now, for the closure. I bought this "Industrial Chic by Susan Lenart Kazmer" from Michaels a couple of months ago when it was on clearance. It was originally sold to be a closure for jewelry.


I had other ideas for the closure. I used it as a closure for the neck warmer. I thought that it was a good match, because it was a bobbin with thread.


Here I am, modeling it. Not bad.....


Wednesday, November 20, 2013

Mexican Blanket Patched and Embroidered Converse High Top Sneakers


I have had some "salesman samples" of Mexican blankets that I received in a bulk estate sale for a while.


 I kept looking for a way to use them, and I found a perfect way to upcycle them when I bought a $10 pair of white and pink High top Converse at  a Salvation Army for $4.99.

After washing and drying the sneakers completely, I put household cleaner bottles inside the sneakers. This is to help support the bonding process. Shoe Goo came in handy again.
Then, I cut the ends of the rugs and started the
piecing process. I wanted those diamond shapes to be on the outside of the sneakers.

The tongue got decorated with glued-on striped parts of the mini blankets.


Of course, I had to make sure that the Converse "Chuck Taylor" logo wasn't covered.


Here's the inner parts, with stripes all lining up to make sure that the logo is not covered.


Here's the heel end, after having the gray and off-white striped pieces being glued on.


Now, the embroidering part.... the same embroidery floss I used for repairing the gray and burgundy cashmere sweater.


I embroidered up and down up and down the tongue. I used a blanket stitch around the edges.


I sewed up all the patches all together. I wanted it all to have that patchy feeling.


Here's the inner side, with the embroidery stitches up down and all around.


Now, to lace it up! I used some round nose pliers to poke holes through the blanket.


Just poke a hole through the blanket, and then push the new laces through....


Here's the finished product..... Front view.


The inner side...


The outer side.....


Ta-dah! Saint Salvage strikes again!