Showing posts with label sewmuchlovemary. Show all posts

Sunday, June 09, 2019

Prom Dress Fail & Outdated Blouse to New Refashioned Outfit


It feels like forever since I have done a refashion (& maybe it has). Sometimes life just gets in the way of our sewing machines, but that is why I come with a double refashion today!

My cousin gave me this prom-dress-fail a few years ago so I could play around with it. Getting excited over receiving "ugly" clothes seems weird to a non-refashioner, but to a refashioner, it is an awesome thing to receive! I knew I wanted to make a skirt out of all the fabric this dress had to offer. To finish off my outfit, I ordered this blouse, which seemed to look better-fitting online than in person, so I had to refashion it. 

The problems:


1. The dress is self-explanatory, right? Hehe.
2. The blouse had these outdated puffy sleeves and the length was too long. 

The solutions:

1. The dress was cut off at the waist and the huge pleats were seam ripped to make three layers for the skirt. The black satin waistband was used to make a new waistband for the skirt.
2. The sleeves and some length were chopped off. The fabric from the extra length was used to make cute and fully lined flounce sleeves.

And this is how my new outfit was created.
Have you ever planned to refashion one garment, and ended up refashioning a new outfit?


For the full tutorial and additional photos, please visit Sew Much Love, Mary.
Thank you for reading. :)

Tuesday, November 27, 2018

Quick & Easy Skirt Refashion


Thanksgiving week was full of busy activities and honestly I am still resting from all of the hustle and bustle. I can't complain though, because I love being surrounded by family. (Even if it keeps me away from my sewing machine!) To get my sewing groove back, I went for a quick and easy refashion. This skirt has been in my refashion pile for ages and it finally made its way out of it, and into my personal closet. The thrift store is a great place to find skirts to refashion.


This refashion was so easy! I just cut off a piece from the top part of the skirt (to preserve the hem that was already present) and added some elastic. 
For the full tutorial and additional photos, visit Sew Much Love, Mary


Wednesday, September 05, 2018

DIY Tassel Jacket Refashion


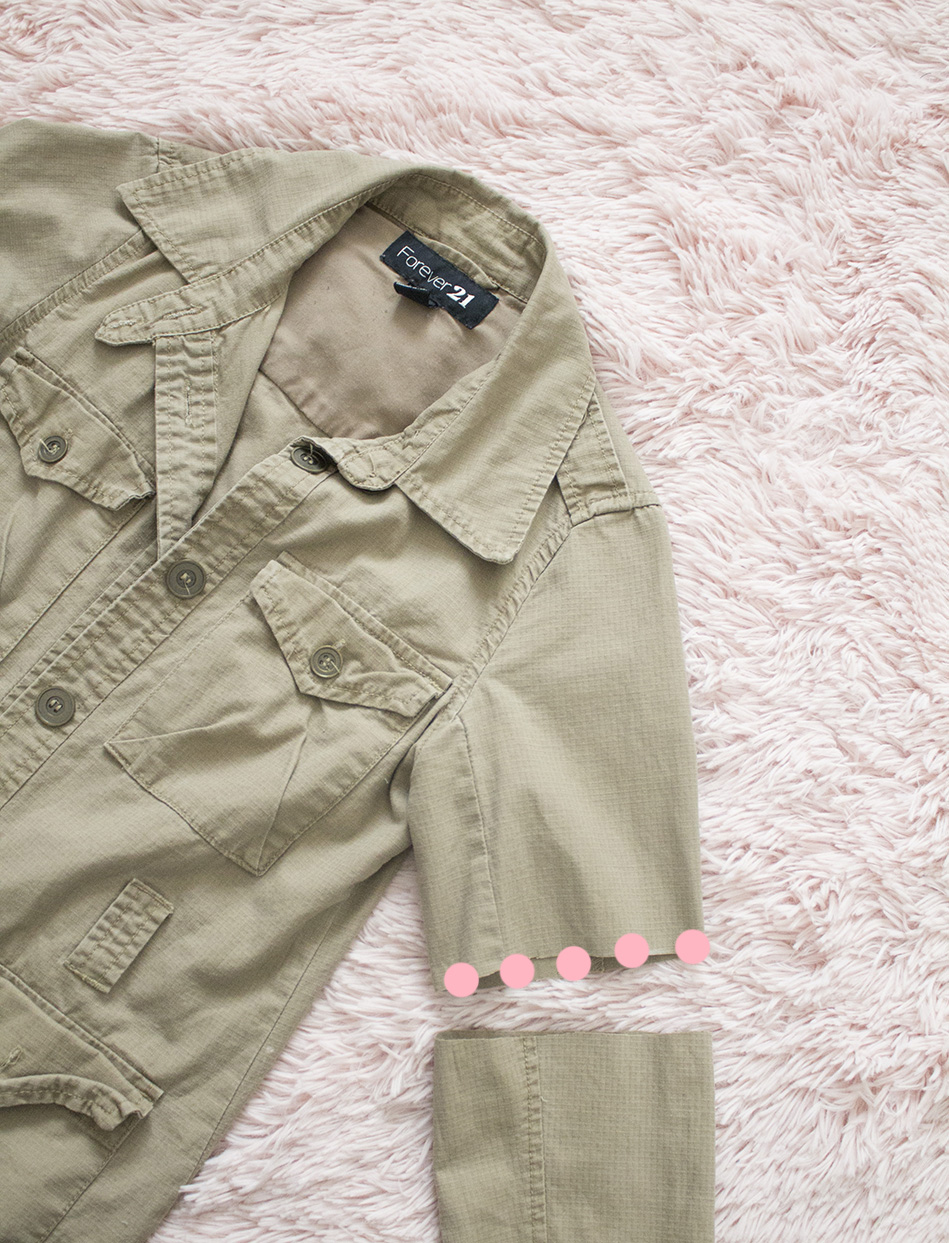
This little khaki jacket was sitting all alone in the back of my closet for a few years now, so I decided it was time to bring it back to life. And when I think of lively and summer, I think of tassels! I've usually seen tassels come in bright colors, but I'm more of a pastels girl, so I made some fun little pastel tassels (somewhat rhymes?) for this jacket.

Since this is a lightweight jacket, I don't use it keep warm. I would mainly use it as a layering piece. This is why I decided to trade in the boring sleeves for some feminine and cute bell sleeves. 


I chopped off those sleeves!


I drafted new half circle sleeves.


The best part of refashioning is making use of what's already in your stash, right? :)
So, I repurposed these little tab pieces to attach my tassels.
(As shown below)


New awesome (in my opinion, hehe) DIY tasseled jacket! :)
For the full tutorial and more photos, check out Sew Much Love, Mary 


Thursday, May 03, 2018

Easy Shoe Refashion Using Embroidered Patches


This was my first shoe refashion that I did a few months ago. I was always too scared to try to refashion shoes, because if I messed up, the shoe would be done for. If I ever happen to mess up a clothing refashion, I could usually salvage the project, even if I just made cleaning rags out of the fabric.  But with shoes, I felt differently. I started off with an easy refashion this time to build up my confidence around shoes. :) 

Even though it is an easy refashion, it looks great and can really give your new shoes a whole different look.
Here are the supplies that I used:

Leather & Suede Glue (since my boots were made of suede), embroidered floral patches (you can use pretty much any cute patch), and a little brush to spread the glue on the patches.


For the full tutorial and more photos, please visit Sew Much Love, Mary


Friday, February 16, 2018

Shoulder Ruffle Sweater Refashion


Ruffles! I love ruffles. They are a great way to add a chic and feminine touch to anything in your closet. Lately, I've been seeing ruffles everywhere and on everything. Ruffles have been trending, especially when placed on the shoulders. 

I had this grey sweater in my closet that had awkward fitting sleeves. The shoulder part somehow got stretched out and the sleeves hit at an awkward length between 3/4 and long. At first, I was just going to change the sleeves, but I decided this sweater needed a little more. As I was scrolling through Pinterest, I kept seeing shoulder ruffles, and I decided that was what this sweater needed.

WHAT I DID:


1.  I chopped off those awkward sleeves.
2. I traced new sleeves out of the old ones.


3. I drafted my shoulder ruffles, cut them out, and hemmed them.


4. I basted the ruffle to the shoulder, then I sewed on the sleeve. The shoulder ruffle should be sandwiched in between the sweater and the sleeve.


See, gorgeous ruffles! 
For the full tutorial and more photos, please visit Sew Much Love, Mary

Thank you for reading!


Friday, December 22, 2017

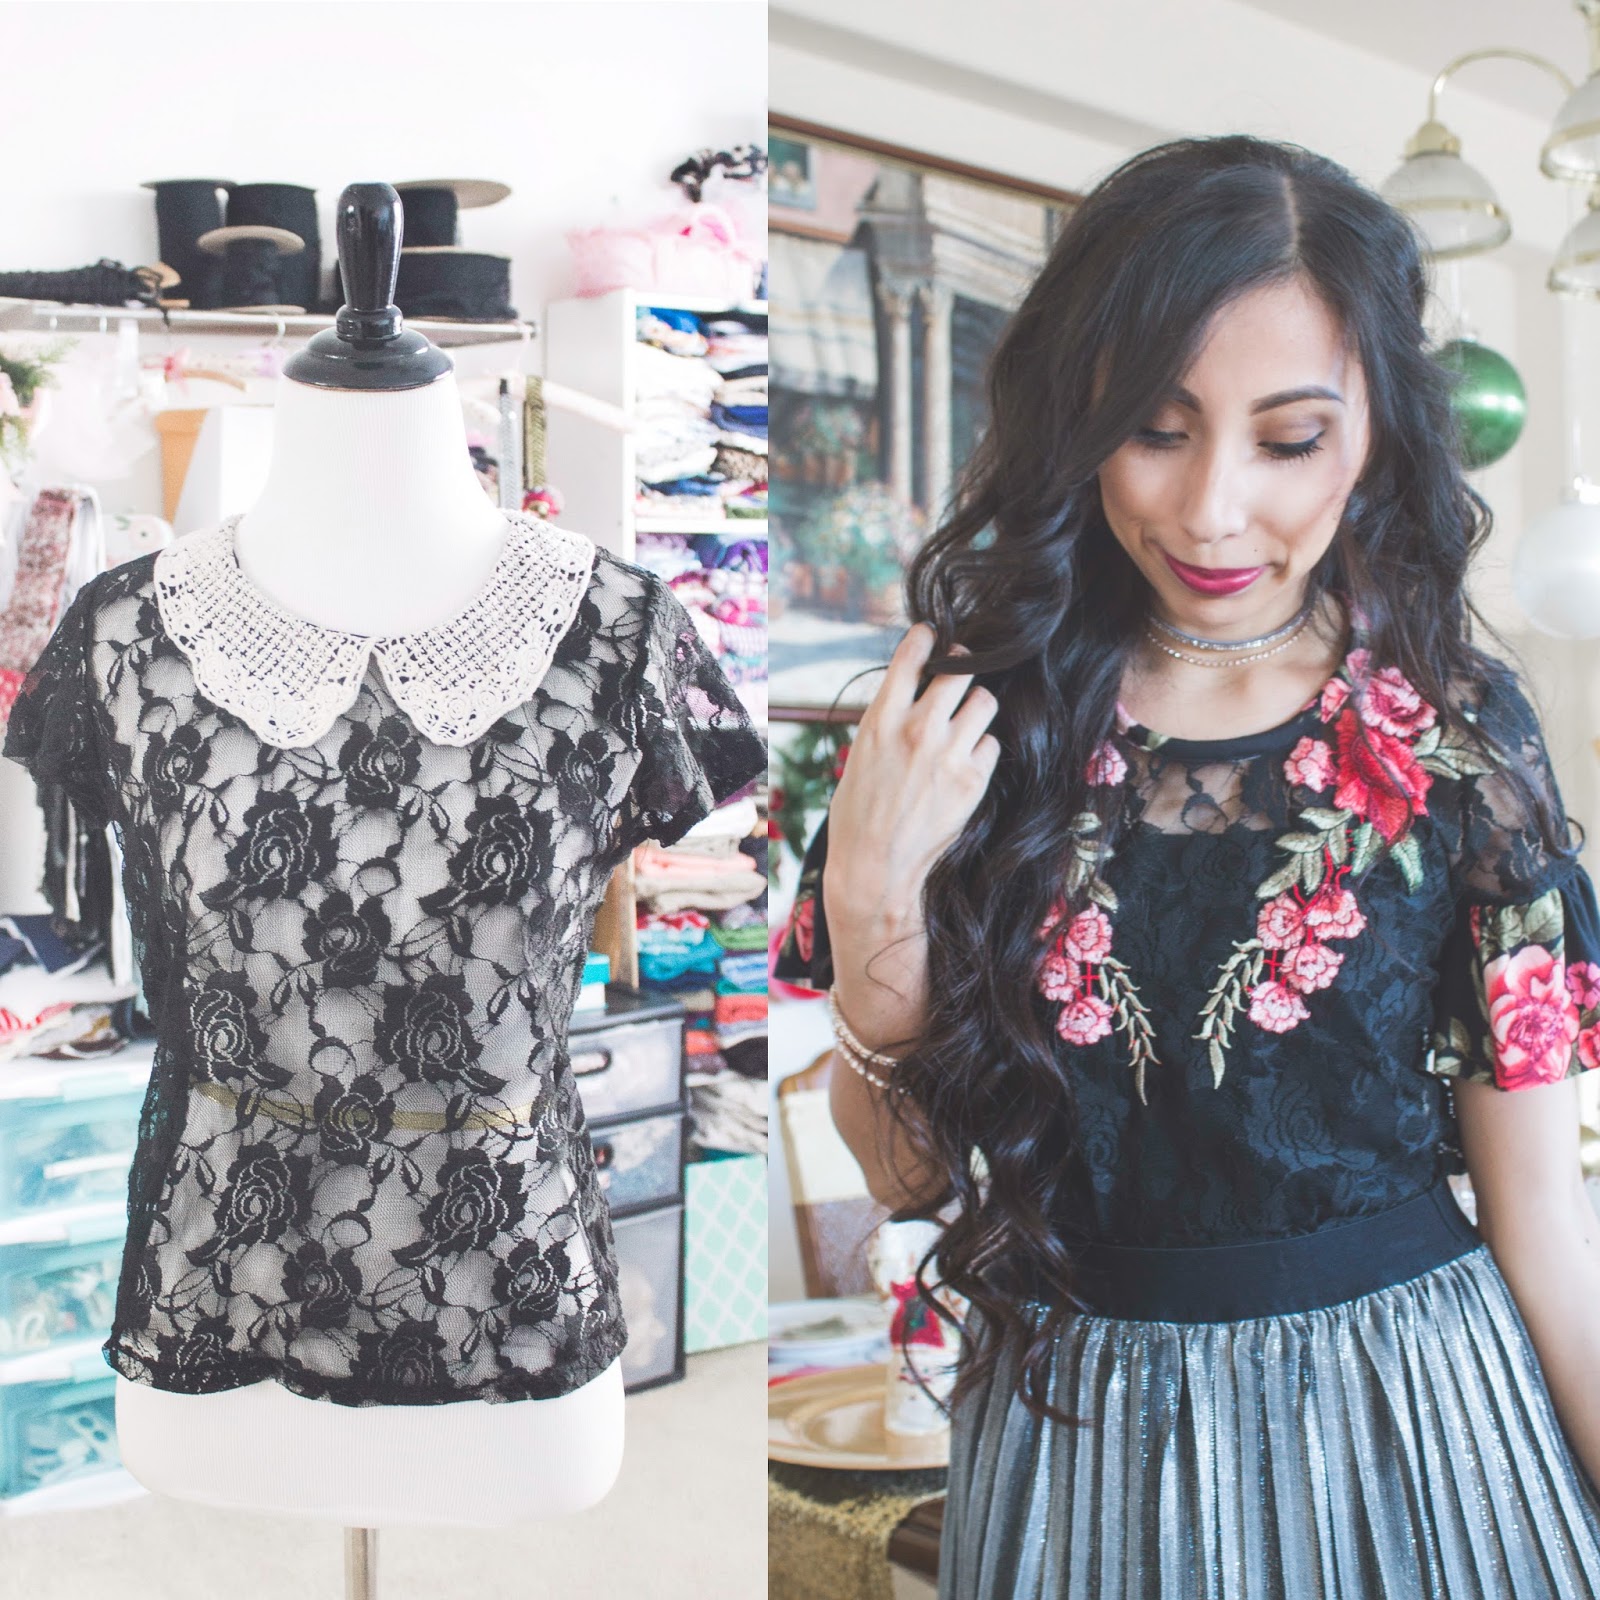
Lace Ruffle Top Refashion Using Embroidered Patches


This little lace top was one of my absolute favorites a couple of years ago. Sadly, the dye from the shirt transferred onto the collar, so it went into my refashion pile. I had some extra floral embroidered patches from another project, so I decided to play around with them. 

Here's what I did: 

1. I added the floral patches and hand sewed them on. Even though I really dislike hand sewing, I felt I had way better control sewing them on this way, especially with all the little curves and edges the patches have. 

\

2. I cut off the collar and added new neck binding out of a matching fabric. I couldn't believe how well it matched with the floral patches! :)


3. To finish the top off, I added some ruffles to the sleeves, in the same floral fabric as the neck binding.


TA DA! New and updated top! :)
For the full tutorial and more photos, visit Sew Much Love, Mary


Thursday, November 09, 2017

Distressed Denim Jacket Refashion


Living in California means that fall always arrives late. I spend practically all of September and October wearing tees, with the exception of some chilly mornings when I can wear a light cardigan, lol. :)

Well, it's finally been chilly enough for a jacket, so I decided to do a refashion involving one of my old denim jackets. I wanted to make it trendier, and mostly I wanted to get rid of the sleeves because they were too short and tight. When I first started, I had a lot of ideas floating through my head, so I just refashioned as I went. Usually, I have a clear image of what I want something to look, but this time I didn't.

Here's what I did: 

I added a hoodie (just for fun and comfort)
I changed those uncomfortably tight sleeves into looser and comfier ones.
I lengthened it because the jacket was originally a tad bit too short.

I used some lovely distressed denim fabric from Mily Mae Fabric Shop to refashion my new denim jacket.

For the full tutorial and more photos, visit Sew Much Love, Mary.


Wednesday, September 13, 2017

Cold Shoulder Refashion Hack for Sleeveless Dresses and Tops


Since the cold shoulder trend is trending everywhere this season, I decided to make my own cold shoulder refashion. This is a very easy technique that can be used to update any sleeveless dress or top you may have in your closet. 

To make my cold shoulder "sleeve," I used a lace that was similar to this dress that I started with. 
First I sewed along the pink dots, attaching the new "sleeve" to the dress. Afterwards, I closed off the new "sleeve" along the green dots.

See? Simple and easy, right? Now go on and make your own beautiful cold shouldered designs. :)

P.S. Since I had some extra lace, I added some to the bottom of the dress to tie it all together.


For the full tutorial and more photos, please visit Sew Much Love, Mary.


With Sew Much Love, Mary 

Thursday, July 20, 2017

Faux Embroidery Refashion


I whipped up this refashion just in time for summer. Lately, I've been seeing a lot of embroidered blouses this summer and I wanted to create my own. I had this embroidered blouse in my closet that I got in Mexico about 10 years ago. I wanted to update the style to make it trendier. Recently, I had bought some fabric markers and hadn't put them to use. I realized I could create my own "faux embroidery" with them. 

After I drew on my embroidered design, I cut some length off, added some elastic, and to finish it off I sewed on some pom pom trim.


TA DA!
For the full tutorial and more photos visit Sew Much Love, Mary


With Sew Much Love, Mary

Wednesday, May 24, 2017

Madewell Inspired Distressed Denim Jacket Refashion


This refashion was inspired by this super cute Madewell Distressed Denim Jacket. My mom got one about a month ago and I really wanted one haha. :) Since I had a denim jacket already in my closet, I decided to update it. That is what I love about refashioning: using things you already have and once loved. I am totally in love with this jacket as I once was when I first got it!

STEPS I TOOK:

1. I cut the collar off and distressed it.


2. I added in new front and back yoke pieces.


3. I added two panels in the back to make the jacket less fitted.


4. I cut the hem and distressed it.


For the full tutorial, photos, and other refashions please visit Sew Much Love, Mary.