Monday, June 01, 2015

Ballet flats to lace up flats

Hi to everyone!
 I had these shoes which I loved but I was getting blisters because of the bias tape.
 So I decided to remove it.
After that I realized that it was diffcult to walk into these because they were too loose. 
The before:


I made 4 holes in each shoe with the belt punch plier, added an elastic cord of the same color...and...

...the after:


...the back:


Now it's very comfortable and I like the style. Thanks for reading!


Black and White and Red all over

It feels like it's been forever since I've posted a refashion, but I checked, and it's only been a month. I guess the rainy, dreary May made it seem longer.

This refashion has been a long time coming. I bought this dress at a thrift store that is no longer open, over 3 years ago. It fit like a glove, and the only change I was going to make was to shorten it by about a foot, since it was that totally-unflattering-on-me ankle length that was all the rage 20 years ago.


I never got around to hemming it before I got pregnant with my daughter. After I lost the baby weight, I tried it on, and it no longer fit like a glove. Something about having a kid changes the way you're built. ;)

After letting the dress languish in my closet some more, I decided I needed to figure out something to do to save it, because I absolutely loved the polka dots. I gave myself the deadline of Labor Day. Fortunately, a trip to the fabric store for some quilt binding gave me the inspiration I needed!

I found some cherry red piping and had my Eureka! moment. I decided to put the red piping around the neck & arm holes.

After a date with my sewing scissors & sewing machine, the dress had a new knee length hem and a more flattering V neck & back.


The beginning of the new neckline.

Black Dress, White Polka Dots, Red Piping
The back, which I'm actually very proud of, because I successfully shortened a zipper for the 1st time.

The front! I will add a photo of me wearing the dress after I get my hands on a red belt to finish the look I'm going for.

Un nouveau tee-shirt pour la nuit !

Pour me détendre un petit recyclage simple et sympa ....

Les vêtements de départ :


Et le résultat plutôt sympathique :


Pour les manches j'ai utilisé des manches de sous-pull qui avaient été coupées et que j'avais en stock ; et pour animé un peu le devant j'ai mis une inscription fantaisie prise sur un tee-shirt usagé.
Et voilà comme les nuits sont encore fraîches je vais pouvoir le mettre ! Lol   On peut être frileuse et coquette  à la fois !

Pour en voir plus c'est Ici 

A bientôt, Elisa Elisa


Mother Knows Best

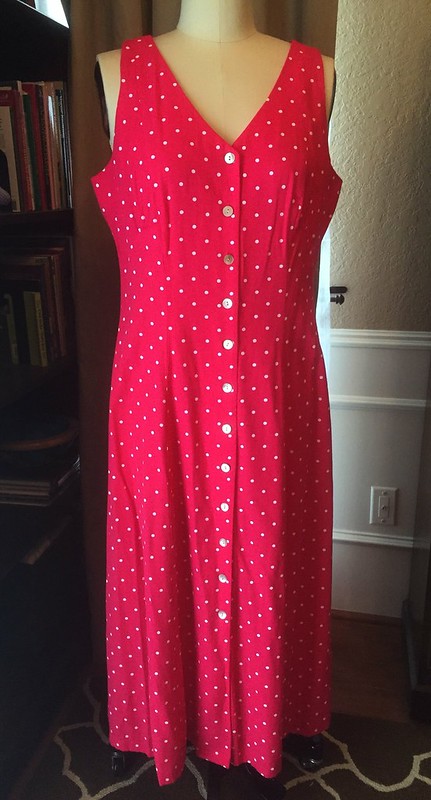
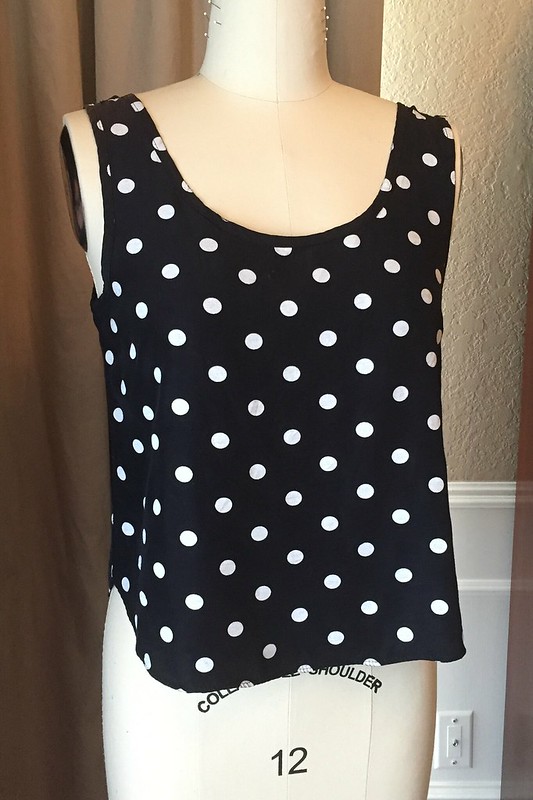
My mom recently sent me a couple items to refashion: a too-large hot pink polka dot dress someone else had given her and a black and white polka dot tank top she hadn't worn in years. It's as if she knows I have a fondness for polka dots...

Pink Polka Dot Dress - BeforeBlack & White & Lace Tank - Before

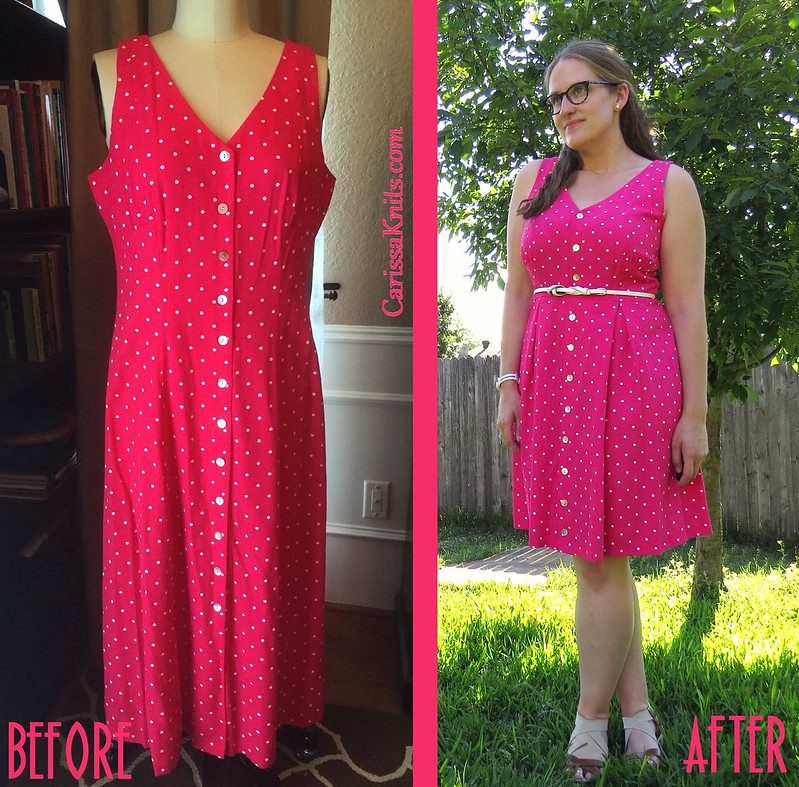
For the dress, I cut out the mid-section, took in the bodice, reattached the skirt with some pleats to soak up the extra fabric, and re-used the buttons from the mid-section to close up the bottom slit. And behold, my new favorite dress!

Pink Polka Dot Dress - After

Pink Polka Dot Dress Before & After


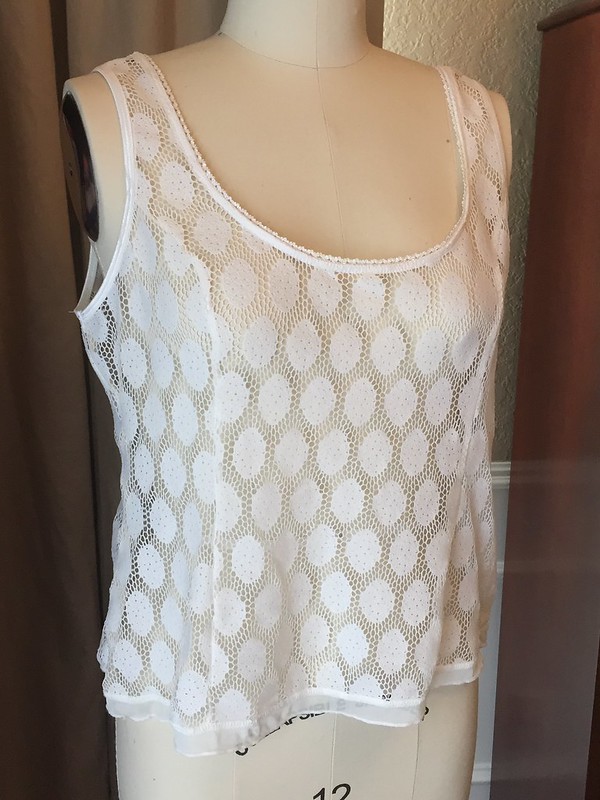
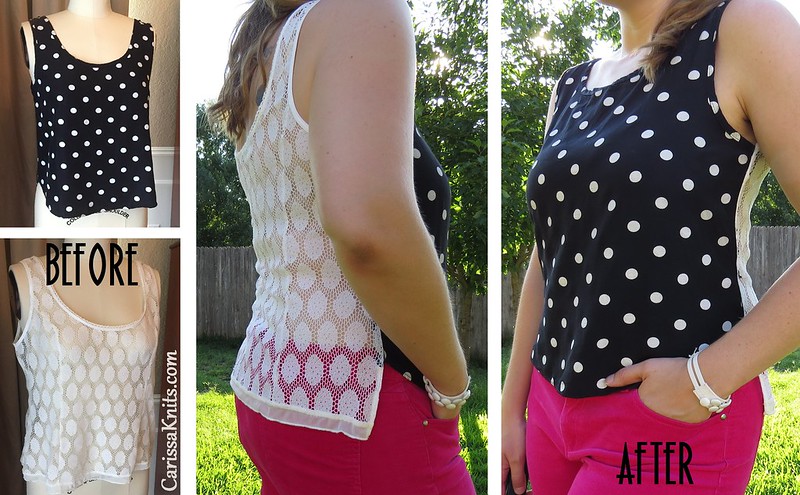
Then for the black and white top, I called in reinforcements in the form of this white polka dot lace tank top.

Black & White & Lace Tank - Before

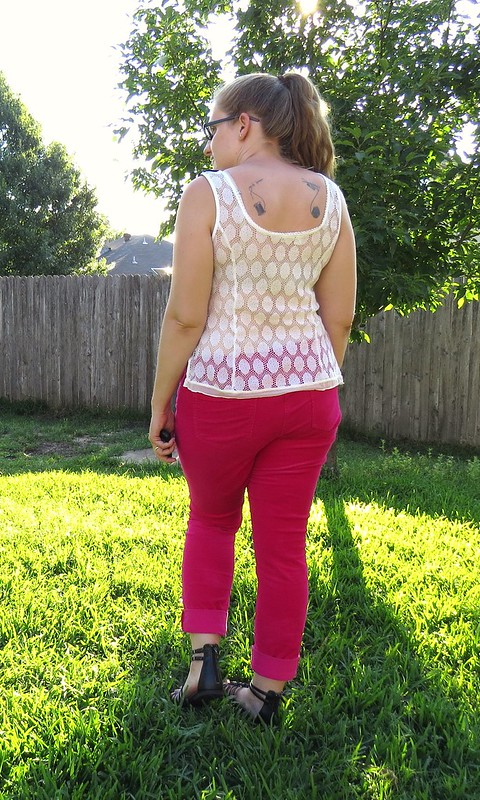
I cut the side seams and shoulder seams on each top and then put the front of one and the back of the other back together! And now I've got a trendy solid-front-lace-back tank top with polka dots all over!

Black & White & Lace Tank - AfterBlack & White & Lace Tank - After


Black & White & Lace Tank - After


For more details and photos of each refashion, visit me over at CarissaKnits!

2 for 1

I bought this dress on clearance at Macy's last Autumn. Original price $70.00, which I paid $7.50. Great deal, so I didn't try it on at the store. So you know what comes next..it didn't fit right. Too confining and fit weird.


So, I cut it half at waist level. For the shirt, I just folded the edges under and hemmed 


For the skirt, I added some ribbing material that I had on hand, folded in half and added to the top of the skirt. 

Skirt with ribbing waist band - so comfy : )


Before                                                                     After