Showing posts with label mariannebags. Show all posts

Monday, March 17, 2014

Refashion of two floral dresses into girls outfit.


You know when you really like the fabric on a really ugly dress???
 
 
Well, I was given 2 really ugly dresses. Now they have been turned into a top and pant set for my niece. She was telling me she was going to sleep in it!!!
I has a tie at the back, so hopefully she will be able to wear it for a while.

Saturday, February 01, 2014

Girl outfit from old dresses

I recently purchased a kwik sew pattern with a view to making a few things for my niece.


I started off with  a few daggy floral dresses given to me for fabric, like this one.

Here is the finished product, a cute pants and top outfit.


 Here is my son James having fun with the top.....


Wednesday, January 15, 2014

ladies top to girl's outfit

 I loved the colour of this size 16 ladies top as well as the cute pockets, though to be honest I could see myself wearing it, I kept it when given a bag of hand me downs.

Using a bit of contrast fabric from the stash allowed me to produce this outfit for my friend's daughter. I used ribbon for the ties at the top, since I had the matching bright orange.


Refashioning allowed me to utilise the ruffles and pockets on the original.

Saturday, January 11, 2014

skirt from fraying top

My niece gave this to me to try and rescue because the neck was fraying and no longer attached. As I had already repaired it once, I really couldn't fix it again. When I was looking for something to take on holiday that was a bit trendy and also easy to pack, I came up with this skirt. I used the coverstitcher to do the hem and insert elastic at the same time.

You can see the part I cut off as well as the finished skirt.

Sunday, December 01, 2013

Shorts from dress

 
This purple dress that was a hand me down was not really needed but I liked the fabric and need more shorts,
 
So I used another pair of shorts as a pattern and made some comfy shorts for the hot Australian summer.


Here's the finished product, ready for the next really hot day!


Thursday, October 31, 2013

a touch of embroidery


I started out  with this slightly too long and lose, not to mention boring, top.


 So I shorted it as well as took it in a bit from the side seams.
 I also added some embroidery.

I experimented with using a bit of elastic to take it in a bit at the waist - not sure about that but it looks a lot better than the original item


Monday, October 07, 2013

Boy's shirt from men's business shirt.

Look at my blog to get more detail of how I turned this business shirt- bought for a 1970's dress up- into my little one's fun fishing shirt.
As you can see by the photo of my pattern, I had originally thought I would be making a top for me, but after I cut it out, it was a bit small and so plan B !


Rather than dinosaurs, I went for fishing embroidery this time.

I  tried to use features of the original shirt such as the collar and cuff details on the sleeve, as what the point if you can't have fun!


Sunday, October 06, 2013

another top update

Recently I showed you a top I was resizing.
here's the old post showing the before of this top:
from this site
And here's the finished product.
I had to work around the embroidery, but at least I'll wear it now!

Tuesday, October 01, 2013

re-do I a maternity top

I liked the fabric and the neck when I bought this top as maternity wear. Even though I have worn it again, I find the loose style annoying, as it tends to drown my shape, so out came the scissors!


First, I removed the pockets and cut off the extra length. Actually, I was thinking I could hem it at this point, but I decided to have fun with the bottom  and  copied the neck style using the extra fabric. I used the buttons I taken off the pockets to embellish the top in keeping with the collar.


Sunday, September 29, 2013

iPad cover from scraps

I made this iPad cover from recycled cardboard from a box and some scraps of fabric from other refashions.

I'm a science teacher, and was disappointed I couldn't find anything in that theme in a shop bought cover.
Hopefully, it meets the criteria of being an accessory!

For more details, look here.


Friday, September 27, 2013

old shirt into child's sun hat

Look at my blog to see how we went from this old shirt to this hat-  its got dinosaurs too!


Tuesday, September 24, 2013

sparkly cape from old evening gown.


 I'm sure I bought this sparkly dress from a charity shop and did wear it just for something different, but now I have so many dressy things, and so few excuses to wear them its just been sitting around, sooo....


I cut along the back of the dress, where the split was, and well as removing the top bit. I undid a bit on the split seams to allow me to continue them along the full edge, and of course the bottom hem was already done.
It was lined with plain black fabric, which I turned into a simple rectangle collar and used the spaghetti straps as the tie at the front.


I'm sure my niece will look much cuter in it then me!!

With Halloween coming up, I hope this is a help to those who celebrate !!

another top rescue

Since I've got the black thread on the overlocker, I decided to keep going with the black tops from yesterday, so here's another one.
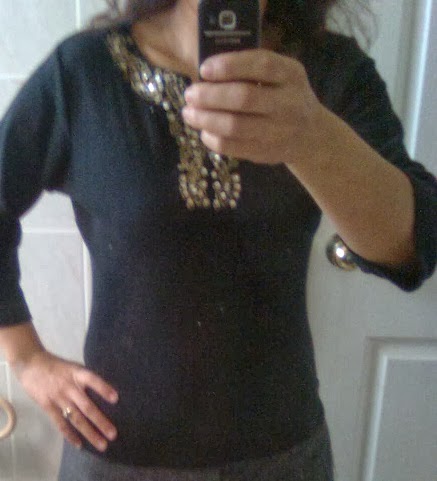
You can see its far too loose to wear.

Now it has a nice shape and is more comfortable.

re-sizing a few tops

When I was given a bag full of hand me downs, I knew it was time to do a few corrections. All the tops were interesting, but a bit loose, although I quite like the extra length in the sleeve. Here are the corrections so far.
BEFORE:


 AFTER- about an inch was taken in at the waist and under arm, tapering at the bottom and along the sllev, so that you keep the original hems.


This one just needed less under the arms.


Here's are really loose top but I like the colour and the embroidery.

To show you how I take, them in: I wear it inside out and use a few pins to adjust the size and take it off carefully, so I don't pin myself or remove the pins.


Wednesday, September 04, 2013

business shirt rescue

This wasn't a very exciting refashion, but it does save 2 new shirts from just hanging in the cupboard. My husband bought himself the usual size shirt in the usual brand, only to find they had a bat wing effect on him. So, after thinking about it for a while and realising they were never going to be worn, I decided to have a go at fixing them. I cut off the sleeve and took about an inch off the length, and followed that down the side seam . This corrected the extra length in the sleeve and also make the shirt less bilious.

I have taken a photo on the un-touched shirt as well as the one I have fixed so far so you can compare how much I had to take off. Since the shirt will always be tucked in, the mis-match at the bottom will be unseen.
I did a similar thing for my son, so his tall frame didn't look like he was wearing a too-short shirt in his school uniform.

Monday, August 05, 2013

another dinosaur story

I had this great coloured skirt given to me- you can still see the labels. All those studs etc made me think it was time for another dinosaur pair of pants, this time for the nearly 2 year old.


I tried to work with the pockets so that the back and front looked trendy. The main thing was to get the seams to join up as symmetry is important.
 I also added elastic by threading through the waist bands before I joined the two halves. Actually, I used  button hole elastic so I could take the pants in or let them out later.
Me being me, I added a dinosaur before making the pants up.
Here the finished result. The triceratops was from emblibrary and the footprints were my own invention using digitising software!

Wednesday, July 17, 2013

another use for an old bra

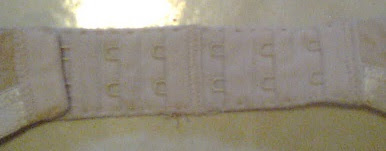
If you are anything like me, finding time to try on clothes can be a real pain especially with little ones in tow, so when I ended up with a too tight bra I was a bit annoyed, even though it was cheap.
Then I thought about this part of maternity bra that is stained at the front and so can't be passed on to anyone.
A quick cut and re-join has an extension that should make the new bra more confortable, being a maternity bra, there heaps of  eyes so lots of options for resizing. I might even just keep it permanently attached to the new bra, as such a small part will likely be eaten by the washing machine!!