Tuesday, February 28, 2017

Fabric Scraps Refashion: Boho Vest


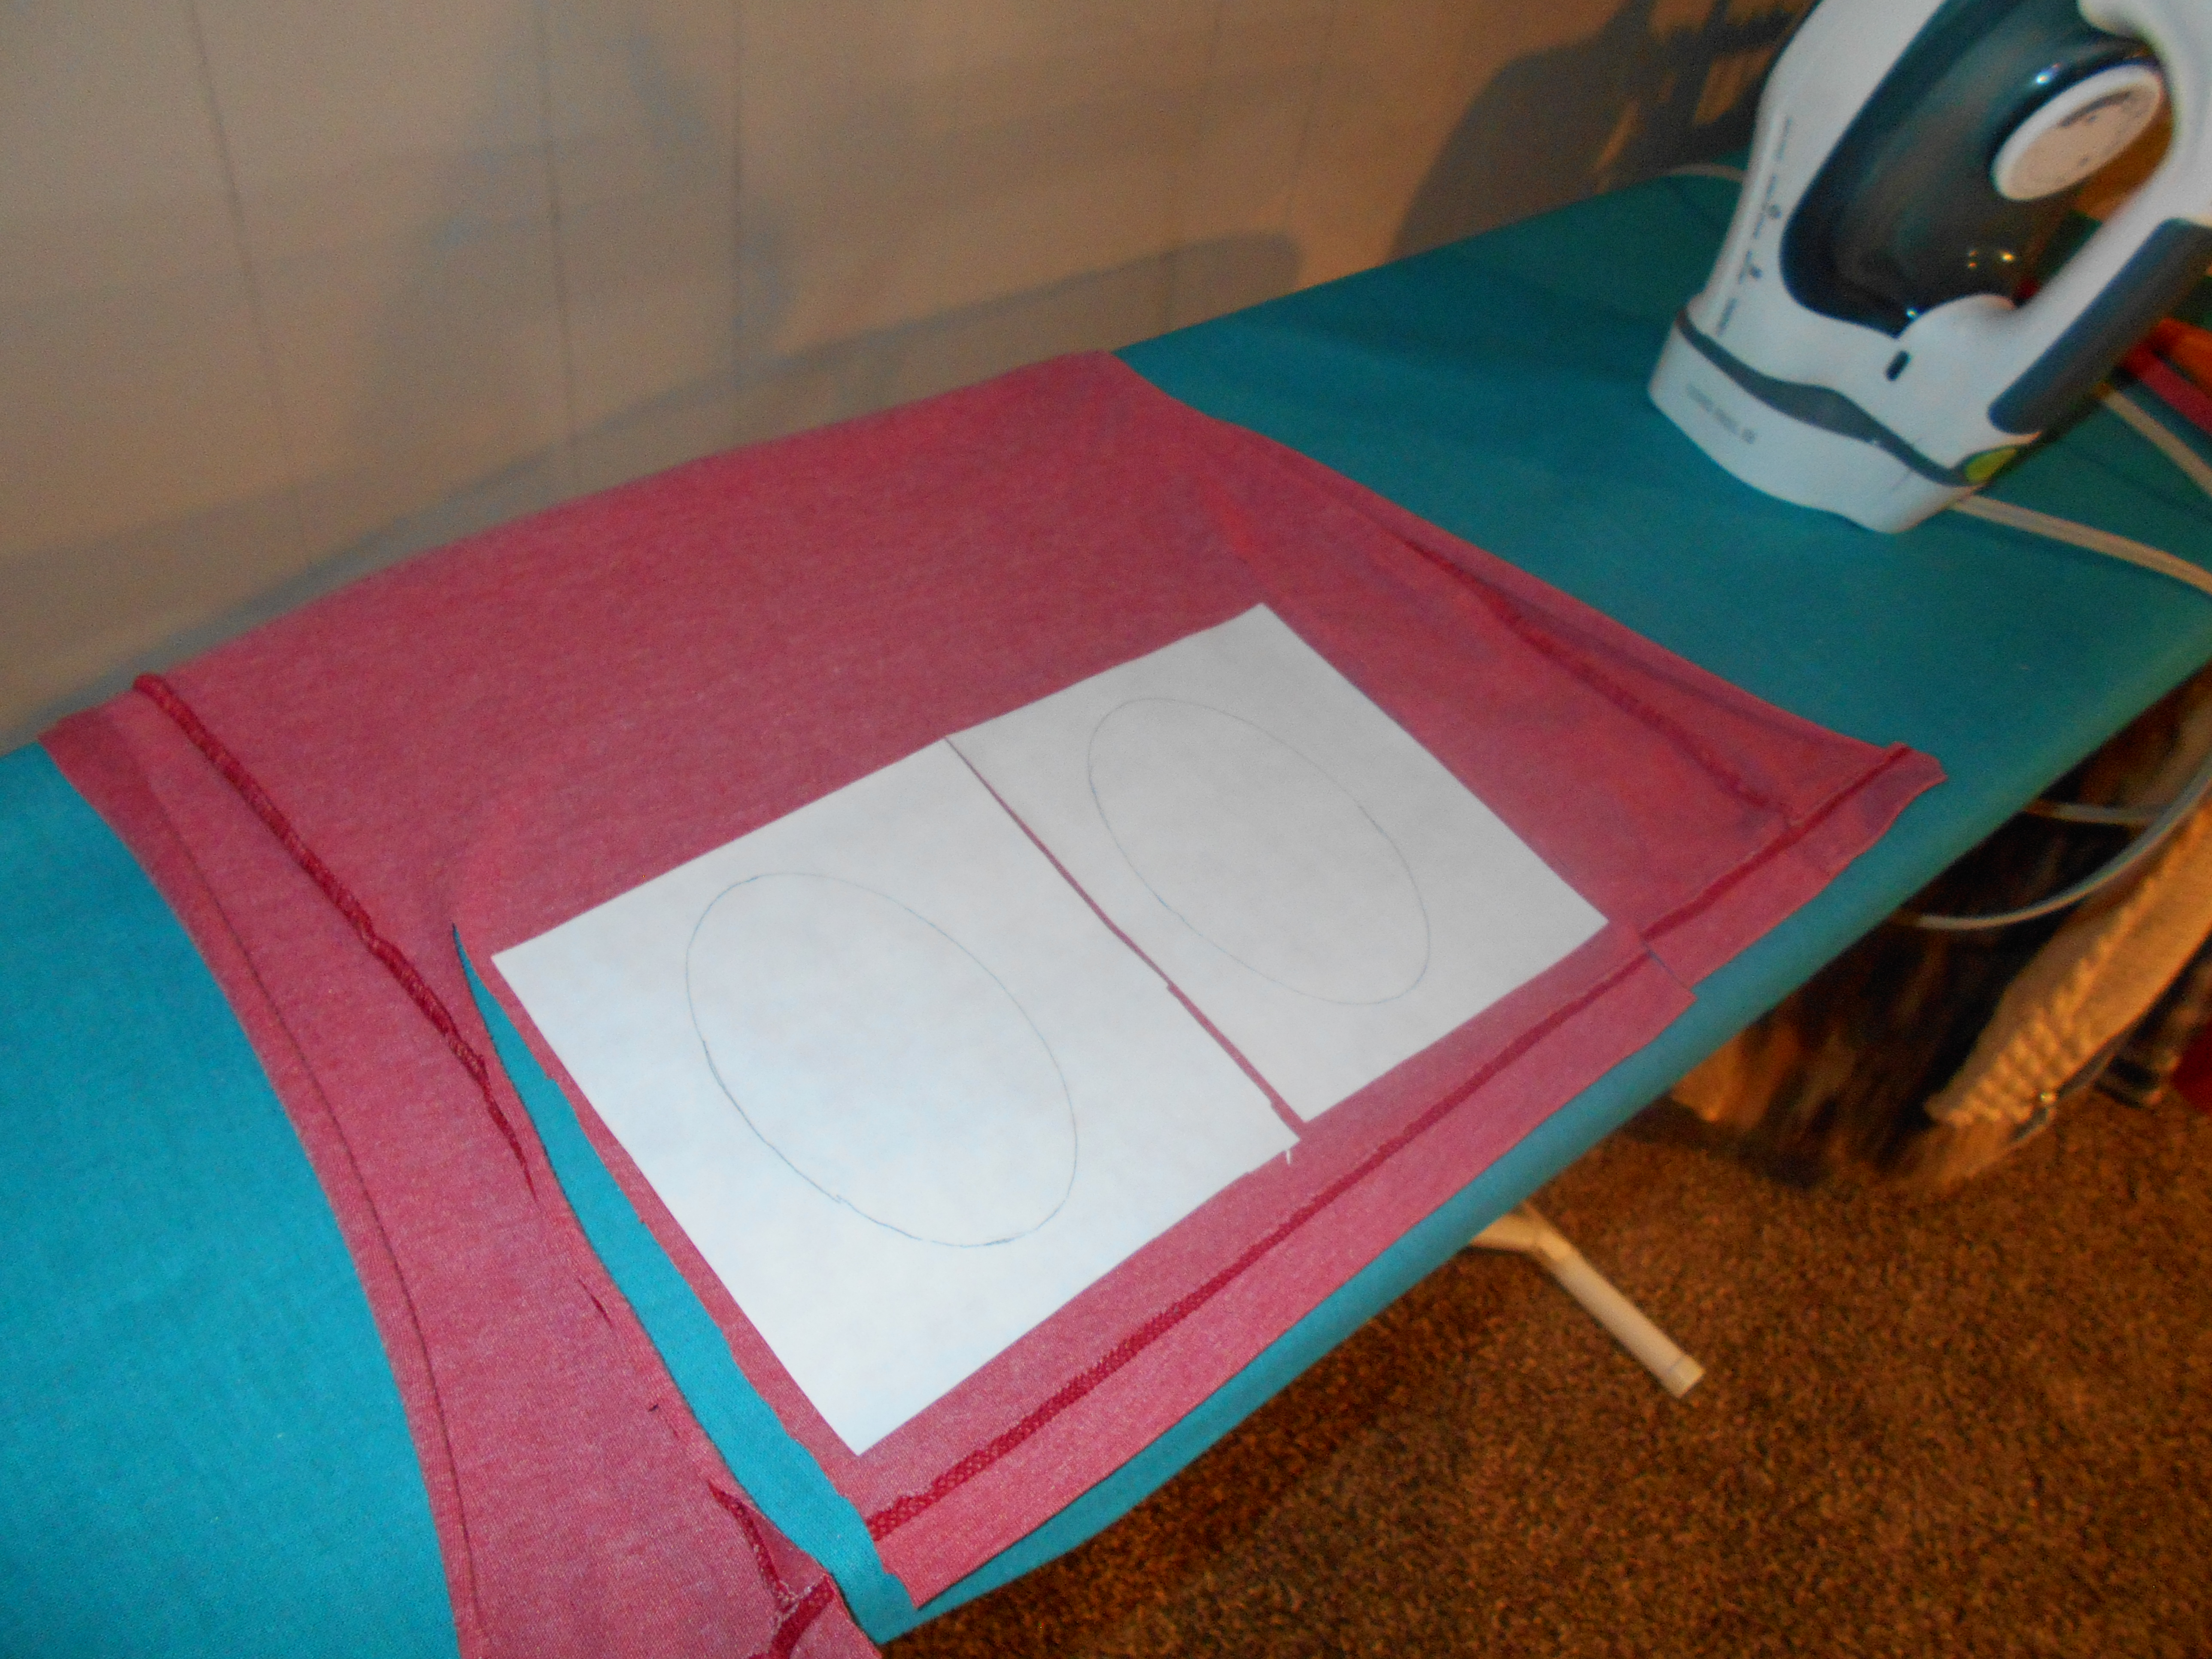
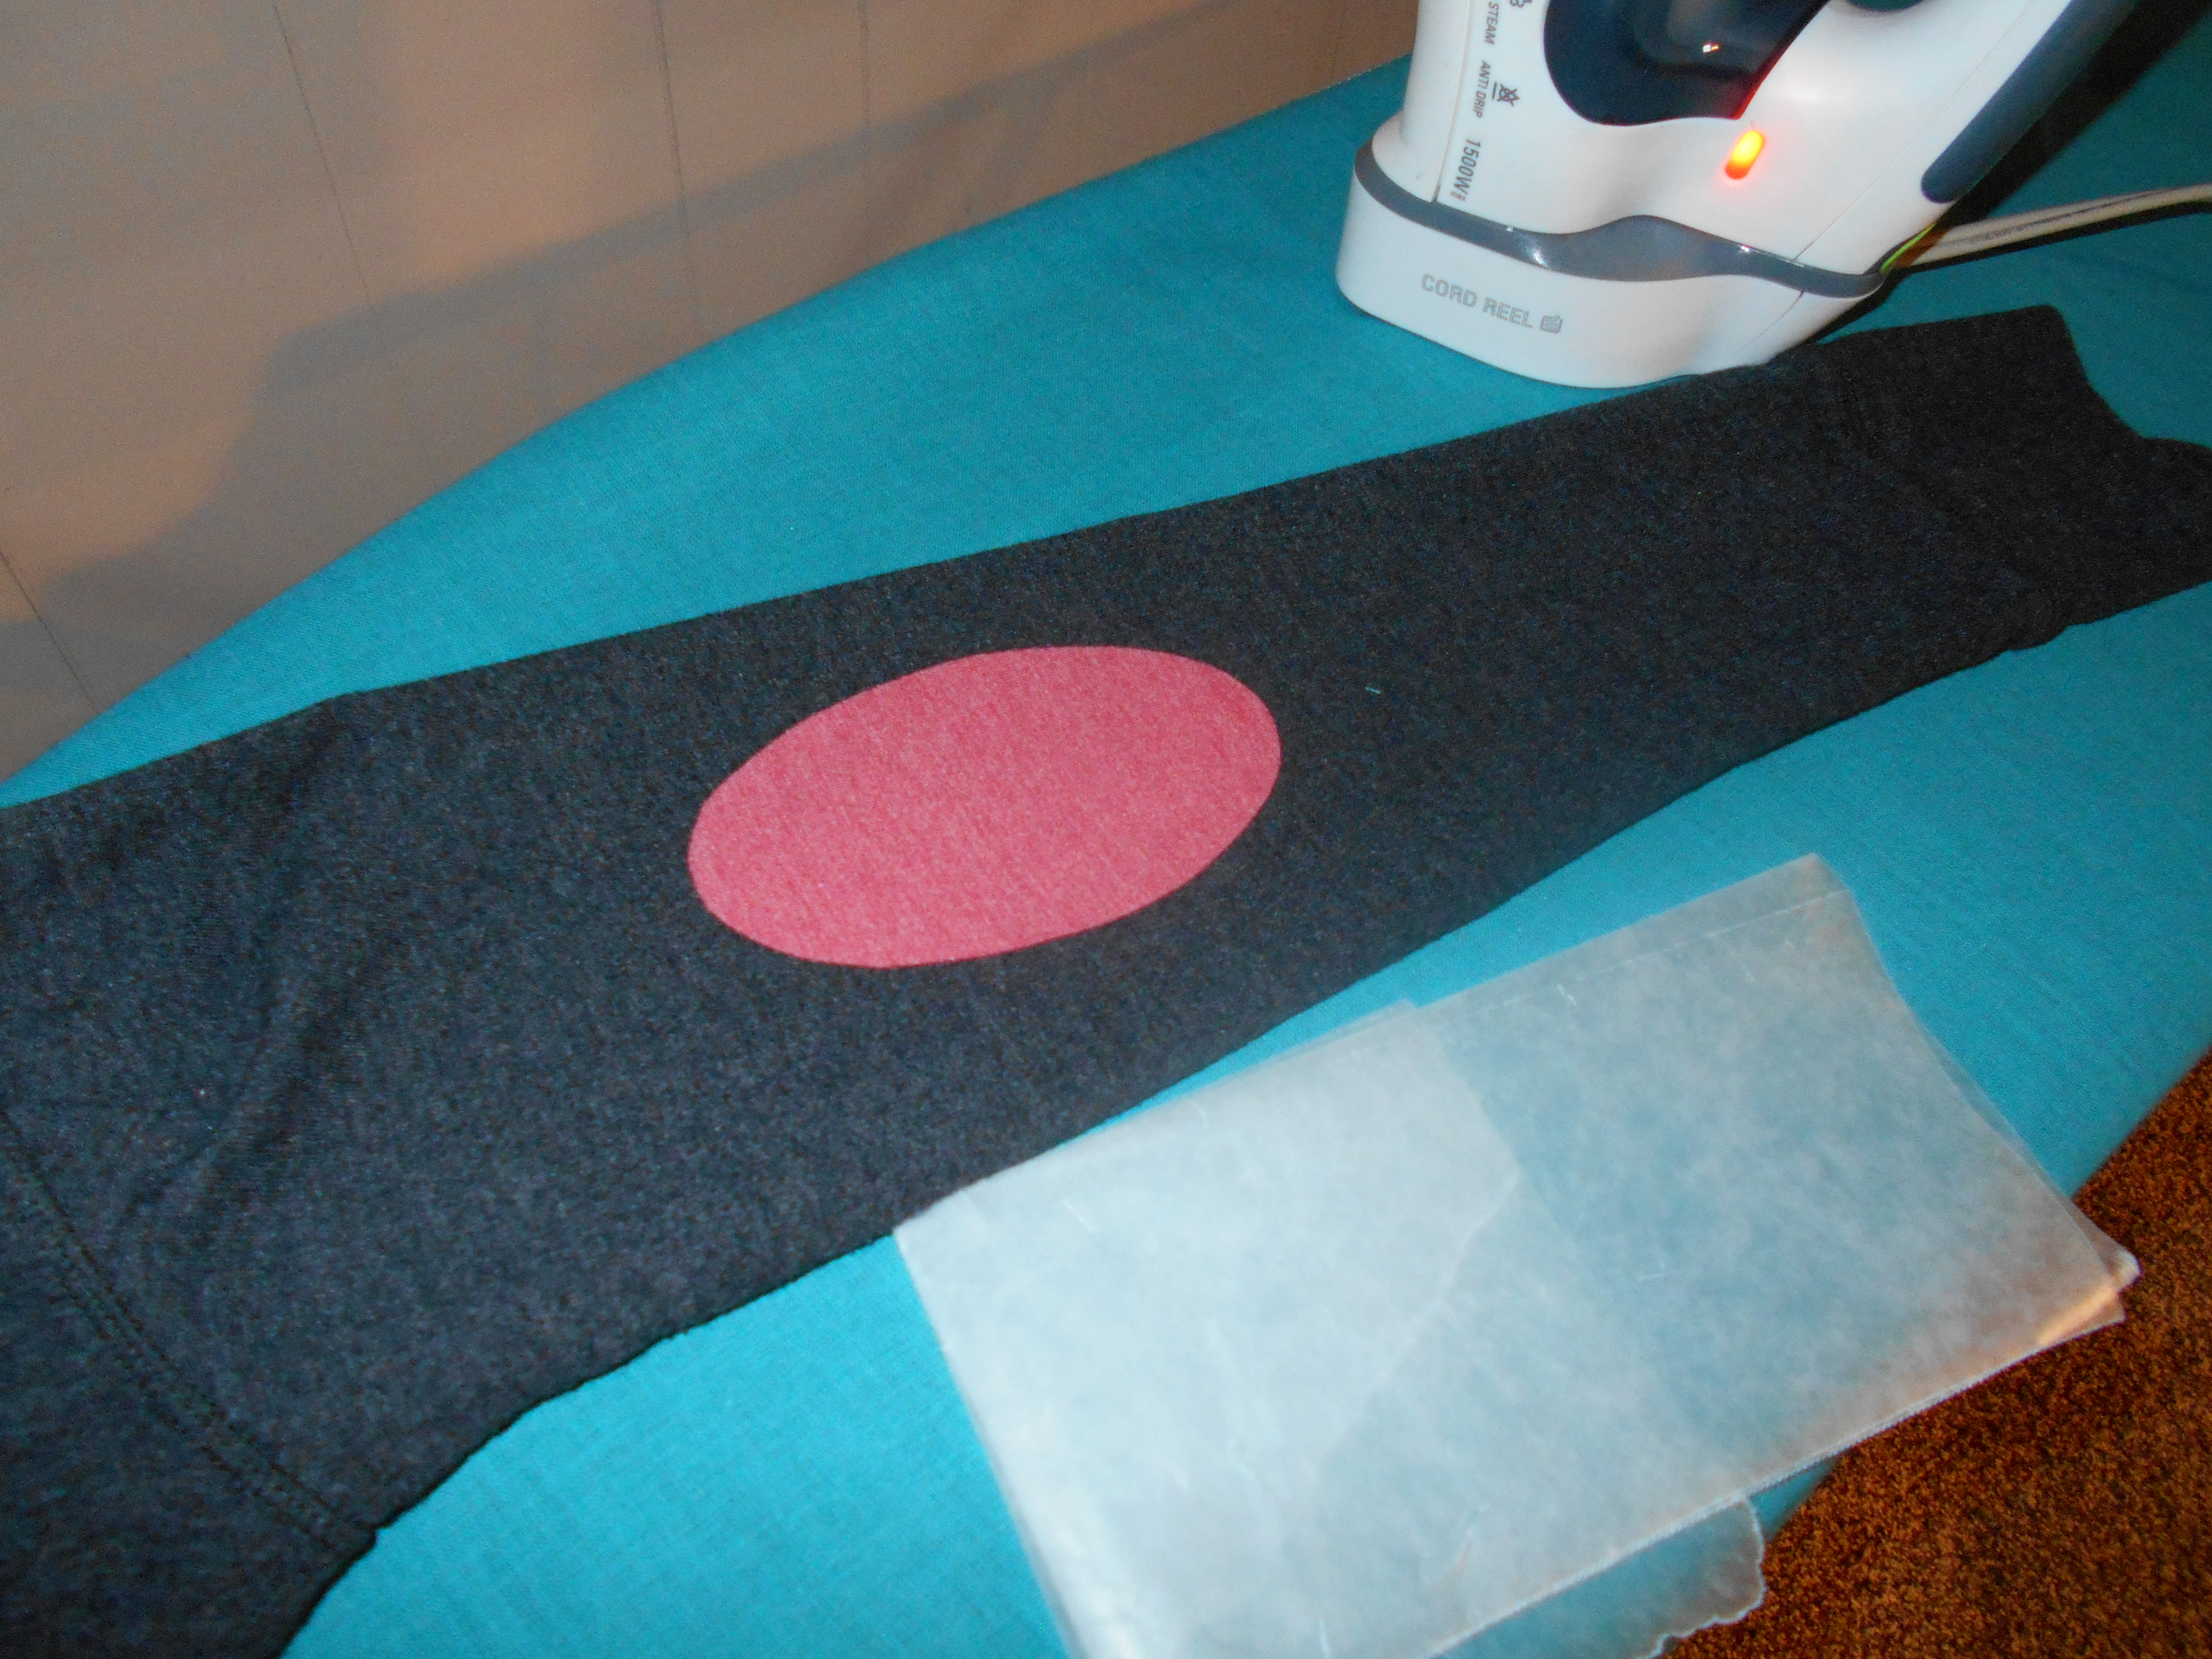
I have a TON of fabric scraps. I have them in stashed in pencil boxes and drawers in my sewing room. It seems that my collection is every growing! I'm constantly thinking of ways to reduce my stash. Now, realistically I know my fabric scrap stash will always be growing, since I don't plan to quit sewing any time soon. It's a fun challenge though! 

Anyway, I had this plain brown vest, that I knew I had to make into something pretty and bohemian. At first, I was just going to add the daisy trim, but then I got the idea to match up various little fabric scraps and make another layer for the vest. I loved how it turned out. I'm also glad I got rid of a little bit of my fabric scrap stash, haha! How do you keep your fabric scraps?


For more photos and full post click here.

With Sew Much Love, Mary 


The Dyed Velvet Skirt

Hello Refashion Co-op. I hope you are well. My most recent project is a great Eddie Bauer skirt I found somewhere a long time ago. I can't remember how or when I got it. Do any of  you have trouble remembering where you got some of the things in your refashion stash? 


This tan skirt was way too long so I cut a lot of  it off to get it out of the way. My dog observed from the side to make sure I didn't mess it up.


I already have a tan skirt so I decided to change the color with some dye. After using a bottle of Rit dye I had this great dark brown color. The stitching is lighter and makes a nice contrast to the darker brown.


I took the skirt in on each side and gave it a new hem. It was really nice fabric and it didn't fray at all. I wanted it to look nicely finished. I pressed the new hem but I don't think it will need ironing normally. 


I love the skirt. It is soft and stretchy and comfortable. 


Thanks for reading, for more details and pictures go to I Can Work With That.

Monday, February 27, 2017

Saunio Cardigan

The February pattern for sewmystyle is the Saunio Cardigan from Named Clothing. I decided to make this a combo Sew-from-Scratch/Refashion-Project.
I found this cosy ribbed knit in my out of control toppling mountain of fabric stash. I only had enough of this rib for the back and front pieces, which is where the refashion part of the project comes in.

I had picked up this big sweatshirt at Goodwill a couple of months ago - I liked the frayed hems, and I know I'll always use T-shirts or sweatshirts for something because they're somewhat forgiving on size and quick to sew.

I wanted to cut off and open up the shirt sleeves and keep the original frayed hem cuffs.
Uh-oh ....PROBLEM: the sweatshirt armholes aren't as deep as on the Saunio pattern. Therefore the sweatshirt sleeve isn't wide enough.
Oh well....SOLUTION: I figure nobody's going to be doing underarm inspections on me (that would just be weird??), so I pieced the sleeves together, overlocking scraps of fabric on either side.
I just managed to get the facings out of the body of the shirt.

The whole cardigan is a quick sew - it took longer with the swearing (a frequent part of my sewing projects), the sweatshirt deconstruction and fudging the pattern layout.

It also looks good in a variety of fabrics (see #sauniocardigan on Instagram). Full post here.

Sunday, February 26, 2017

#45 Back to School Wardrobe: Wind Pants to Summer Shorts

REFLECTIONS:
My self-challenge: Back to Elementary School Wardrobe started last August:
Goal #1: 10 Re-fashions each month beginning August when I returned to teaching. 
Goal #2: Shop from the closet. No new / used clothing for this school year.
Goal #3: Shop from the sewing stash for Re-fashion materials.

I have bought only 2 pieces of fabric for a Re-fashion and 4 pairs of winter tights.
Since I cannot shop, I am checking Winter lounge wear for items in need of mending or Re-Fashion.

BEFORE: Wind pants in the at home lounge-wear. These nylon pants were scratchy and very uncomfortable. But they had lots of wear left in them.  

STEPS:  
  • Use a seam ripper to open seams in outer legs and waistband.
  • Fold up legs to meet hems at waist-band. Cut to length for shorts.
  • Cut new side inserts from the old leg bottoms. Insert, serge, topstitch in place.
  • Use old t-shirt to cut new waistband facings. Re-insert old elastic.


AFTER:  Paper-bag waist Shorts for summer gardening at the RanchHouse. 

AFTER:
Paper-bag waist shorts for summer gardening

AFTER:
Leg bottoms cut for new side inserts in shorts.


AFTER:
Old t-shirt cut to make facing
for new paperbag waist

BEFORE:
Nylon wind pants legs were scratchy

Saturday, February 25, 2017

#44 Back to School Wardrobe: Snug Thermal to Sleeveless Lounge Top

REFLECTIONS: Old thick cottom thermals are a favorite RanchHouse at home lounge and sleep wear. Before thinner "silkies" I wore them under winter clothing. In the 70's one co-teacher raised her skirt to show thick cotton thermals under her long skirt and boots. 

BEFORE: Too snug thermal top in RanchHouse at home loungewear. 

STEPS:  
  • Use a seam ripper to open sleeves/side seams.
  • Leave sleeve in. Cut sleeve 1 “ down from the sleeve seam. Serge / turn to create the new facing. Topstitch in place.
  • Cut new side inserts from old sleeves. Insert, serge, topstitch in place.
  • Add lace to bottom edge.


AFTER:  Sleeveless thermal to warm up RanchHouse at home flannels. 

AFTER:
Sleeveless thermal under flannels

AFTER:
Sleeveless thermal

Lace added

Side panel cut from sleeves added to enlarge.

BEFORE: Snug thermal from RanchHouse loungewear

Pinned to the wall

Turned an outworn shirt with a great design into a cute wall hanging using some fabric glue, a chocolate box lid, some ribbon, and some sparkly stickers. I think she looks real pretty up there! What do yall think?

Thursday, February 23, 2017

An Imagine UNtunic alteration

Today's refashion is simple: Mine typically are... What makes this somewhat unique, perhaps, is that I refashioned this tunic using ONLY a Serger.

This is not a flattering silhouette for a "hippy" gal such as myself...

I use Sergers all the time (Yes, you saw right. Plural. Sergers.). My job/livelihood is selling sewing machines and giving lessons on how to use them. I may not be the best seamstress, but I know ALL about how machines work and how to best utilize them for certain "looks." (Not bragging... just illustrating that even though I'm a horrible seamstress I'm still knowledgeable. Those who can't do, teach, right?) :)  I've found that when it comes to sergers, people can get quite flustered. But there's really NOTHING to it.

Exhibit A:

For this super simple refashion, I used our Baby Lock Imagine Serger to "UN tunic" this sweater.

This is what the side seams looked like with a 3 thread overcast stitch on the Imagine:

This is so much more professional looking than a zig zag or straight stitch

And even though I did like the striped linen fabric trim, it sadly went bye-bye when I finished the bottom edge with a rolled hem (done on the same Serger).

Still only 3 threads, but a completely different look.

This alteration was SO simple. Seriously... just 3 stupid little seams and it was all done on a Serger. If I can make a refashion look good (or at least not "home made" looking...) by using a Serger any one can.

I think this is much better on my, uh, curves...

I bought myself some Tieks for Valentine's Day :)


If you've contemplated getting a Serger, I would highly recommend them. They really polish up your projects and they sew at lightning speed so you can get your sewing done much faster too. It's a win-win :)


Happy SERGING ;)


The Witch Dress

Hello Refashion Co-op. I have had this black dress on my refashion rack for about 2 years. It was just so unexciting I never even tried it on. When I did try it recently, I found it fit pretty well.


I still thought it was really dark and severe looking. And these dangling open wrists made me feel like a witch. Maybe I should have saved it for Halloween. I cut the bottom of the dress off in a high-low style. I thought about leaving the sleeves alone but I have a toddler and I had to change a diaper with these sleeves in the way and decided I hated them and they had to go.


I closed the sleeves and they were nice and plain. (And more hygienic!) I can live easier with drama free sleeves.
You can see the high-low hemline of the shirt. It is a heavy knit and when I saw it didn't fray at all, I left it as a raw cut edge. It was lighter and had more movement with out folding it over and making a thick hem. 


Here are the pants. They were too big, too high waisted, and the zipper was broken. They were also very soft and stretchy, with an elastic waistband. So, I decided to try and make them wearable.

I took some fabric off the inner legs and crotch to bring the waist down to my waist. I also took some excess off each side, including that zipper. I figured/hoped that with stretchy elastic at the waist and stretchy fabric I could get them on and off without a zipper. 
I was right, I didn't need a zipper. I don't know why anyone put a zipper in stretchy pants. It was totally unnecessary.


Thanks for reading, for more details and pictures go to I Can Work With That.


T-Shirt Applique

Hello readers!
I apologize for taking so long to post. Have I given up sewing? No way! I have been busy with my 1st New Years Resolution: Organizing the house. I have made great progress with my home organization but now and then I need to take some time for a creative break!
Here is what I have for you today….
Whenever I am out on a thrifting adventure I find some quirky t-shirts that I just HAVE to have! But what do you do with a t-shirt that does not fit? Take the quirky part and sew it to something else!
dscn1202
I don’t really understand it….but I love it!
dscn1203
I cut out a square piece around the piggie.
dscn1204
Found this cozy sweatshirt for .99cents! Did you see the zipper detail?!
dscn1205
I didn’t want to put the applique front and center. I decided to get artistic and place it at the bottom corner at slant. Something different! Then sewed that into place! I even used a decorative zig-zag stitch with black thread to contrast the red fabric.
dscn1206
I decided to use the rest of the t-shirt material to make elbow patches for the sleeves of the sweatshirt. That’s where I broke out my handy dandy heat ‘n bond! (Love this stuff)
I ironed on the heat ‘n bond. Traced 2 ovals for the elbow patches. Cut out the ovals. Peeled off the heat ‘n bond backing. Finally, ironed on the elbow patches!
dscn1207
I always place a layer of wax paper underneath the fabric that I am ironing the heat ‘n bond to, just in case! Don’t need any messes or fabric bonded together that doesn’t belong together.
dscn1209
Ta da! Such a silly but cozy sweatshirt! ….don’t mind my sock monkey slippers
dscn1210
annnd let’s not forget the elbow patches!
2017-22-2-16-27-10
Happy Refashioning!!!

Check out my stash of refashions on my blog: http://therefashstash.wordpress.com
  • Edit
  • Share
  • Comment

Wednesday, February 22, 2017

It's tunic time...part two

The second tunic in this series was just about as easy as the first one.  I started with a crop top that had a nice lace edging, and a long, pleated skirt.


I put on the crop top and determined how long I wanted my finished tunic to be.


I cut off the bottom half of the skirt to the predetermined length, retaining the original hem.


I carefully pinned all of the pleats in place and serged along the top edge of the skirting before attaching it to the top.


I was fortunate that the width of the skirting was already the width of the top, so no adjustments were necessary.


I then pinned the right side of the pleated skirt to the wrong side of the crop top at the point where the lace edging met the t-shirt fabric.


I topstitched the pleated skirt to the top, stitching along the top edge of the lace edging.  For modesty, I also stitched a strip of the skirt fabric to the back side of the lace that ran down the front of the top.


I love the flowiness of this top!  Although, it made for some fun times trying to photograph at the windy Oregon coast!

Stay tuned for more tunics on my blog, Second Chances by Susan!