Showing posts sorted by relevance for query long sleeve bow sleeve. Sort by date Show all posts

Saturday, March 26, 2011

Tutorial: Long sleeve to Bow sleeve Tee

Fistly hi from a refashion co-op newbie, so excited to share on this great site, anyway enough gushing!

If you've ever checked out my blog ruby murrays musings you'll know I love to change things up,  my Hand-Me-Down Horror series has been all about buying yucky or just plain boring clothes and making them into something I'd be proud to wear. Hack off those sleeves, raise that hemline and bob's your uncle a cute custom piece, for pittence.

So without further ado get your sewing needles and thread out and sharpen up those scissors, this tutorial only requires minimal sewing by hand and is so quick and easy you'll be done before you know it.


Before, a plain long sleeve Tee from Old Navy, that cost me a wopping $2.60

1. Hack off those sleeves, keeping the cut line as neat as possible, then turn the sleeves inside out.
2. Next cut off the cuff again nice and straight, then cut off the stitching (serged seam) keep this as straight and neat as possible and keep everything.
This is what you'll end up with, don't throw anything out, nothing goes to waste on this project.


 Next you'll be making the bows, out of the sleeves (I know, genius right!)

3. Start at the bottom cuff end of the sleeve and slowly pinch your way up, it's a very informal pleat, just basically grabbing finger fulls of the sleeve all the way up until you get to the top and have the entire sleeve pinched between index finger and thumb.


Whole sleeve pinched together

4. Next take the cut off sleeve cuff and wrap it around the middle of the bunched up sleeve, I fanned the sleeve out a little so you can see what it's starting to look like.

5. Keep wrapping the cuff edge around until it's tight and the sleeve is unlikely to fall out.

 6. You've just made yourself a cute bow out of a sleeve, now to repeat the process until you have two.

There's a distinct (to me anyway) top and bottom to the bows, the top of the bow will be the rounded edge of the sleeve cap (the top part) just keep this in mind when you come to sew them on.

7. Next we're finishing off the neckline, and for this we're using the two long pieces you have left over from the sleeves, I only kept one so I just sewed the serged piece to the front and it looked fine but if you want to have matching front and back to the tee just continue sewing around the neck.


8. I just used a simple in and out 'running stitch'  for the neckline, making sure to line up the serged piece with the neckline edge to make sure it's even.


The finished neck edge, it looks great doesn't it and to think it's just a piece of t-shirt scrap!


9. Next take the bow and making sure the top shorter edge is facing the neck edge line the middle of the bow up with the shoulder seam and simply stitch through the centre of the bow all the way through the t-shirt, I went all the way around the centre piece to make sure it was secure.
That's it, if you want to be extra fancy you could add a few stitches to the bow edges to keep it from flapping around but I've found I didn't need to do this and the bows stayed put. I also left the sleeve edge unturned, you could always turn it under and stitch, personally I liked the raw edge.

So there you are, it shouldn't take longer than an hour even for newbies to sew so even us naptime crafters can make a cute new addition to our wardrobes.


Friday, March 14, 2025

A bow for bow sleeve shirt


Hi everyone,

The 14th anniversary Refashion co-op in February encouraged me to do some digging into the archives and statistics. For example, which blog posts were popular over the years, which refashions are unforgettable (too many!). Where do our readers come from (all over the world!) etc etc. I'll be sharing some fun facts and throwback refashions with you in the coming months. After all, Refashion Co-op is a treasure trove filled with refashion gems worth cherishing. 

Best read post
One of the things I wanted to find out is which post had gotten the most views over the years, I was curious!

Well, here it goes: out of 7982 posts(!), the best read post is Bow sleeve t-shirt by Andrea (aka Little did you know). Her post was published on march 7th in 2012 and has been viewed over 247.000 times (yes really)!

Andrea's Bow sleeve t-shirt

Now the fun part is that Andrea mentions in her post that she actually got her idea from fellow Refashion Co-op blogger Ruby Murray! And Ruby had shared her refashion 'long sleeve to bow sleeve' here a year before, in march 2011. 

Ruby's Bow sleeve tee

So you could say that Ruby and Andrea both were responsible for the most populair post on Refashion Co-op! Congratulations to you both, it's such a fun and simple idea. I immediately liked it when I saw it and I absolutely want to try it myself.

What's your favourite refashion shared here on Refashion Co-op? Let us know in the comments!


Ruby explains the whole process in her post and if you're into easy projects, you should look into it. According to Ruby it's 'quick and easy and you'll be done before you know it'! I guess that's my cue, until next time!

Wednesday, March 07, 2012

Bow sleeve t-shirt

*--*New addition...the link to the tutorial on ruby murray's website instead of just the website :)
Just click on bow-tee to head over!*--*

*****I just wanted to add here that I found the original of this where I got the idea! It does show up on the sew whats new website, but it is actually from this Refash Co-op blogger ruby murrays musings. Go check out her tutorial for the step by step and the original idea! I love how she used a striped top...it definitely gives the sleeves even more interest!*****

Here's a quick long sleeved t-shirt to short sleeved t-shirt refash that I saw over at sew-whats-new.com. ( they have the how-to with helpful photos, sorry :( I haven't managed to slow down enough to make up 'tutes' for my refashions)

I started by chopping off the sleeves, cutting off the cuffs of each sleeve and then cutting straight up the sleeves from one end to the next on the underside. I then gathered each sleeve and wrapped the cuff around the middle to form the bows (no waste here!). Next I sewed the bows onto their respective shoulders and even stitched parts of the folds of the bow to the top so that it would drape nicely over the shoulder. I left the raw edges of the arm holes as-is, and think they look just fine. You could absolutely take this a step farther with extra added details if you're using a super plain t-shirt like mine. Lace, rosettes, felt flowers, ruffles, beads, buttons, etc could really glam this up!
And again no before, but you can imagine what it looked like...long sleeves
It went from a long sleeved t-shirt that I'd only wear when not leaving the house :) to a super cute top that I can dress up with...you guessed it! A pencil skirt! Please totally ignore the fact that my mirror is dirty...and probably has been for a couple of weeks...don't hate! Haha, I quickly cleaned it AFTER taking the photo. Hope you enjoy seeing my version!

Andrea
LittleDidYouKnow

Friday, November 15, 2013

Spring Dress in Fall

It's only my second time posting here on Refashion Co-op, so let me take a moment to re-acquaint. I'm a beginner refashioner with no sewing machine! (I occasionally use my parents') I like to use vintage items of clothing (usually dresses) and give them small updates, usually staying true to the vintage look. My blog, Craft, Thrift, or Die is a tongue in cheek way to share my DIY attempts as well as cope with depression and anxiety. Anyway, for this project, I started with sheer pink flowery dress with poofy sleeves.

 Like my last post, this dress was also $0.50, which should explain why I purchased it in the first place. It's got a lot of strikes against it: it's pink (I just don't like wearing pink); and the combination of the really high neckline, pouffy sleeves, and long length remind me of...I don't know, something from a polygamist cult?

I'm exaggerating. Normally, when I'm refashioning an item, the sleeves are the first things to go. Making sleeves smaller is too damn advanced for me. I wanted to keep some sleeve and just make them less ginormous. This dress actually had mini shoulder pad-type things for extra sleeve height. 

my attempt to make the sleeve more fitting
After removing a lot of additional fluff from inside the garment, I pinned the top of the sleeves. They still looked weird. I decided I should move on to the neckline and return to the problem area after the easy part. 
 I tried it on, and marked the spot where I would cut the bottom of a v neck. I measured and marked, but I wasn't all that careful. I planned on adding some kind of fancy collar, so the neckline was allowed to look bad.
I tried pinning the sleeves a few more times, eventually cutting and sewing, and lets just say that somewhere a mistake was made. Fine. I hacked them off. After removing the sleeves, I pinned down the edges, and due to a sewing machine malfunction, I ended up hand-stitching as I watched TV. 


 With the hastily sewn v neck done, I considered my options for embellishing it. I had this black collar that I removed from another shirt in my scrap pile. After pinning it, it seemed to heavy and didn't work with the lightweight dress. I thought maybe just a small lace collar would work. I had lace ribbon, but since I wanted something thin, I scavenged lace from somewhere else.

I pinned the lace down, ans used a little fabric glue on the other side.
That's underwear. You see, despite being a petite gal, I've got a big ass. This one time, I bought some medium underwear and when I got home I realized that I ended up with small instead--that detail is not important, all you need to know is that I had a pair of new black panties with a lace trim that I used to make a collar. 
After completing it, I took a few pics, satisfied with the result. Here's what it looked like:

 Nice; but for whatever reason, it stayed folded up on that chair that every disorganized grown up has in their room for which to pile clothes. Then, a few weeks later, I had some inspiration


That's one sweet, little dress that I couldn't replicate in a million years. But, I could throw a little sash around the neckline of my cheap dress. I didn't have much excess material from my dress, since the only thing I cut off was the sleeves and a little triangle. What I did have was a handful of those long. thin, belt/scarf things that I always find at thrift stores. I decided to use a black one. 

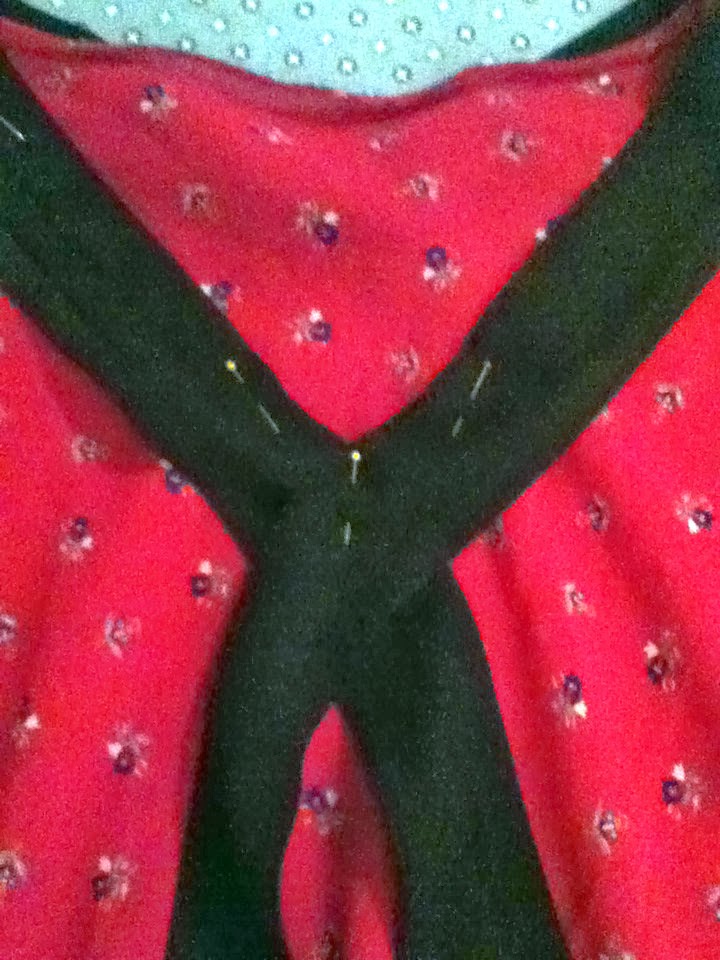
I pinned the sash on the shoulders and then in the front on both sides of the v neck. I let it hang just a bit in the back. I hand stitched it in place, only where the pins are. Just in case I changed my mind again, I didn't want it to be attached to securely. Here's the result, take two: 

The sash may have been a little short or thick, because getting a proper bow was tough. I kinda liked it just hanging there, though.
I obviously used photo editing magic to get this picture to look cool. I should also mention that even though the color and floral print say "spring/summer," it's sheer fabric require it to be layered over some kind of slip. When the weather is warm, I like to stick to one layer, especially since I work in a school and they don't air condition us. So, I guess this dress works for fall because I love layering stuff in the cool weather.


Friday, November 08, 2013

Dress Upsized and Upscaled


Dress Upsized and Upscaled

I got some great clothing from my sister. Which were good labels and nearly new. But size 8 which I am not anymore…I took this great dress and another which I had from my days of too tight, too short, and too low. Put them together and bang. Well you’ll see it took a little more effort than that.
CAM00120 CAM00121
This is the neat size 8 and I sat here on my bed and ripped the seams up both sides from hem to sleeve hem. My cat Gorda helped me as always...
CAM00122
Then the other dress and some black scrap I may use may not…? You be the judge.
I cut Up the side seam of the second dress about 3 inch wide strips with both seams I got four long piece strips. I used the already made hem and lined it up with the other dress right sides together. I took the other piece and lined it’s hem up with the sleeve hem. There they meet at the armpit and all is good. then sew the back and front pieces together. more details @ uggysburtnest@wordpress.com

This is the sewn in place part.
CAM00125
This is the done and on me shot!!!
So here is my question for you… ? Should I border the bottom in the black oh and should I add a bow to the back…?
Sorry for the blurry shots for this my back has been killing me.
CAM00131 CAM00133
Without bow………….            With the bow…………
Oh I don’t have a picture of the border but by the pictures a 2-3 inch border.
I thank you in advance for the time you took to read and to comment I know time is precious and noone wants to waste time. I value your input, and your friendship.
God’s grace, peace, light, and love to you today and always in Jesus’ service, Doreen

Monday, July 13, 2015

Vintage Laura Ashley Refash

A fews weeks ago I found this vintage Laura Ashely dress (made in Great Britain) at my local Salvation Army!  Love that neckline, but its a little long...Long lengh and long sleeves.


See I didn't make it up...its really made in Great Britain!


1st I removed the side ties. At this point they were totally useless since the dress already fit me very well and I didn't need a random bow at my back.


Good bye ties!


Sewing together the holes the from the ties.


I really wasn't digging these buttons that blended in so I decided to change them to something more fun!

Awww like these cuties!

Next I needed to shorten this dress to bring it up to date. I used my dress I refashioned for watching the Kentucky Derby as a template for the length. I actually took about 10 inches off the length.


Pinning the new hem!

The sleeves were a little too long for my taste so I cut off about 2 inches and sewed a new sleeve hem.

Our wedding anniversary is July 13 so the husband and I decided to celebrate today with a trip to the zoo and dinner at one of our favorite Italian restaurants!

Got to see the penguins at the penguin house!!!

The Detroit Zoo has just added a wolf exibit! Here is the alpha wolf who is a female, girl power!

Me and my zoo swag! Zoo water bottle and stuffed artic fox!

Happy 3 years!

Followed by a yummy dinner at a family favorite: The Villa! The manicotti palamina and veal parmesan is amazing! I'm still full! 

 
Happy Refashioning!!!!

Check out my stash of refashes on my blog: therefashstash.wordpress.com