Showing posts with label mylifeonthedivide. Show all posts

Thursday, September 19, 2013

Refashion With Fabric Paint


This inspiration for this Duck shirt refashion came from my Son. One day  he was having a tantrum and threw his lunch on me. I had to change my shirt after his food tossing behavior.. The clean tshit I put on had a picture of a bird on it(he has a duck obsession)as I changed he stopped crying. He started yelling with excitement  DUCK! DUCK! DUCK! and pointing and laughing at the duck on my shirt. That is when I had my light-bulb moment. I knew I must make him a duck shirt

I got this old hand-me-down out of the, to be refashioned box. I bleached it up until it was white.

Next I mixed up my fabric paint, you can find fabric paint mixing directions here

Next I got a stencil and taped it under the shirt. 
You can find the full step by step directions here on my blog


My Duck shirt turned out so great that I am going to be fabric painting some adult clothing soon!
I hope you like this duck shirt tutorial

Oh and if you like to refashion I have an open invitation for all refashistas to come show off their refashions here on this community pinboard all are welcome

Tuesday, July 30, 2013

DIY Splatter Painted Denim Shorts

How to splatter paint the hem of your denim shorts
I had some very used hand-me-down girls jean shorts that needed a facelift. I have been loving the shorts in the stores that are white and dip dyed in a bright color. I thought it might look cool if I made some white shorts dip dyed in splatter paint! And I love how they worked out. 

I used little girls shorts for this tutorial but I think they would look perfect for any age girl. 

This project was very fun and easy to make. You can find the step by step tutorial here on my blog 

I hope you have enjoyed this refashion! 

Monday, June 17, 2013

How to Refashion a baby gown into baby pants


I have a thing for refashinging baby gowns. I don't know how it started but one day I made a baby gown into this 6-12 month baby PJ set. I guess that was the start of my baby gown refashioning and today I want to show you another baby gown refashion I have recently came up with.

See my little man, he had a growth spurt and needed some new lounge pants. So I whipped them our in about 20 minuets, including taking photos! So I know you can do it! Even if this is your first time refashioning. This is a very good first time refashion project.


I made two pairs and just love how they worked out! If you want to see the whole step by step tutorial you will need to come to my blog and check out the very easy step by step process. I hope you like them! Let me know what you think of how to make easy baby pants out of an old baby gown!
If you do make these please send me a picture of how they looked on your little cutie pie! Do you do tutorials on your blog? I have started a community pin board for anyone who wants to show off their pins, just email me.

Saturday, April 27, 2013

How to Make an Easy Nursing Top

 This is an easy top to make out of a few items you probably have laying around. Because of the shape of this nursing top I think it is a perfect one to make with one of your old maternity tops. With this you can turn a maternity tank into a nursing tank that will cover your belly right after delivery.

This top can be lifted up or pulled down to nurse

This nursing top is refashioned out of a few items.  This is what I used plus a few sewing supplies.
When you are finished with this simple refashion you will have a nursing top that will look so cute, this is how mine looked. You can choose to make it in different colors. I would love to see what yours looks like.
If you want to see the step by step directions  then check out my blog. My Life on the Divide, I have a whole section of nursing and maternity items that I hope you will enjoy. 

One of my most popular nursing tops is a "no-sew" nursing top that I just LOVE!

Thank you so much for looking at my post

Tuesday, March 19, 2013

DIY Off the shoulder top


 How to DIY an off the shoulder top with a cinched waist out of an old tee shirt 

See the tie at the bottom? Very easy... I will show you how.
This is what I started with, nothing special.
And this is what I ended up with. Also nothing special but a little better.
You can see the whole process here. The shirt only takes about 20 minutes. You can see this and
 all sorts of other refashions over at my little blog.

Thank you so much for taking the time to look at this refashion and for looking at the refashion Co-op. Please leave a comment and let me know what you think about this or any of the other ideas on this little co-op.  If you do stop by over at my blog I would love to know that you came from the co-op, so let me know.

Thursday, February 07, 2013

How To Upcycle a Maxi Dress

I know you have a Maxi dress in your closet  that you are so over. If not a whole stack of them. If you do have a closet full of Maxi dresses that you don't want to wear, stop beating yourself up for buying them and start refashioning them. I am in the process of working on a whole "maxi" dress series. Because their is so much that you can do to give new life to these dresses.

This is one very quick and easy way to give an update to an old maxi dress. See my cute before and after? Notice how much better my girls look after? I had the same bra on in both pictures but the little lift from this refashion makes all the diffidence.
This is way easier than it looks
Just make a few cuts
If you want to see how I made this with an easy to fallow step by step tutorial then check out this page on my blog.
And then you are done

You can see this refashion on my blog My Life on the Divide.

This is another Maxi refashion that I did a while back. It is very easy, way easier than it looks. I love how this turned out and it only took me a few minuets! If you are interested in reading the step by step tutorial for this refashion then click here.


Thank you so much for looking at my maxi dress refashions.

Kasey

Wednesday, February 06, 2013

How To Refashion babies sleep n' play

How To Refashion Baby Pajamas 

Hi friends who I have been missing. I have not posted much in a while. I got hurt while crafting and needed a little break, then we had to move and life was just crazy. Let me tell you, I sure missed crafting!And blogging about my crafting during my move. Well I needed to get back into refashioning to release some of my creativity. Only I was sort on time, because I was in the middle of moving. I was also short on supplies because of the move, same with space and... you guessed it, moving!

So lets gets started with this refashion. This is a simple as can be No-Sew! Baby outfit refashion.

This is a simple little refashion and all you really need is some scissors  I have some good tricks to help you get the sleeves just the right length.
See how happy my man is in his new Sleep N' Play? He loves it! If you want to see all my tips on how to make this refashion with our cutting anything to short check out the step by step tutorial here on my blog .

I hope you love this cute and simple refashion! I have some fun stuff planned for the next few months that I know you will love. 

If you like this type of refashion (cute little baby things) I also did somthing a lot like this a few weeks ago.  This one was how to refashion a baby gown into a sleep set. You can see the step bay step directions for this cute sleep set over at my blog called My Life on the Divide.  

Thank you for looking at my refashions today! I hope you enjoyed them and I would love to know what you are making this week!

Saturday, February 02, 2013

Refashion a Smock Top into Asymmetric Hem Skirt

HOW TO UPCYCLE A SMOCK TOP INTO A ASYMMETRICAL SKIRT 

Before and after smock top refashion into a skirt

 I saw this Anthropologie skirt on line for $228, I thought it was so unique but not $228 unique. It is called the the Corvida Skirt and it was my inspiration for this upcycle. I used a smock top I thrifted. I discovered that this type of refashon will also work very well for making maternity skirts. So this could also be a maternity or postpartum skirt.
The Corvida Skirt from Anthropologie $228, My insperatio


 My final product turned out to be very loosely inspired by this.  However I think if I had been working with a longer top or even a Maxi dress to start with I could have made something that more closely resembled my inspiration.

This skirt was VERY easy to make so this is a good one if you are a beginner refashionista.
I have a step by step tutorial on my blog My Life on the Divide.

All I used to make this skirt was the top and scissors! So any one can do it!

My asymmetrical sheer skirt

Tuesday, September 11, 2012

Refashion a Night Gown into a Top and Shorts Set

How to Refashion a Night Gown

Short and Tank Pajama Set

I got a lovely little night gown at the thrift store.  I picked it up becuase it was great fabirc. Super soft and looked brand new.  However I don't sleep in Night Gowns.  I like to sleep in a tank top and shorts.  So I decited to take the night gown and make it into somthing I couldl get more use out of.


This is a quick before and after photo I took 


You can see all the step by step directions on my blog.  I also have a lot of other refashions on my blog.


For this pair of shorts I used a method that I have never used before for the waist of the shorts.  I could have done a lot of things, like add a casing for a draw string or add elastic.  But I wanted to do somthing more unique.  

This is how the shorts ended up
I added a waist band from another pair of yoga pants.  I like how it worked out and think I will try in agian.  I did this so that I could leave some raw edges.  I think this could also work well with a draw string, maybe I will do that next time.

If you want to see how to mak this with step by step photos this link will take you 

Monday, August 20, 2012

How to make a no sew nursing top


Can you even tell this is a nursing top?   How about an easy one to make?  Well it is both, I will show you how


I was browsing my favorite maternity shop figure 8 maternity  and found this cute nursing top for $74.  I love it but I can't spend that much on myself, I just can't.  I am sure all you Mommas know what I am talking about.  So I am going to show you how to make one like this one for less. Much less


This style top was super popular a few years ago, so guess what that means?  Yep you got it!  The thrift stores are filled with them.  They are the perfect style to convert into a cute nursing top...Ok lets get started!


This is the top I got out of my sisters closet(not a thrift store but actually garbed it from my sister)


The process to convert this type of shirt into a nursing top is so easy, the step by step directions on my blog. As well as some other nursing top ideas.

This is a unique refashion because when you are finished the top actually still looks the same, but it will have easy access for nursing a baby.

Look you can not see anything as I nurse the baby!
Look, you can't see anything!  
And when I am out and about, it just looks like a normal top... that also covers any extra belly.  Because I know as a new new mom I have some tummy to cover

Saturday, July 21, 2012

DIY Refashion Maxi Dress in to a sexy TOP!

Maxi Dress in to a Top is My Favorite ReFashion EVER! 


I refashion onften, but a lot of my refashions are so "fun" I don't actuly get much use out of them. Example? OK how about my DIY polka dot shoes? You can find them here Polka Dot Shoe Refashion So I don't get a lot of use out of them. 


But sometime I do a something a little less "fun" and more reasonable.  If you call a one shoulder top reasonable.  I use this top so often I thought I should shear it with all my refashion friends.  So this is what I made out of a maxi dress and I love it.  

This is how it looked before 
I got this for 3$ at wal-Mart.  I made 1 big cut and tossed in about 20 stitches... and 
VIOLA
So what do you think? This refashion is VERY easy! I tell ya!  If you want the step by step tutorial click here or if you just want to be my friend then come to check out my blog, My life on the Divide

Thank you so much for looking today


Kasey

Monday, June 25, 2012

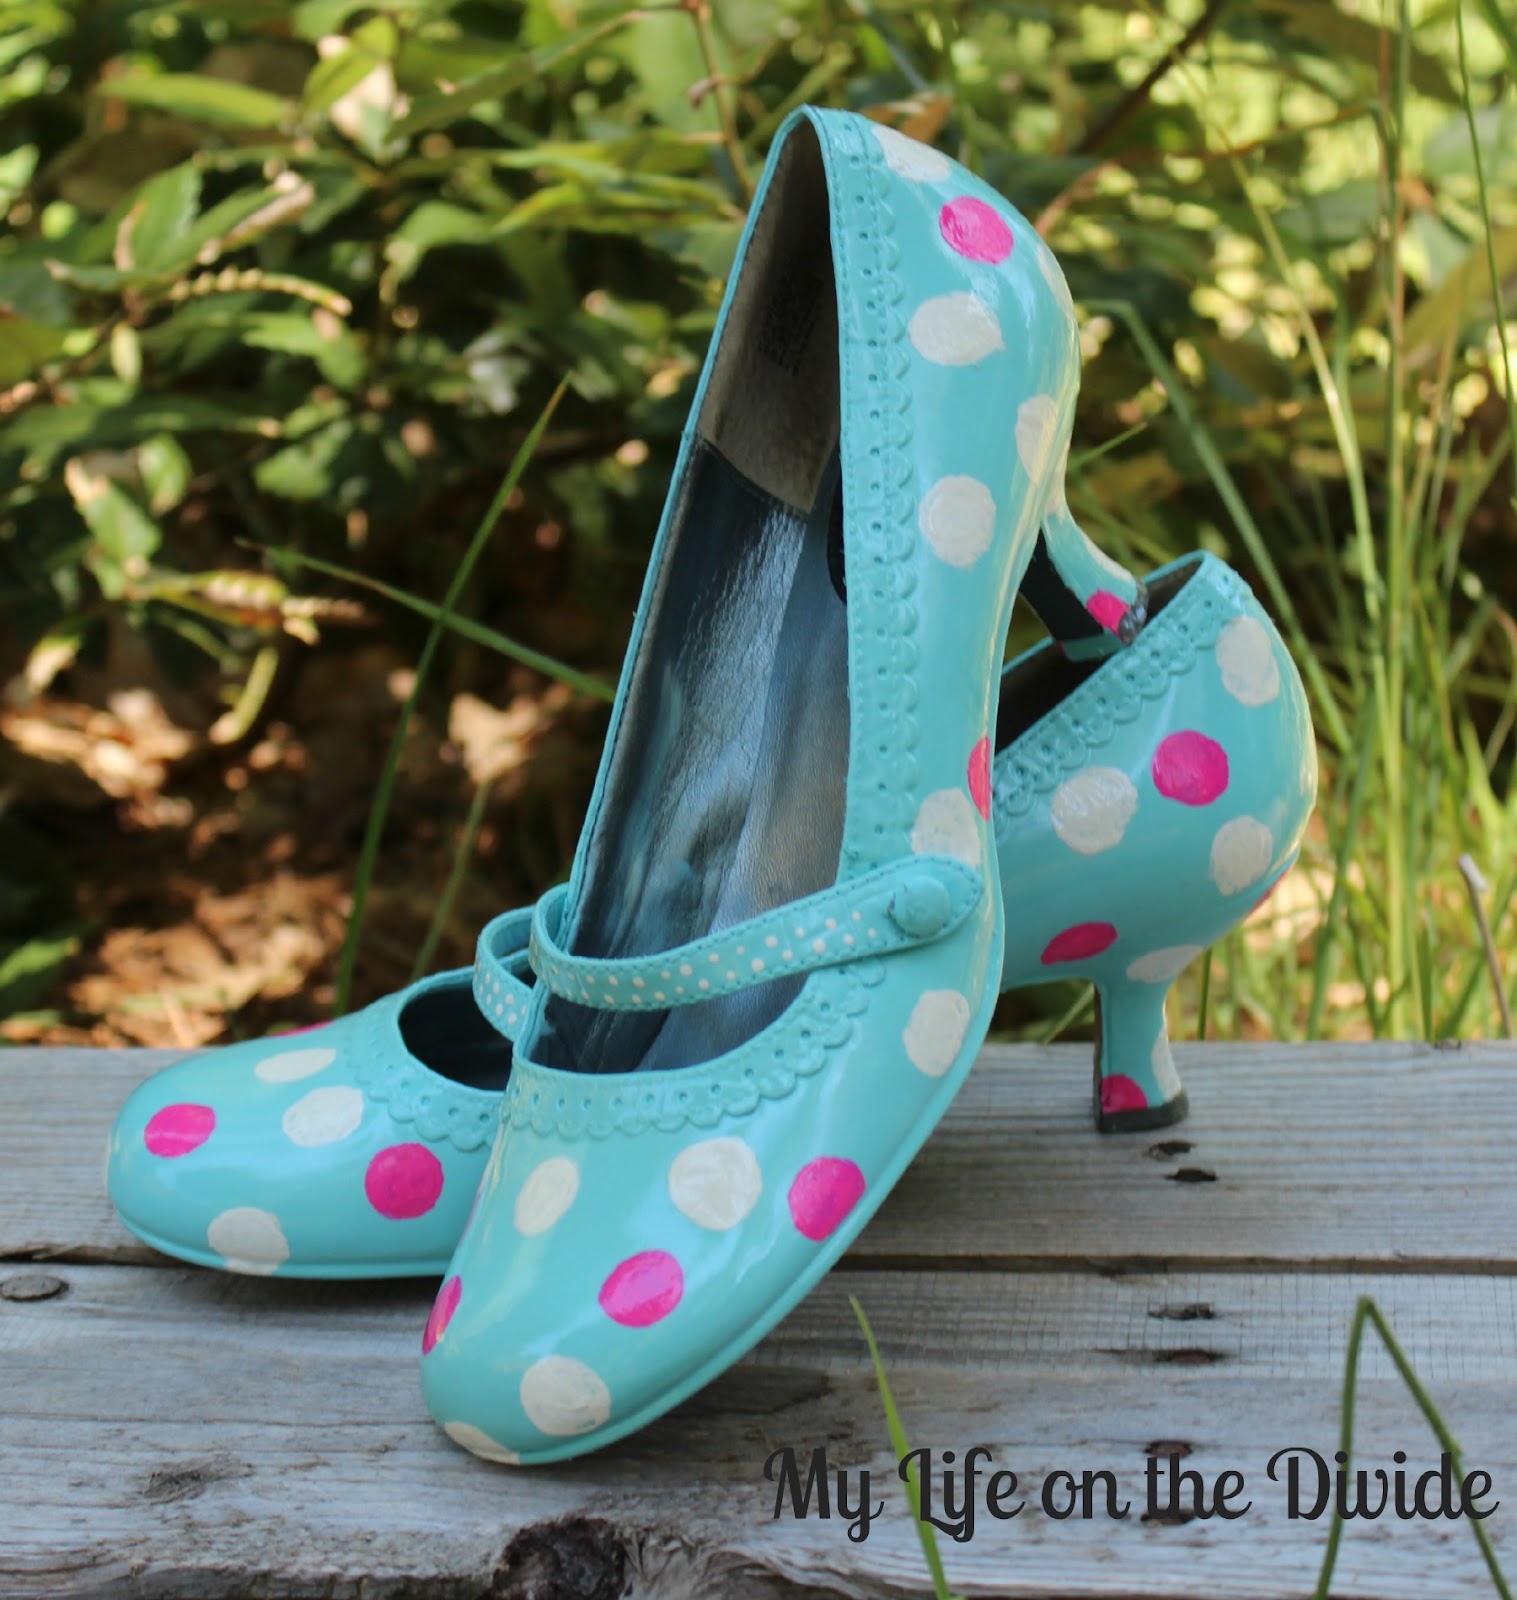
Refashion Shoes With Paint


This refashion was based on an inspiration photo that I came across on pintrest, I am happy with how it worked out, so I am shearing it with you.
This is the inspiration I found on line on the left and the right this is a photo of how mine worked out
This is pretty easy to do but somewhat time consuming.  You have to be very careful whit hand painting dots on shoes.  If you use a gloss paint like I did for the base coat it helps, because if you make a mistake you can easy wipe the mistake away.
So I started out with an old pair of black shoes that had a strap on them.  A little tape paint and a new button and I had a new pair of fun polka dot shoes!

I absolutely love how they turned out! You can fallow my step by step tutorial and make a pair just like this.  I love to refashion and provide tutorials that are easy for any one to fallow along with.  If you want to see more of my refashion please check out my blog, My Life on the Divide.  It a place full of fun refashions and easy tutorials.


Thank you for looking today

Kasey

Tuesday, June 19, 2012

Refashion a Baby Gown

How to refashion a baby gown into a short and top set for a baby.

Finished outfit only took about 15 minutes 


Make this outfit for your baby by upcycling a baby gown.  I used a 0-3 month baby gown and that converted into a size 12 month short and top set.  Yours might not be the same, but I will show you how to measure in my tutorial.
Before and after of a 0-3 month baby gown refashion into short and top set size 12 month.
All you need for this refashion are a baby gown scissors a needle and thread and your good to go!

For step by step directions please come check out my blog post on how to refashion a baby gown.  My blog  has step by step tutorials on refashions for the whole family.

Saturday, June 16, 2012

How to fix sleeves that are too tight

How to fix sleeves that are too tight

Today's refashion is more of a fix. I actually did this one a few weeks ago, all the lovely pinners on pintrest have been keeping it very popular.  So I decided to shear it with all you. This is very easy shirt refashion, and it makes a huge improvement!
See I got rid of them!
I got this shirt a few weeks ago at a thrift store.  I LOVED the color, but look how the arms looked, not only ugly but not comfy at all!(I just had a baby, so I need comfort!)
I had to do something about that


The end result was perfect, I still love this color!


I hope you will stop by my blog My Life On The Divide and check out my other refashion that are good for beginners.

So what do you think of the transformation? This refashion was very easy but had a big impact.  I hope you will give this one a try, then show us all a photo!

Thank you for looking

Kasey :)