Thursday, January 31, 2013

Refashion: Grey & Black Floral Skirt

After a long break of not posting much I think I'm back ladies & gents! :) Today I'm sharing the simple 'refashion' of adding length to a casual cotton skirt that I felt was too short on me. To solve this problem I picked out two different cotton shirts that no longer fit me and cut them into strips that were the same width. I ruffled the pieces, attached them to the bottom of the skirt, sewed them in place and now it's done and fits me perfect. :)


There you have it! View the original post about this refashion here!


Wednesday, January 30, 2013

A couple of aprons from curtain/lining and lace!

Hello all!

I wanted to make an apron to put money in when I had a stall at a recent event.

But I wasn't quite sure what to make it from.

So I rummaged in my stockpile and came up with some lace from a top which got me thinking...


I  had some gorgeous curtain fabric somewhere...

And it was lined...

So I designed an apron, added the lace, lined it with the curtain lining and added a money pocket on the front. 

Can you see it? 

No? 

Good! 

That was the plan!


All dressed up ready to go!


I also made one for my daughter to wear too:


There are more details and photos of this and other refashions at my blog:


Happy refashioning!

Tuesday, January 29, 2013

Chopping Off Length

Just changing the length made these two pieces really flirty. Which is just the way I like it!


And both are paired with thrifted finds! (Not the shoes though!) Top outfit: thrifted $2 dress and $6 belt. Bottom outfit: thrifted $3 top, $6 belt, and $3 skirt

Another dress to skirt refashion

At a yard sale this summer, I bought this sleeveless gray flannel dress for $1. It was from Eddie Bauer and was long and shapeless.


As it was about 90 degrees when I bought it, I had no immediate plans to use it, but I knew it had potential. This winter, I realized I could really use a heavy-weight gray skirt, so I grabbed this dress. I chopped the top off, leaving me with this. 


I cut off two strips to make a waistband, then I took it in at the sides to make it more a-line in shape. It took some wrangling to get the waistband on, since I didn’t use a pattern, but I figured it out. I used a couple of hooks to fasten it at the top. When I tried the skirt on, the fit was good, but the buttons were too far apart, leading to some wardrobe malfunctions.  I made a few extra button holes between the existing ones and took some buttons off the discarded part of the dress. Here how it turned out.


And here’s how it looks on me.


With tights and boots, it is warm enough for most winter days. I have some pretty casual styling here, but it also dresses up nicely for work.

Thanks for reading!
-Amy


waist replaced

DH had some undies where the fabric had frayed over the elastic. Recently I got in on a deal for proper waistband elastic. So, I took the idea from some of his other pairs to replace the whole waistband part with this other stuff.
one of the frayed pairs

Okay, it wasn't as easy as I thought it would be. The 'good stuff' is very firm. I struggled to stretch and overlock at the same time. For the second pair, I stretched and sewed on the sewing machine first, then did the stretch and overlock part.
one of the fixed pairs - I put the overlocking on the outside so it wouldn't be scratchy.

Confession: I have decided it is easier to buy new. Sorry.

I did learn how to do this though! and I will make sure to buy the undies with that sort of elastic so they don't wear out so quickly. So, still a bit of saving.

Oh, and I kept the buttons from the pairs that I tossed.

a skirty tunic

From 1970's disco diva skirt...


to glammmed-up rockstar tunic...

 
Here’s how to take your own piece of lurex history & make one for yourself!

Monday, January 28, 2013

I thought I knew what I was doing...

I have a board on Pinterest that I've named Refashion Ideas. I decided to browse through said board to gain inspiration for this lovely coral silk blouse that I'd thrifted...


I came across this photo from shoppetal.com of a lilac top:


I could totally pull this off, and its super cute ;) So, I began my refashion with this end in mind.
I began by seam ripping the collar, sleeves and up each side of the top.


I then cut the body down starting where the shoulder should be and angled out to the bottom outer corner, ran the sides through my sewing machine up to the armpits and reattached the sleeves. I cut the sleeves off just above the cuff and buttons and finished off the new hems with thin elastic that I zigzagged in with my machine.


Alright, now, all I had to do was to cut out the scoop back and create a bow...


I made sure not to cut it too low as I prefer to wear a bra without it showing. I finished off the new neckline and tried on my new top before making the bow...I didn't like the way it was laying on me at all. I decided to turn it around. Wow, I loved the drape much better, and now the button down front made for an interesting back...without a bow! (I could still always make a detachable bow with the scraps left from this, and may do so later today :))

Here's my final look:


I belted it to give myself a waist and paired it with some casual jeans, but as with most of my silk tops, this can be paired with nice jeans and heels, pencil skirts and sandals, a black and white patterned mini and ankle boots, etc...so comfy and light, I'll be wearing this all seasons!

Hope you enjoy!
Peace,
Andrea
LittleDidYouKnow

Re-refashion number...37?

Before: Well, the before pix have already been deleted from iPhotos (sorry editors!), so you'll need to pop here first to see the original refashion. I blame the lack of sunlight.

I chopped off the cowl neck from my British Airways sleep suit refashion of this past November, cut that in half, cut the now cowl-less top right up the front


and stitched those cowl bits to the newly cut front edges. It looks better pinned over than open IMO.

After:


Luckily we don't lack for kilt pins 'round here.

(None are mine...).

Bit more detail here.

IWOM

Just Sew: Hooded Scarf

The possibilities are endless with this simple project.  Stop by Just Stuff to see how to turn a long sleeve shirt and some scraps into a fun accessory.  Or, to see how a fun accessory can turn you into a unicorn, a robot, a kitty, a bear ....

Go Team Daddy!

This refashion is for the little ones, and perfect if you need a baby shower gift.  You can make one-of-a-kind baby bibs out of old baby clothes, t-shirts, or any fabric that has a fun print.  I turned this one-piece baby outfit from Goodwill....


...into an adorable baby bib.


You can see step-by-step instructions at my new blog for 2013....Got It At Goodwill.  Please stop by and say hi!

Sunday, January 27, 2013

Tiers before bedtime


I had this dress that felt too bare across the front and I didn't like the metal discs on the straps either

I cut all the discs off and then my idea was to attach some more fabric to the back bodice and bring it round to the front, sew it to the straps and form sleeves.  I bought some dark grey net but soon found out that my idea wasn't do-able because it pulled too tight, so I had a rethink.
I cut a length that would cover the back bodice and extend about 8 inches either side.  I sewed it to the bodice all round the edge.  I did the same to the straps at the front.  Then I made another layer by cutting a sleeve shape and sewing it into the armhole but leaving the bottom open so that all the layers hung down like handkerchief edges.  
The net doesn't fray so I didn't need to do any hemming.

You can see more photos here

Bolo bow ties

Hello!

I work with mens ties - I upcycle them in collars - maybe you have seen my previous posts. But usually I'm left with ties which are damaged or don't fit. So I had to figure out what to do with these...
I love bow ties, but I don't fancy that stripe holding it on neck. And I have discovered bolos - American cowboys thing, but very fashionable even these days. So I mixed these two I made bolo bow ties... (smile :)

They are made from skinnier part of neck tie, the back part. The edges are secured with leather (from vintage leather pants). Bolo slides cords and tips are from USA - well, you cannot get them in Europe!

It's an accessory for girls and boys, bit geeky // nerdy, but looks good on shirt as well as on strapless top - just like necklace.


I have more pictures on my Facebook page. Enjoy!

OLD SWIMSUIT INTO 2 PIECE WITH PEPLUM

Make this Dolce & Gabbana inspired 2 piece swimsuit with a pleated peplum out of an boring old swimsuit. Made in minutes using Stitchless Speed Sewing techniques.

Click on link to see video on Stitchless TV Sewing Channel


Shirt and Skirt Refashion

I scored!  My neighbor brought me a bag of old clothes to dig through.  I found a few pieces that I could refashion.  This shirt jumped out right away ...


.... and this skirt.


Here is how they came out after I attacked them with my scissors, iron, and sewing machine.


It wasn't an extreme refashion, but I am super happy with the outcome, especially the top.


Read more about how I refashioned these here.

Thanks for looking!!  Erinn of Sticky Genius

Saturday, January 26, 2013

Flowery Dress into Skirt


I had this great summer dress that I stretched out all funny as I wore it a bit when pregnant. So I refashioned it into a skirt with a comfy elastic waist. Am wearing it heaps more now. More details on my blog Lisa Un-hemmed.


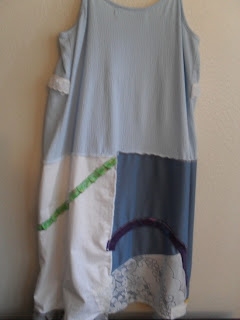
Hello again.  It's me Missy from Love Flow Creations.  Quite simply these are a few examples of how to make tank tops into dresses using cut-up T-shirts and piece of lace and doilies.

Friday, January 25, 2013