Sunday, August 31, 2014

A new gym-shirt!


My sister gave me a shirt in my size that was meant for the world cup.
Since The Netherlands lost ánd the world cup is finished I'm not gonna wear is anymore.
Hannah wanted it desperately but the shirt was to big.
Lucky for her I just watched this tutorial about making a shirt from a shirt.
And that is what I did. So this shirt went from a women size to a kid's size gym shirt.


Another handy detail.. I had a piece of neckline that I've sewed between the side-seam of the shirt.
I wrote her name on it so now everybody knows that it's her shirt!


View the original post at here and visit my blog for more refashions!

Greetings Joke.

Denim and Ruffles

Found this denim ruffle top dress for a $1 at one of my favorite thrift stores.  The fit was big and the dress was simply too long.  I wasn't really sure what I would do the dress but I knew it definitely had to be modified.


 So I decided to change the denim dress into a one shoulder relaxed fit dress.  Started of by removing the elastic waist band. I then sewed up one of the armholes and took in the dress by a few inches.  Moving on to the bottom of the skirt, I made a straight skirt using my measurements.  I attached the top and bottom together at the seams.


I loved the results.  Not bad for a $1 dress.  
Step by step details with pictures are over at ChiChi Loves


NikolaLuigi Refashion

More dying from NikolaLuigi! This one didn't go quite as planned as the top ended up being polyester based, rather than cotton (the label is completely faded so you can't see it!!)
But I actually ended up really liking the faint difference.

You can check out this creation, how it was done, and photos of my day here.

A disymetic shirt into a tunic

Hi

It's a long time I'll do a refashion.

At first it's a nice fabric shirt with a big default.

I cut and redo for made a nice tunic.

I'm sad because the simili leather fabric I choose is too light and break !

For visit me ..IT's here

Saturday, August 30, 2014

COPYCAT: Little Did You Know infinity scarf

Ever since reading Andrea's scarf tutorial on her blog -- littledidyouknow.blogspot.com -- I wanted to copy her beautiful scarves. She has an amazing talent for combining different textures, patterns, and methods into one beautiful scarf. Her tutorials -- spring scarf tutorials -- make the process look so easy with great results. I think my copycat scarf looks great, and I love it but the process wasn't so easy.


BLUE4B

I am in love with my new scarf. I loved I could use bits and pieces of leftover fabric scraps to create a new look, and I loved seeing one of my refashion piles go down a teeny bit. I'm sure I'll attempt to create another scarf using Andrea's method as a source of inspiration because I am really in awe of her creativity and abilities.


pink1a

To check out the entire post with more pictures and my thoughts, click here.

Jennifer Elliott

P.S. Did you know Andrea's recent shoes refashion was her 100th post on Refashion Co-op? AMAZING! I can't wait to hit that milestone!

Friday, August 29, 2014

Funky Maxi dress to a dress and skirt

My biggest issue with maxi dresses is the fact I am tall and usually they are never long enough. Never. This one was almost manageable but the problem was there was not enough walking ease for my long legs.

Instead of adding a slit, which I had initially planned, I decided I would actually wear it if it was not a maxi. So one cut and some sewing, I had a shorter dress perfect for lounging around and a easy skirt.

Dress part 1 here, skirt part 2 here.

Cheers,
Lauren

NikolaLuigi Refashion

As you all know, I love to dye my old clothes. So if you love to dye clothes too, and love seeing the transformation, you will love this refashion!
You can check out how I went about making this, and photos of me wearing it out and about (in rainy woking!!) here.

Breezy Summer Dress

As summer is winding down, our weather is heating up.  It's been quite hot and humid here in Hawaii.  I'm one of the few lucky ones at our school who gets to work in air conditioning.  It's a privilege that I don't take lightly, and I enjoy it as much as I can because there's no AC in my home.  So, on the weekends, I like to dress in light airy clothing.

Luckily, I stumbled across a vintage 60's dress at Salvation Army a few years ago.  It's been my go-to dress for weekend errands and the beach.


I love this dress so much that I used it as inspiration and a pattern for my latest refashion.  Luckily, I had the perfect Tori Richard dress to work with. Here's a before and after.


If you want to find out more about how I constructed this dress, check out my blog.  Feeling Kinda Thrifty

One for me, one for you

I forgot to take a “before” picture, but once upon a time this was one long skirt.  I bet you’ll take my word for it, right?   I found it at a thrift store (of course) and it was half off (of course) and it was the wrong size (of course!)
The fabric is quite nice, and the ankle length gave me enough fabric to cut it into two pieces.   The top portion has the original zipper, and I opened up the waistband so I could cut out a chunk of elastic.  I turned a size 10 women’s skirt into a size 7 girls skirt in just a few minutes!  A quick hem and skirt #1 was complete.
WP_20140827_14_24_20_Pro

The bottom 2/3 of the skirt was now too wide to fit around my waist, so I sewed it onto a 2 inch wide black elastic, stretching the elastic as I sewed.  It didn’t go as well as I hoped.  It it very uncomfortable up against my skin.   I love the paisley purple print, so I might re-try the elastic in hopes for a more comfortable finish.   Any tips from people who have used the elastic as a waistband?
Love,
Amy Jo at The Little Moments

Taking It All In

My husband and I had a little get-away this past week, so I didn't have much time to squeeze in my sewing allotment (am I the only one who gets a little twitchy if I don't sew something every so often?). So I just grabbed a couple pieces that only needed minor tweaks.

These boring khaki slacks I picked up secondhand a couple months back, but I never actually wear them. I would if they were skinnies though! And the pale pink blouse I've had for a couple years now, from when I was a bit heavier. All it really needs is a quick re-fit too.

Pink Blouse & Khaki Skinnies - Before

I simply turned both garment inside out and put them on. Then I carefully pinned the side seams of the shirt and the side seams of both legs before extra carefully taking them off again. A few lines of stitches, and I had a new outfit for our vacation!

Pink Blouse & Khaki Skinnies - AfterPink Blouse & Khaki Skinnies - After

Come see me at CarissaKnits for more pics and details!

Pink Blouse and Khaki Skinnies - Before & After

Overly Colorful Sundress into crop top and skirt

My mom bought me this sundress from the thrift store, but it's way too many colors and kind of frumpy looking.

I took the ruffle off the bottom, cut it in half, and sewed it back together again:
Then I sewed it to the bottom of the bodice to make a crop top.

I took the skirt and hemmed it and changed the shape to be a bit more of an a-line.

And that was how I took this terrible dress and made it wearable.
For more details on how I did it, see my blog.

Peasant Neckline from Over-sized Shirt

Tutorials show how to change a mans shirt into a peasant blouse. Let us know if you have a good link to Peasant Blouse Refashion Tutorial at Made By Lex
Sew Country Chic tutorial: http://www.sewcountrychick.com/quick-mens-shirt-refashionpeasant-tunic/
Before. Large ladies shirt.
Neckline cut. 

Pins mark cutting line.
Peasant/Tunic after
This over-sized ladies shirt is a good transition weight and color for our Texas fall.
Black buttons. Bias casing added.
Steps:
  • Keep tunic size/shape. Change neckline to peasant style.
  • Cut neckline higher than most tutorials show. 
  • Add white bias strip casing cut from pillow case stash.
  • Add elastic.
  • Change to black buttons on front & cuffs.        
  •  Wear with refashioned white linen pants. 
  • Casual/Professional outfit for College and School District visits.


    Lunch napkin.


Add-on: I like fabric napkins and hope they reduce my ecological footprint.  Scrap napkins remind me of clothes I make/refashion.
Steps:

  • Combine shirt/pillow-case scraps to make a casual napkin for the kitchen napkins basket. 
  • Back with white scrap from neck binding, 7 " wide, serge.    


Doilies + Shoes = Perfection!

So I've been sharing sneak peeks at these shoe refashions on Instagram and finally put the post together to share with all of you! They were so fun to do, and you could really make both pairs no-sew with a good fabric glue...just be mindful whether it dries clear or changes the color of your fabric, lace, trim, etc.

Here's the before and after of each!

I styled them with a basic knotted T and a vintage pleated lace skirt/slip that I wore with a simple cotton slip underneath. If you'd like to see more of the process and over many pics of the final products ;), head on over here to my blog.

I've got some more fun things lined up and will be sharing sneakpeeks on Instagram! Happy Refashioning!

Peace,

Thursday, August 28, 2014

Tablecloth Skirt

Inspired by this earlier Refashion Co-op post
I decided to make my own uneven hem tablecloth skirt. What do you all think?

Skirt Slit


I bought this skirt some time ago at the thrift store. I love the varied stripes and midi length, but it was too narrow, which made it really hard to walk in! I cut a slit in the back and finished it with bias tape. I folded bias tape over the long edges first. Then I sewed a square of bias tape to the top of the slit to reinforce it- don't want it to rip! The slit has worked out well- I wear the skirt often now and can walk in it. For more of my projects check out my blog!

Blue cotton skirt Refashion

My dear readers,

finally I had the time to take pictures and write about my latest refahion-project. Once my grandma gave me this old lovely skirt. It's royal blue with corn- and field flower-pattern. Unfortunately it was way too small around my waist. So here is what I did:
 http://ninutschkanns.com/2014/08/28/refashion-blauer-bauernrock/

Check out the whole tutorial at my blog.
Have fun reading :)

Nina

Linen Dress Refashion

Mom had this blue and khaki linen dress that she didn’t wear any more, so she said that I could have it.  The reason she didn’t wear it anymore was because the hem was sort of wavy.  I guess this happens to linen dresses after a while because of the nature of linen.  The reason she still had it taking up space in her poor old closet was because it was a tall size and she'd spent a lot of money on it and hated to just throw it away!  But instead of throwing it away, we decided to do a linen dress refashion.  It was a bit too long in the sleeves and hem for my taste, so I decided to start there. I started by cutting almost a foot off of the bottom and re-hemming it. Then I did the same to the sleeves.
Come over and visit us on the blog at Skirt Fixation!

Wednesday, August 27, 2014

Dress to fringe top

This purple dress has been with me for a long time. I had planned on using it to accent a bellydance costume but then I moved and don't dance anymore. Then it sat. Then I saw something on pinterest and got inspired to turn it into a fringe top. It is almost a ZERO WASTE refashion but I have 2 strips left. I cut in half, used the bottom to make fringe. I used the hem as the base and cut 1 inch strips. Then I sewed 3 layers onto the top. Done! Fun fringe top! Now I just need to go to a music festival.
More info here!

Cheers,
Lauren

Big Girl's Briefs

This was a fun one. I had been planning to make underwear for my daughter for a while. Since I tested the Big Girls Briefs pattern by Serger Pepper, I was able to make the first pair of briefs ever. For that I used this pirate shirt and scraps from two other shirts I had refashioned in the past. 


And here's how they turned out:


Don't you just love them? Well, I do! I made them size 3, for my daughter and I just might try to make a pair for myself anytime soon (or better later)!

Read more about them HERE... (with link to pattern).

NikolaLuigi Refashion

Turning a special dress into a top for a meal out, for a special occasion.

Easy to do when you have fray check to hand!!

Check out the methods here!!

Tuesday, August 26, 2014

NikolaLuigi Refashion

Gingham, check! Blue, check! Checks? Check!!

Love a bit of gingham check, so "check" (oh the puns keep coming) out my latest refash involving a dress, some dye, and a bit of magic!!!

You can check out this refashion, and my day of magic (and butterbeer) here.

Monday, August 25, 2014

Better late than never!

Hard to believe it's been a whole month again! Where does the time go? It's been a busy few weeks and i've not done a whole lot of sewing, so i'll take this opportunity to catch up on posting some refashions from a while back that i never got around to putting up.

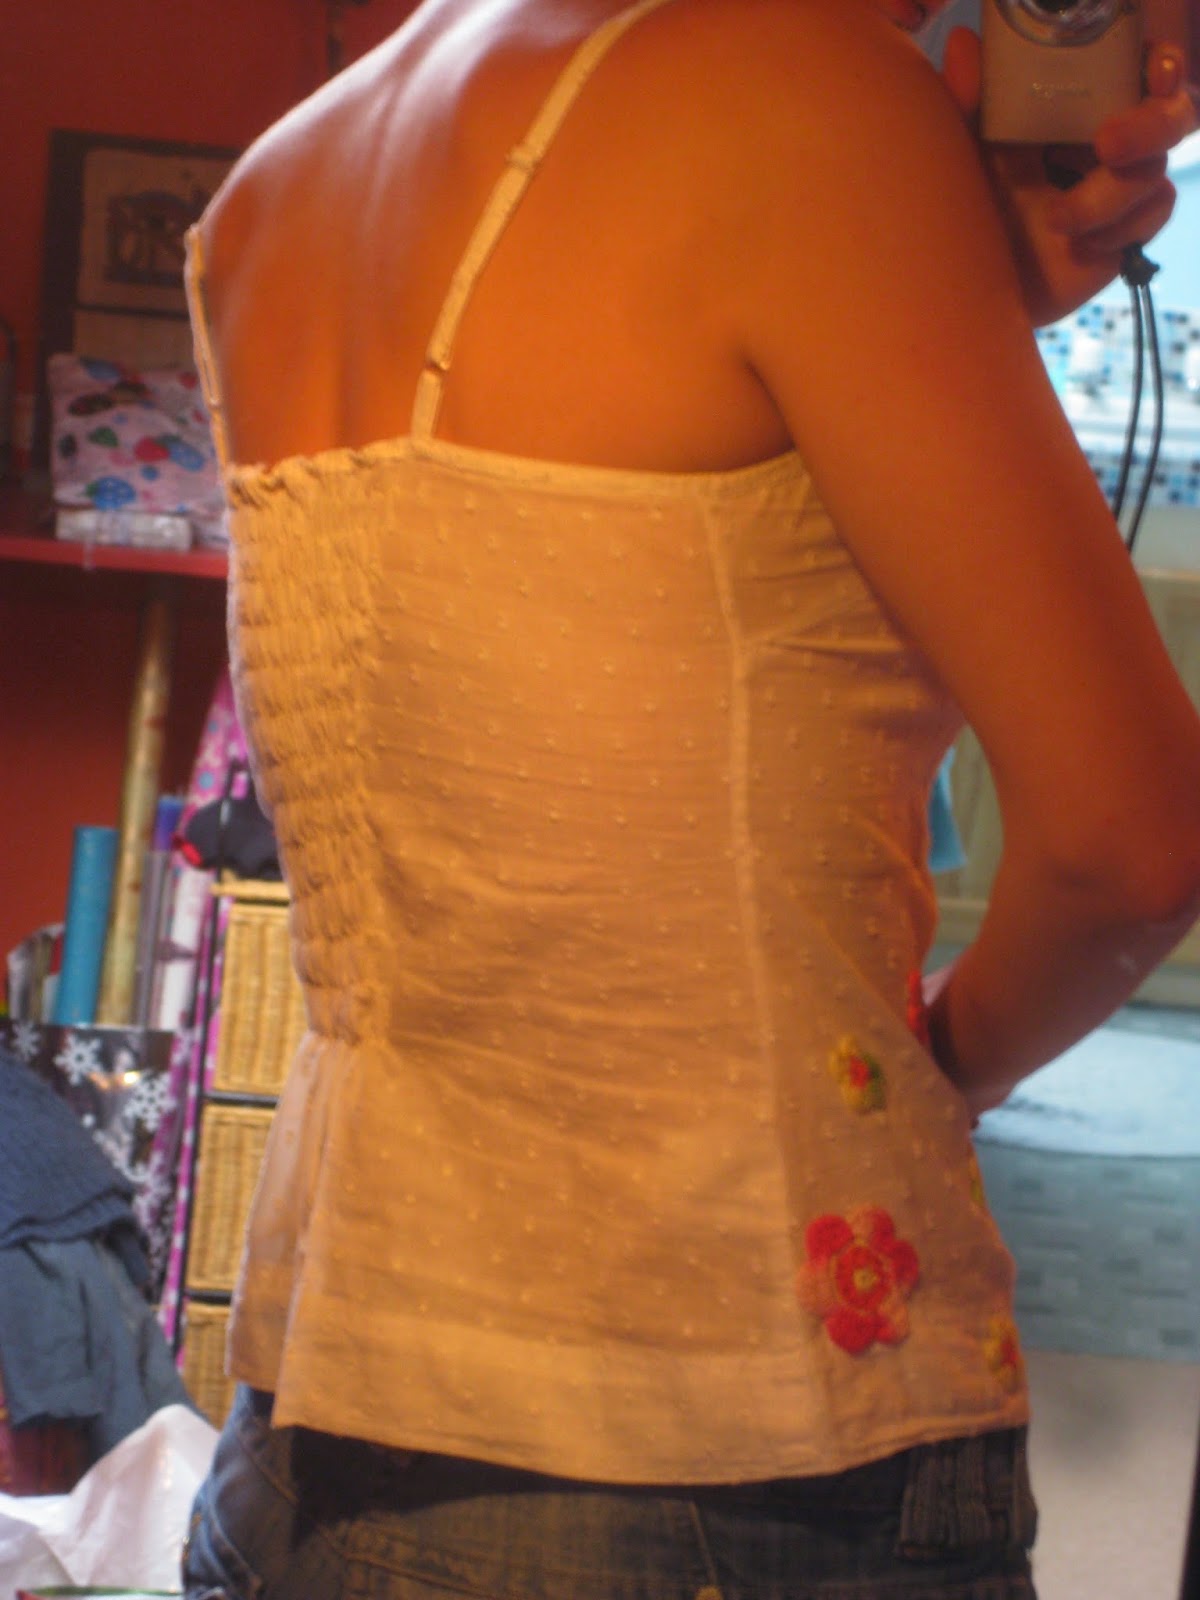
These are really just a couple of simple adjustments to make things more wearable. The first (no before pic sorry) was a patterned, strappy top on which i'd previously cut the straps where they attached to the back, creating a halterneck. I more recently added some shirring in the centre back to make it fit better around the bust area, since before it didn't sit right, was slightly too loose and had a tendency to drift a little, which meant i'd rarely worn it, certainly not out of the house, despite loving the pattern. Below is the after (the before was similar, just no shirring and thus a looser fit around the bust).

and the shirred back:


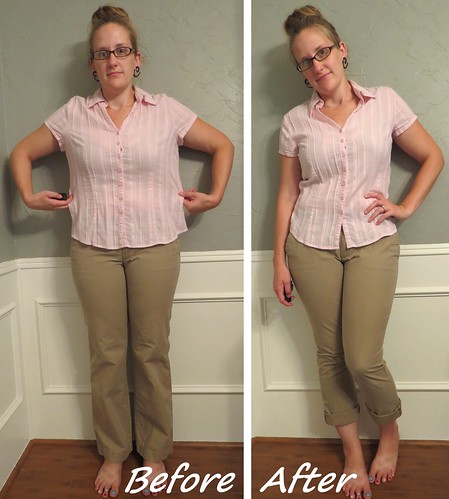
 I did the same to another top which i had previously added colourful buttons and crocheted flowers to (here), again just to make it a bit more fitted as it was a little too large and i felt the shirring would make it a more flattering fit.


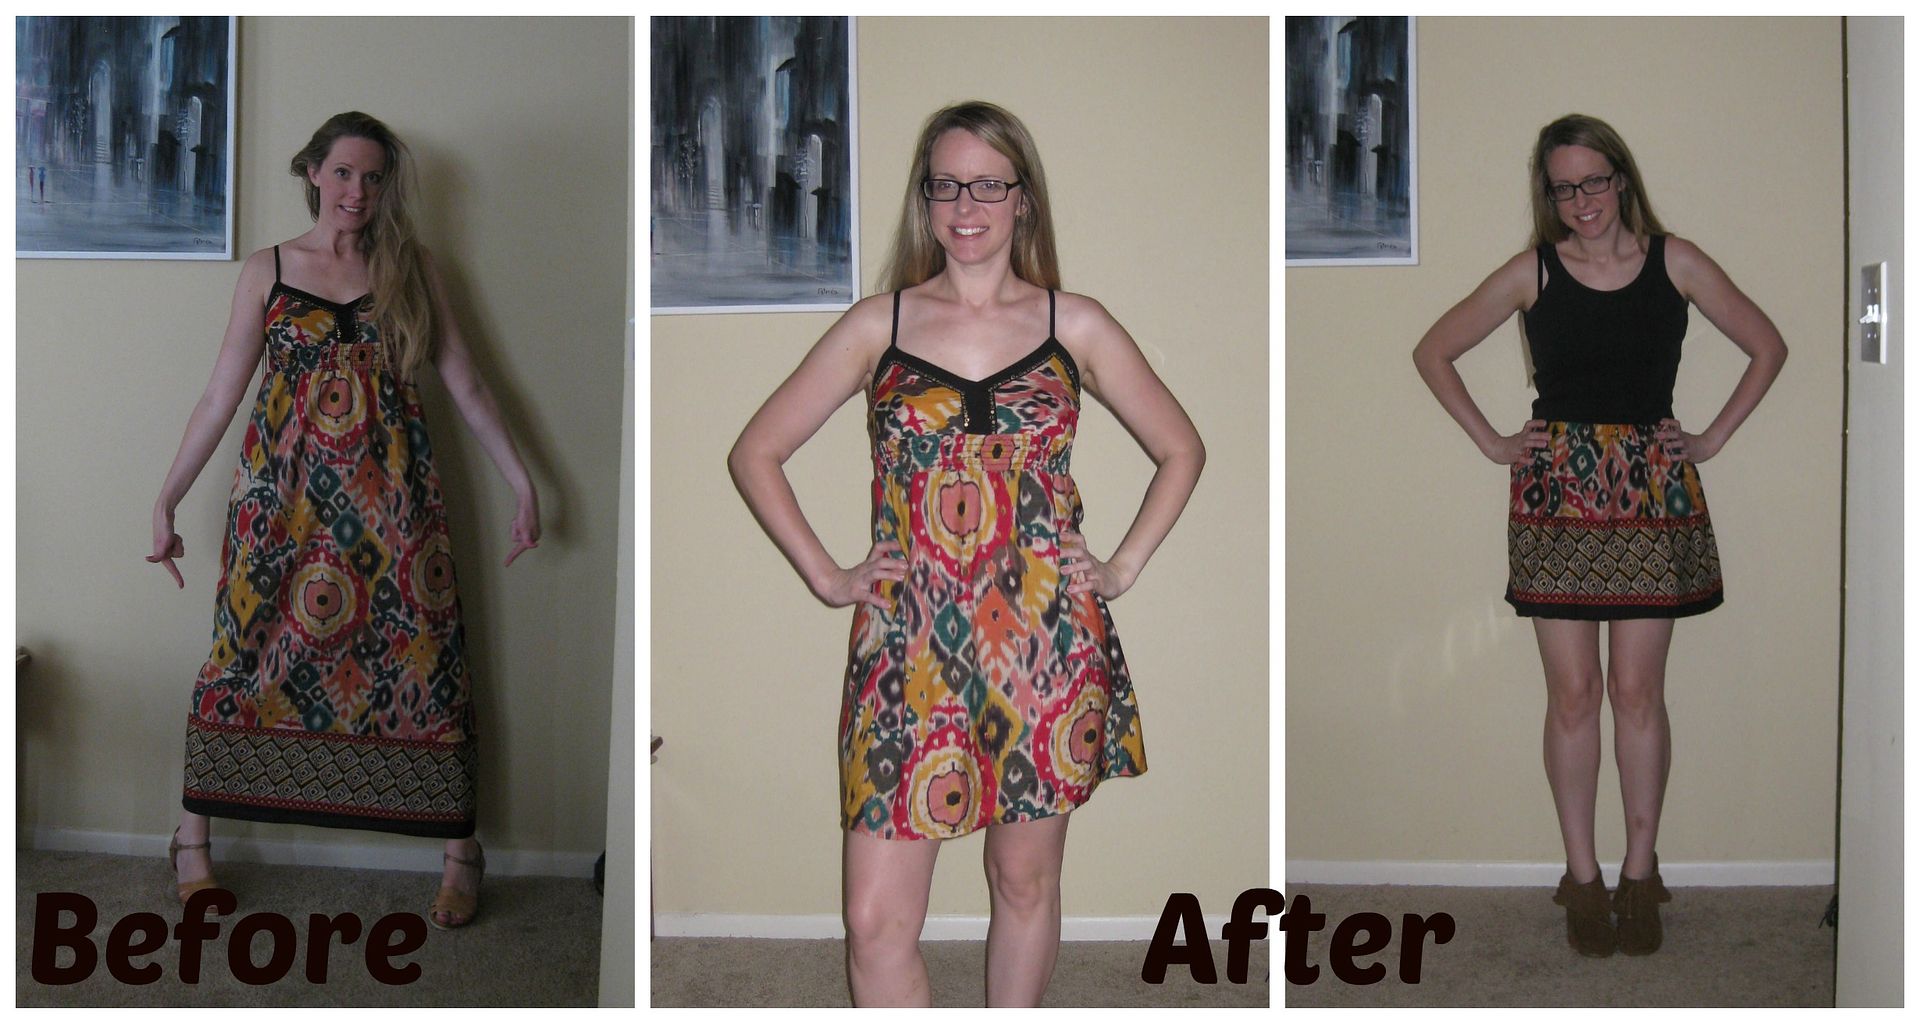
I also took in a tunic top gifted to me by my mum, which started off several sizes too large (again, no before pic, sorry!) The problem with this top was the beautiful beaded hem, which was hand stitched and i really didn't want to cut into or have to try sewing over (i've broken needles this way before!). I managed to flare the new fit of the top at the hips to allow the hem to remain whole while making the rest of the top fit me better. I love this top and now wear it all the time :) i'm actually really happy i had to work around the beaded hem, as the flare in the tunic gives it a more feminine look and makes it really nice to wear with a skirt as well as jeans.


Thanks for reading! xx