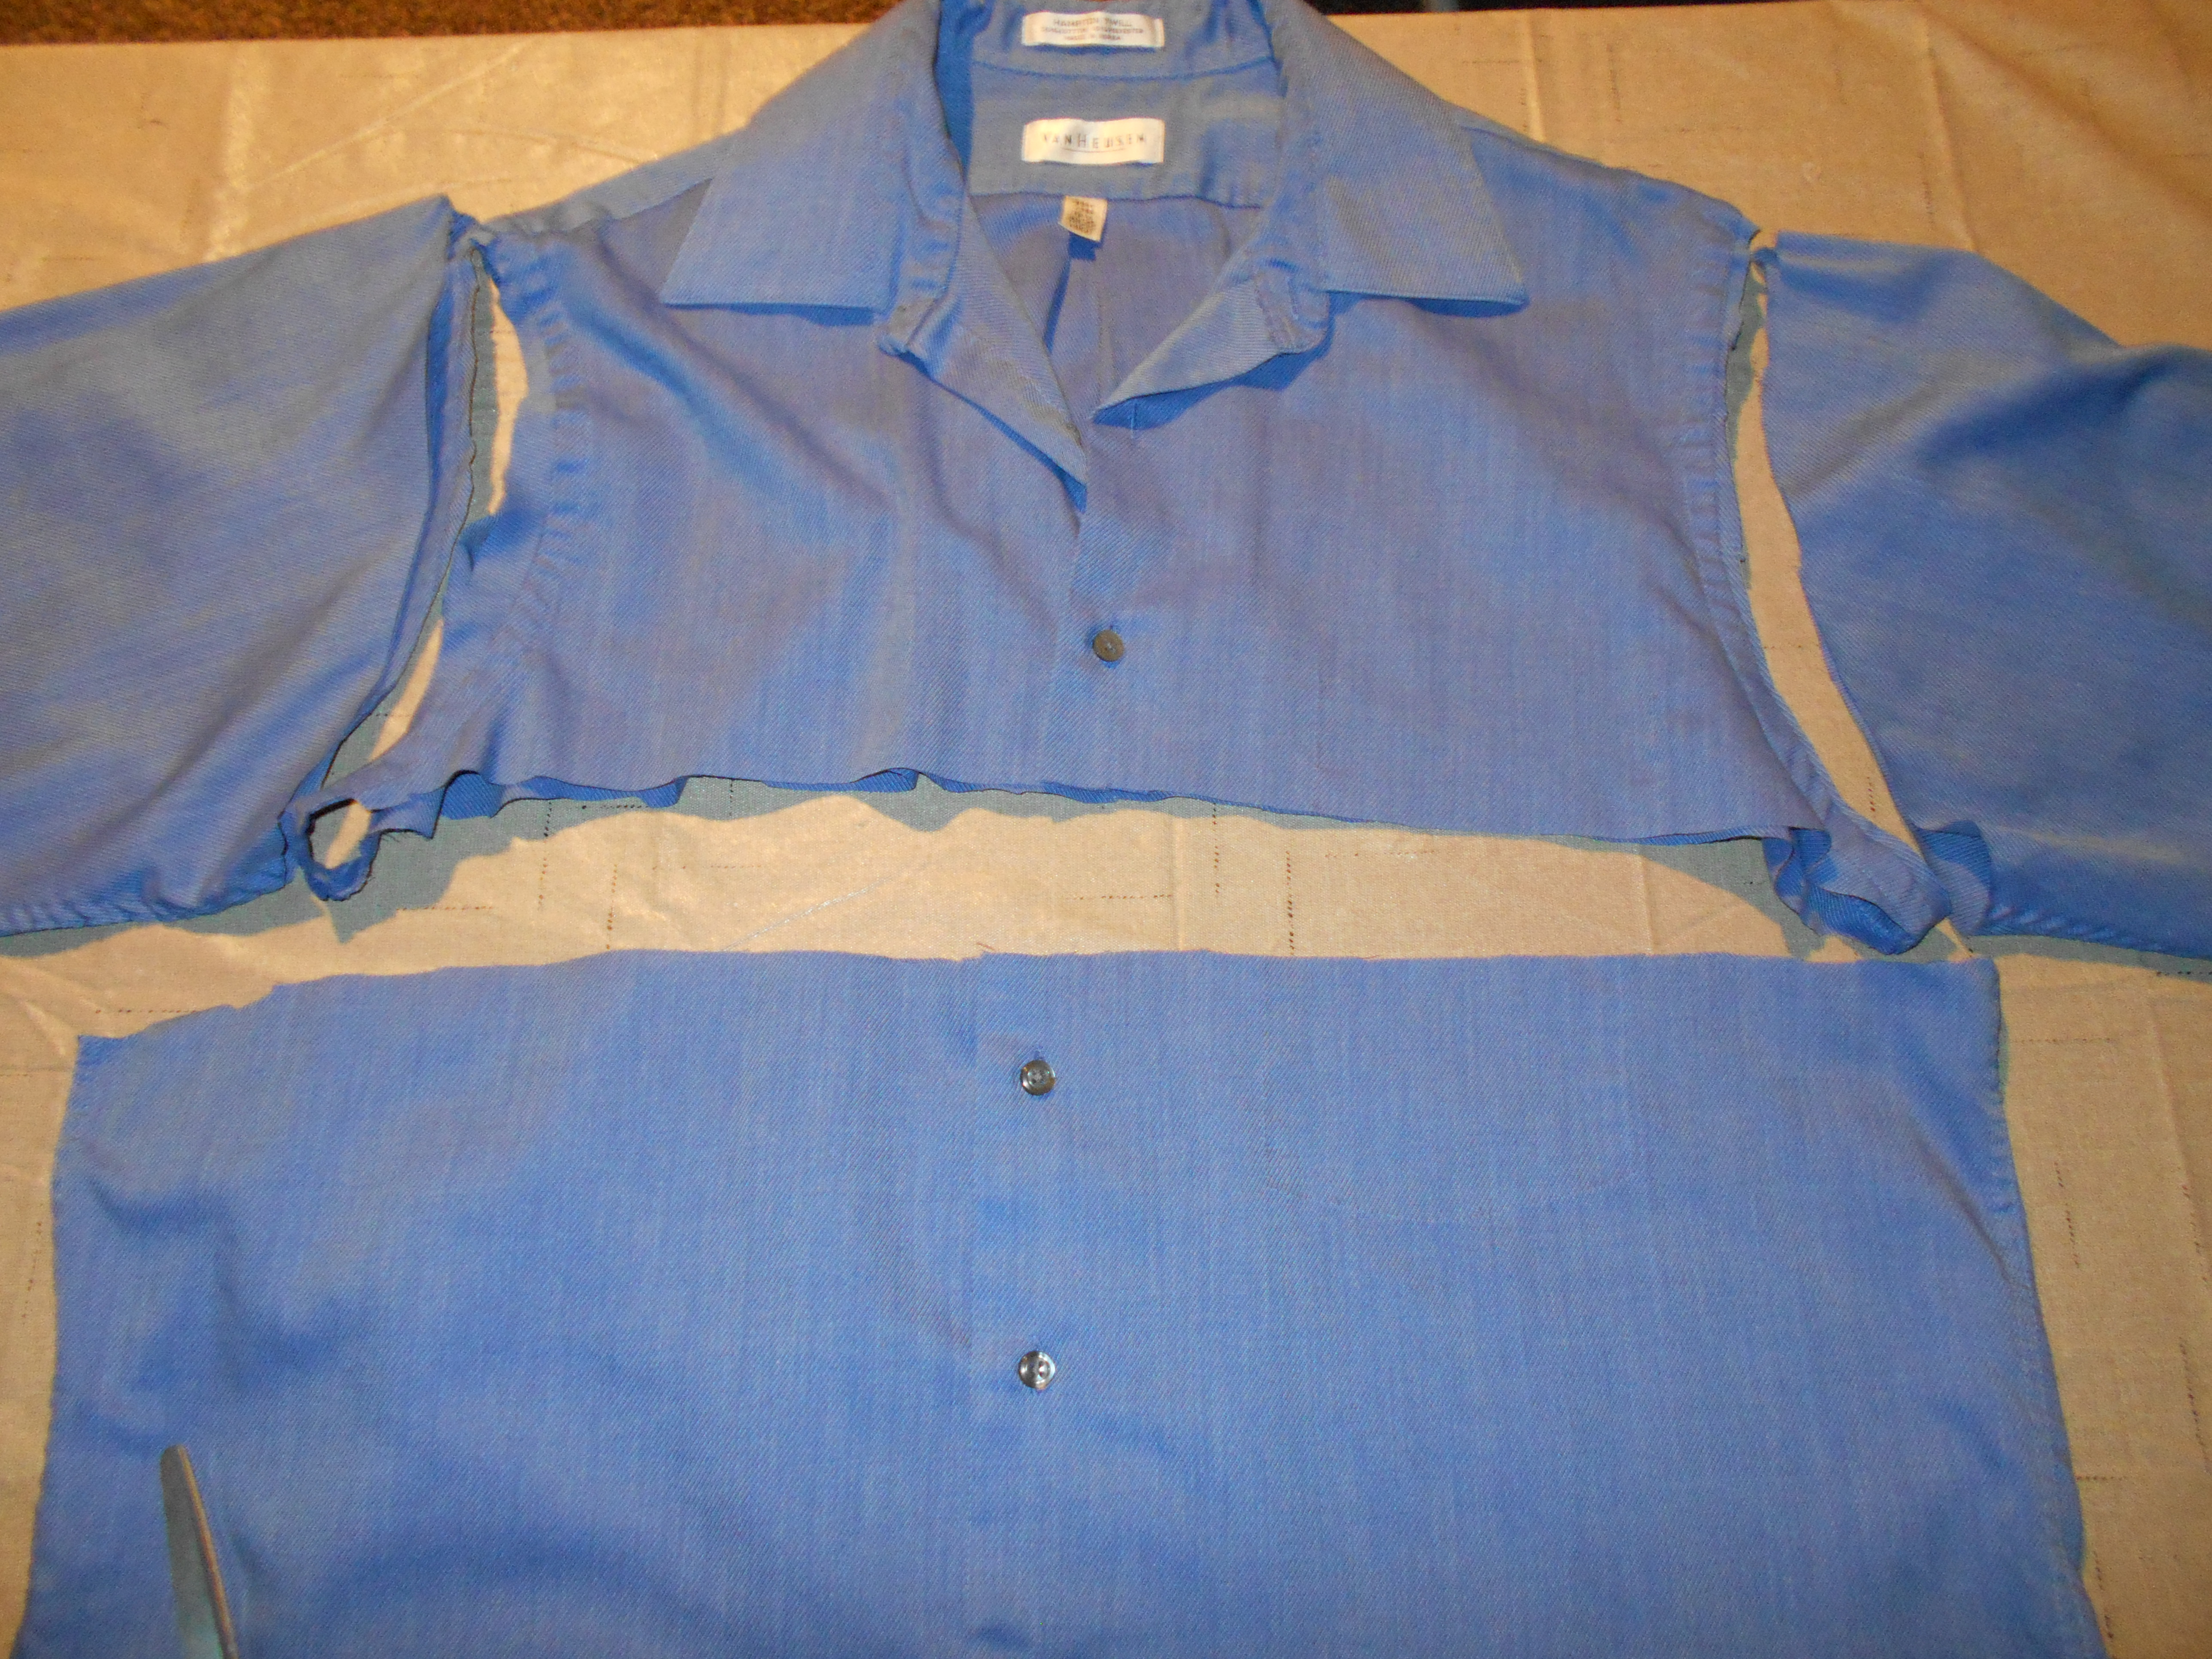
This post has been a long time coming. I completed this project back in March but other posts took priority in the posting order.Here I have a light weight denim shirt. A little large in size, but that will be perfect for this project! I have seen that overalls have been very popular as of late. Not my favorite fashion trend, but Hey I'm always one for keeping up with the times! The idea is to making a skirt from the bottom 1/2 of the shirt and use the sleeves for the straps of the overalls.
I cut the shirt straight across as close to the armpit area as I could get, to maximize the amount of material for the skirt. Then I cut off the sleeves. I measured a piece of elastic around my waist. I folded over and pinned the top of the skirt to make a casing for the elastic. This will be the top of the skirt! The best part is I am still using the original hem of the bottom of the shirt so less sewing for me! I threaded through the elastic with my ever so handy Bodkin. Once that was pulled through, I stitched up the hole in the casing I left to thread the elastic though. That completes the skirt portion.
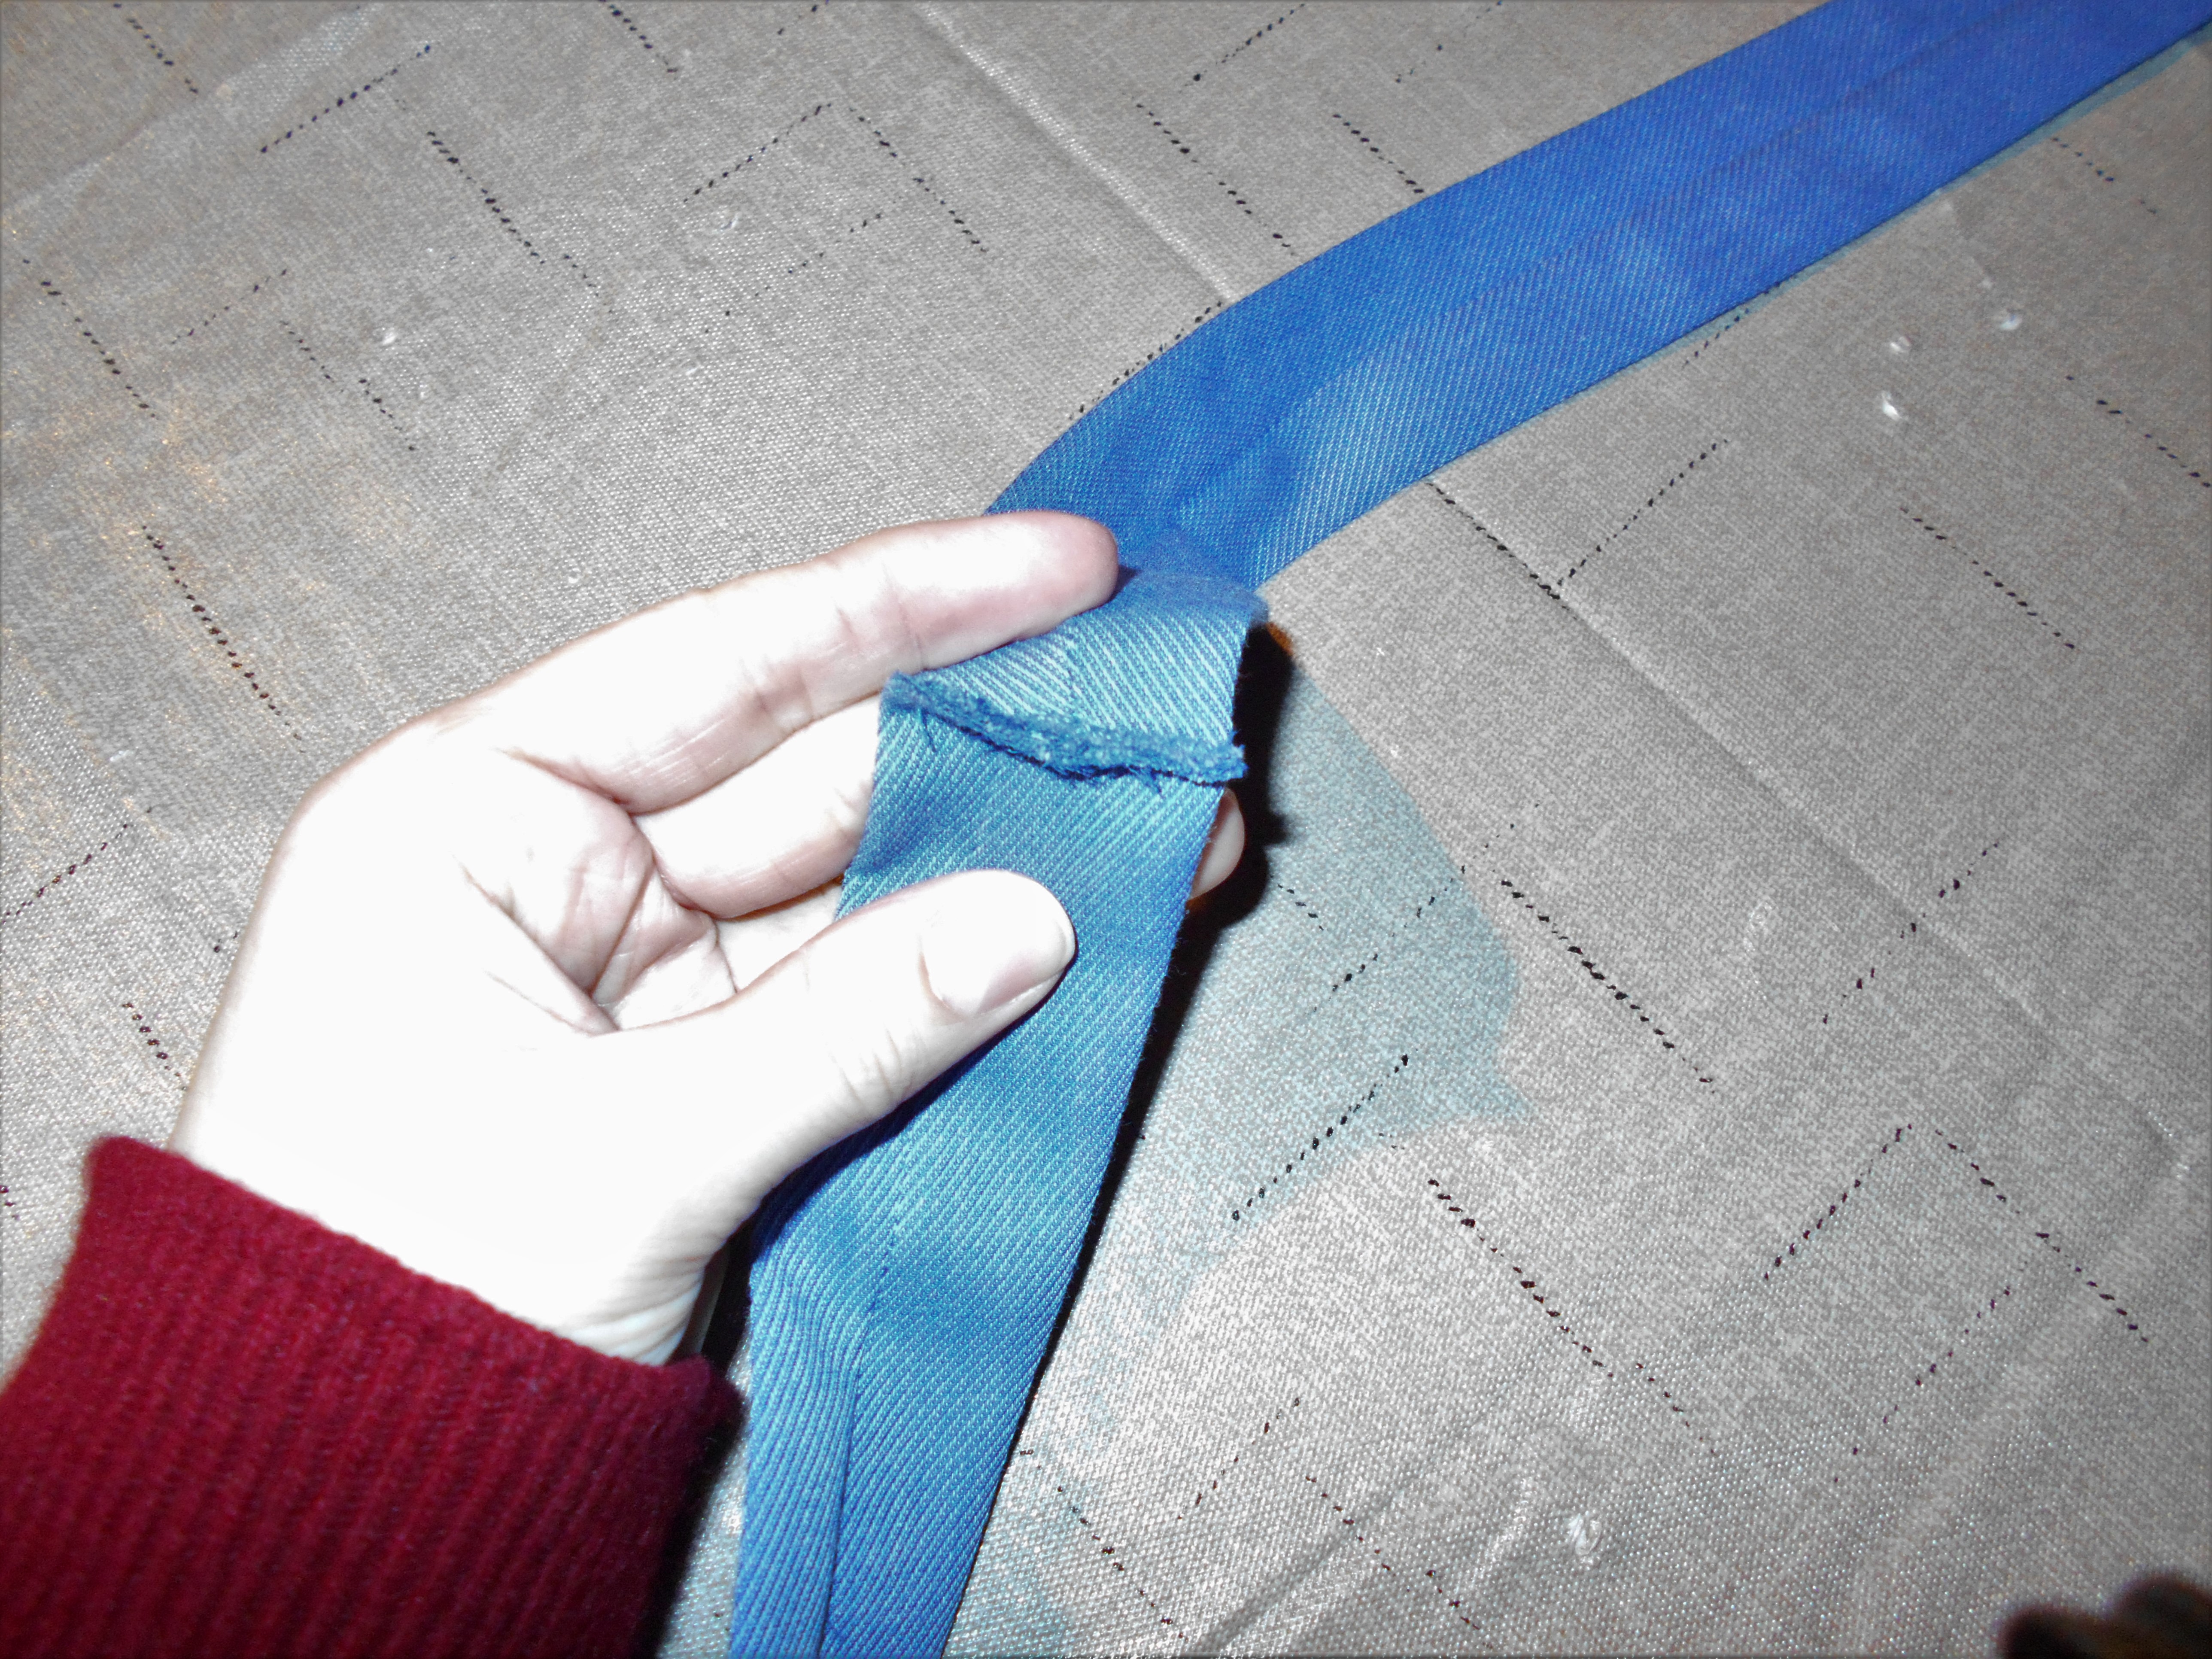
Now onto the straps: I used the material of both sleeves to make 4 equal length and width pieces. I sewed each of the 4 pieces lengthwise and inside out. Then they were turned right side out and 2 pieces were stitched together to make 2 very long straps. Then the skirt was put onto my dress form and the 2 long straps were pinned onto the back of the skirt, criss -crossed and then pinned securely to the front of the skirt. Stitched that together and the overall was complete!
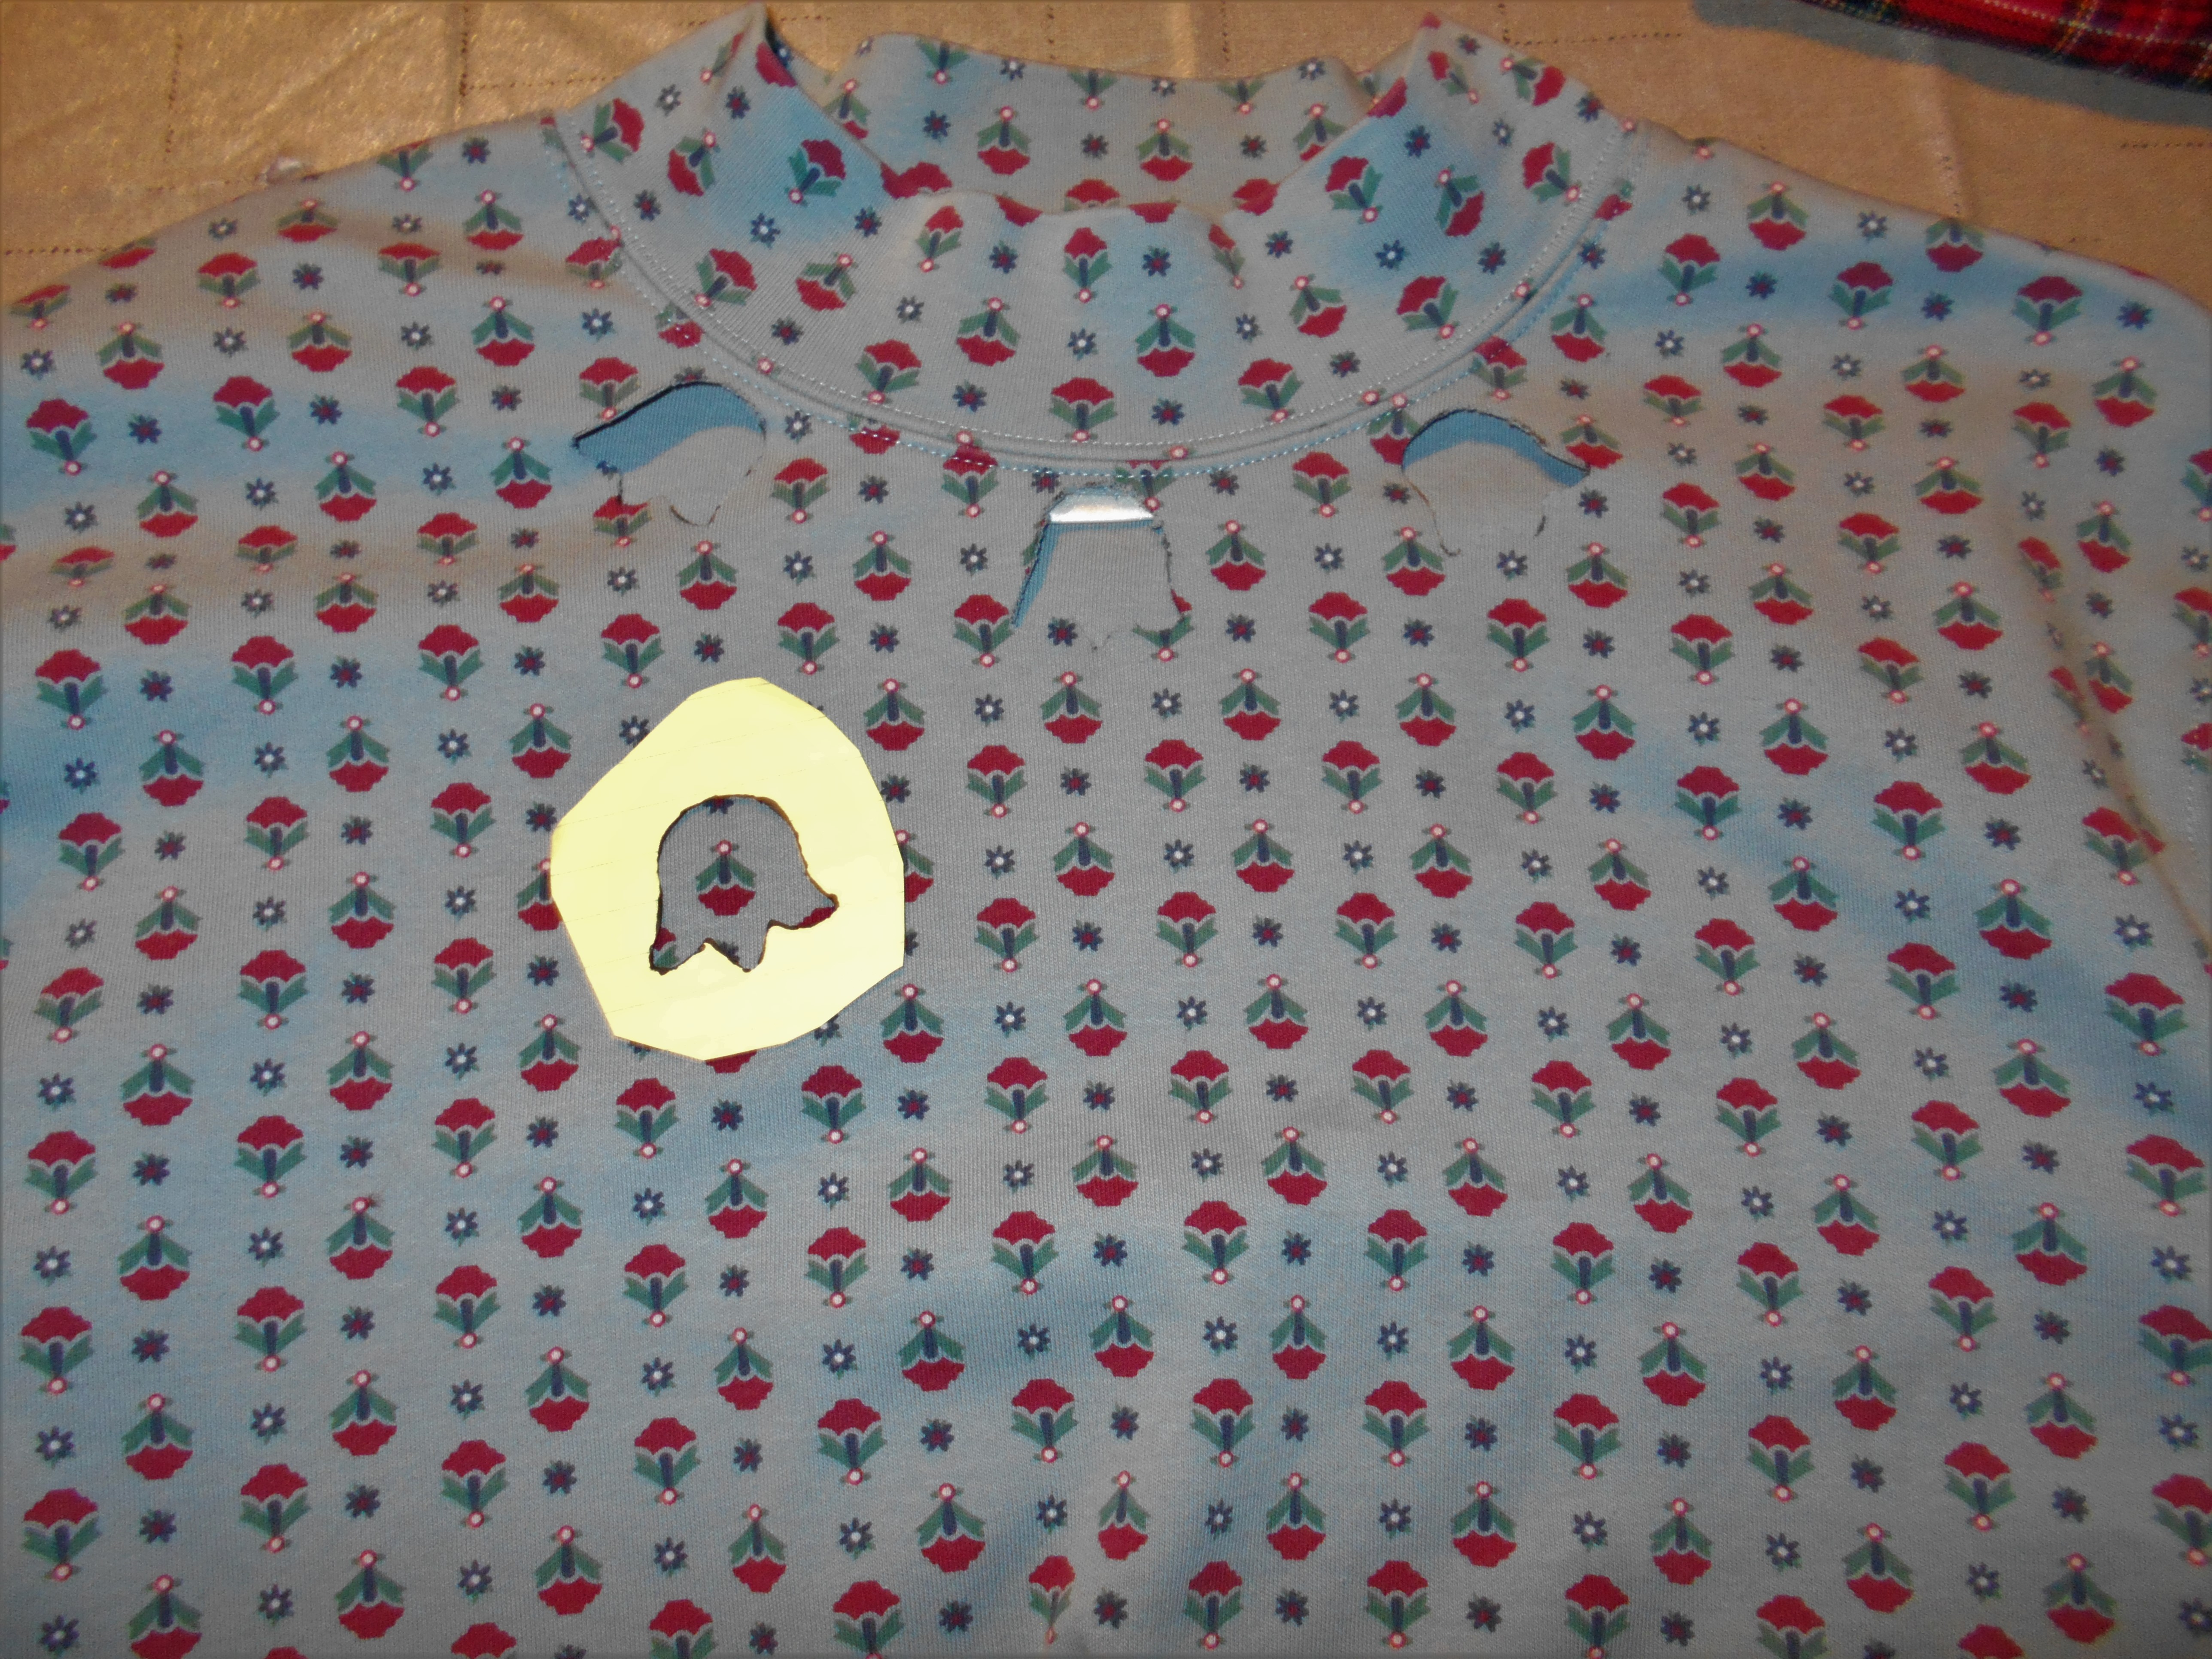
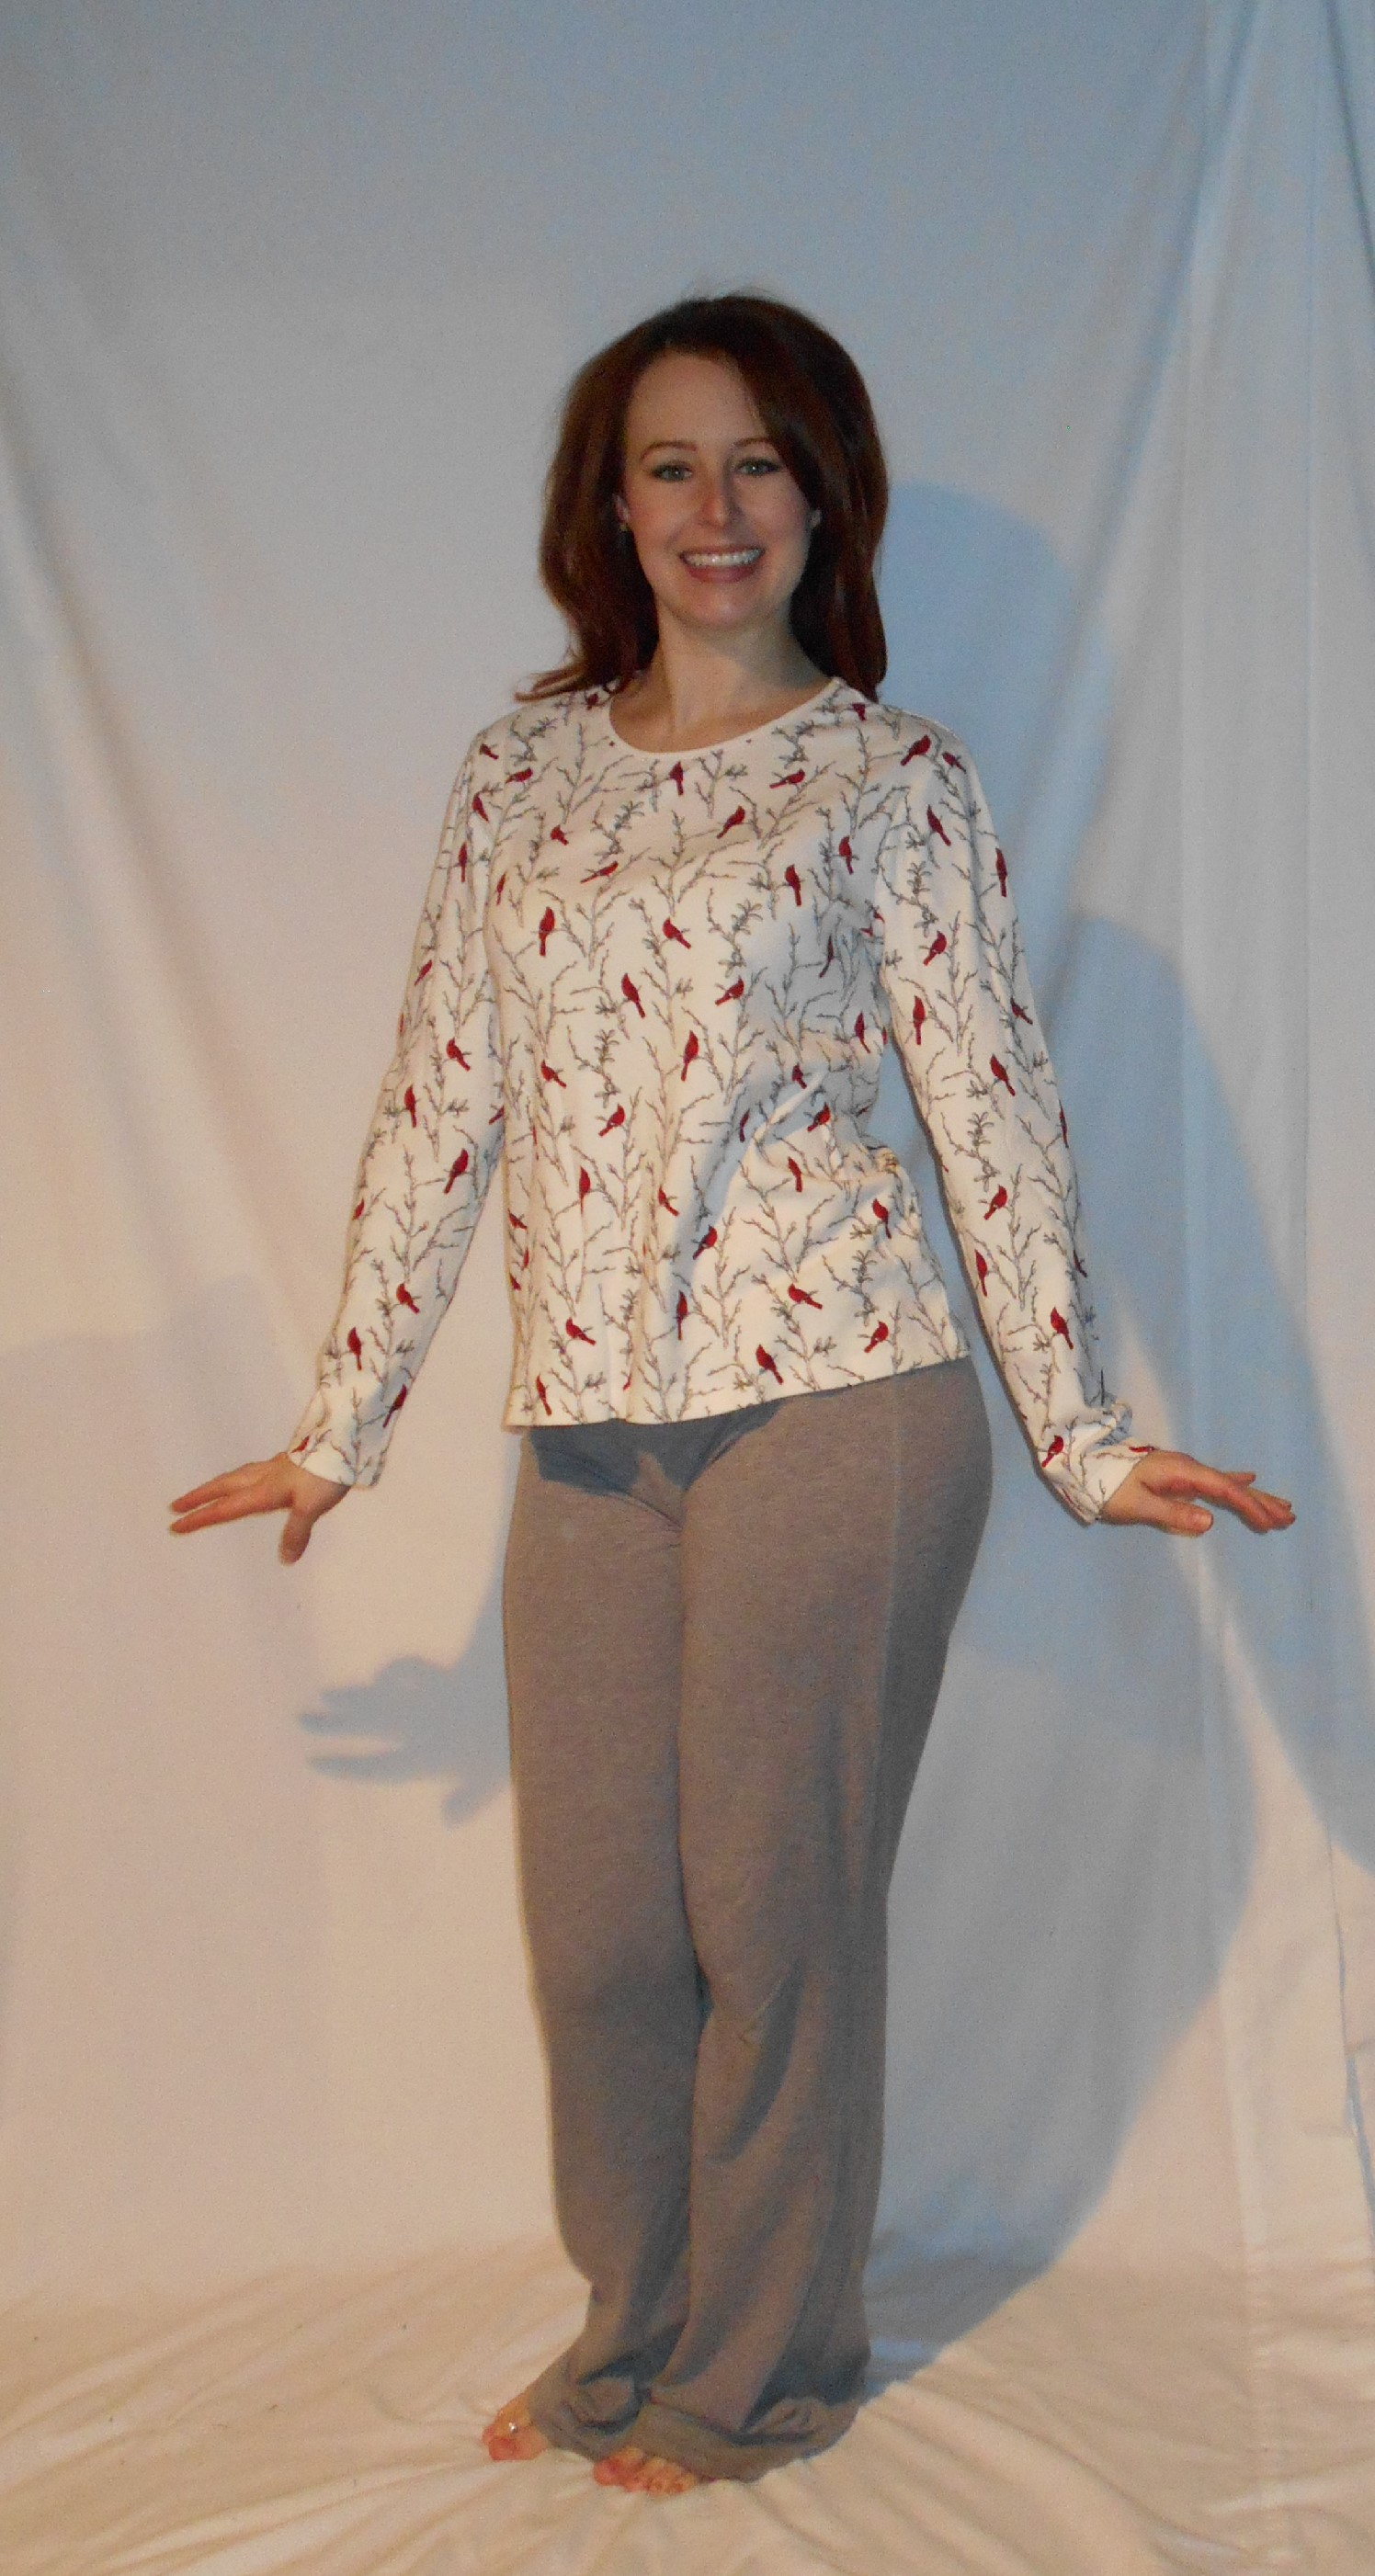
Now for something to wear with my new overalls: a new shirt! I decided on this tulip design turtleneck shirt.
Mimicking my Christmas turtleneck refashion by cutting out designs at the neckline: I cut out these tulip shaped pieces. To jazz up the sleeves a bit I make vertical slits at each end of the sleeves, about 1 inch apart. Then I weaved some cream colored ribbon through the slits and then stitched up the edges.
Then my outfit was finally complete! Not too shabby, huh? :)
Happy Refashioning!!!
Check out my stash of refashions on my blog!
Hello Refashion Co-op. Do you ever end up with a lot of similar items on the refashion rack? I always do but never intentionally. I don't know how it happens.
This is the first of 4 white sweaters. I do not need 4. I wanted to change it up somehow. I already liked the lace panels in the front and the 3/4 length sleeves.
I used some Rit dye. I love this stuff. They don't know me or pay me to say that. I just like to use the dye a lot. Why purple? It was on sale, and I didn't have a purple sweater.
Here is the finished sweater. I dyed a cotton top to go with it. They are perfect for me to wear to work.
Thanks for reading along, for more pictures and details go to I Can Work With That.
I have a pair of shoes that keeps coming back, year after year!
When I got them, they were white, and I literally loved them to pieces.
Before
After
I covered them with strips of denim in three shades, which I blogged in an earlier post.
After a year or so, I wasn't really happy with how they were aging, so I removed all the denim and started over with my now even uglier white shoes!
After That
For their third time around, I coated them in fabric from an old tank top (also a previous refashion), which worked even better than I expected. When they were all done, they looked like this:
Because there was tons of fabric left over, I also made a matching headband.
If you'd like to see more of how I made them and how I wore them, head on over to my original blog post!
Voici une transformation que je voulais réaliser depuis longtemps ........ avec un panneau de rideau tout en dentelle...
Et après quelques heures de couture, voilà le résultat : un joli peignoir d'été. Je me suis aidé d'un patron de La Maison Victor pour le couper mais j'ai fait des adaptations afin qu'il corresponde à ce que je souhaitais.
Désormais, je vais pouvoir traîner le matin dans un joli peignoir et pour en savoir plus c'est ici
Hello Refashion Co-op. Do you ever start a refashion and create a total mess? That's what I did.
I cut the top off the dress and started making shorts out of the skirt. So far, so good.
I cut out the shorts and they were way too small! I used a pattern but you can see I didn't use it right.
I added some yellow fabric on the sides to make the shorts bigger. I thought the yellow fabric would be cute. It wasn't.
They are still too tight and it all looks terrible on me. I decided to save the top for later. The shorts are just awful. Things don't always work out, right?
Thanks for reading along, for more details of this disaster go to I Can Work With That.
Voici 2 nouvelles transformations de sweats avec un modèle de patron déjà réalisé de nombreuses fois.......
Deux sweats chinés dans une friperie pour n'en réaliser qu'un seul ! mais qui a fait le bonheur de l'une de mes amies .........
Et la seconde transformation concerne un sweat que je m'étais fait il y a déjà quelques temps mais que je ne mettais pratiquement pas alors je n'ai pas hésité à le transformer pour en faire un nouveau que j'ai offert à l'une de mes filles ...
Après quelques heures, voici la nouvelle version pour ma fille :
Bonjour , voici la transformation d'une chemise en blouse pour l'été ........ ainsi qu'avec un tissu qui avait du être une jupe dans une autre vie .........lol
Et voici le résultat avec l'aide d'un patron que beaucoup d'entre nous connaissent le "Datura"
de Deer & Doe en T46 . Une très agréable surprise car le modèle tombe impeccablement ...
Comme c'était une "toile", je ne me suis pas embêtée et du coup je n'ai pas doublé le haut mais simplement fait des parementures pour l'encolure et les emmanchures.
Comme la chemise n'était pas vraiment ma taille, j'ai du rajouter du tissu sur les côtés, on le voit un peu sur les photos ....
Et bien sûr j'ai gardé les boutonnières d'origine de la chemise pour faire le dos . Quant à l'ourlet je l'ai fait à l'ancienne en faisant juste un petit rentré simple de 1 cm....
Hi Refashion Co-op. I loved this dress but it didn't fit me well through the top.
I thought the pleated skirt was wonderful enough by itself so I cut the top off. I finished the waistband by turning the edge under and using a zigzag stitch. The elastic was already there so it was easy-peasy.
This navy shirt matched well, so I was done.
Thanks for reading along, for more details and pictures go to I Can Work With That.
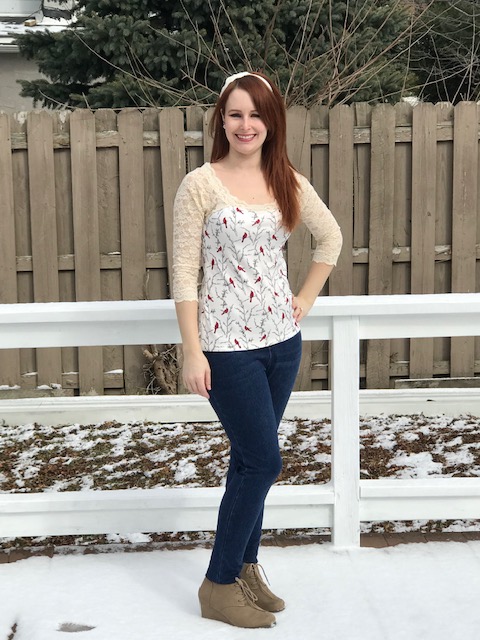
It has been said that if you see a Cardinal it is a sign that a loved one who has passed has come to watch over you. I never really thought much of this old tale because I have always seen Cardinals around just like you see a Robin or Sparrow. This all changed when my grandpa died and a Cardinal showed up in my backyard. My husband and I have lived in our house 3 years and haven’t seen a Cardinal until my grandpa died. I truly believe that this Cardinal is him watching over me. You may think it is a coincidence but I do not.
Since then I have had a special place for Cardinals in my heart. So, when I found a shirt with Cardinals on it at the thrift store, I HAD to pick it up!
Here I have a special refashion that is close to my heart.
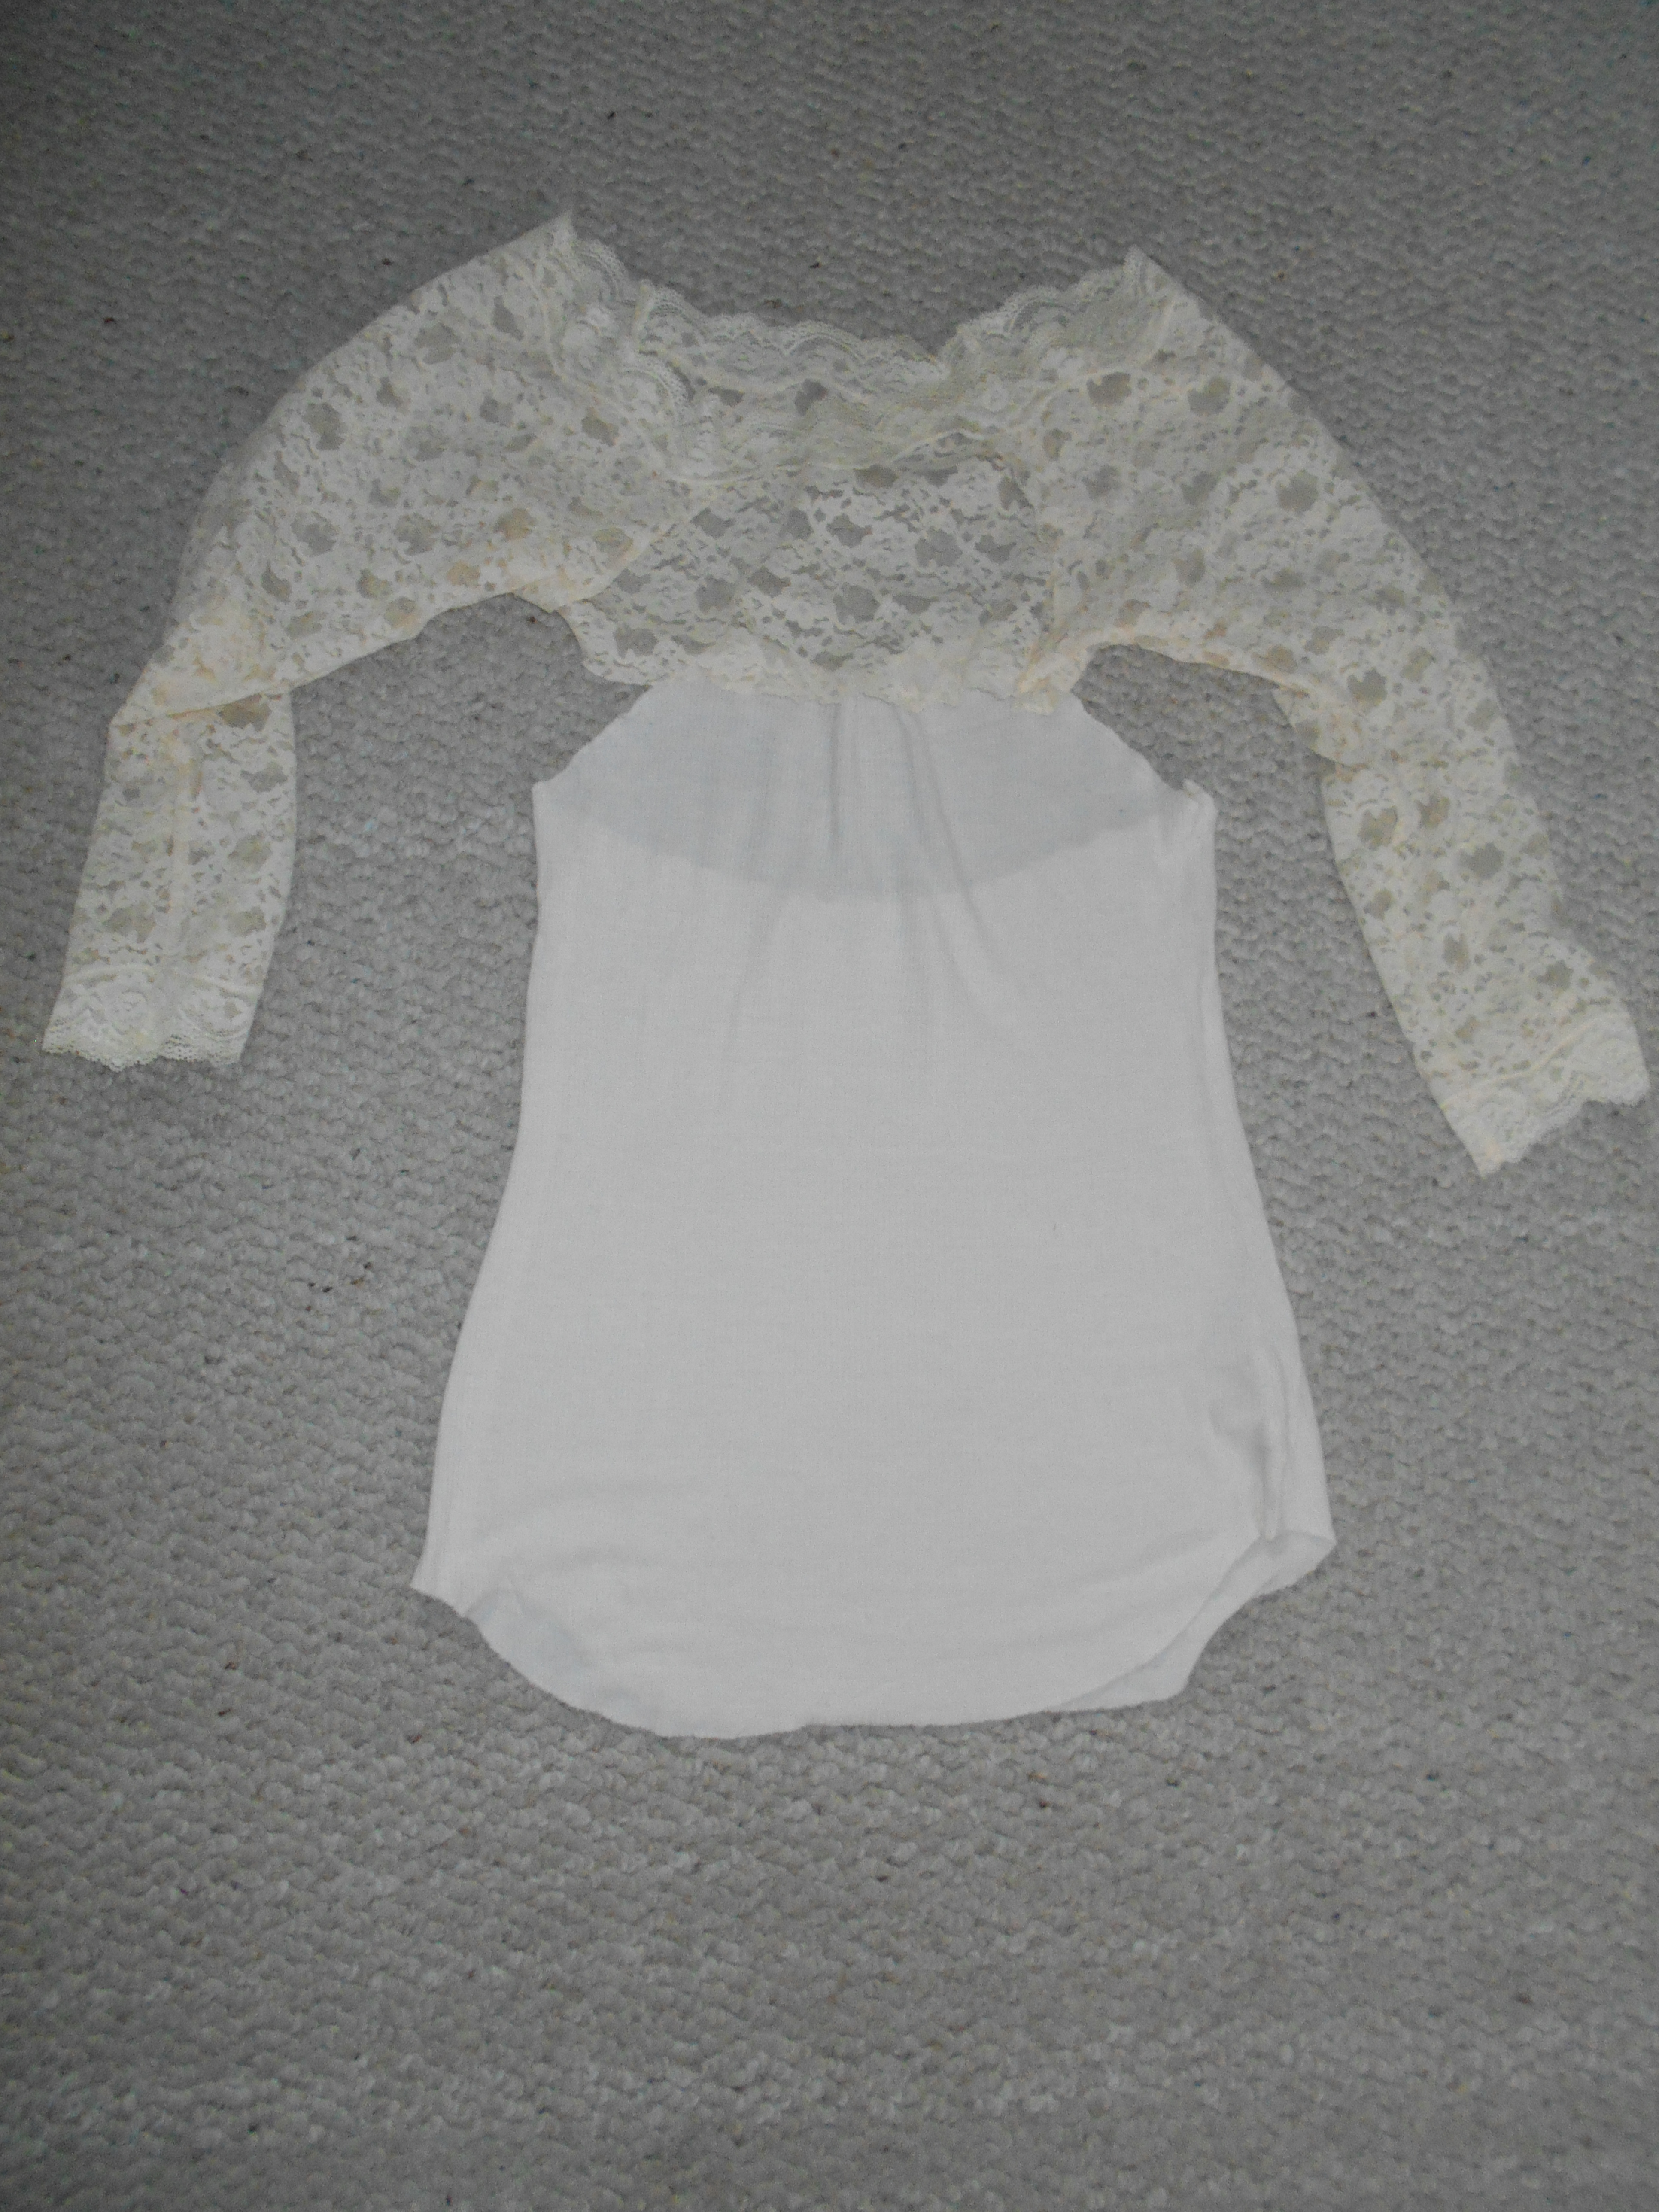
Cardinal shirt
A lace shirt
I began by carefully removing the lace sleeves from the top of the shirt. I let nothing go to waste so I cut up the bottom part of this shirt to use as rags!
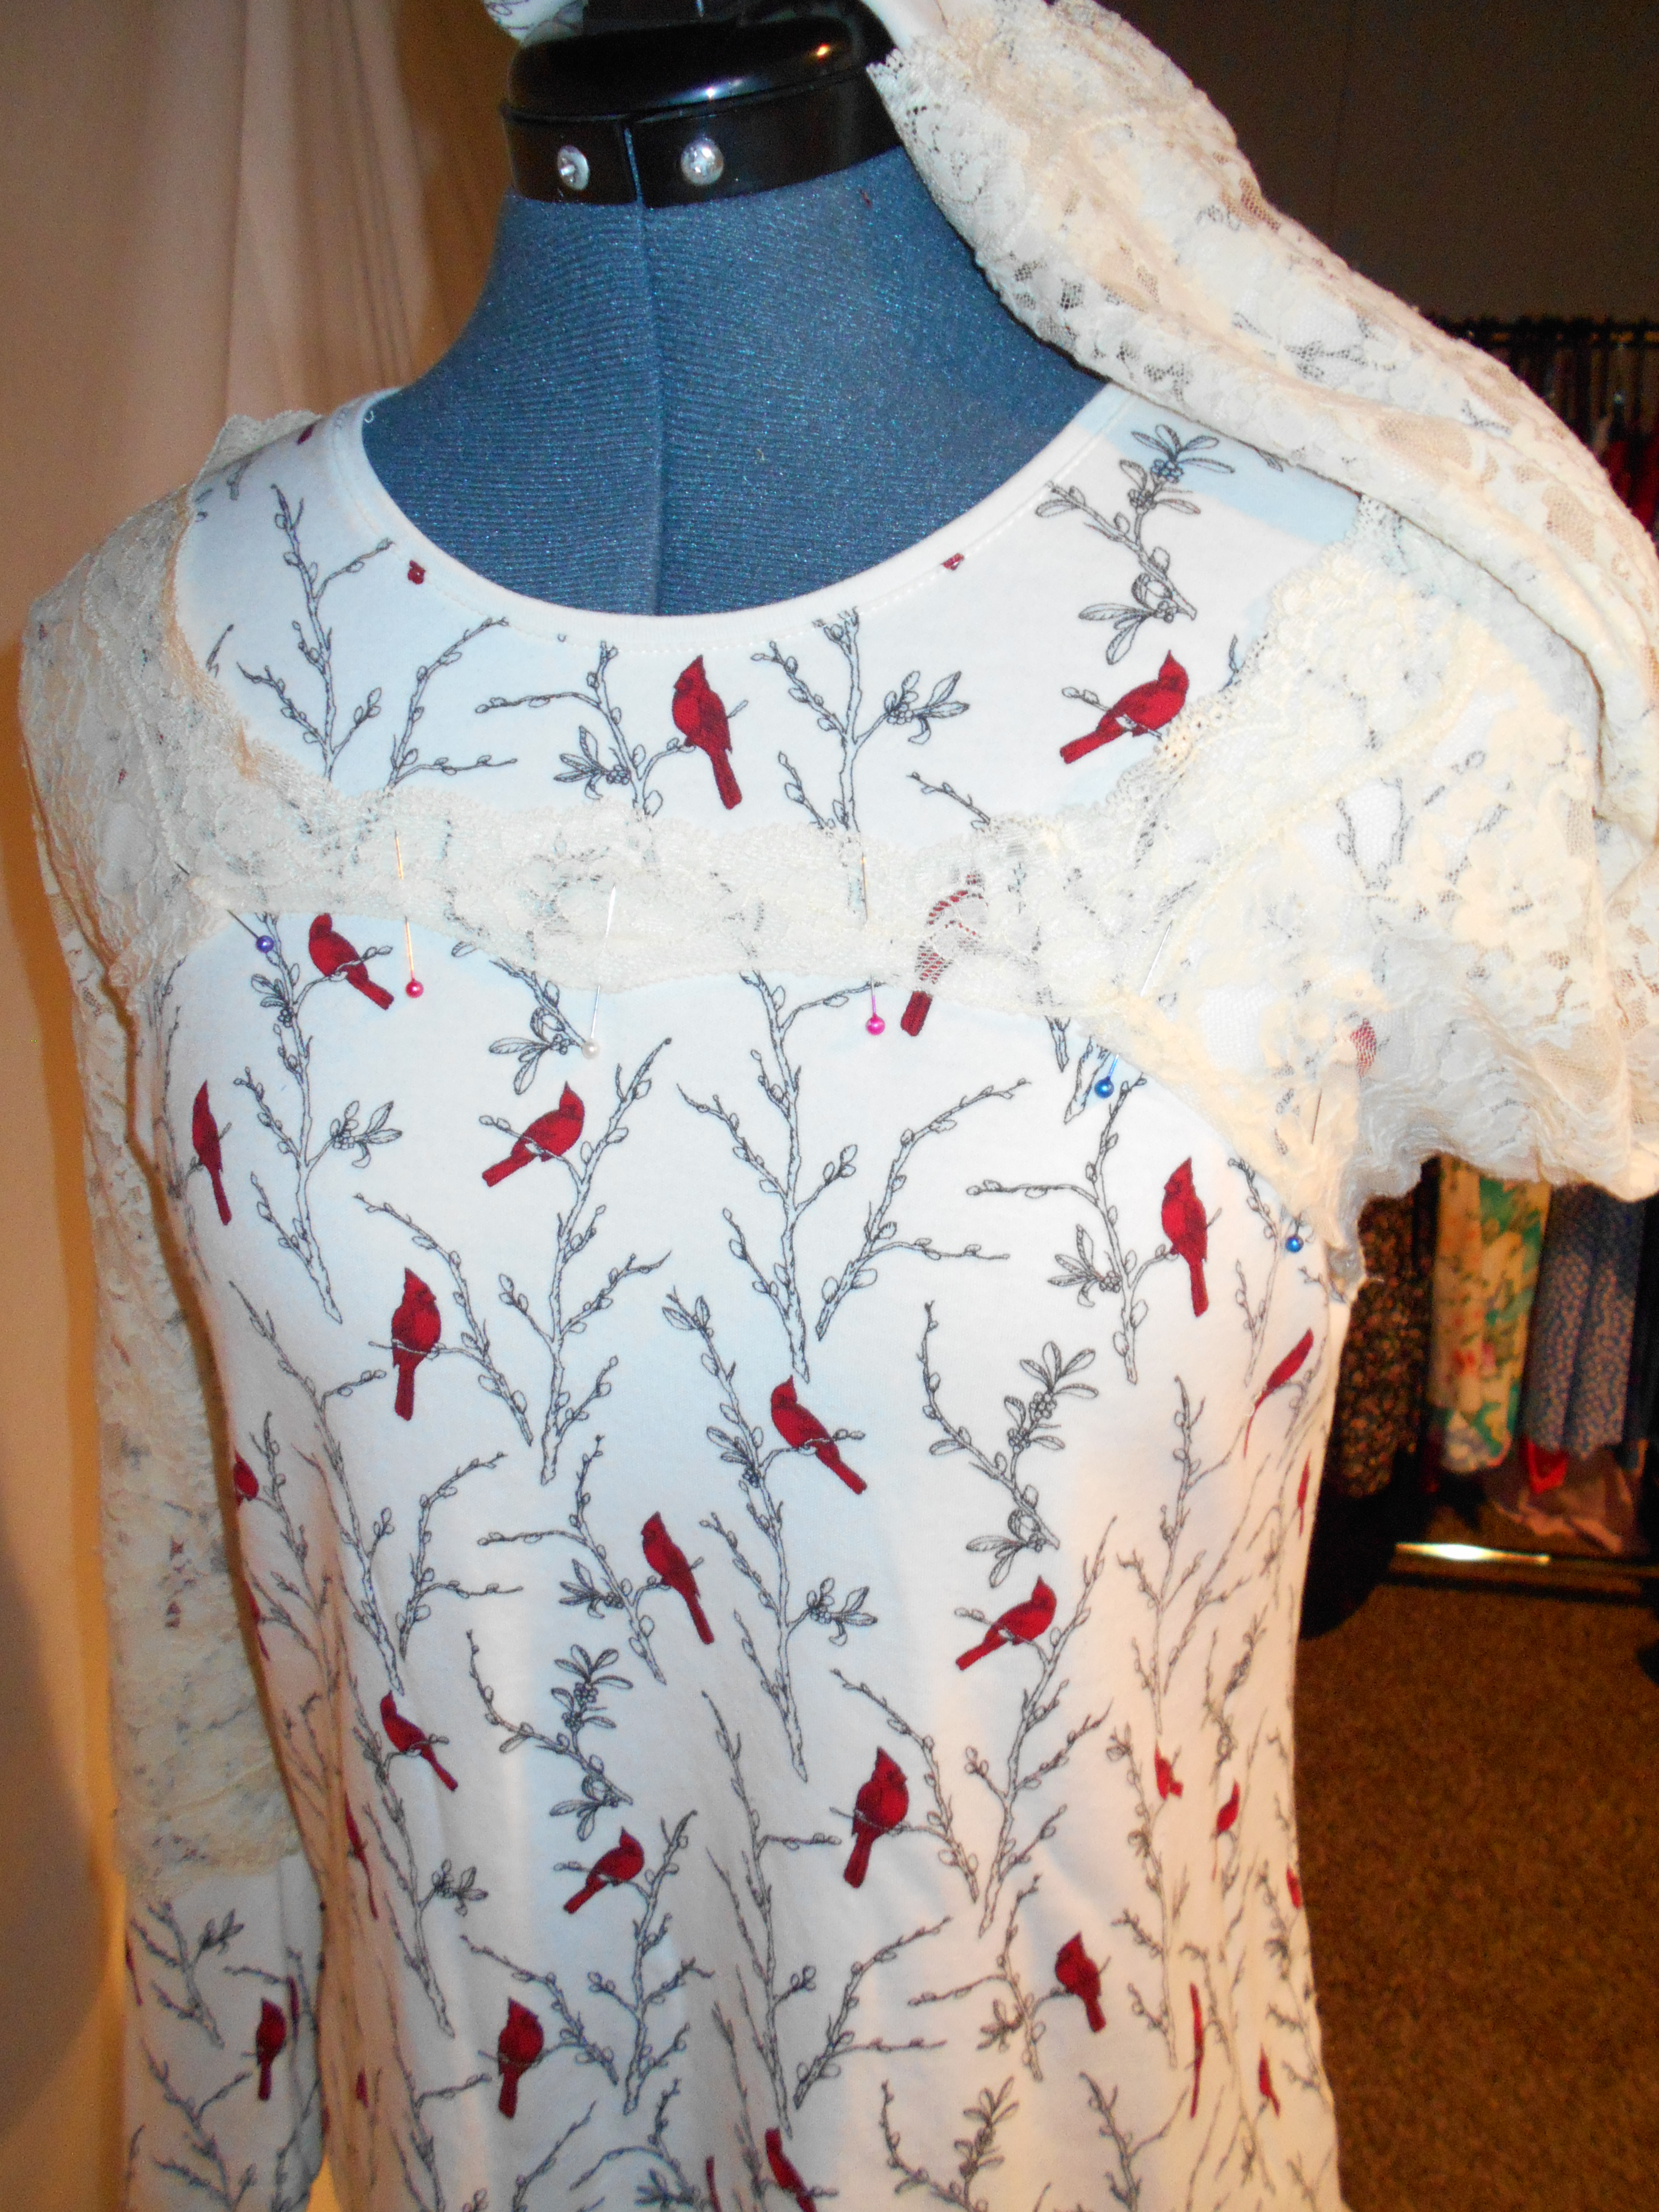
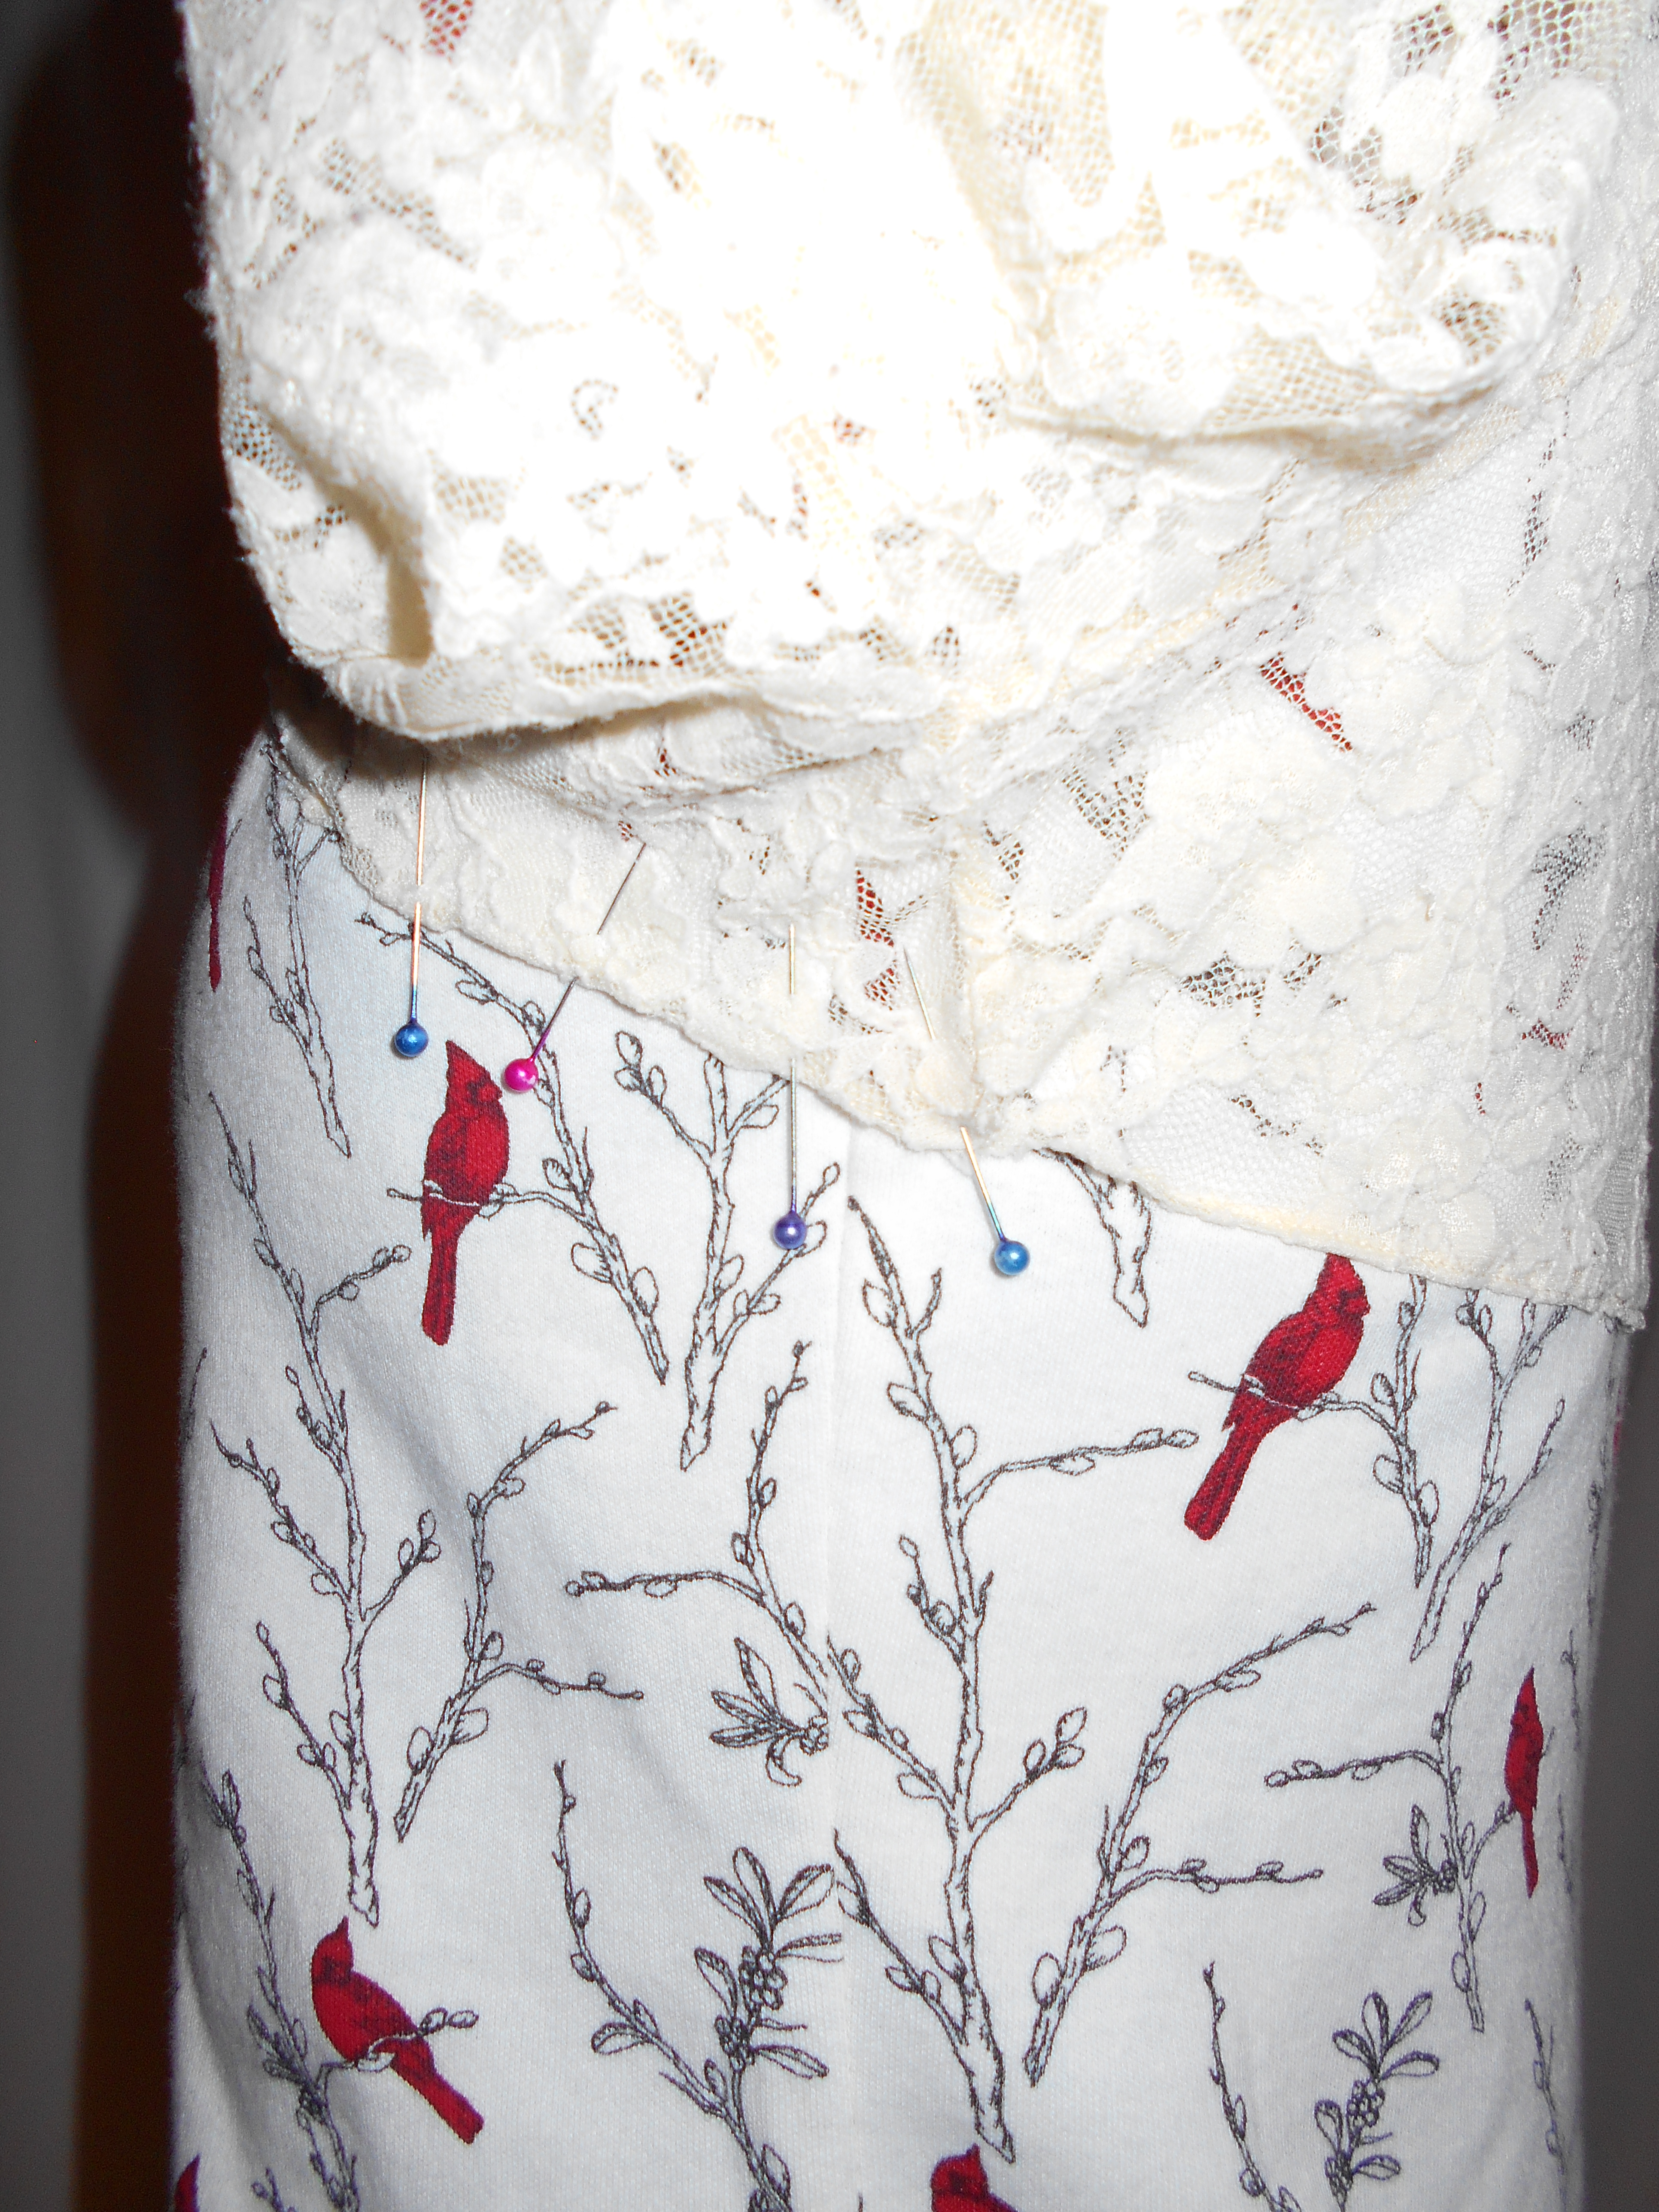
I put the Cardinal shirt onto my dress form and placed the lace top ontop of the Cardinal shirt. I pinned that and sewed them together on the front and back. I left the armpit area unsewn at this point because I needed to take the Cardinal shirt in at the sides.
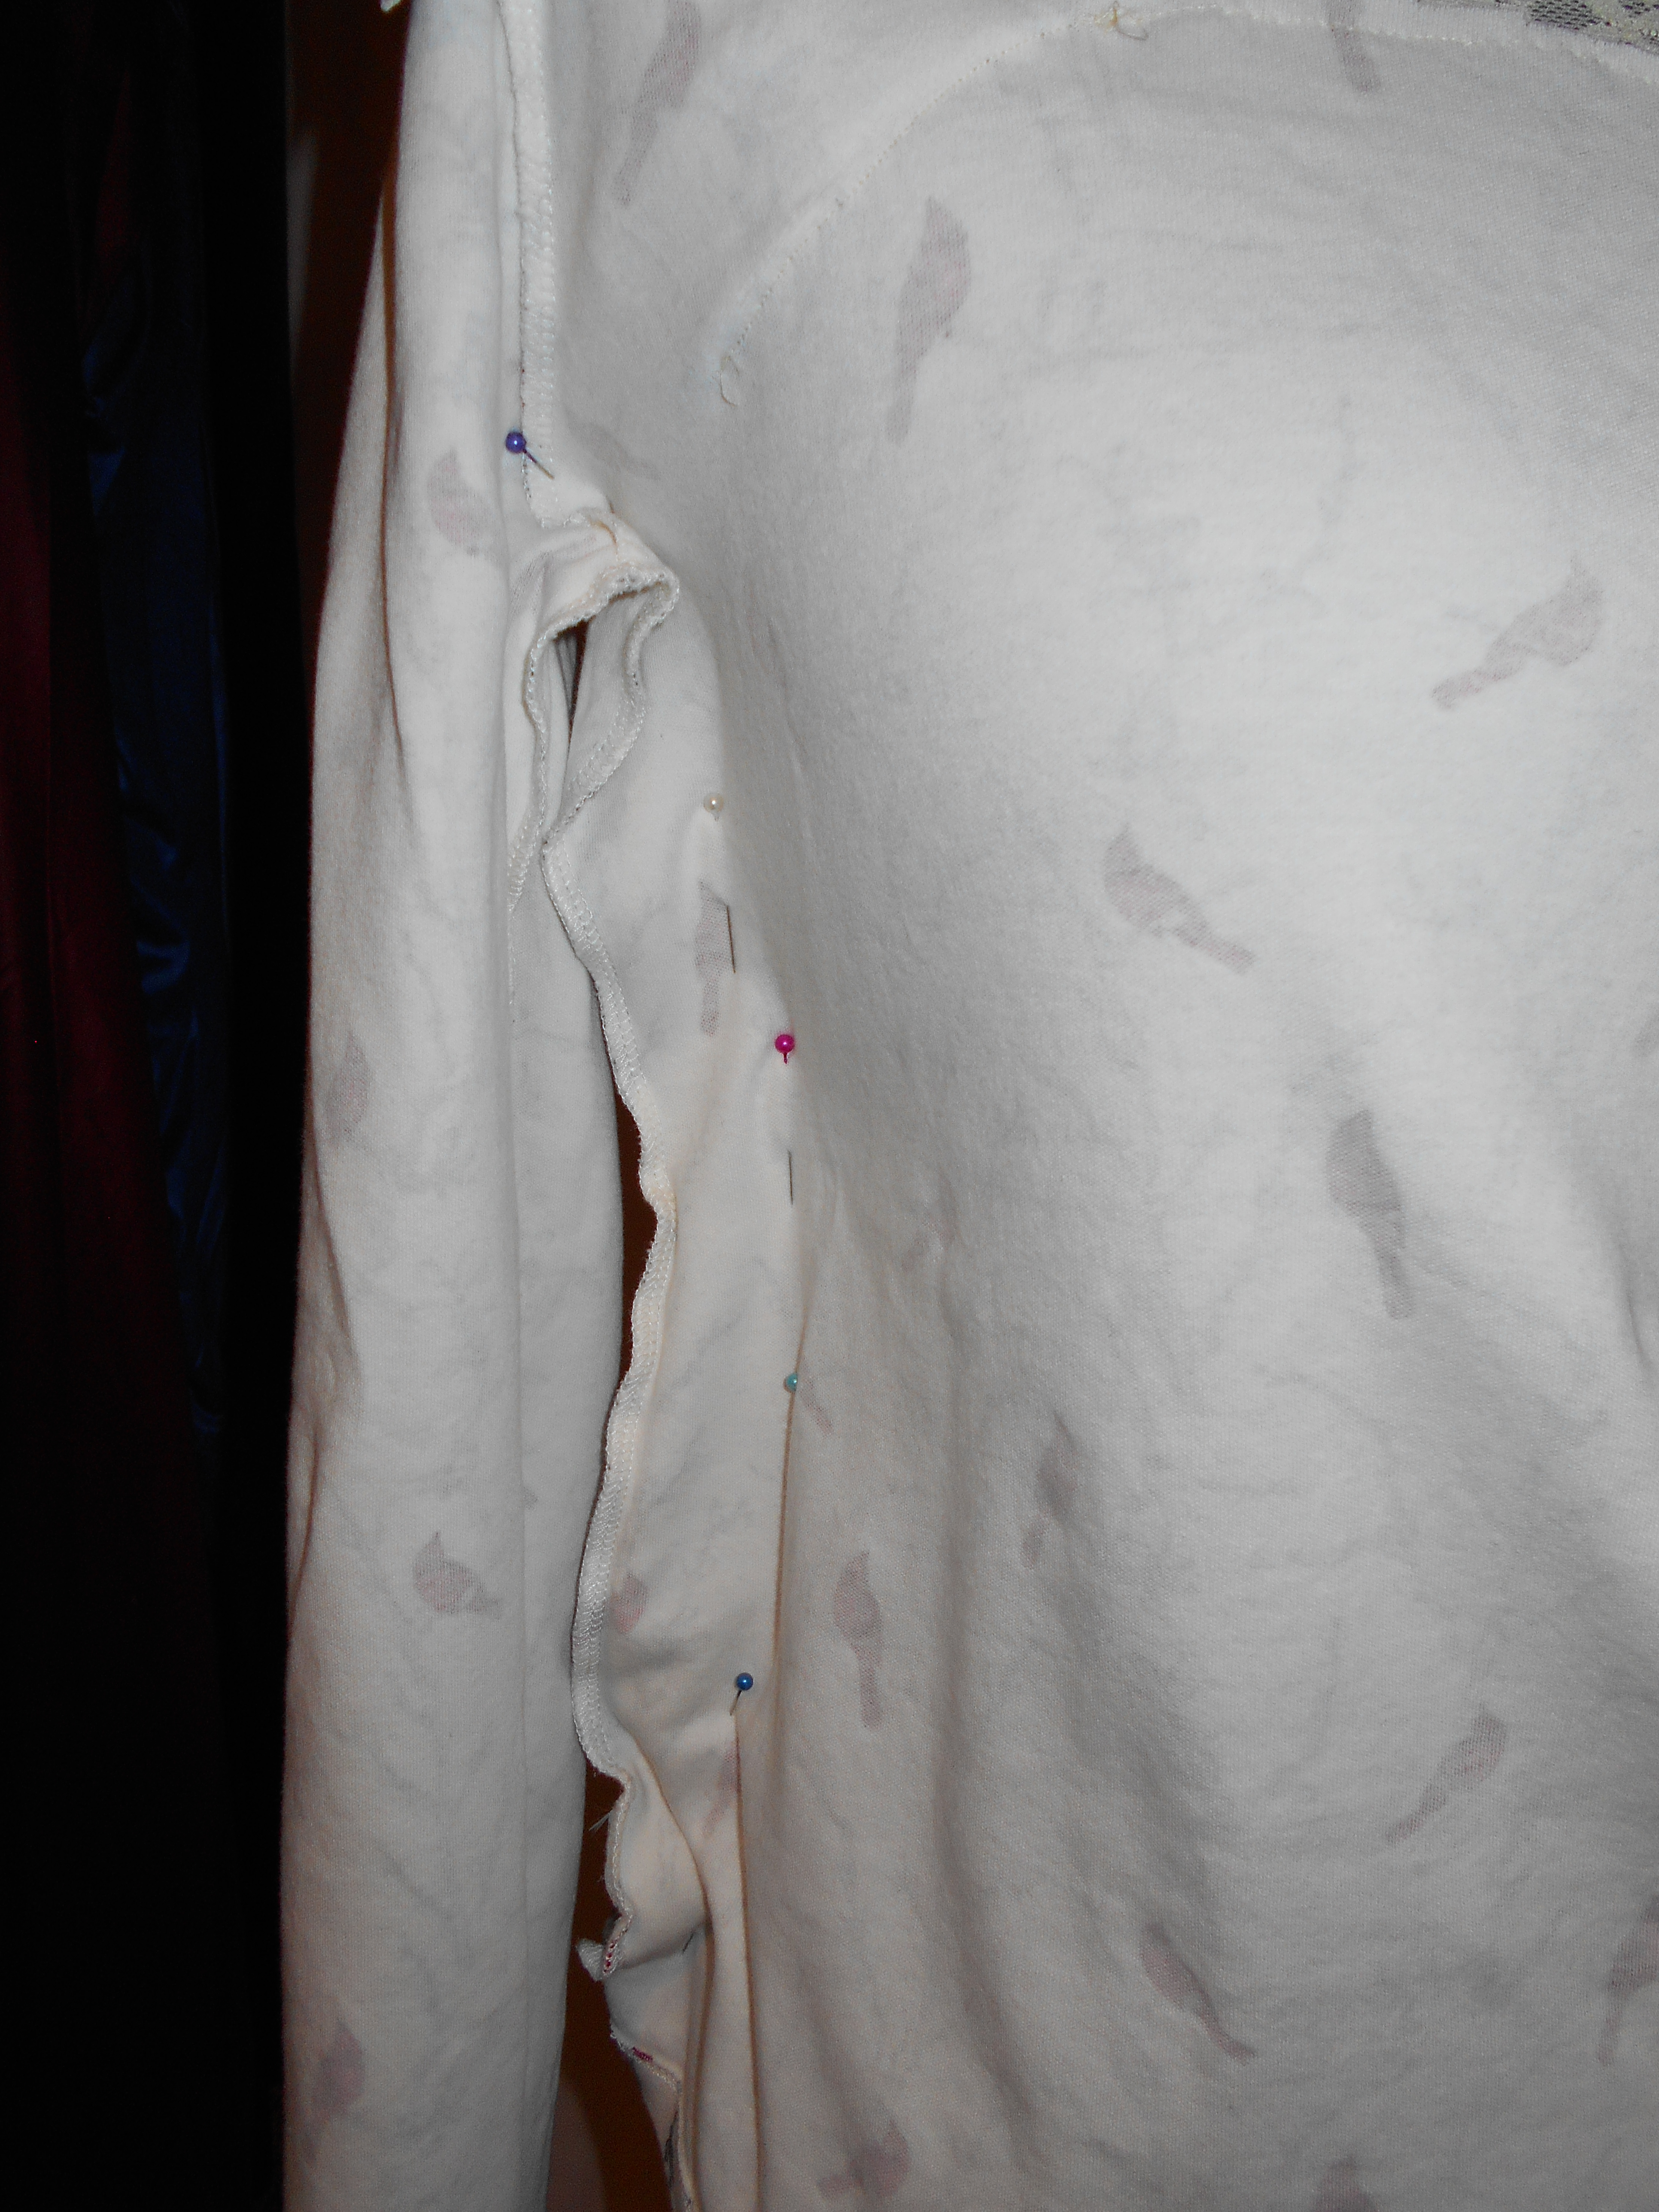
I took the Cardinal shirt it at the sides. Sewed it up!
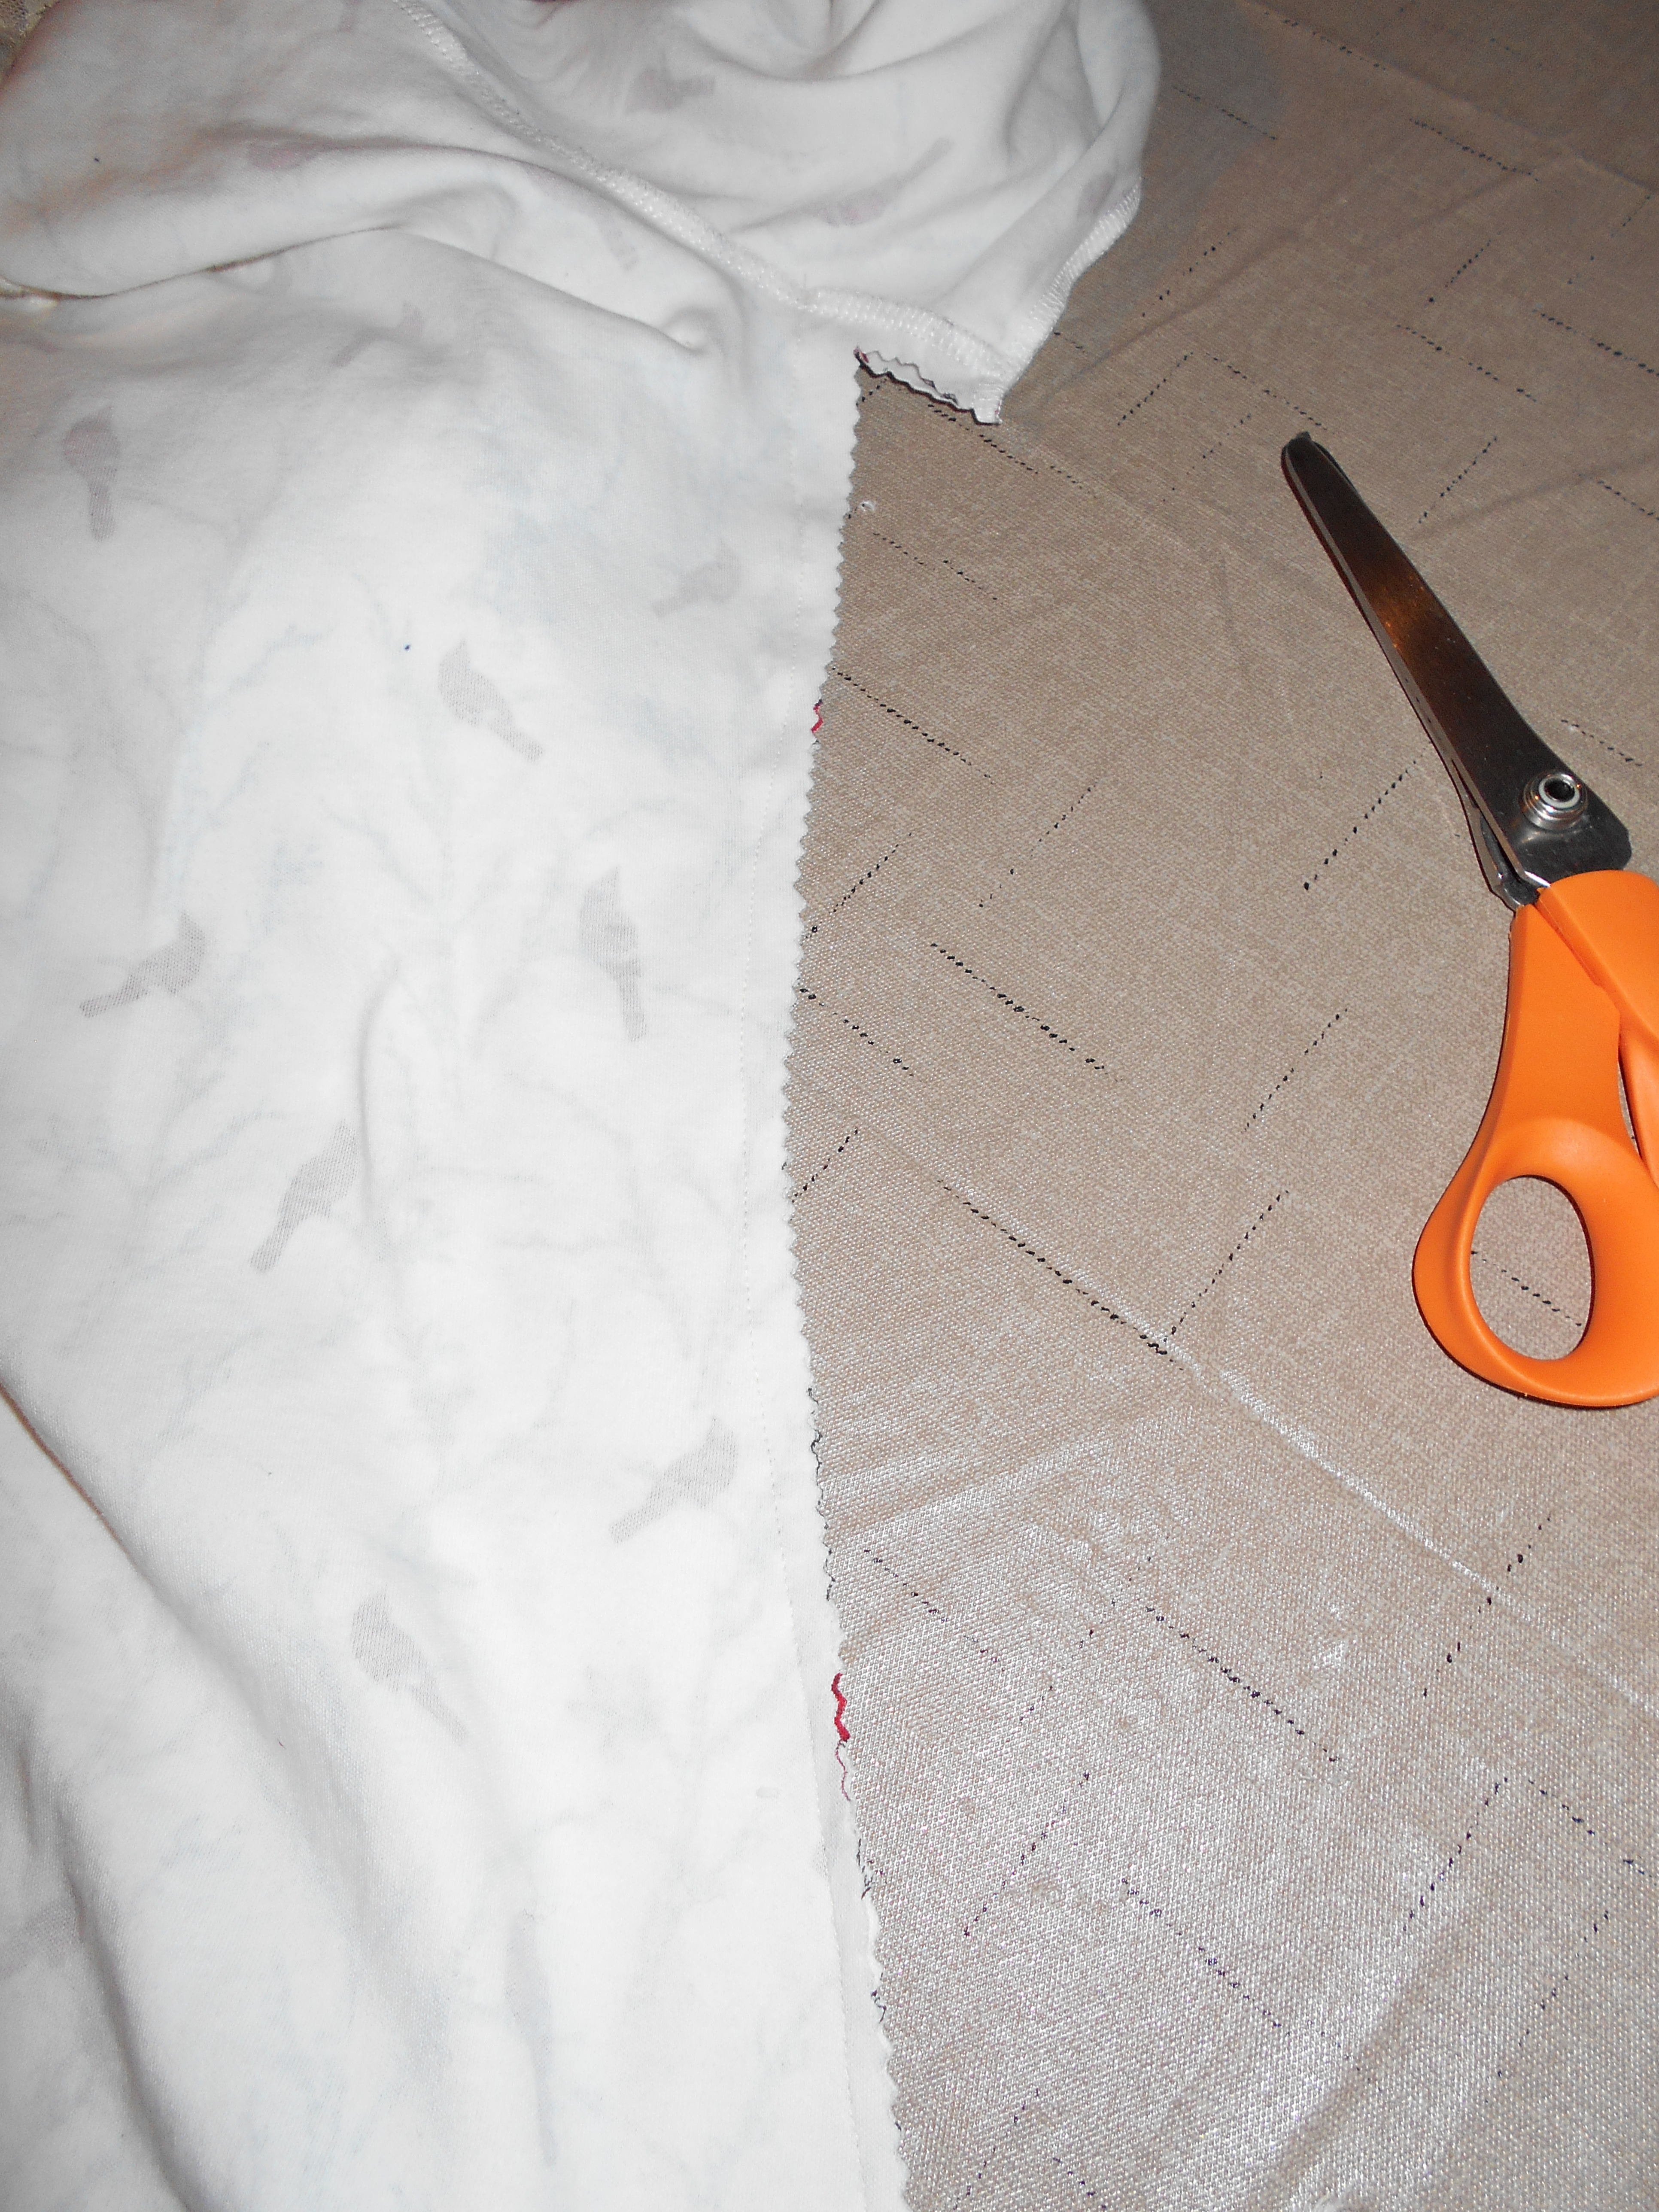
Trimmed the excess off with my Pinking shears.
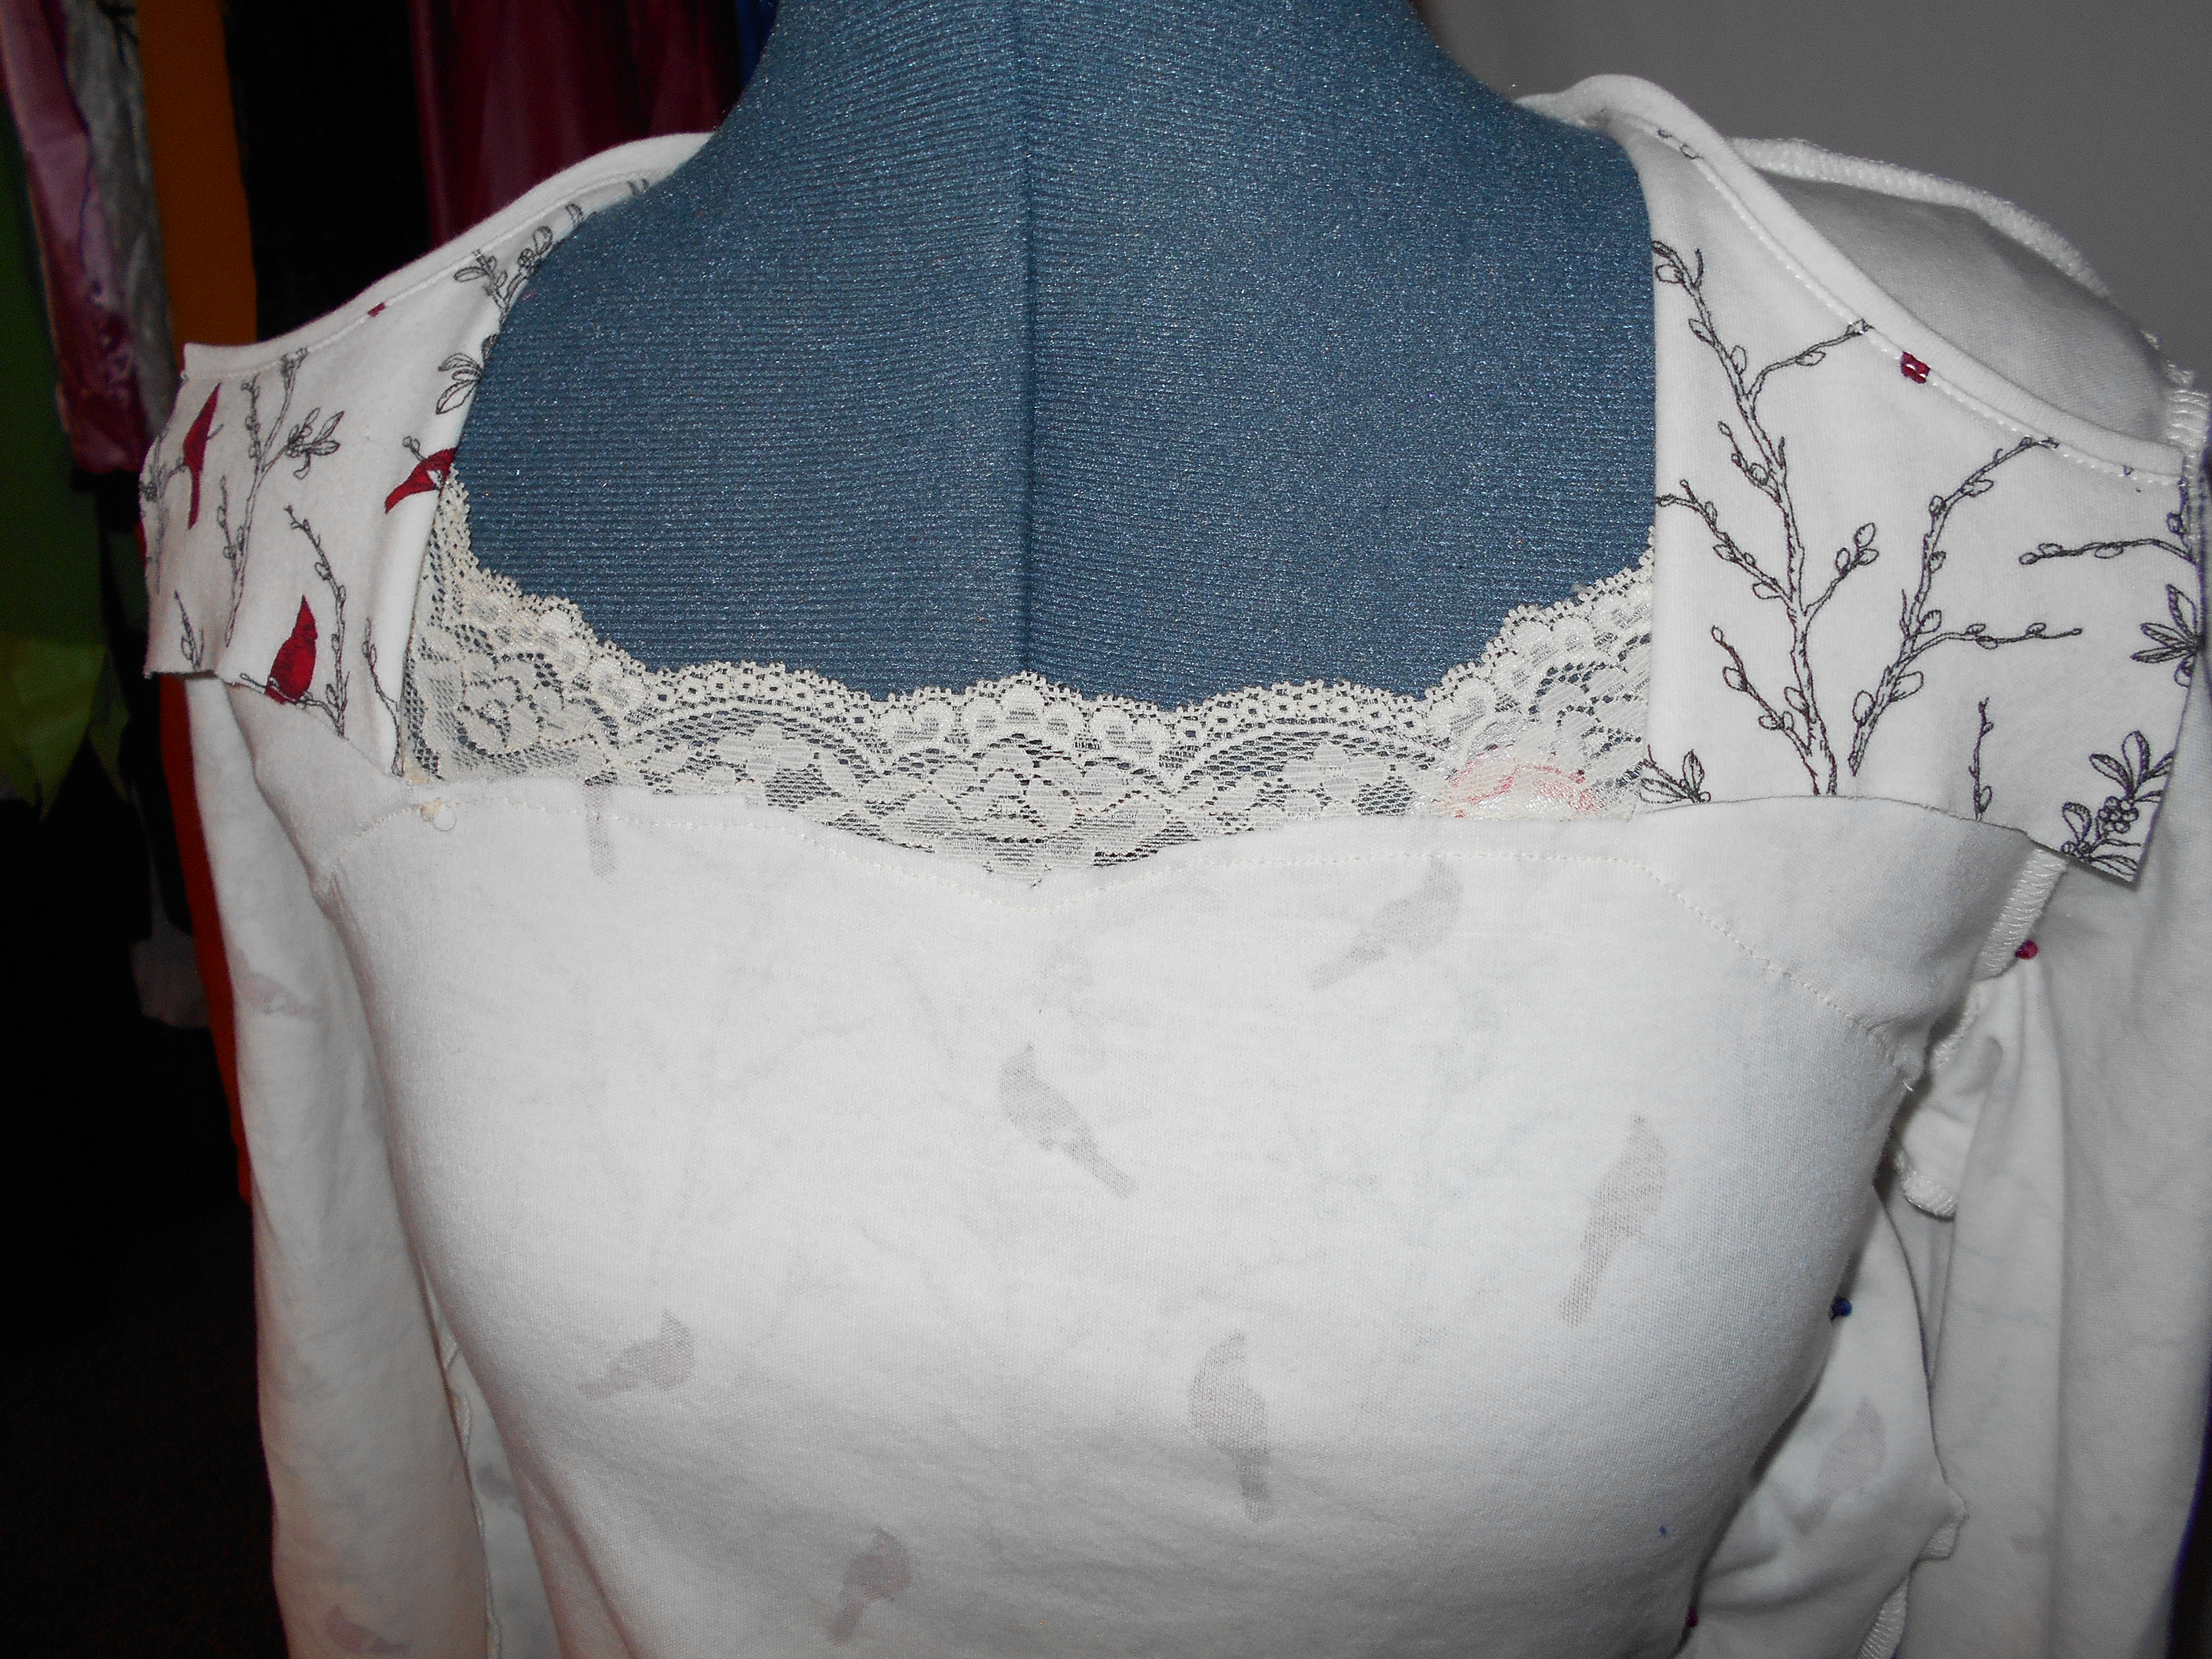
Once the sides were taken in I sewed the lace to the under arms.
Once the lace was all sewn onto the Cardinal shirt I cut the top of the Cardinal shirt and the sleeves off. Leaving just the lace top and lace sleeves.
Soaking up the last of the snow for the Spring!
Like my headband? I made it with a scrap of a dress and some ribbon.