Wednesday, January 31, 2018

Fiesta Fashion

Hello everyone!

Sorry for not posting for so long. The end of the year was super busy; my little sister got married, I have started some new hobbies, I'm back in school, and work was insanely busy for a while, as well as me dealing with some physical/mental health stuff! But I am really excited to get back into my stash and start getting some projects done. Here is my first project of the new year :)

Please forgive the lack of before pictures, I thought I had one :( I found a huge t-shirt with hand-painted sombreros and confetti on it at the thrift store for $2! It was obviously made in the 80's or 90's and was so funky I HAD to have it.

The first thing I did, which took a couple weeks, was to take some permanent fabric glue and this little brush and paint over ALL the glitter glue! It was cracked and peeling in some places, and I thought maybe some fabric glue would act like a 'varnish'. I'm happy to report it worked great! I will still only hand-wash this shirt but all that glorious sparkle is not going to peel away! 

I simply cut off the length of the shirt below where the design ended, and cut off the sleeves also

I cut open the sides, cut strips, and tied them together to add a little interest and also bring in the fit somewhat

Tah dah! Here you can see the glorious design! Because the shirt was so big, simply cutting off the length and the sleeves made it slightly cropped (an adorable length, not too scandalous) and the shoulders are now sort of a "cap sleeve"
The tied side. I can't wait to wear this somewhere! The little gold scribble in the lower middle of the photo is the artist's signature, it's either "Laura Nora" or "Laura Nara". I hope Laura would approve of how I made her art wearable again!

Hugs to all!

~Illy

Twin Tops

Hello Refashion Co-op. I got a couple of identical shirts from a neighbor. They were such a soft knit material. I really liked them. They were too big and had a lot of fluttery, asymmetrical layers too.
 
 
 I wanted to make them smaller and simplify all the layers and asymmetrical angles. There was just too much going on here. The wine and rosy coral colors are great.
 
 
 My first step was to make the V-neck less low cut on both shirts. I made a new front seam down the middle of the front of the shirt. I used the front seam that was already there as a guide for my sewing. I cut out the excess fabric. This made the shirts less low cut and made the front layers smaller and less overwhelming.

 
I made the body and the sleeves more narrow and then I cut off the bottom to make the shirts even across the bottom. I wanted a simple bottom hem so cutting off all the asymmetrical angles was a quick way to simplify it all.

 
Thanks for reading, for more pictures and details go to I Can Work With That.


Tuesday, January 30, 2018

Pajama Pants Refash Part 1

Hi everyone! I know it's been awhile since my last post but I hope everyone has been enjoying 2018 so far! I have started 2018 by cleaning house. I have been busy mending previous projects and mending things for family, friends and co-workers. So, I have been busy with the less fun or creative side of being a seamstress.
Today I have a refash that started out as a pair of my husbands old pajama pants. Santa brought my hubby a bunch of brand new jammie pants which was good for me because I inherited the old ones! This is a 1 of 2 refash so stay tuned for part 2!

DSCN1456
First up! Plaid jammies!
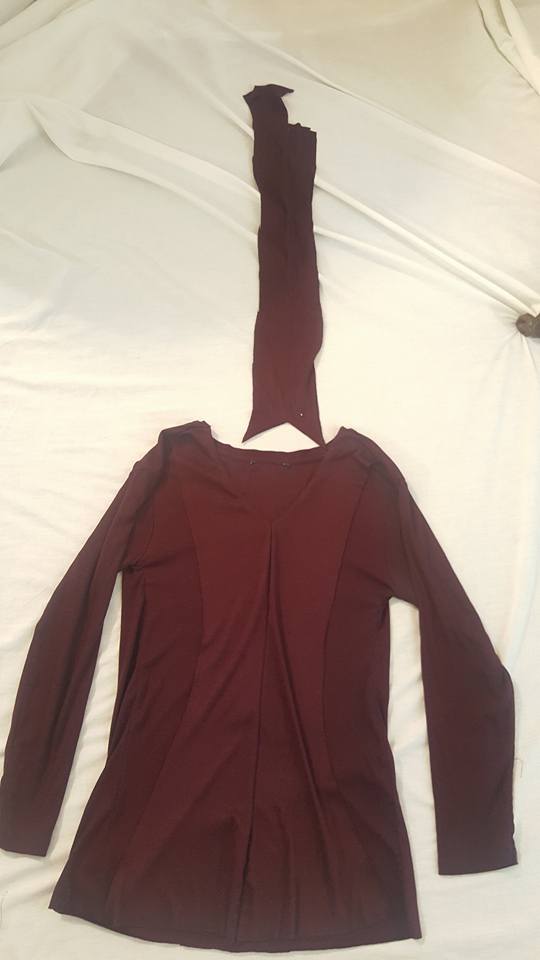
These jammies have been retired as nighttime wear and will not be refashioned into a warm cozy scarf!

DSCN1458
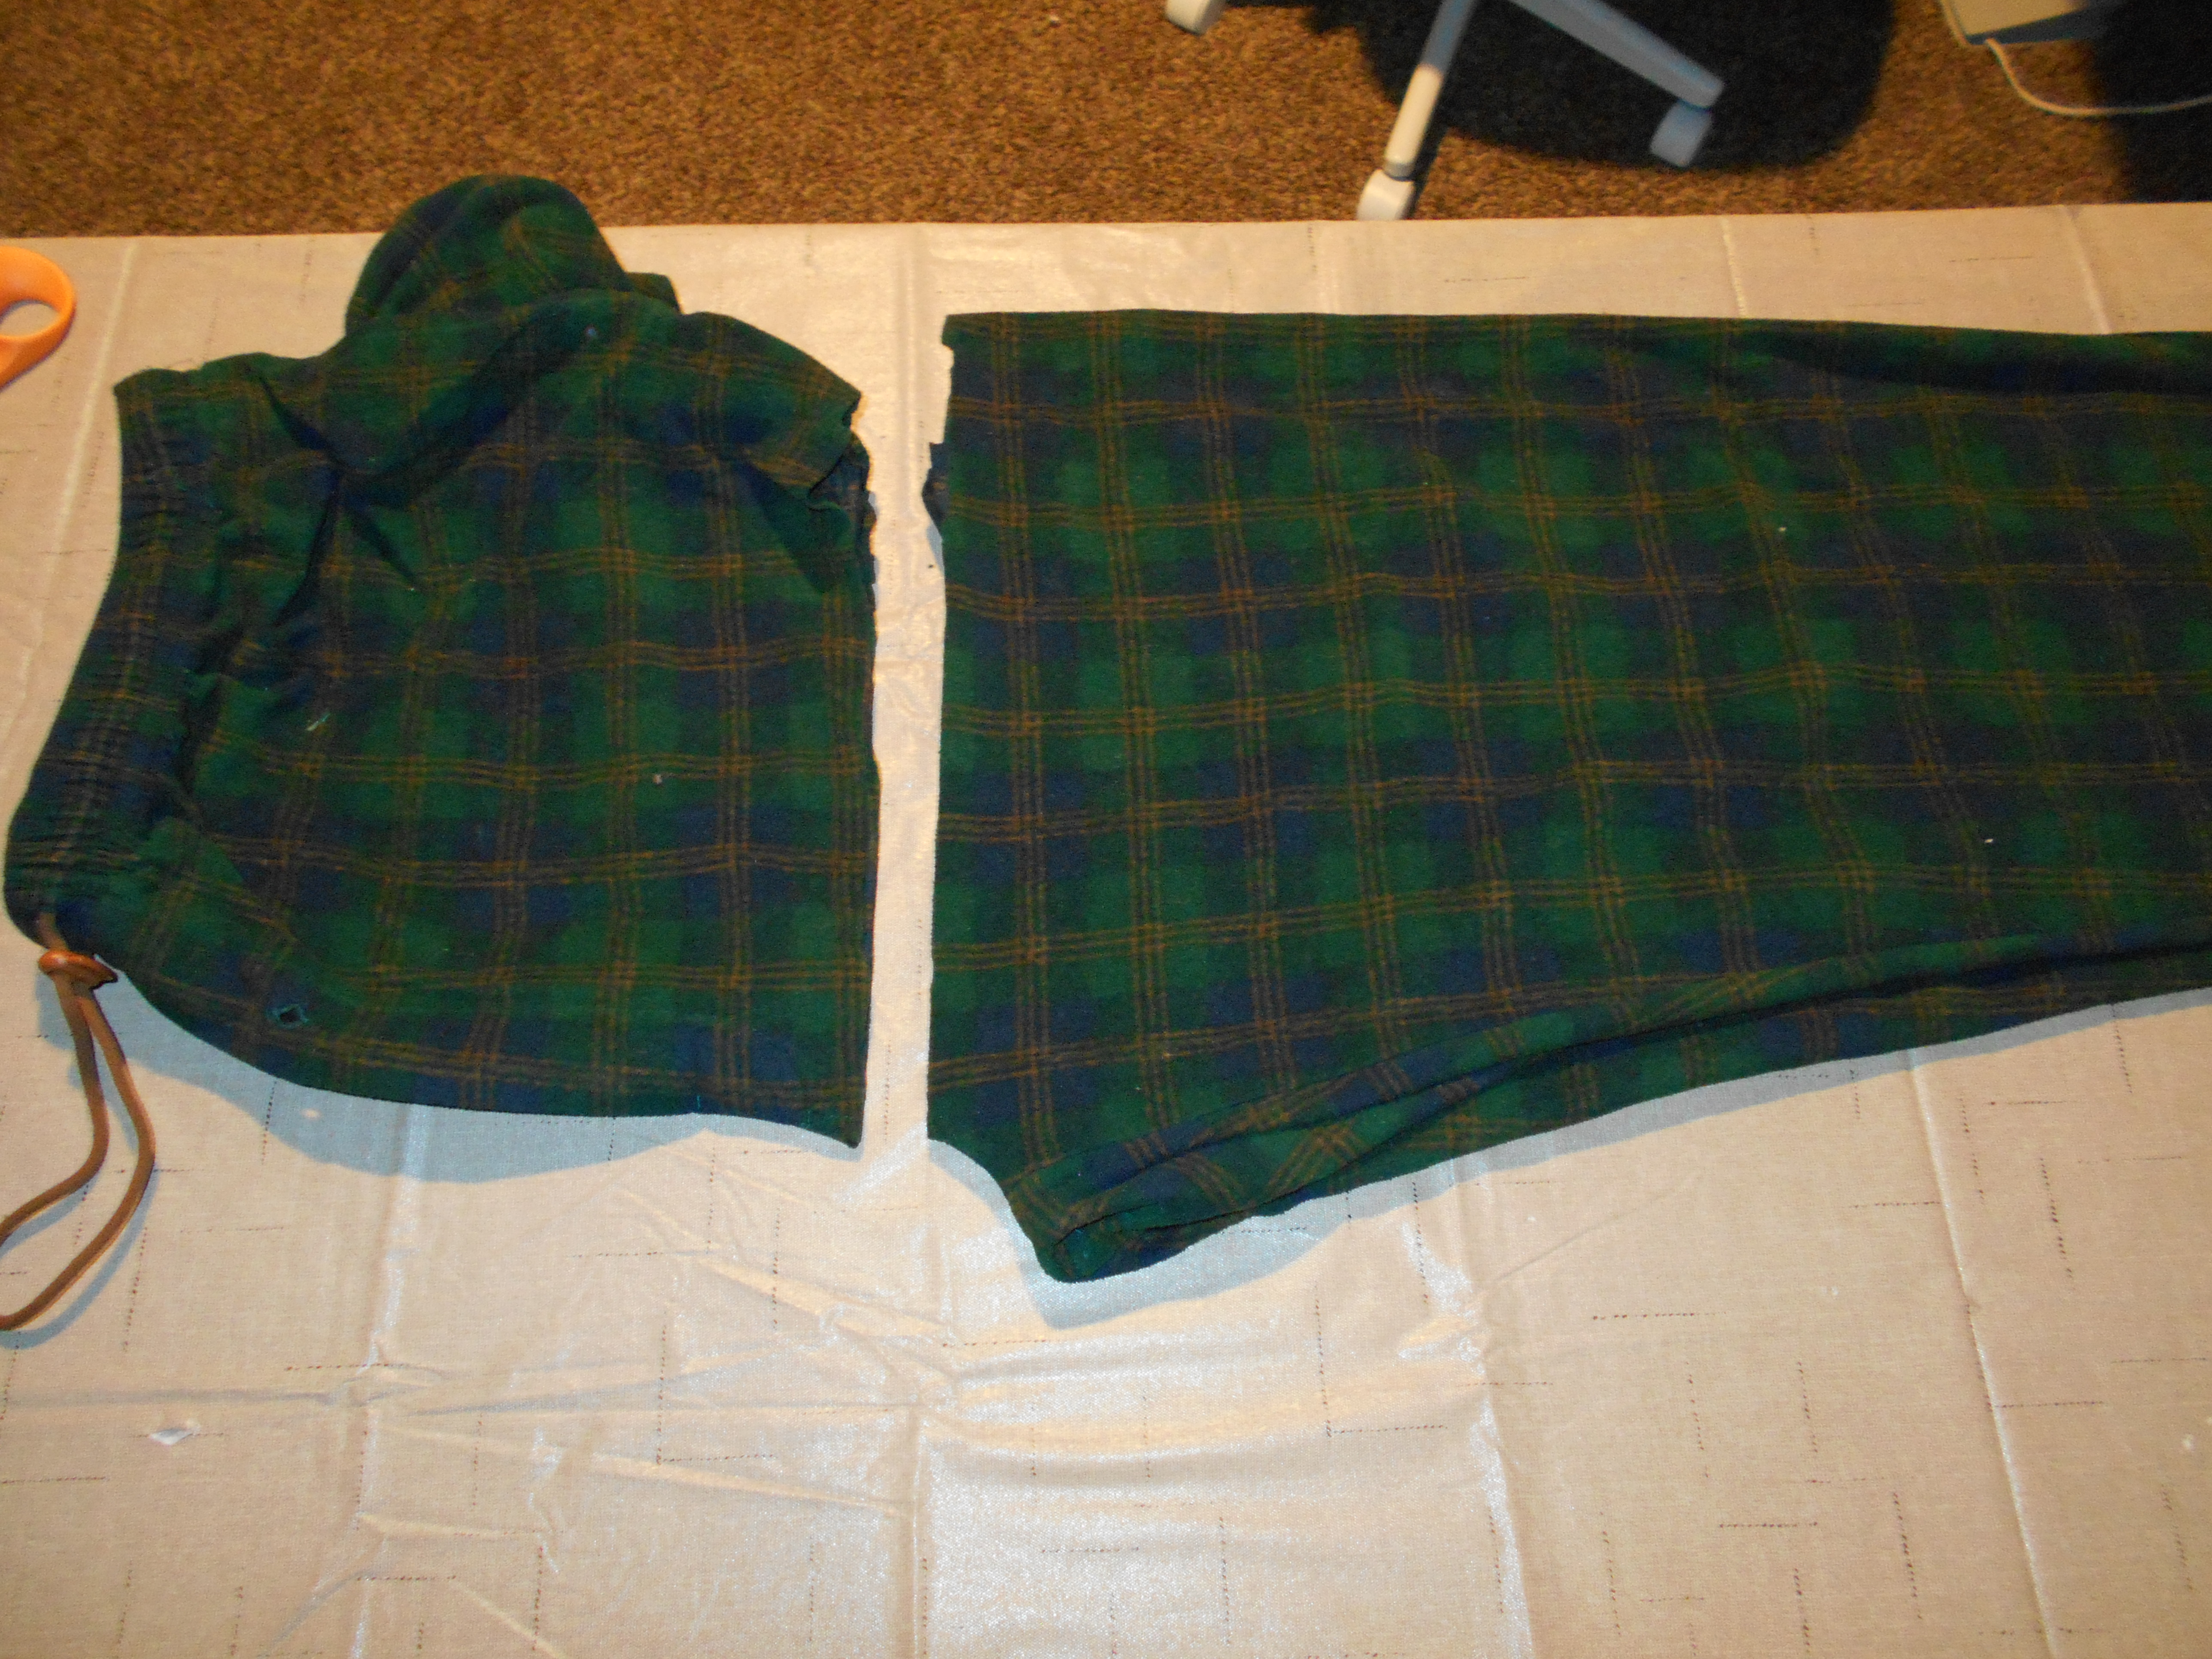
First I folded the pants in half lengthwise. Then I began by cutting the top of the pants off.

DSCN1459
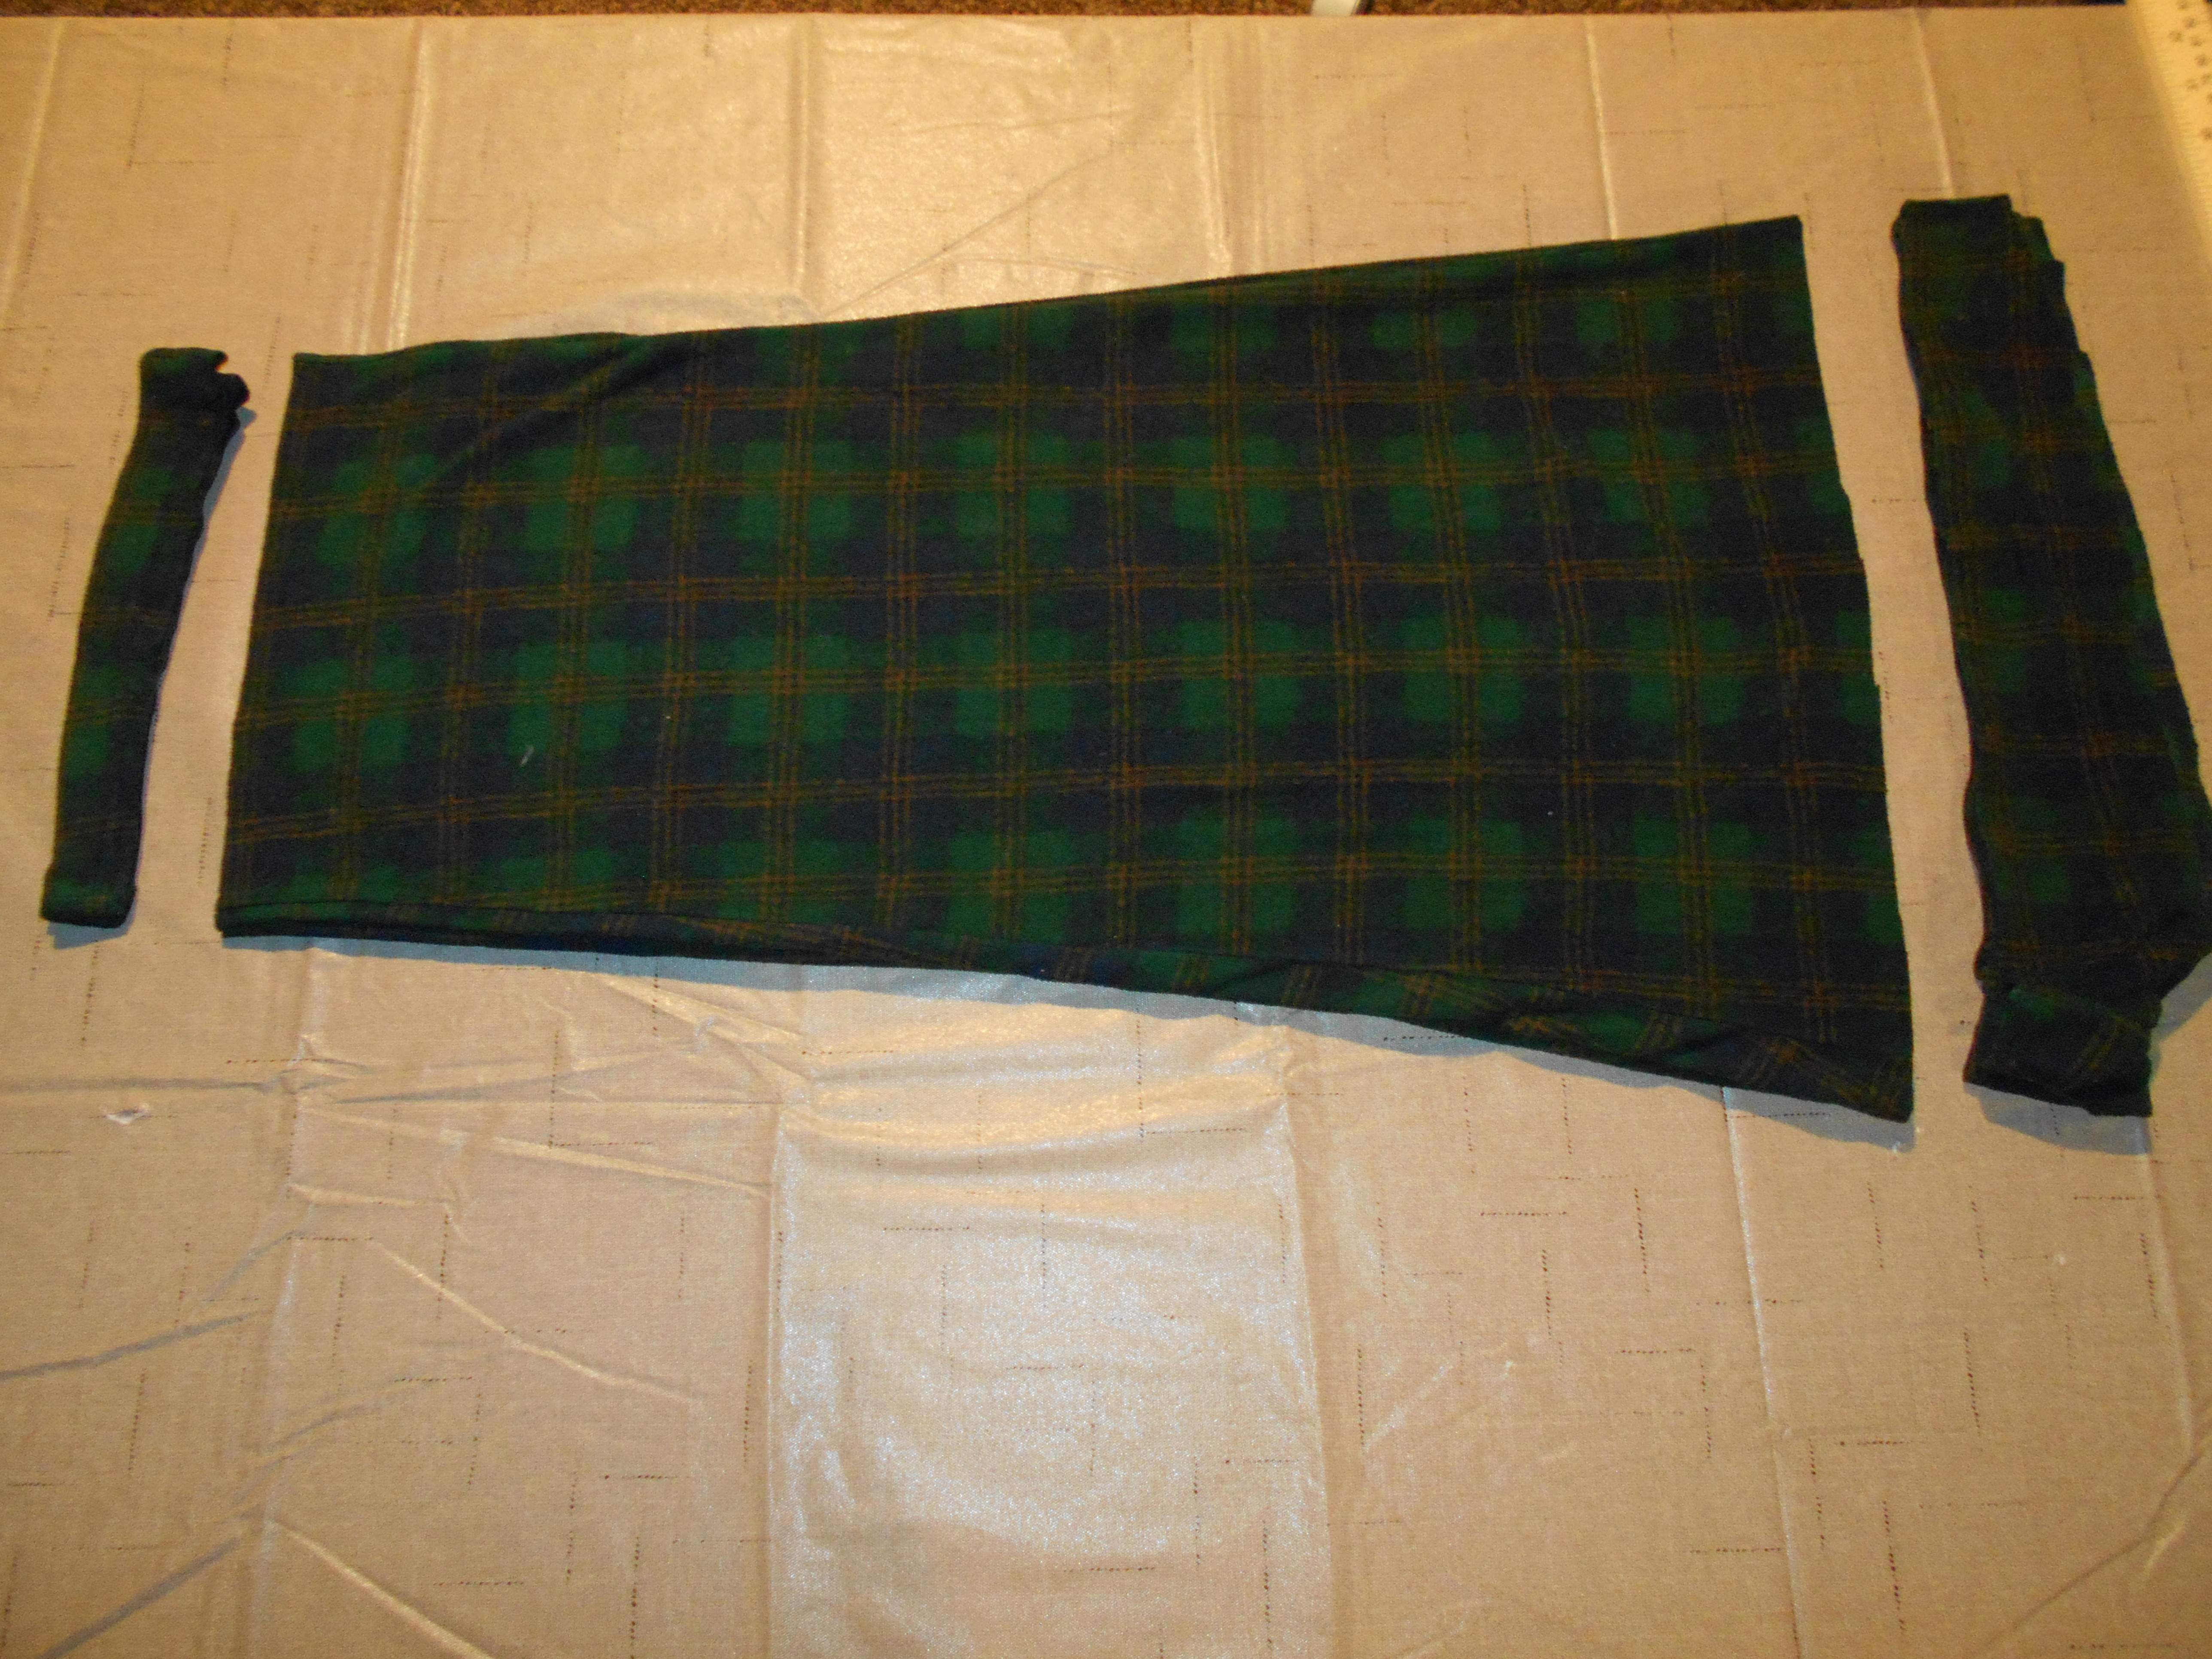
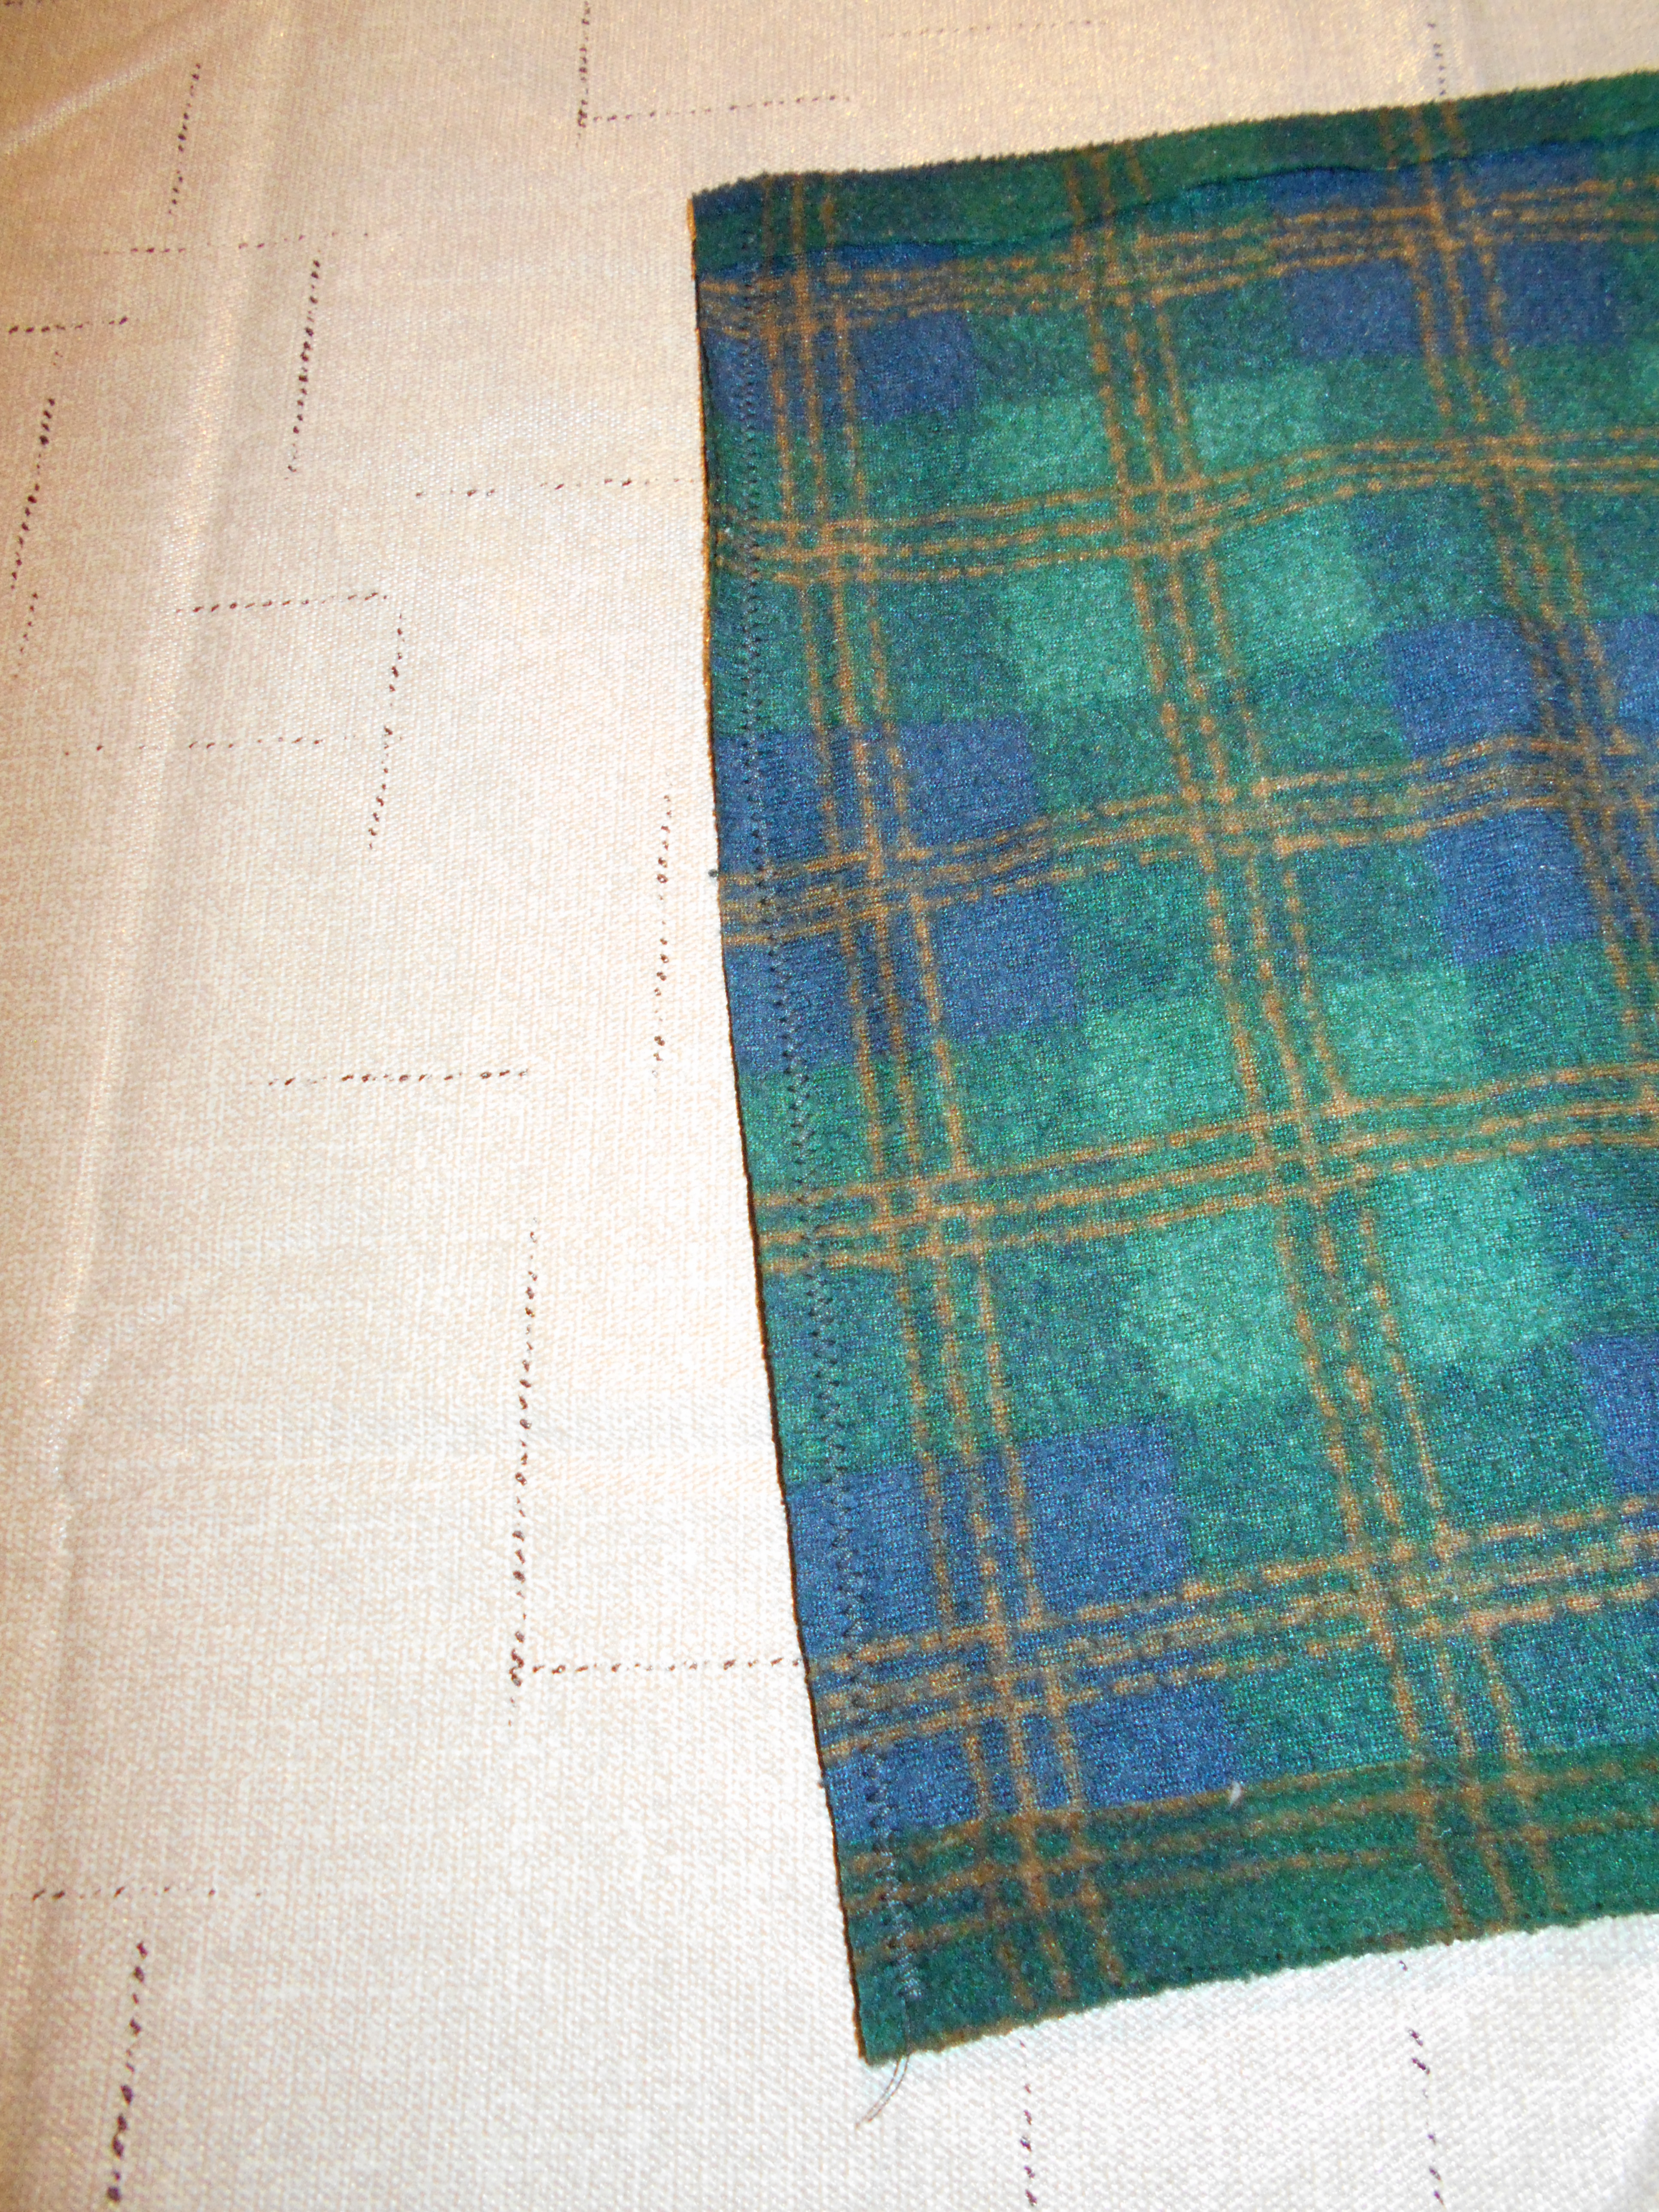
I cut off the original bottom hem and trimmed off more of the top. This left me with 4 rectangles.

DSCN1460
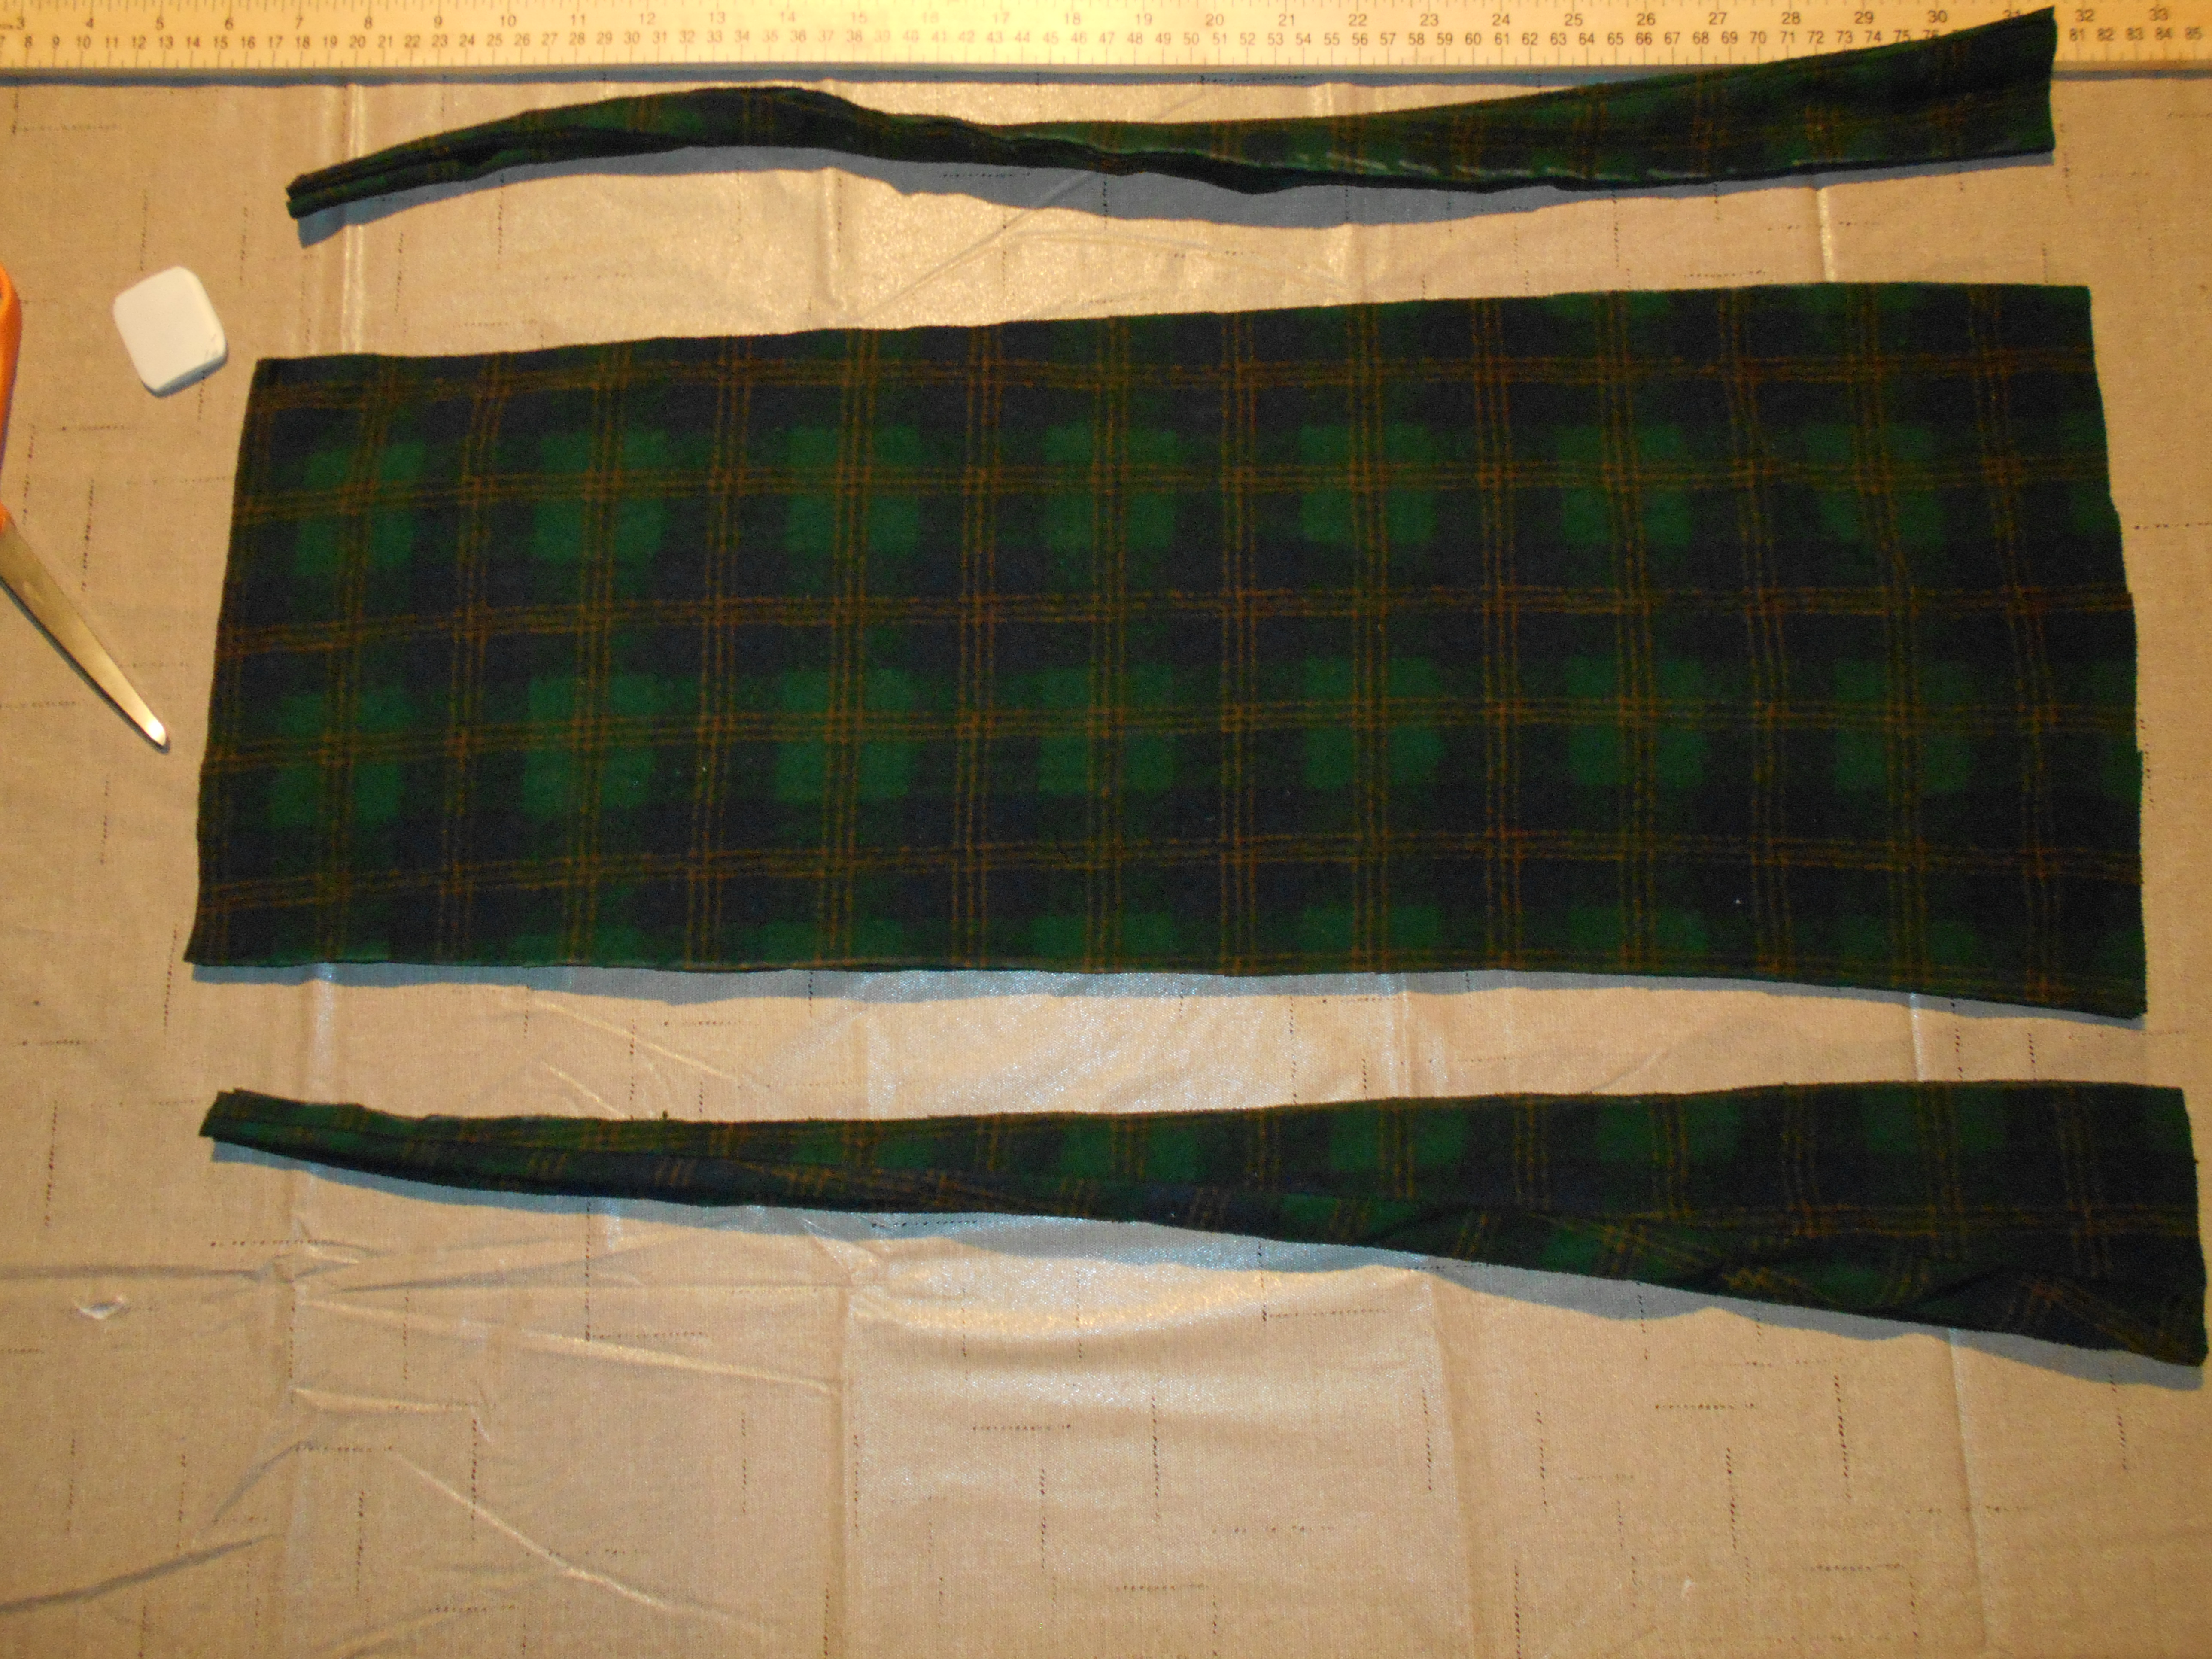
I had to use my yard stick to makes sure my panels were straight. Which they weren't so the needed a little more trimming.

DSCN1461
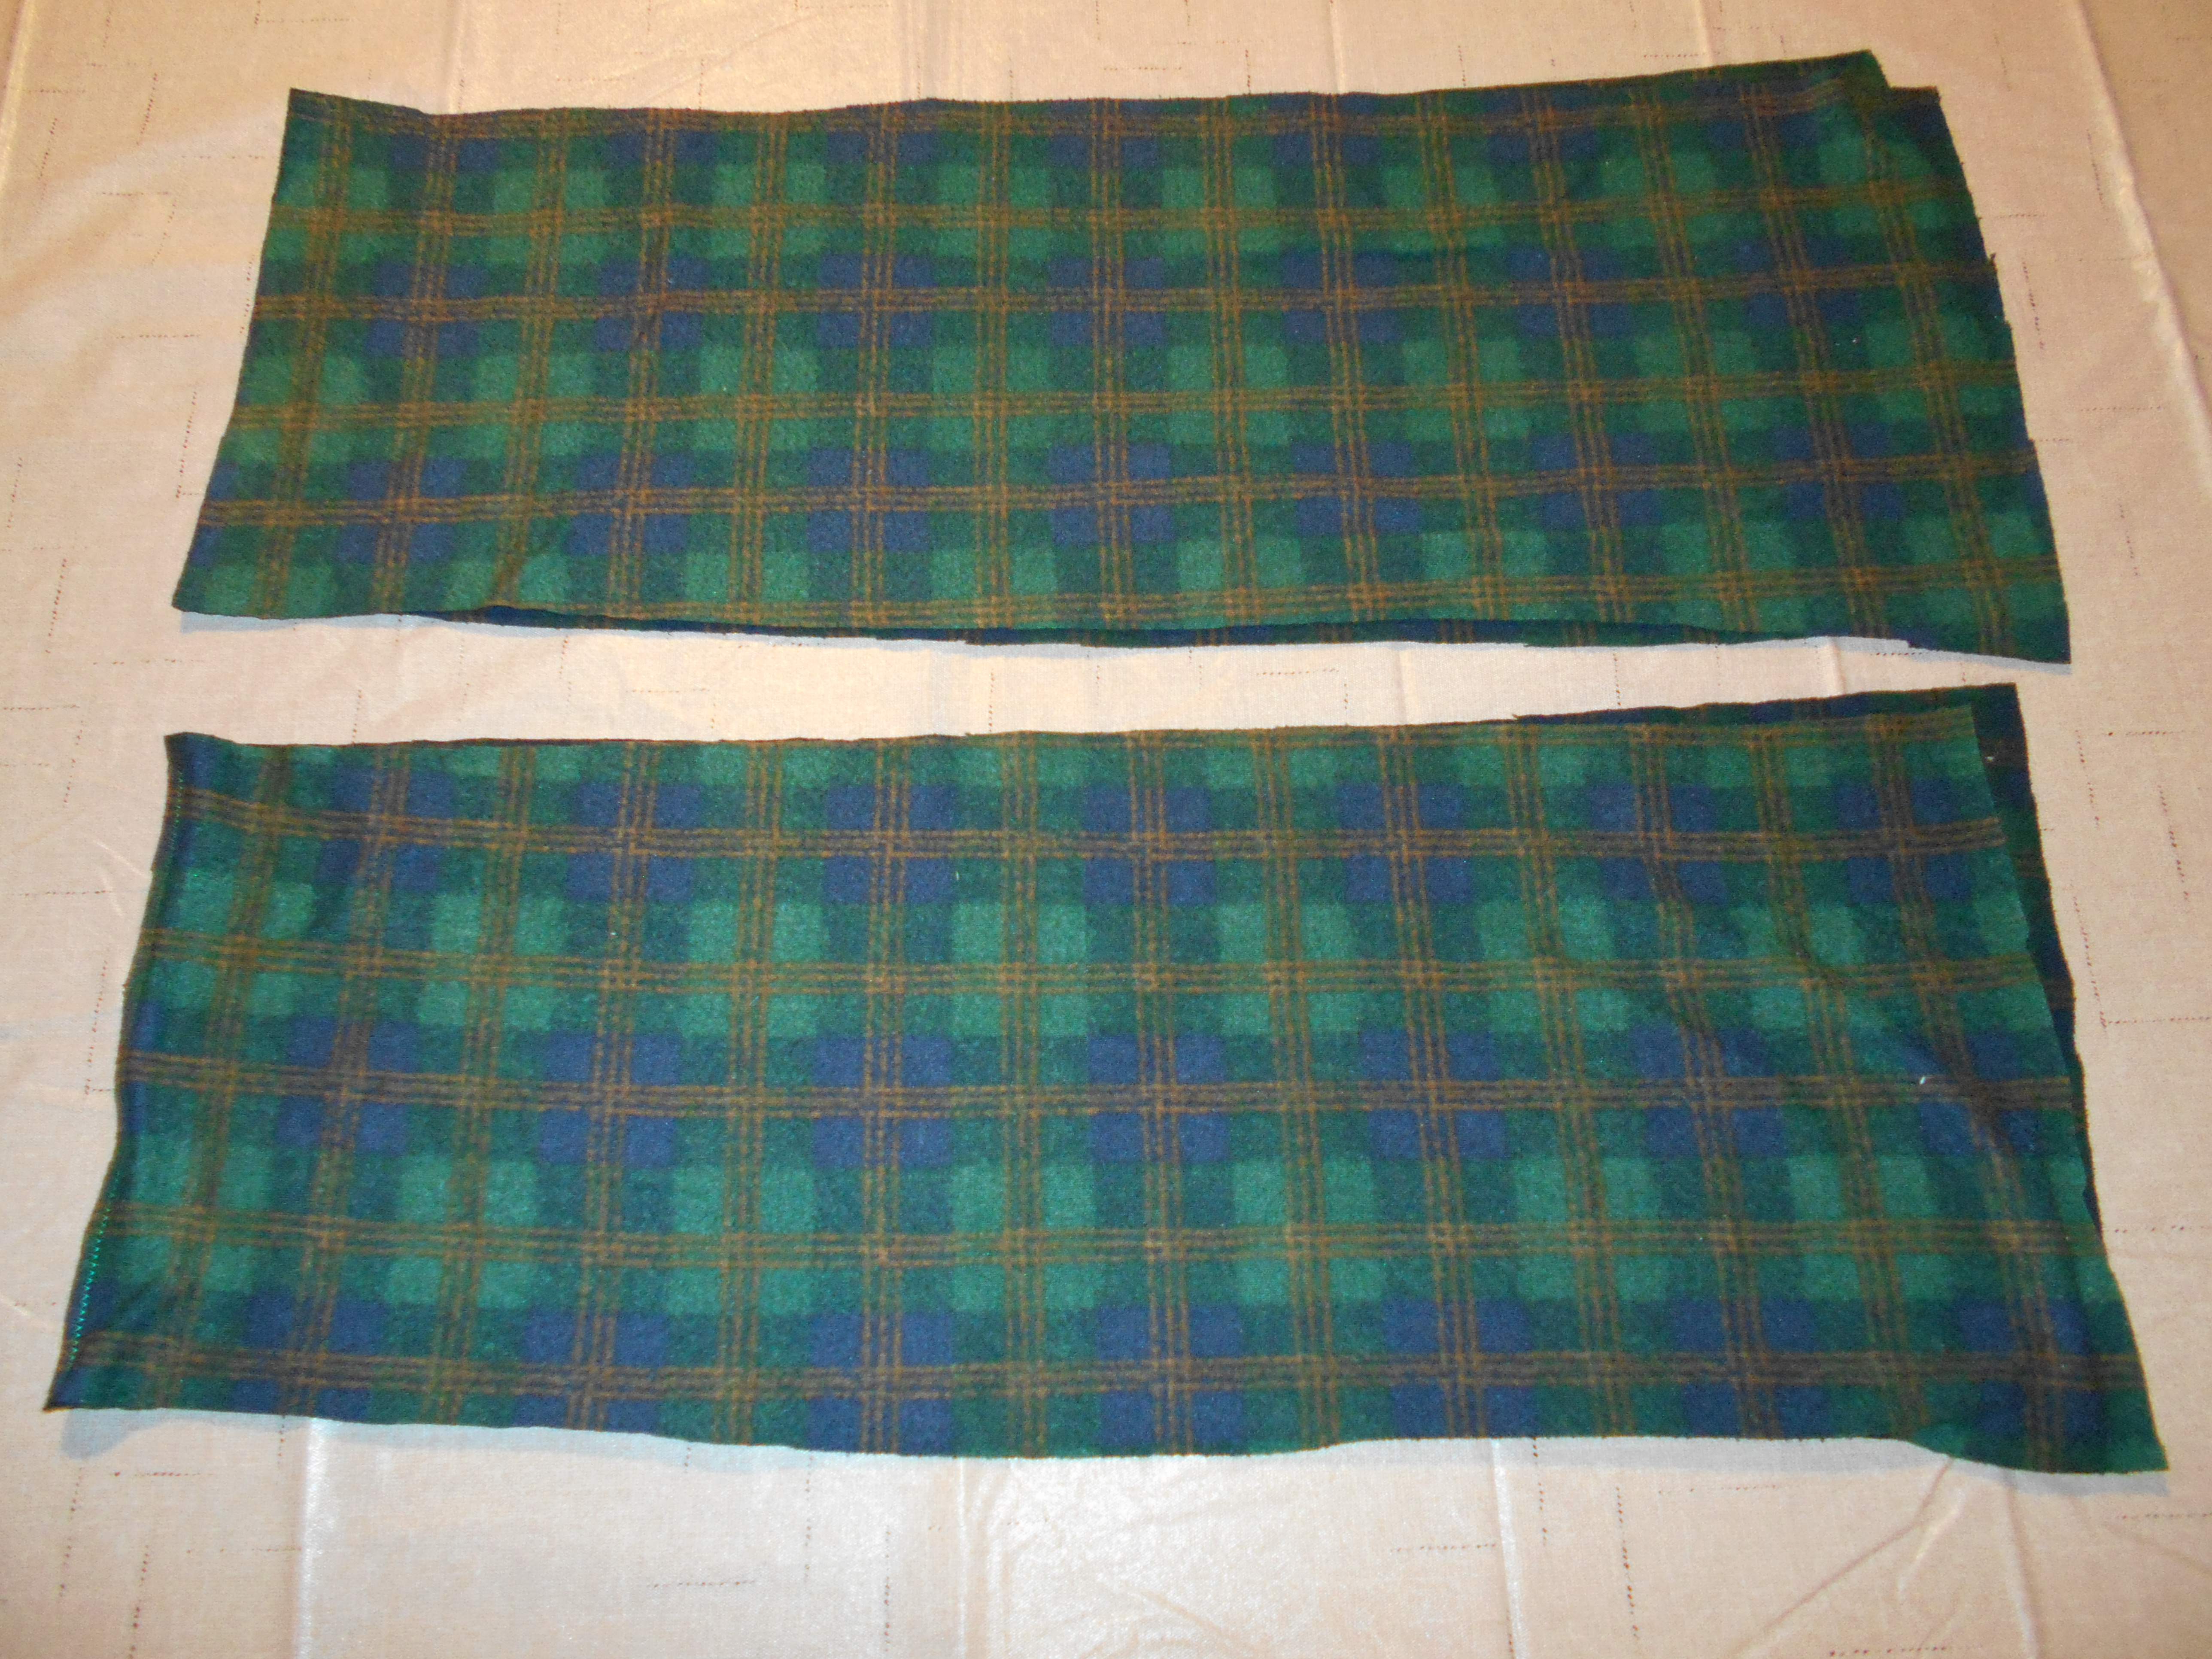
There they are! My 4 straight rectangles.

DSCN1462
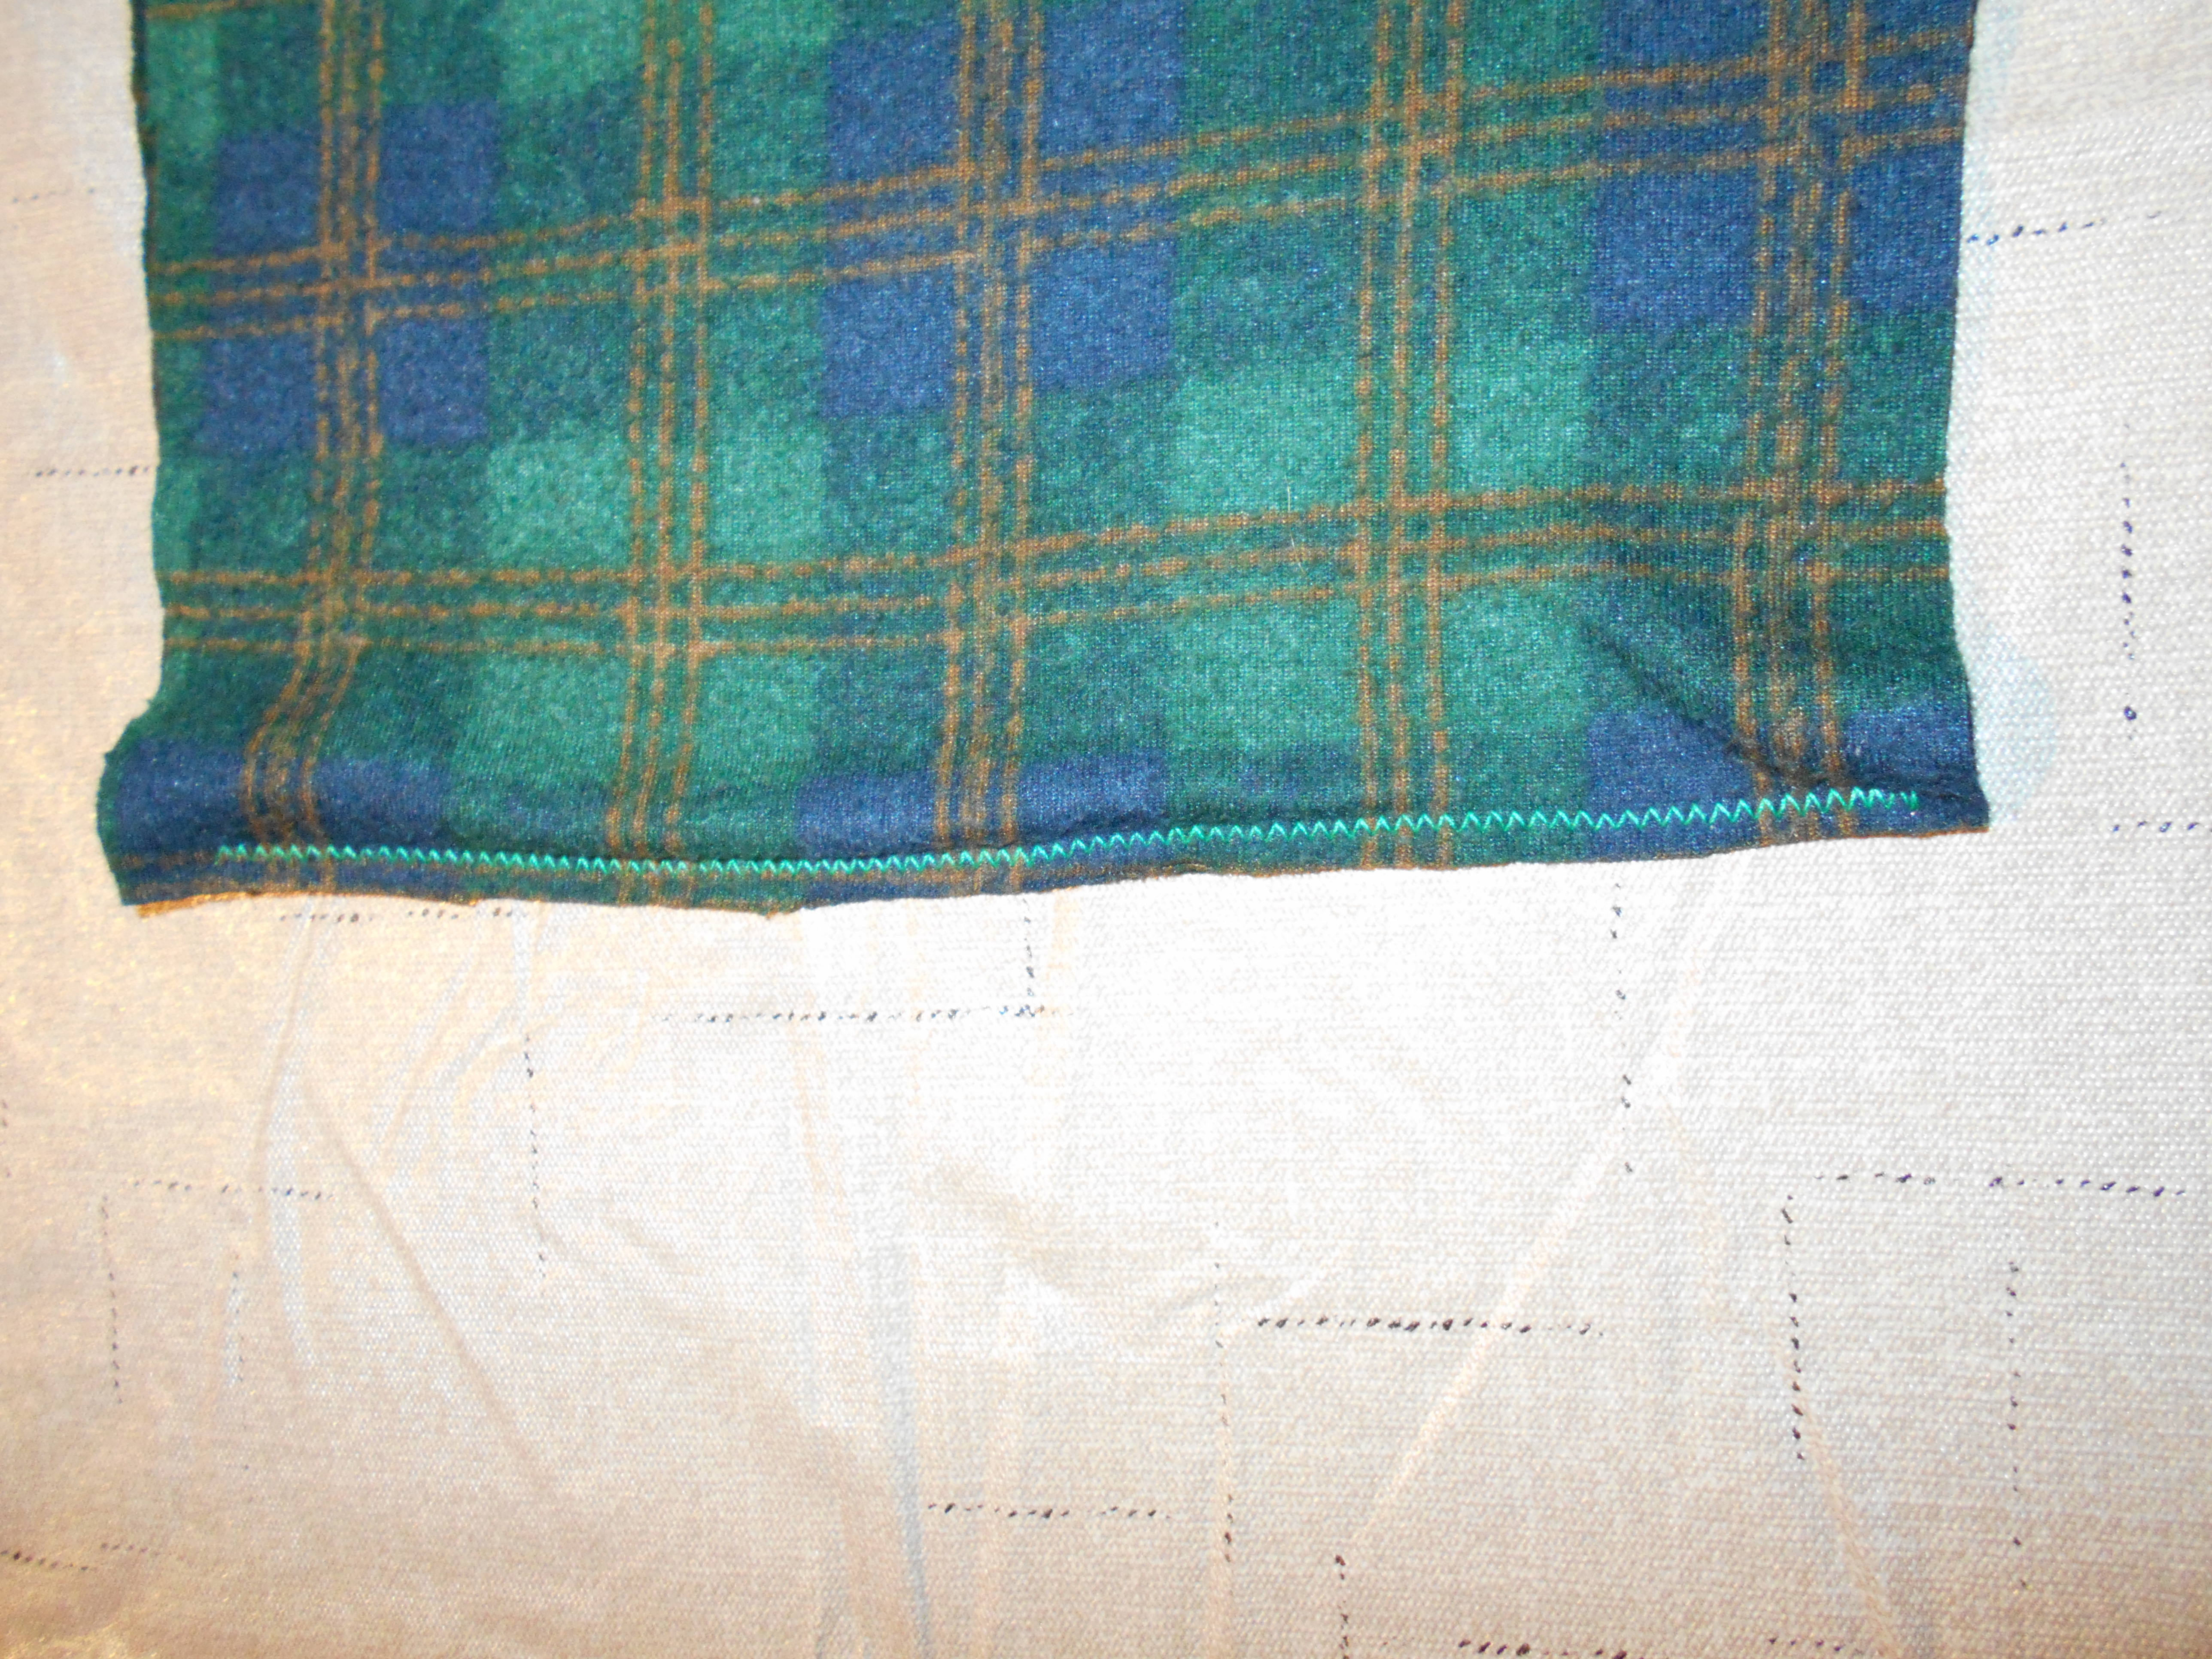
I placed each panel outsides together. Then stitched up 1 end with a zig-zag stitch. Once both sets of 2 were stitched at one end, I then stitched the panels together to make the 4 panels one long piece.

DSCN1463
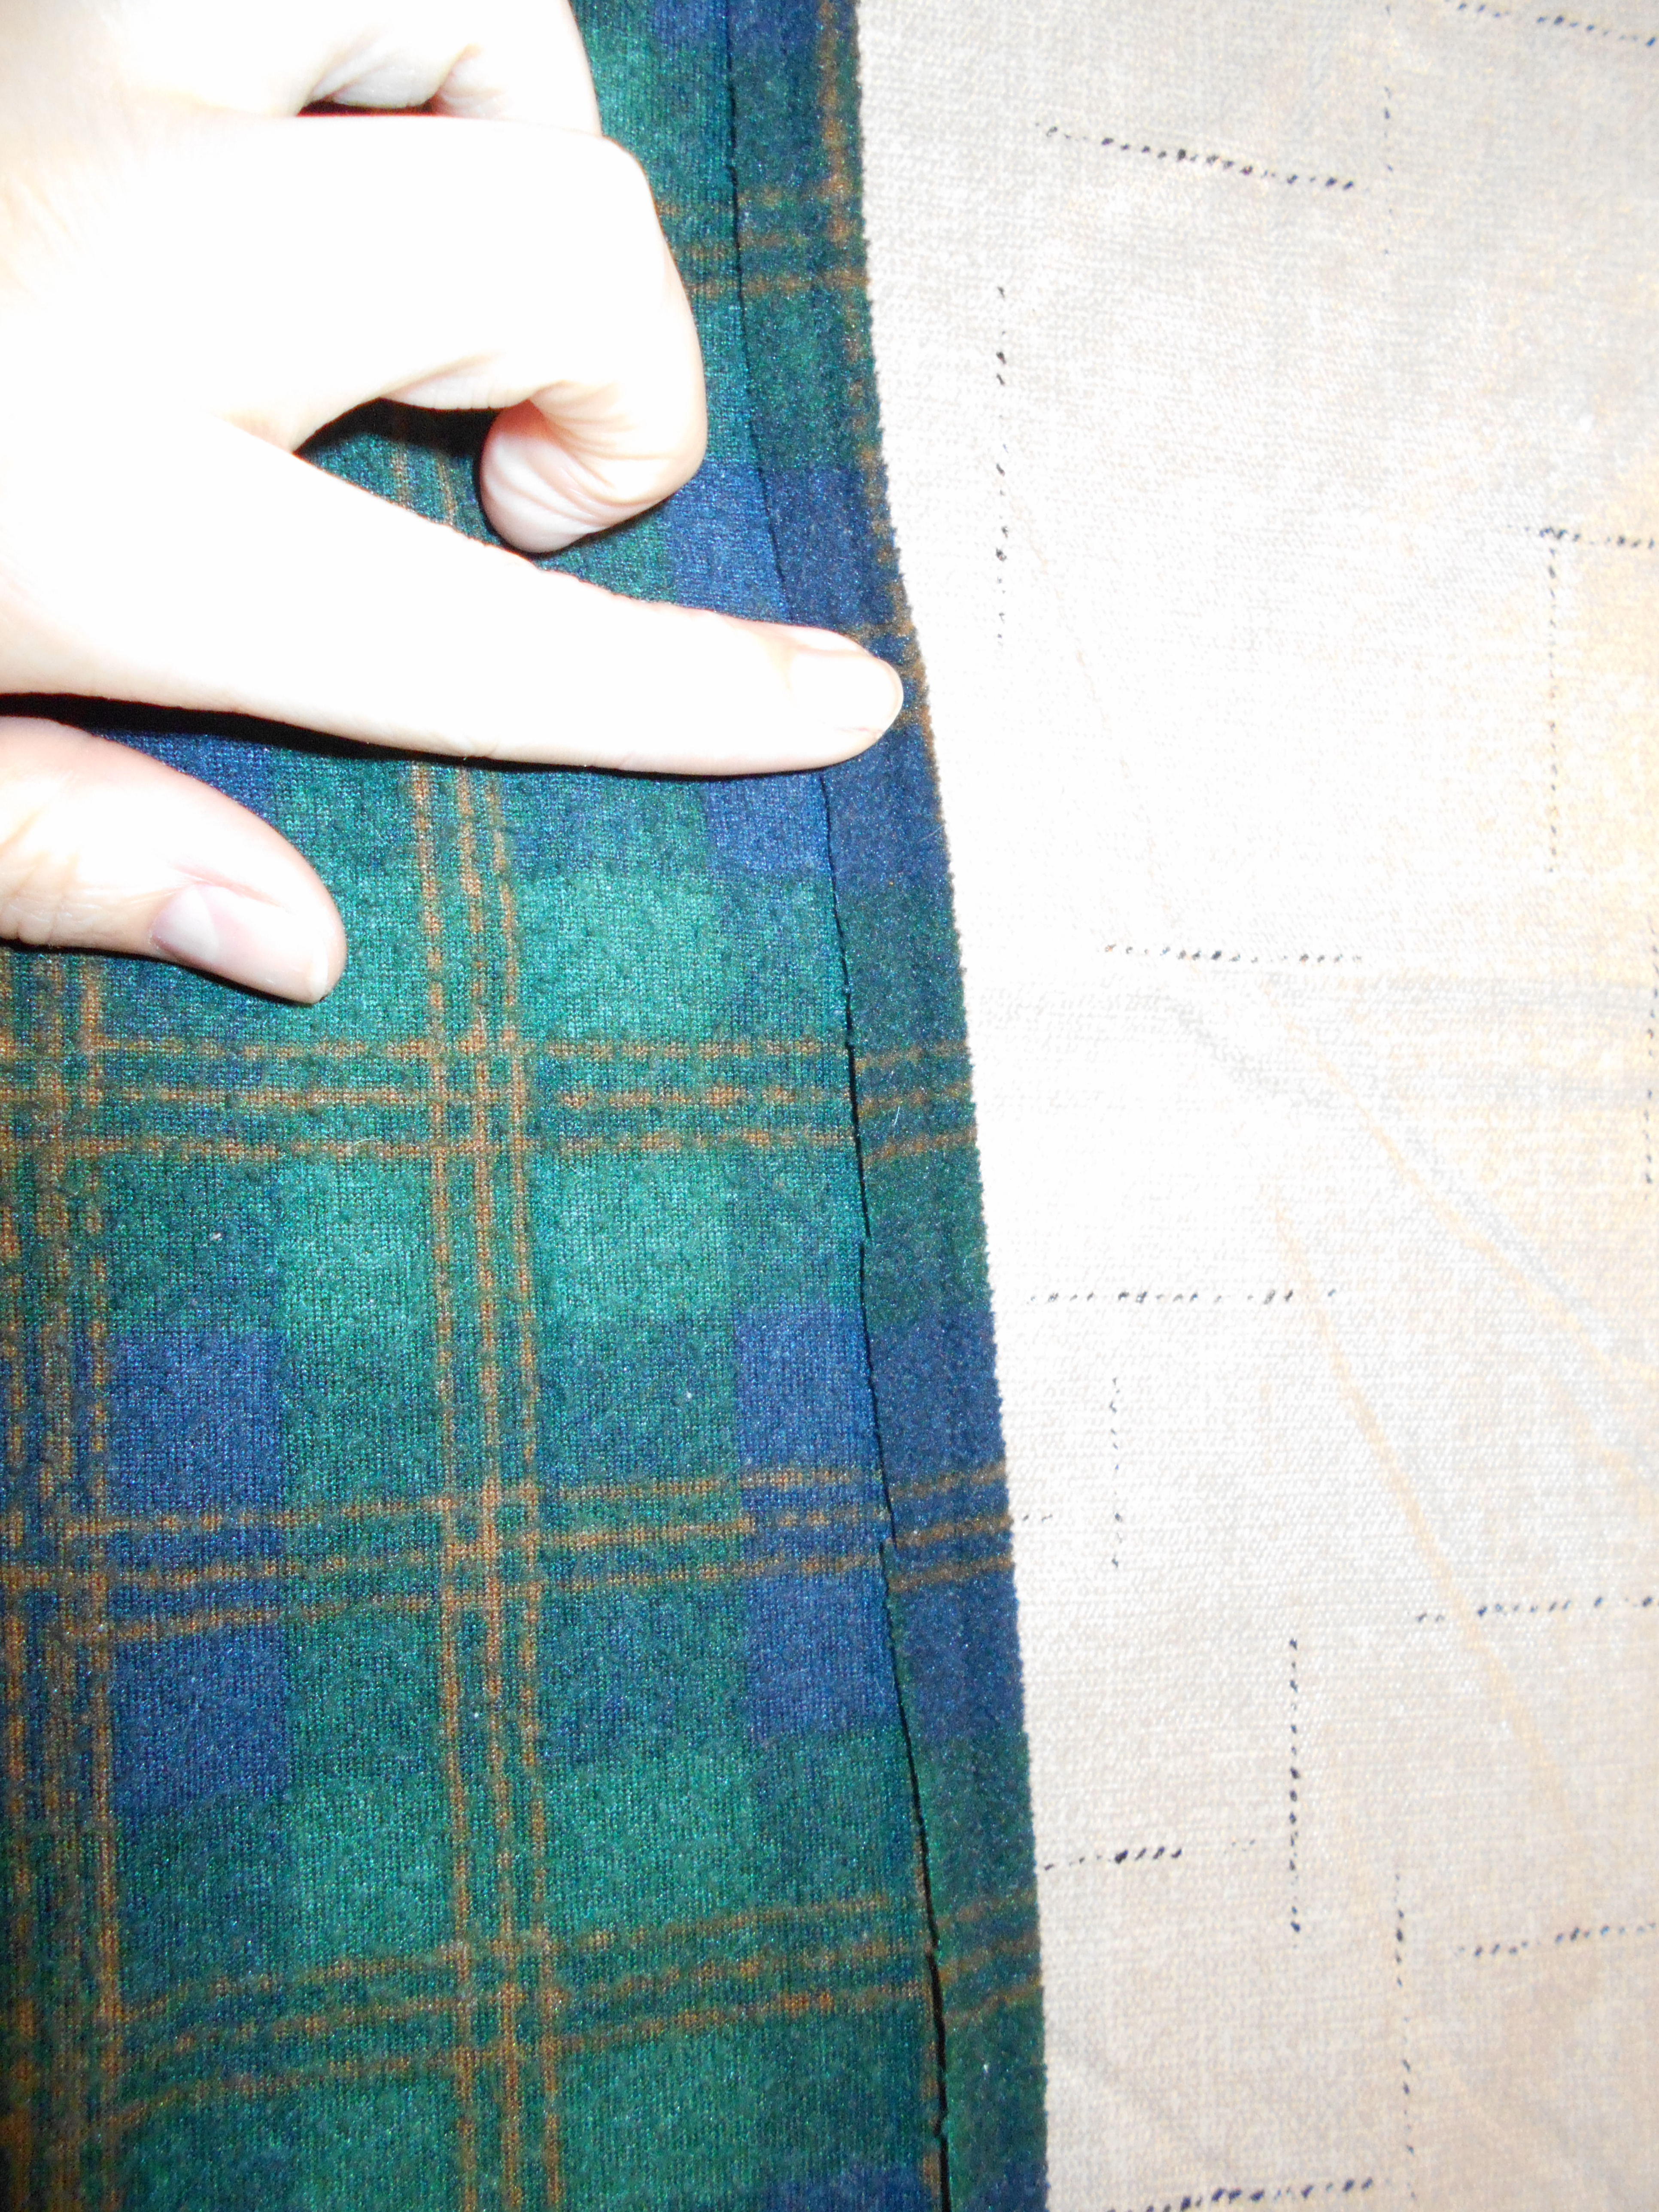
Once all 4 panels were attached I started on sewing the sides.

DSCN1465
Once my side seams were done I laid out the piece (outsides together) and made one last stitch to combine and make it a circle. Once that was done my infinity scarf was complete!
This project took me a total of an hour. I would say that was pretty fast seeing as I had to stop every now and then to take pictures!

IMG_0714[887]

2018-29-01-20-09-47

Happy Refashioning!!!

Check out my stash of refashions on my blog!

Friday, January 26, 2018

The Shawl Skirt

Hello Refashion Co-op. Sometimes I like clothing items but never wear them. That was the case with this green and blue shawl. It was really nice heavy material and the colors were bright and cheerful. But I never wore it.
 
 
It buttoned up the front and it was soft and cozy. And it has been in my closet for a couple years just waiting to get out and live a little.

 
I opened it up and used my dress form to make a skirt shape. I put the shawl on the dress form inside out and just started pinning.

 
I also sewed the whole thing shut because I like how wrap skirts look but I don't really trust them. The can blow open in a strong breeze and cause extreme embarrassment.

 
Thanks for reading this post, for more pictures and details go to I Can Work With That.


Thursday, January 25, 2018

Un pull un peu sport ........

Je viens un peu moins ici en ce moment mais je dois dire sue je ne pense pas toujours à faire les photos "avant" , lol , je suis assez étourdie ....

Voici un pull un peu sport que j'ai fait en utilisant 2 articles de mon stock, ben oui, pourquoi acheter du tissu si on a ça en stock ??

Les articles de départ :


Un pull écru qui m'a été donné, et un gilet genre boléro acheté sur un coup de coeur mais jamais porté...

Et voici la confection finale qui a nécessité quand même un petit métrage de jersey gris milano....


Alors il vous plaît mon nouveau pull ? 
Si vous souhaitez en savoir plus c'est Ici 
A bientôt , Elisa Elisa 


Wednesday, January 24, 2018

The Caroler Coat

Many years ago I was given a vintage dress coat that swept all the way down to my ankles. It was a pretty gray wool with a dark velvet collar and it flared out into a skirt at the bottom. I called it my caroler coat because it reminded me of something a stereotypical Victorian caroler would wear.


I decided I was going to make this dress coat modern-dress friendly, so that meant shortening it. Honestly this doesn't feel like a real refashion, it’s a hem. But it drastically changed the look for the coat so I say it counts.

For the new length, I decided it should fall at my knees.

You can learn more about how I refashioned the coat and where I wore it on my blog probablyrachel.com.


Staying Warm In White

Hello Refashion Co-op. I have been working on warm clothes for chilly days. I had a big shapeless poncho style sweater. I liked the white color but the baggy poncho shape doesn't work for me.
 
 
I decided to reshape it. I made the arms more defined and I made the body more narrow.
The cut off fabric in the shape of stingrays was a happy accident. Can you see the sting rays? Am I crazy? Because I see sting rays.

 
Anyway, The sweater was more fitted and it seems shorter because it was tighter. I was happy with the end result. It was more flattering now that it wasn't so big and baggy. I wore it to sit on a comfy chair. Outside. No big deal.

 
Thanks for reading this post!

Friday, January 19, 2018

Staying Warm In Blue

Hello Refashion Co-op. It is so cold out right now. All I want to wear are things that will keep me warm. Things like sweaters. I had this nice cozy blue sweater. It had very small arms and a very big body. They didn't seem to go together very well.
 
 
I made new side seams and gave the sweater a more traditional shape. I didn't want it to be tight, I just wanted it to fit better.

 
I also had some fitted black jeans that were too big around the waist. I have a super quick way I fix this problem.

 
I make tucks in the waistband of the pants. I usually make 2 and center them above the back pockets and between the belt loops..

 
I usually end the tuck down in the pockets.

 
The tucks make the waistband lay flat and I can still wear a belt but I don't have too.

 
Thanks for your time, for more pictures and details go to I Can Work With That.

Scarf refashion

Started with an old bra and silk scarf, transformed into a camisole


Wednesday, January 17, 2018

Staying Warm In Green

Hello Refashion Co-op. It is really cold where I live and all I want to do is wear lots of sweaters and be as warm as possible. I went through all my refashion clothes and found some warm clothes to work on. I had some hand-me-downs to start with. This green sweater was from my mom. I loved the color but I didn't like the fit or the fake collar. The pants with the zipper pockets were a great length on me but they were too big and baggy.
 
 
I unpicked all the stitches and removed the collar. I thought the sweater would be easier to wear without it. I also took it in on the sides to make it more fitted.

 
These pants are actually cropped Capri pants but they are the right length on me because I am super short. I took them in on the sides, right behind the side seam. I didn't want to damage or change the zippers on the front or hip pockets. I wanted a skinny jeans type of fit so I could tuck them into boots.

 
I didn't mess-up the zippers! And I liked the new slim fit and I thought I could layer more things on top of them. Like a big cardigan or jacket. I am all about the layers right now. I need blankets, hot cocoa, and lots of layers.

 
Thanks for reading, For more details and pictures go to I Can Work With That.

Monday, January 15, 2018

Un peignoir qui devient robe-doudou .........

Voici à quoi ressemblait mon peignoir avant (photo trouvée sur le net) :


Et voici le peignoir après transformation :


Et si vous voulez en savoir plus, c'est Ici

Merci à vous, et à très bientôt
Bisous , Elisa Elisa