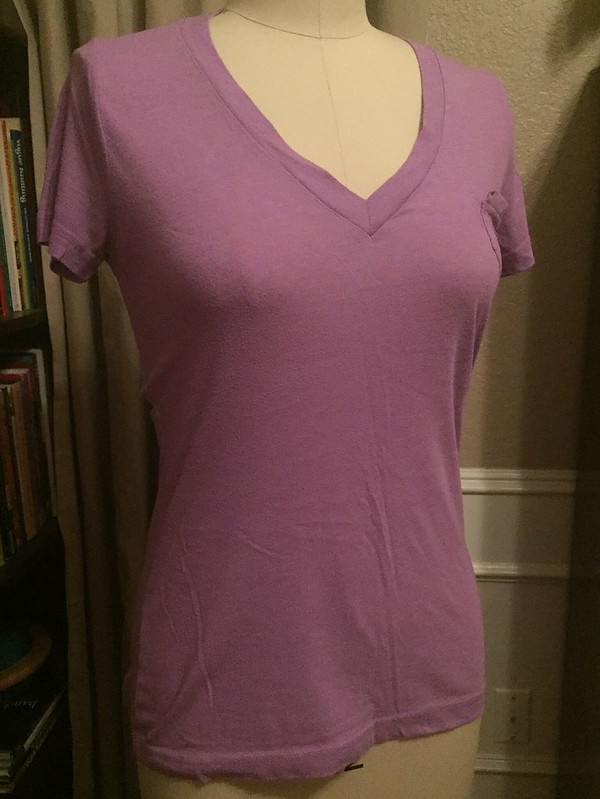
For this week's asymmetrical Refashion Runway challenge, I decided to keep it simple and make over a basic boyfriend tee that fit fine but could use some lovin'.
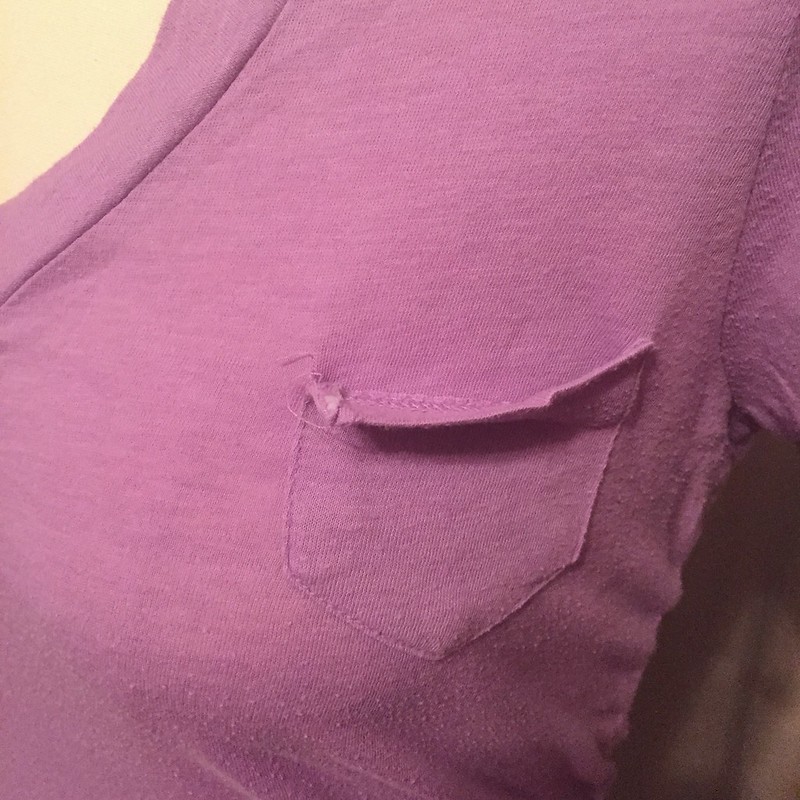
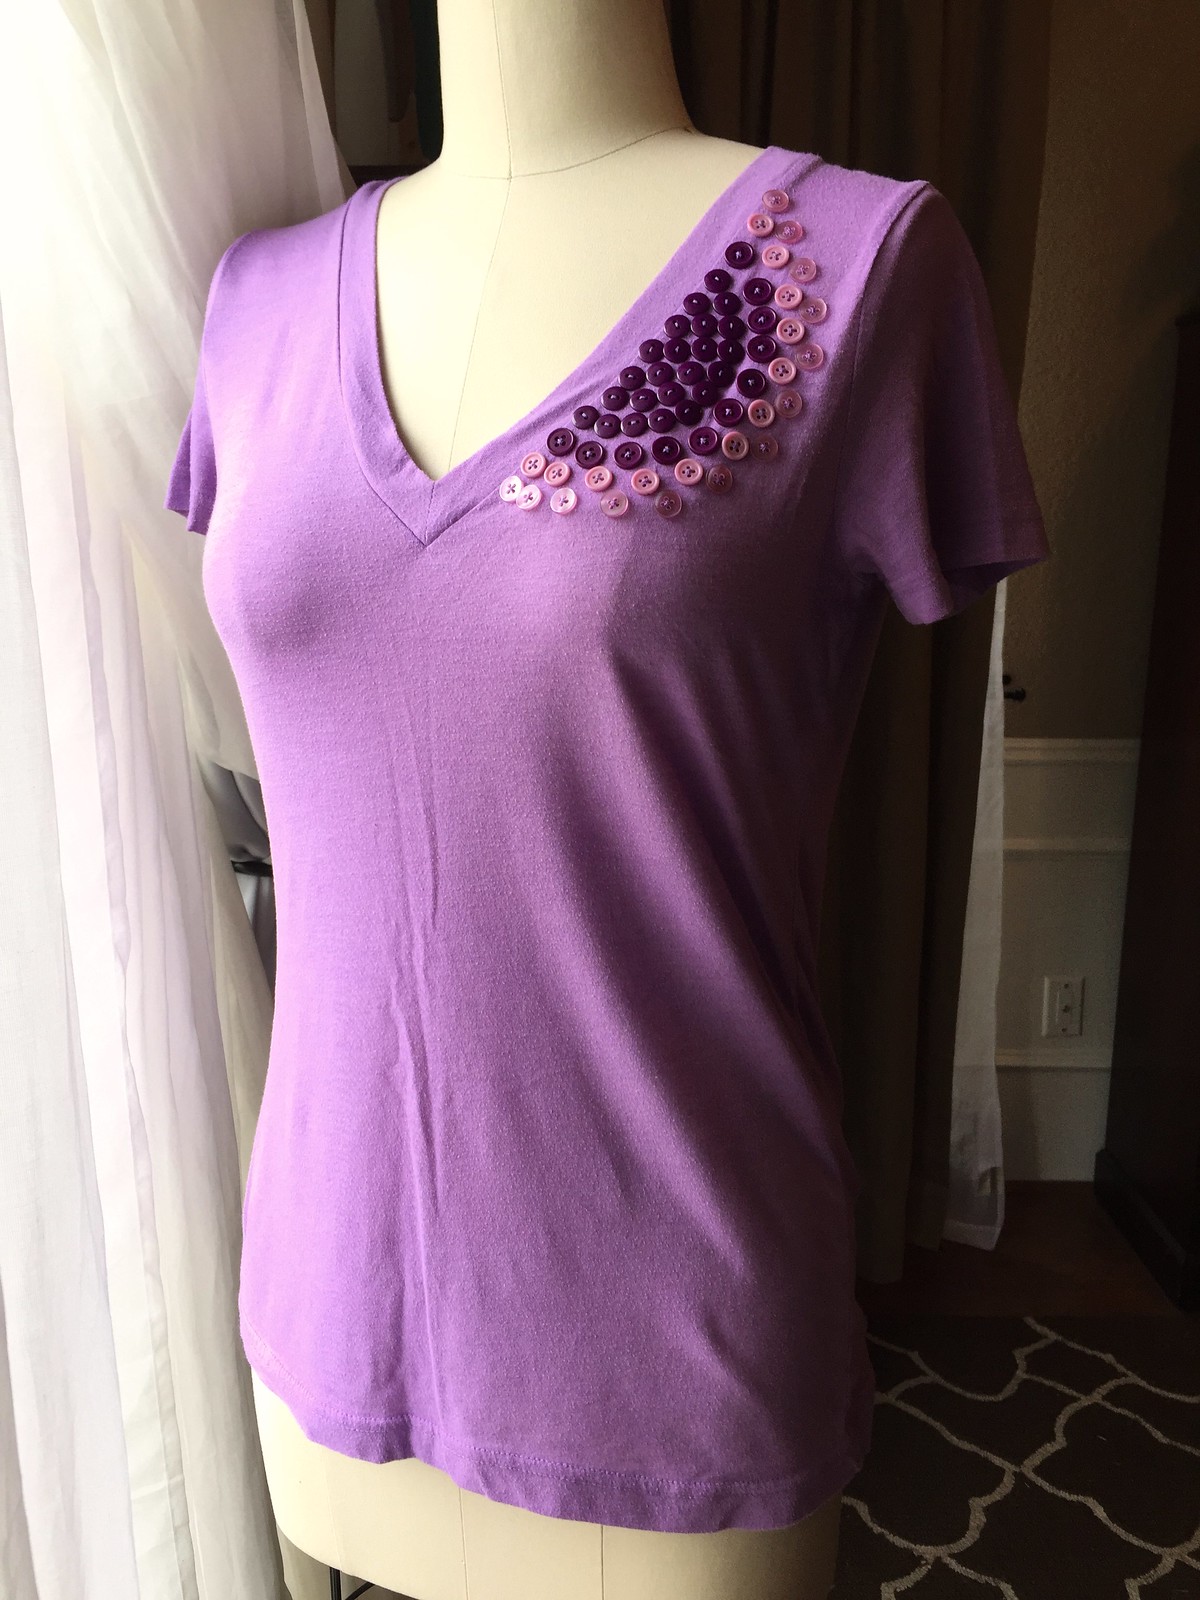
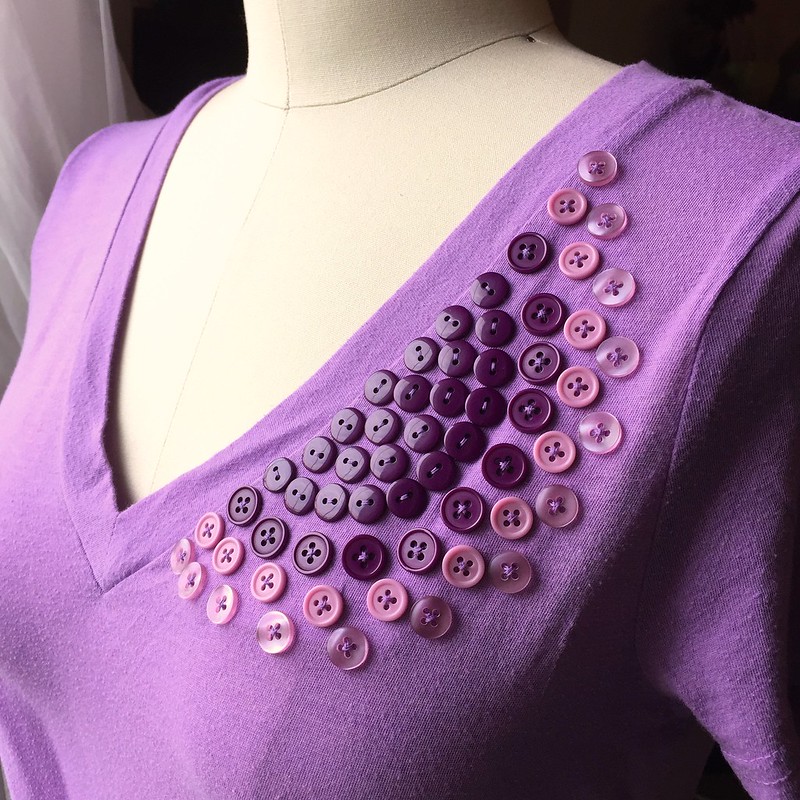
I removed the little pocket that was falling off anyway. Then I started playing around with all the purple buttons in my button stash. Once I had a design I liked, I stitched them onto the shirt, using a remnant of fabric from another project to add stability to the inside of the t-shirt.
As always, you can find more details and photos at CarissaKnits!
Monday, August 31, 2015
National dress refashion
This is a refashion out of the ordinary for me. And one that has been long underway. In fact it was one of the reasons I started refashioning.
My grandmother gave me her folk dress about 10 years ago. I wanted to alter it to fit me, but had difficulty gathering the courage for it. When she died in april, honored be her memory, I decided that now was the time. And that I had the skills now to pull it off.
I took the bodice in at the sides, and altered the garment, so in stead of being a full dress, it is a waistcoat with a skirt, that attaches to it. Everything is hand sewn with linen thread

In the picture I am only wearing the dress, so I could show it.
****But I want to point out that the dress needs to be worn with knitted blouse, apron, shoulder scarf, coif and silver pins to be correct.****
The full outfit will look like this one.
I still need to make the knitted blouse and the coif (unfortunately I wasn't the one, that got my grandmothers amazing coif, that you can see in the blogpost), but they aren't refashions.
My grandmother gave me her folk dress about 10 years ago. I wanted to alter it to fit me, but had difficulty gathering the courage for it. When she died in april, honored be her memory, I decided that now was the time. And that I had the skills now to pull it off.
I took the bodice in at the sides, and altered the garment, so in stead of being a full dress, it is a waistcoat with a skirt, that attaches to it. Everything is hand sewn with linen thread

In the picture I am only wearing the dress, so I could show it.
****But I want to point out that the dress needs to be worn with knitted blouse, apron, shoulder scarf, coif and silver pins to be correct.****
The full outfit will look like this one.
I still need to make the knitted blouse and the coif (unfortunately I wasn't the one, that got my grandmothers amazing coif, that you can see in the blogpost), but they aren't refashions.
For the geeks, here is the full post on the dress and the refashion. It is VERY image heavy:
http://saga-i-farver.blogspot.dk/2015/08/min-farmors-folkedragt.html
http://saga-i-farver.blogspot.dk/2015/08/min-farmors-folkedragt.html
Labels:
Saga
#2 Boxers or Sleep Shorts from Worn Shirt
RanchHouse September Sewing Goal:
Before: A worn casual shirt from the closet that I was not wearing.
After: Back panel boxers for sleep or lounge
Steps:
*Old Shirt to New Boxers: Piece and cut new boxers. Add the red back panel and waistband cut from stash fabric.
*Back Panel Pattern: Pattern from men's boxers was traced onto white pillowcases. There aren't side seams. They can be added in order to piece fabrics.
What I Learned: WHOOPS!!! I laid the new pattern across existing unmatched plaid shirts seams. Theses seams show as unmatched seams in the new boxers.
- Mend, alter, refashion 10 Boxers or Sleep Shorts. This is #2.
- Made from Pre-retirement stash that does not fit the Retirement lifestyle.
- Fit the need for more at-home lounge clothes.
 |
| After: Front WHOOPS!!! Original unmatched side seams show. |
 |
| After: Red Back panel and elastic waistband. No center back seam to ride up. |
Before: A worn casual shirt from the closet that I was not wearing.
After: Back panel boxers for sleep or lounge
Steps:
*Old Shirt to New Boxers: Piece and cut new boxers. Add the red back panel and waistband cut from stash fabric.
*Back Panel Pattern: Pattern from men's boxers was traced onto white pillowcases. There aren't side seams. They can be added in order to piece fabrics.
What I Learned: WHOOPS!!! I laid the new pattern across existing unmatched plaid shirts seams. Theses seams show as unmatched seams in the new boxers.
 |
| Close-up. Men's-wear print echoes the plaid and boxers. |
 |
| Before; Old shirt from the closet. Denim and red fabric audition. |
 |
| Stash Fabric: Stash fabric is folded onto a file folder and stacked onto a bookcase. |
Refashioners 2015 - Alternative Angles
Before and afters - front and back
I have really enjoyed refashion runway and The the refashioners 2015. These talented sewers are so inspirational, who could resist sewing along?
I took this pretty standard men's shirt and flipped it 90 degrees so the sides became the front and back - I'm not particularly recommending this, it was fiddly and took ages, but I'm happy with the end result.
I used the shirt collar for a neckline with and added contrast trim.
I also re-used the pockets to make one central pocket
I'm planning for this to be my men's shirt refashion entry, there are more details of the process here
Sunday, August 30, 2015
REFASHION: Skirts for Shelby
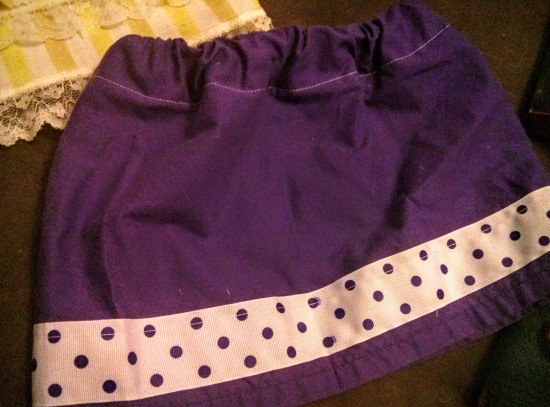
I love making skirts for my 3-year-old niece, Shelby, and what I love more is Shelby loves wearing skirts! Yay! With old bed sheets taking up a ton of room in my stash, I decided matching skirts for my nieces and my sisters. Once I made one simple skirt for Miss Shelby, I needed to make more. The skirts aren't fancy by any means -- simple elastic waist -- but I really enjoy making tiny little skirts.
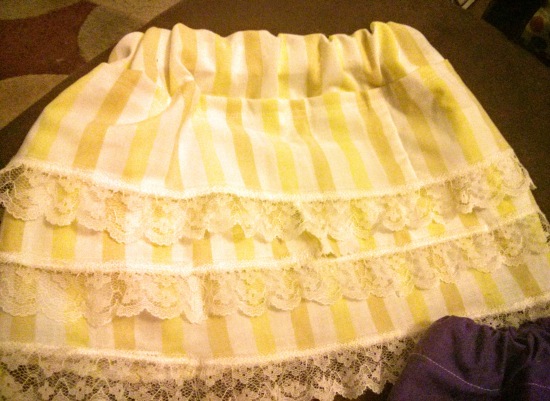
I had some fun with the cute yellow lace skirt made from an old bed sheet that my parents kept from the 1970s. Because the sheet was a little see-through-ish, I created a layered lace skirt using my lace stash and remnants from the other four skirts I made from the sheet. I couldn't complete the skirt in one night since I had to forage for scraps from the other skirts.
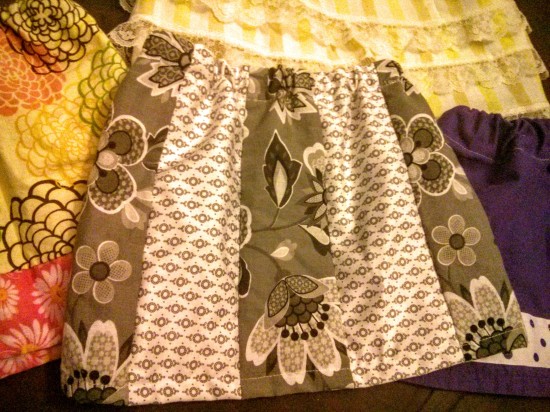
And, finally, Shelby's last skirt was made from another unsuccessful skirt of mine and a remnant from a pillowcase. I cut the contrasting fabrics into three- to four-inch strips and sewed the strips to together -- gray, white, gray, etc. From there, I hemmed the skirt, created a casing, inserted a piece of elastic, and stitched the side seam. Done!
For more awesome pictures and amazing commentary, please click here.
Jennifer Elliott
#1 Boxers or Sleep Shorts from Jacket
RanchHouse September Sewing Goal:
Project Goal: Refashion well worn Pre-retirement jacket into Boxers.
Before: I refashioned this jacket when my aunt handed it down to me. I then taught in it for at least 10 years.
After: Back panel boxers. This project reminds me of memories that go into quilting from family clothing. I like that I was able to use the jacket worn by both my aunt and by me.
Steps:
*Old Jacket: Piece and cut new boxers.
Add the red waistband cut from stash fabric.
*Back Panel Pattern: Pattern from men's boxers were traced onto white pillowcases. There aren't side seams, they can be added to piece fabrics.
What I Learned: This jacket yielded less fabric due to seams, darts, pockets. The back-panel boxer worked around limited fabric yield.
- Mend, alter, refashion 10 Boxers or Sleep Shorts. This is #1.
- Made from Pre-retirement stash that does not fit the Retirement lifestyle.
- Fit the need for more at-home lounge clothes.
Project Goal: Refashion well worn Pre-retirement jacket into Boxers.
 |
| After: Back panel boxers. |
Before: I refashioned this jacket when my aunt handed it down to me. I then taught in it for at least 10 years.
After: Back panel boxers. This project reminds me of memories that go into quilting from family clothing. I like that I was able to use the jacket worn by both my aunt and by me.
Steps:
*Old Jacket: Piece and cut new boxers.
Add the red waistband cut from stash fabric.
*Back Panel Pattern: Pattern from men's boxers were traced onto white pillowcases. There aren't side seams, they can be added to piece fabrics.
What I Learned: This jacket yielded less fabric due to seams, darts, pockets. The back-panel boxer worked around limited fabric yield.
 |
| Before: Jacket with at least 20 years family history. |
 |
| New Back Panel Pattern: Traced from men's white cotton boxers. |
 |
Ideas for Boxers:
|
Une veste + une chemise + un tee-shirt = 1 sac !
Pour offrir à une amie , j'ai fait un petit sac en partant d'un tee-shirt avec un joli motif .
Voici les différents éléments avant :
Et voici le résultats après plusieurs heures de travail :
Si vous voulez en voir plus c'est Ici
A très bientôt,
Elisa Elisa
Voici les différents éléments avant :
Et voici le résultats après plusieurs heures de travail :
Si vous voulez en voir plus c'est Ici
A très bientôt,
Elisa Elisa
Saturday, August 29, 2015
Refashion Runway Challenge 6: Asymmetry
Well, all good things must come to an end... I was eliminated from Refashion Runway this morning. I'm gonna miss looking at my phone first thing on Saturday morning to see if Beth had posted all the girls' refashions yet. It's a little bittersweet. It was a super fun ride!
For the final challenge I was inspired by a Donna Karan numba I saw on pinterest :)
For the final challenge I was inspired by a Donna Karan numba I saw on pinterest :)
It's simple, yet fabulous... I found an equally fabulous frock for .99 cents. Though it didn't turn out exactly like the inspiration piece, I'm quite happy with it :) I have a full tutorial on my blog site.
If you haven't seen Gema, Kara, or Sarah's refashions for this week's Asymmetric Challenge, you need to head over there now and cast your vote. You won't be disappointed in their creations! :)
Summer showers!
Sadly we've had far too many of those in the UK recently - I mean, WHERE IS OUR SUMMER? I honestly feel cheated.
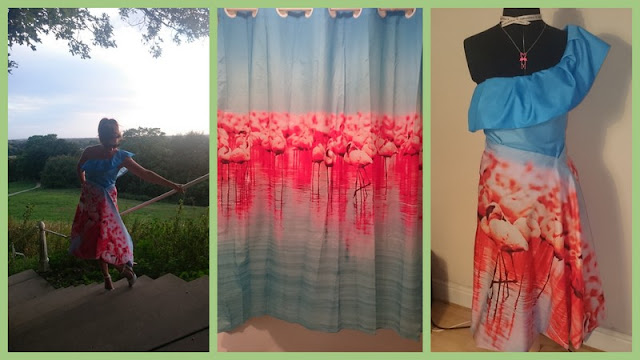
Anyway, it seems like the perfect reason to create something shower-proof, but summery, for the last ever challenge in this year's Refashion Runway! I've loved every moment, every single project that each of the refashioners have made, and reading all the back stories to their creations. It's been a fabulous thing to be a part of... and I'm really going to miss it. I'm hoping to continue in the same vein, setting myself targets - and creatively exploring new areas... it's been a great journey for me, personally. ANYWAY! Sew to the final piece, in the asymmetrical challenge...
I started with a shower curtain. (well I did say I wanted something water proof...)
You can see I've got a great piece of material to work with here... and also a couple of hurdles to overcome. If you want to know more about ironing polyester coated plastic (!), creating a sturdy bodice, draping, hand stitching finer details, and more, then head over to my blog to see how this panned out. I won't go into every detail here - it'll go on forever!!
But here are a few bits... creating the ruffle...
Making a bubble hem for the skirt...
And some experimenting that lead to the final piece...
Here's the asymmetrical dress I entered into the final of this year's Refashion Runway...
(it was a windy day!!)
And the obvious Before and After shot;
The other two ladies have created BEAUTIFUL dresses, and I don't honestly feel I should be in the final three... but, as I've said in the comments on the post, I'm happy to play bridesmaid to them both, knowing that I've made some firm friends on this refashioning journey!
Take a look, and cast your vote for whichever one you're most moved by. I have my favourite...but I'm not telling here ;) And for more info on how my dress came together, visit my blog!
Thank-you x
Gema
Labels:
Gema
How not to make a bleach-stencil T-shirt
What follows is the story of a refashion (actually 2) gone terribly wrong.
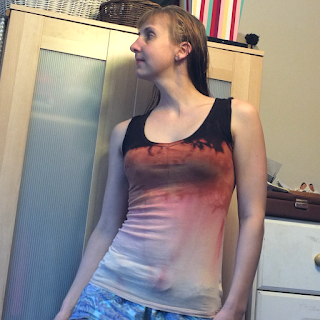
I started with this plain old black T-shirt...
And proceeded, after a failed attempt at stenciling a bird graphic onto it, to mangle it into this poorly dip-dyed tank top:
I would shamefully hide this refashion forever, except that I learned a few valuable lessons along the way, which I hope will be helpful to other crafters out there! I share interesting facts about bleach, stencils, and even a bonus about calligraphy ink!
Read it all at The Unfashionista blog!
A dress become gifts
Hi
It's gifts I made with the fabric of à dress
My blog : madeinliochka.blogspot.fr.
Sorry my computer is out! I cant make links
Xoxo
Friday, August 28, 2015
Getting the Maximum Use Out of a Maxi
One of my top three posts of all time on my blog is What to Wear to a Graduation. In that post I not only shed some light on what I consider to be appropriate attire for graduation ceremonies, I debuted the first maxi dress that I ever bought.
After a handful of wears in the course of a couple of years, I realized that I wasn't getting the maximum use out of the dress.
So I sat down with it and 15 minutes later, I had the perfect maxi skirt for a work cookout.
After a handful of wears in the course of a couple of years, I realized that I wasn't getting the maximum use out of the dress.
So I sat down with it and 15 minutes later, I had the perfect maxi skirt for a work cookout.
For more pictures and my four easy refashion steps, check out my blog, probablyrachel.com.
Thursday, August 27, 2015
Rhapsody in blue!
I find dyeing clothes quite fun. The fun is about transforming your clothes batch-style! For a while, I had been collecting a pile of clothes I wanted to dye in different colours and the rainy weather was holding me back since it is always best to line-dry dyed clothes for the first time. Once the weather changed, it was time for our vacation, so this post was pending for a while now. Nevertheless, I would like to share a part of my dyeing adventure with you – and for this I chose the use of double batch of Iberia electric blue and a pile of clothes, including:
- Men’s brown polo (the colour my husband wouldn’t wear)
- Men’s bright green polo (with stains)
- Khaki t-shirt with netting (the colour made me wear it… never)
- A very pale cotton summer dress (looked like a night gown)
- Woman’s lavender cotton shirt (with bleach stains)
I have prepared the clothes for dyeing according to directions, while you can check here how I prepped the dress for dyeing. It was transformed from a plain and boring piece into something that I actually like wearing.

