Wednesday, January 30, 2019

The Gaping Waistband

Hello Refashion Co-op. I wanted some new black jeans. My current pair of black jeans was very old and faded. I was really motivated to  make these jeans I found at a clothes swap fit well.


 I hate when jeans fit everywhere but the waistband hangs open in the back, or the front.
 

 I took the sides in a little. That helped but didn't fix the whole fit problem.


To fix jeans like this I like to make 2 tucks in the back of the jeans, right at the waistband and tapering down into the pockets. The pocket help hide the tucks themselves and any imperfections in the tucks.


I don't alter the pockets I just make a tuck behind the pockets. It's fast and easy.


I was happier and more comfortable with these jeans now that they fit so much better. 


Thanks for reading along, for more details and pictures go to I Can Work With That.

Sunday, January 27, 2019

New Years Fail Refash

I  originally planned for this to be my New Years Eve dress but by the time I finished it and put it on for my New Years Eve Party, I realized that it was just too tight in the hips. So sadly I did not start my 2019 with a new refash.
I left this alone for awhile until I calmed down enough to try and fix this refash. Here is what I came up with.
Back in 2017 I used the sleeves on this dress for my Morticia Addams dress.
dscn1735
This is what as left over from then. Not much was needed to save this dress.
dscn1736
I stitched a new hem for the armholes. This is when I tried this on and realized it was a little bit too tight in the hips and would be too uncomfortable to wear all night. I admit I got very frustrated and almost threw this project in the trash.
Luckily I came to my senses and just put it on the hanger for a later date.
dscn1737
The day finally came where I got the inspiration to fix this project. I would turn this dress into a sort of peplum shirt. I cut the dress in half which meant I also had to cut the zipper too! Yikes!
dscn1738
After I cut the dress in half I cut some more off the top of the bottom scrap. This was to make the portion for the peplum I would be adding.
dscn1739
I sewed a new hem onto the top of the dress, mostly to make a new stop for the zipper.
dscn1740
I folded the peplum piece inside out and pinned it to the top. I kept the back slit of the dress and made sure it would be in the front of the shirt but off center. I then I hand sewed 2 big black buttons to accent the slit in the front.
A close up view of the buttons!
A fancy brand new shirt that I could wear when my hubby took me to see The Russian Ballet perform Swan Lake! My very favorite ballet!
Happy Refashioning!!!
Check out my stash of refashions on my blog!

Wednesday, January 23, 2019

Mad For Plaid

Hello Refashion Co-op. It is cold outside and that means it is perfect timing for a wool refashion. I found this great wool skirt at a clothes swap.


I decided to shorten the skirt a lot. It was thick fabric and after I cut it, it needed to be evened up and hemmed. There was a lot of leftover fabric for me to play with.


I wanted the scarf to wrap around my neck once and I wanted to keep that fringe. I also wanted the skirt to be shorter and more fun. They could easily be worn separately which is nice because that scarf is really warm!


Thanks for reading along, for more pictures and details go to I Can Work With That.

Sunday, January 20, 2019

A Very Late Christmas Refash

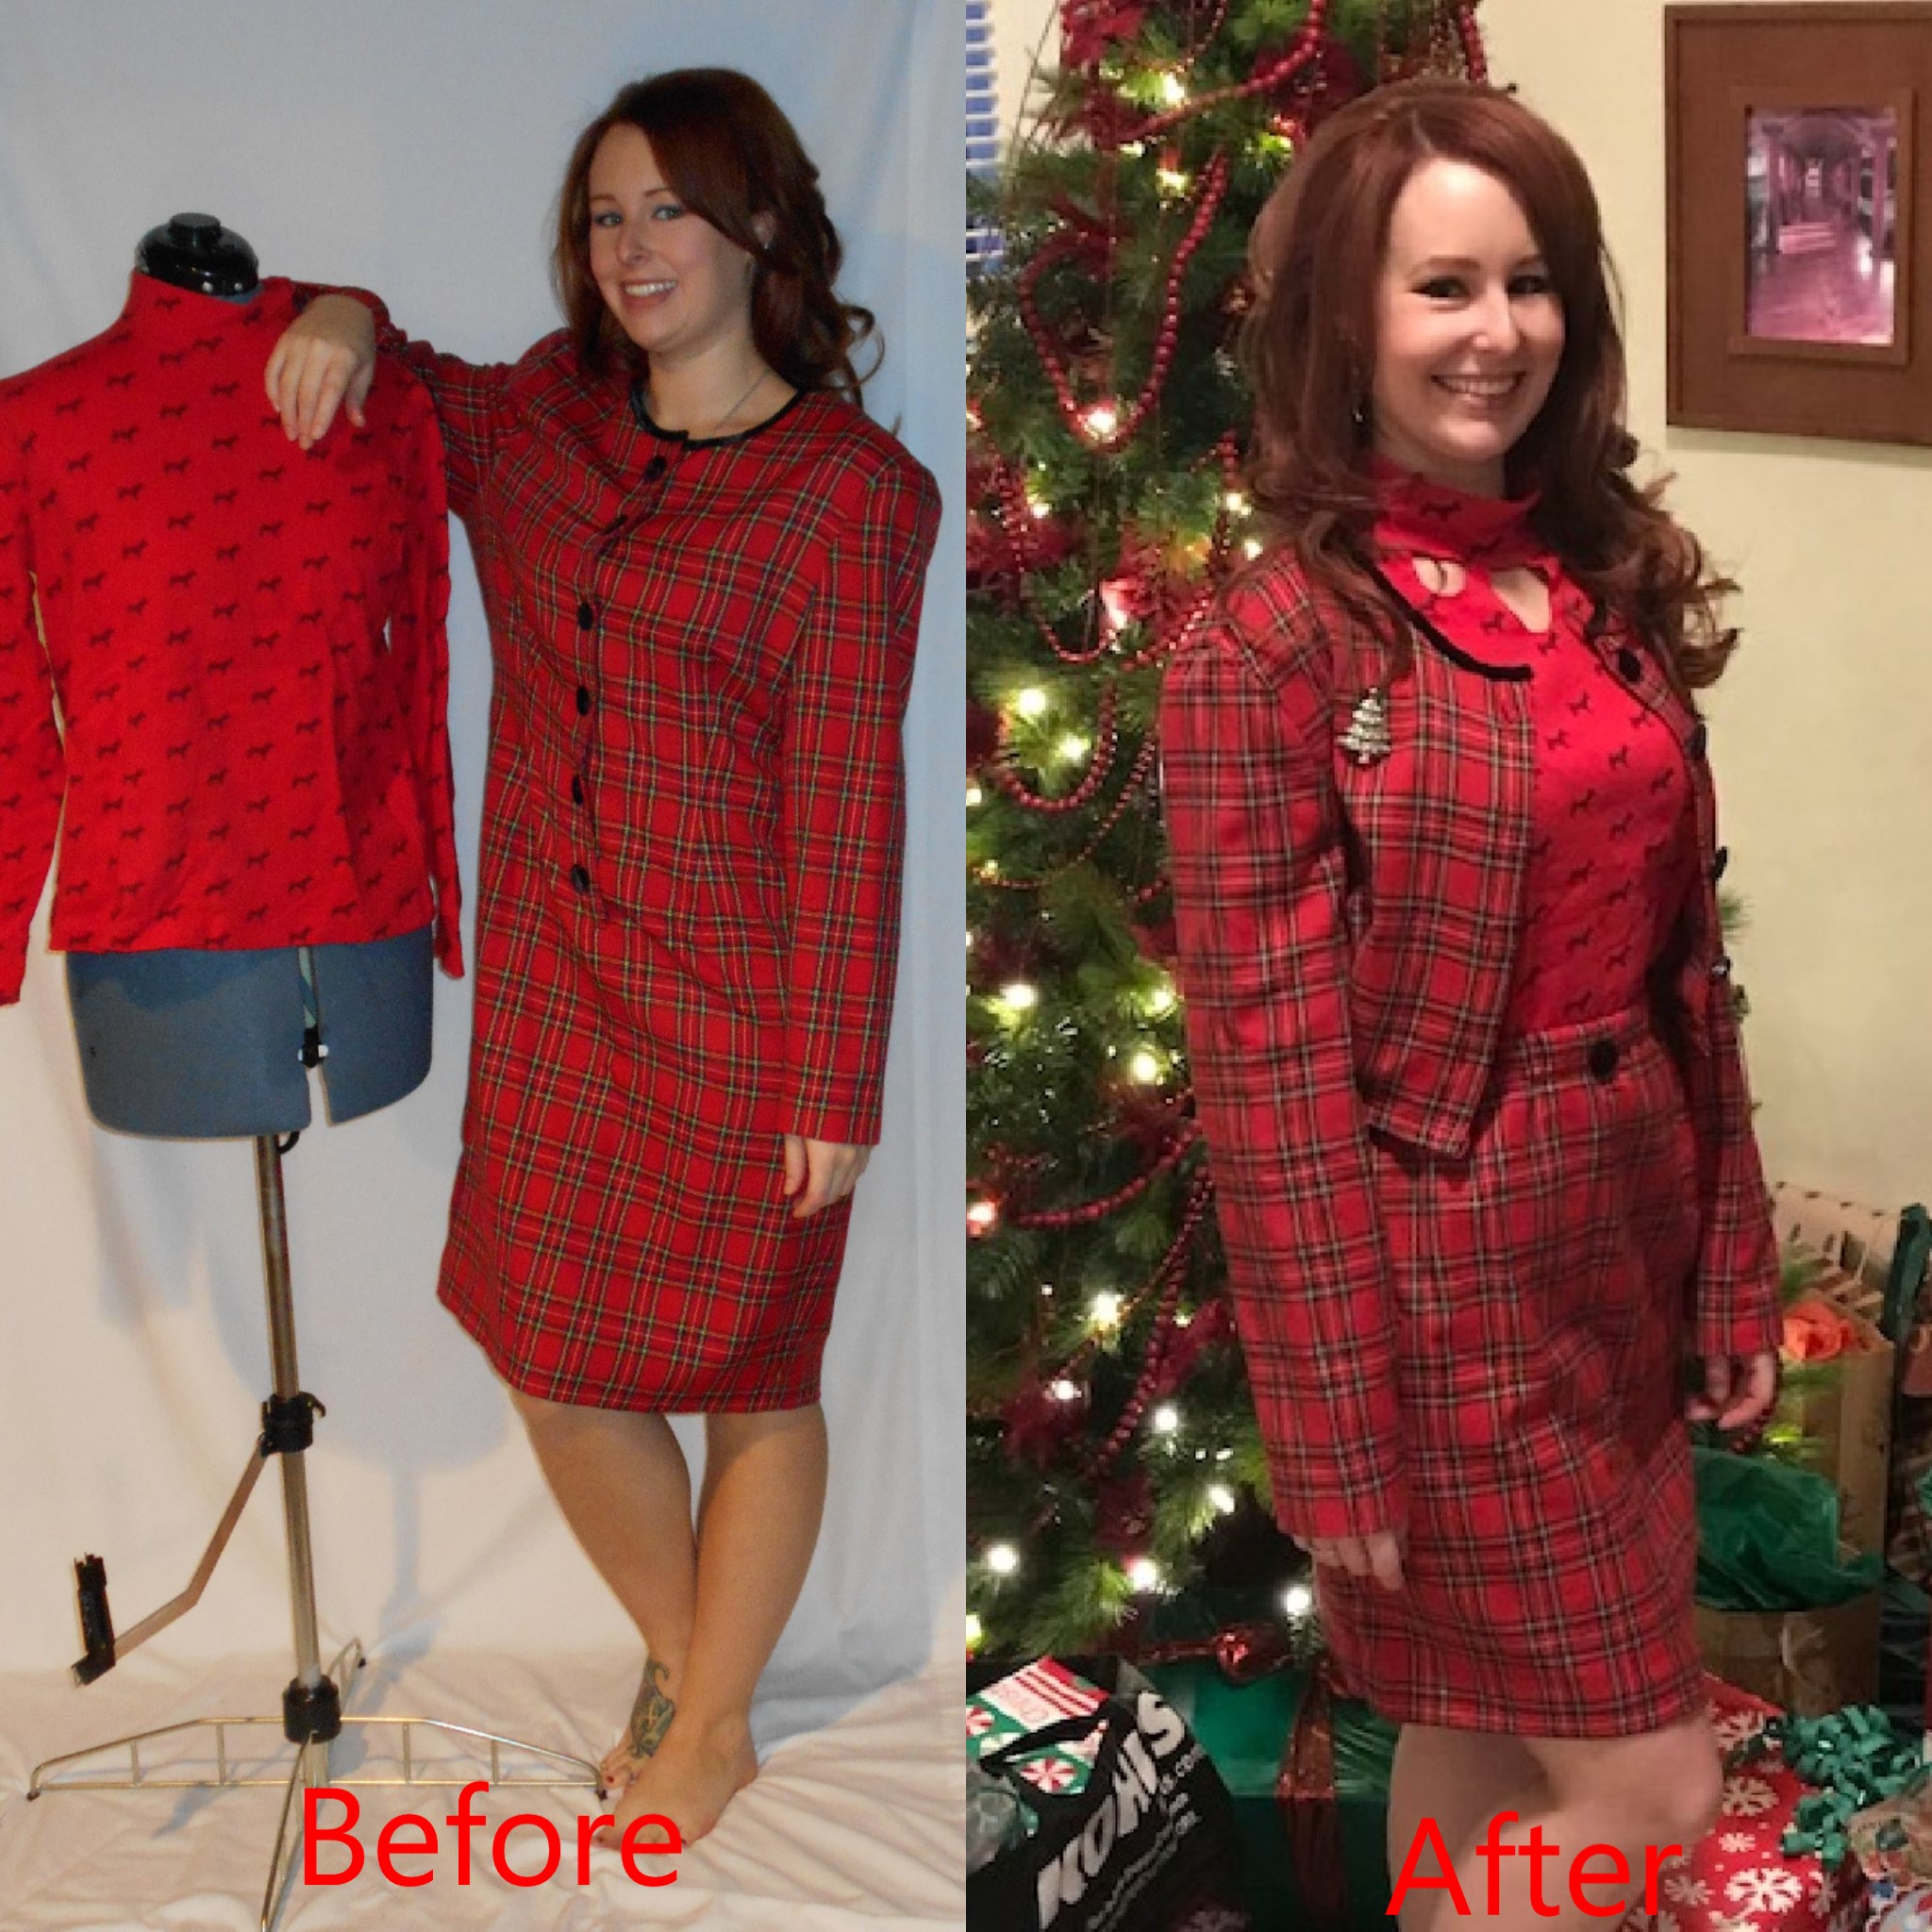
First of all, I hope every enjoyed their Holidays! I had a wonderful time with my family but it feels good to get back into a normal routine. Don't worry, I have a Christmas refashion for you. I did not forget!
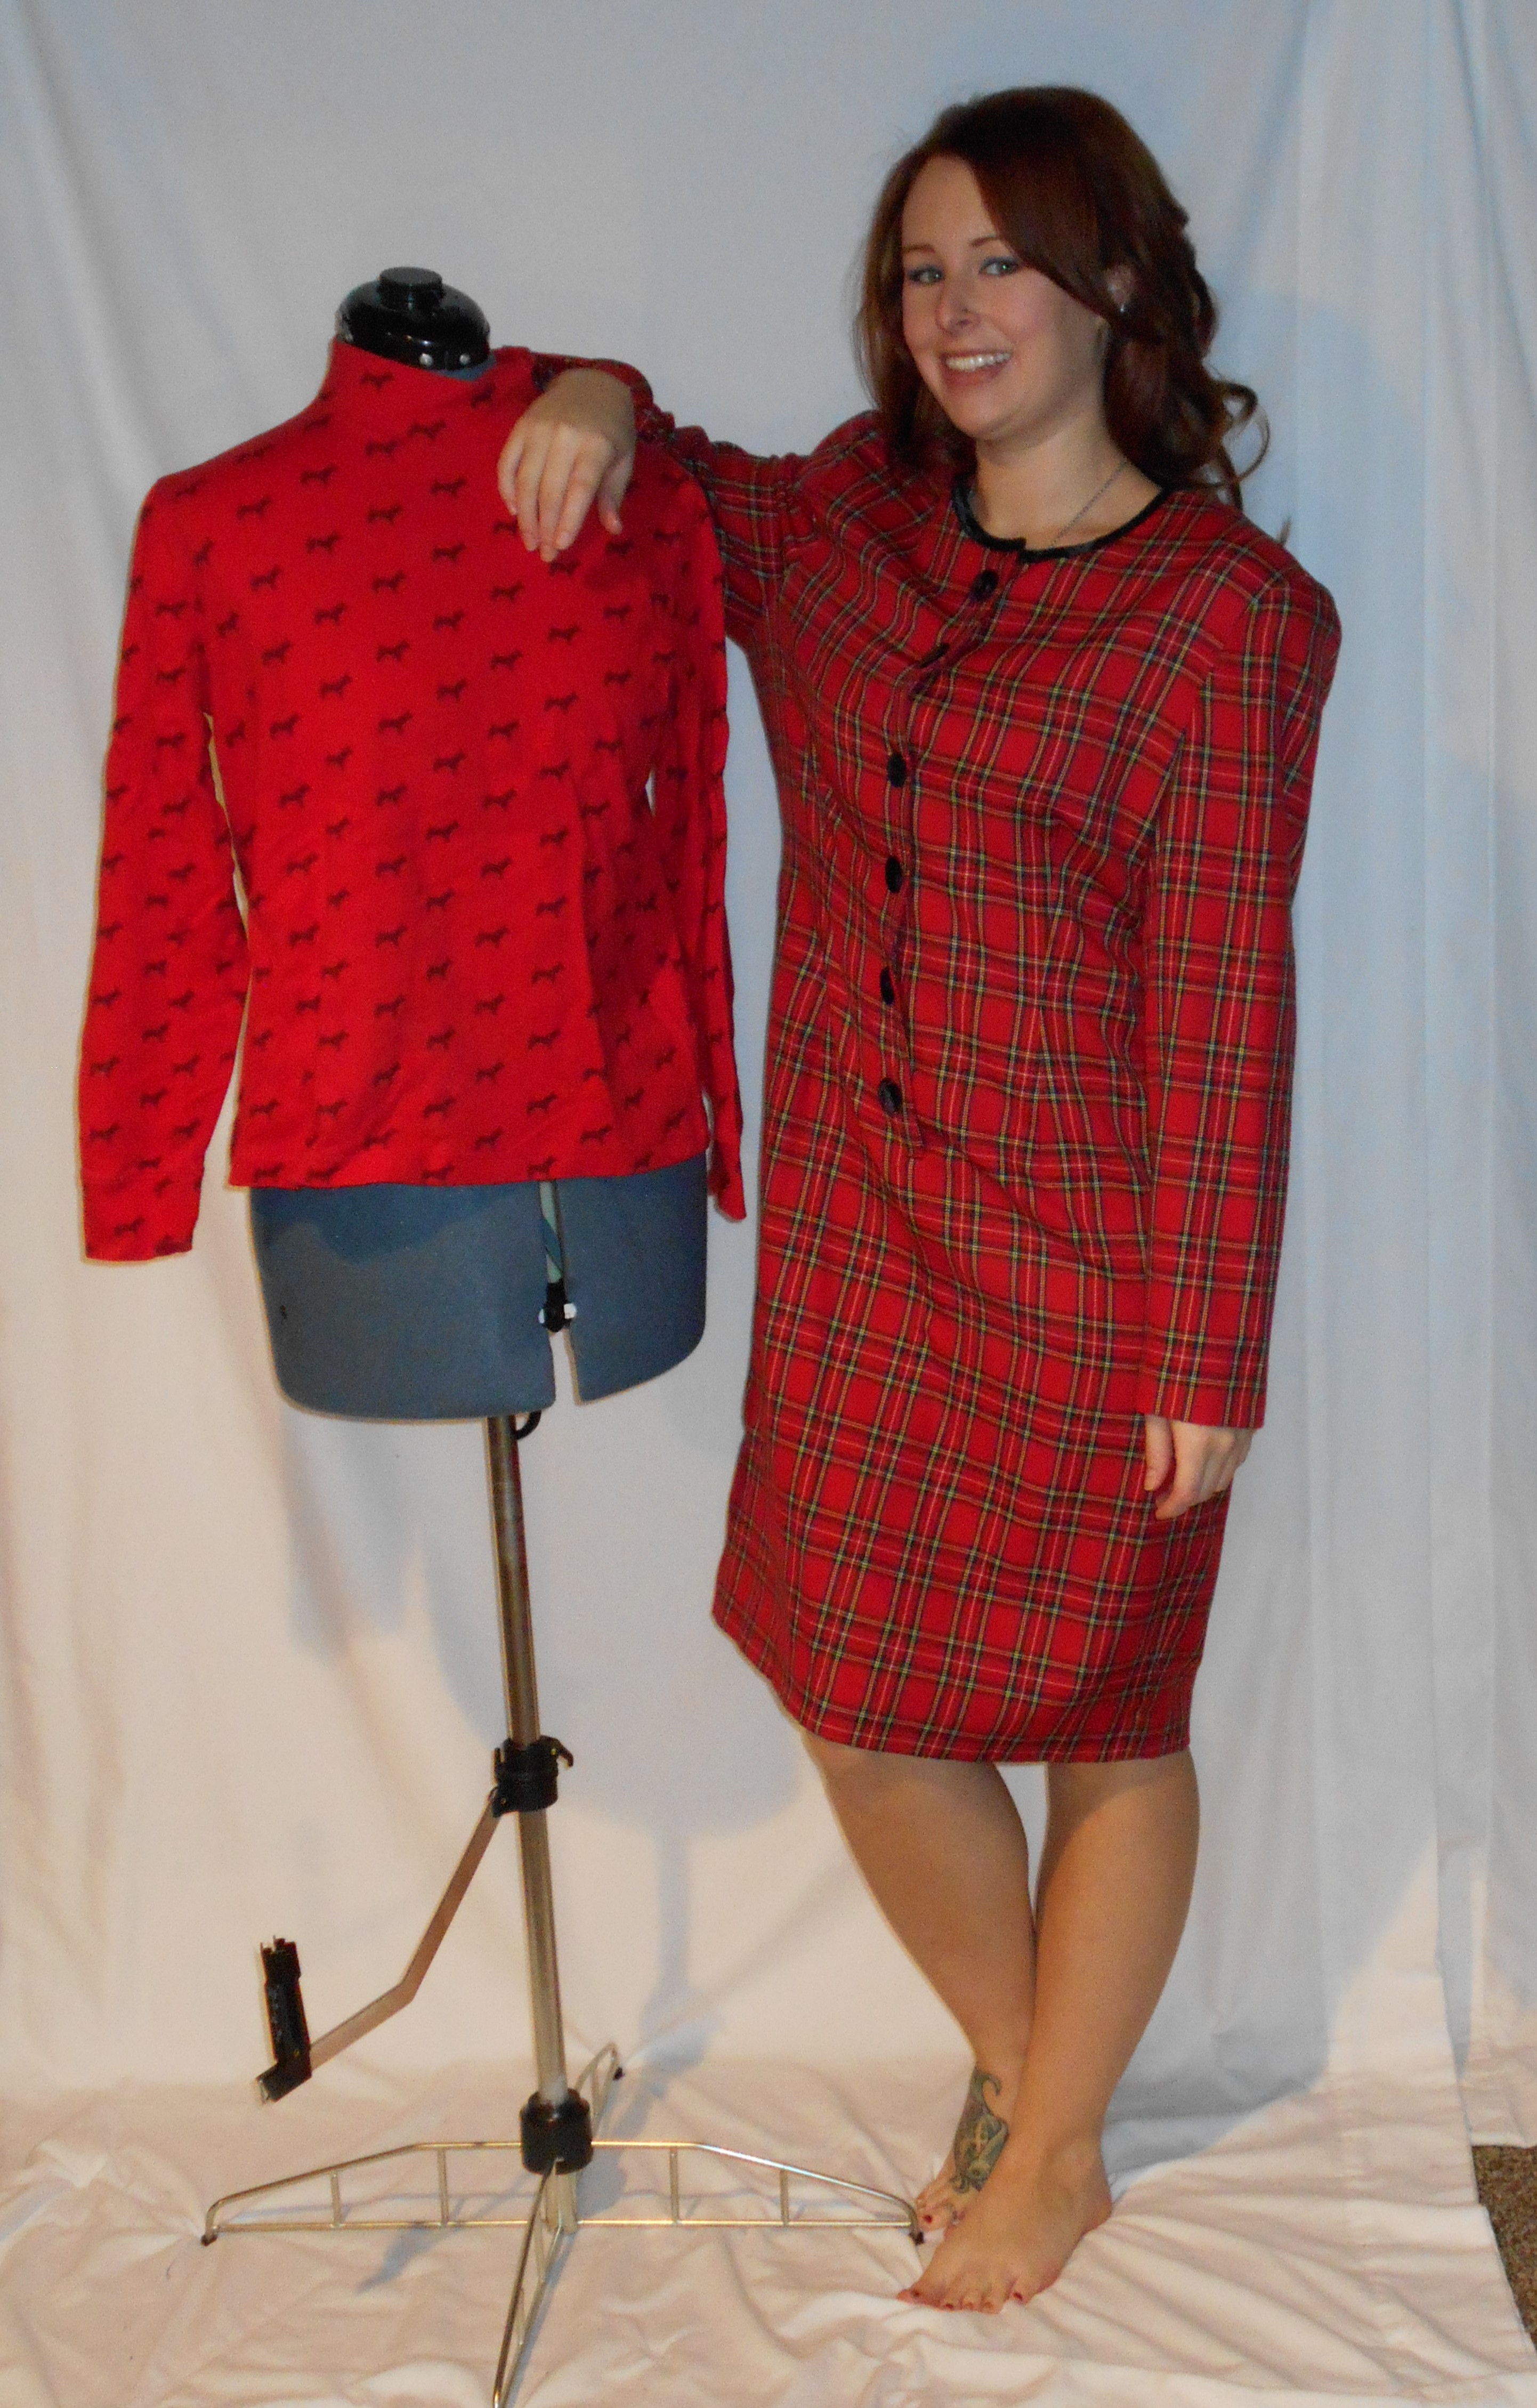
I had this plaid dress and scottie dog print shirt for sometime now and I had always wanted to incorporate the two together. Here was my chance!
dscn1719

dscn1720
First thing is first! Away with the shoulder pads!

dscn1721
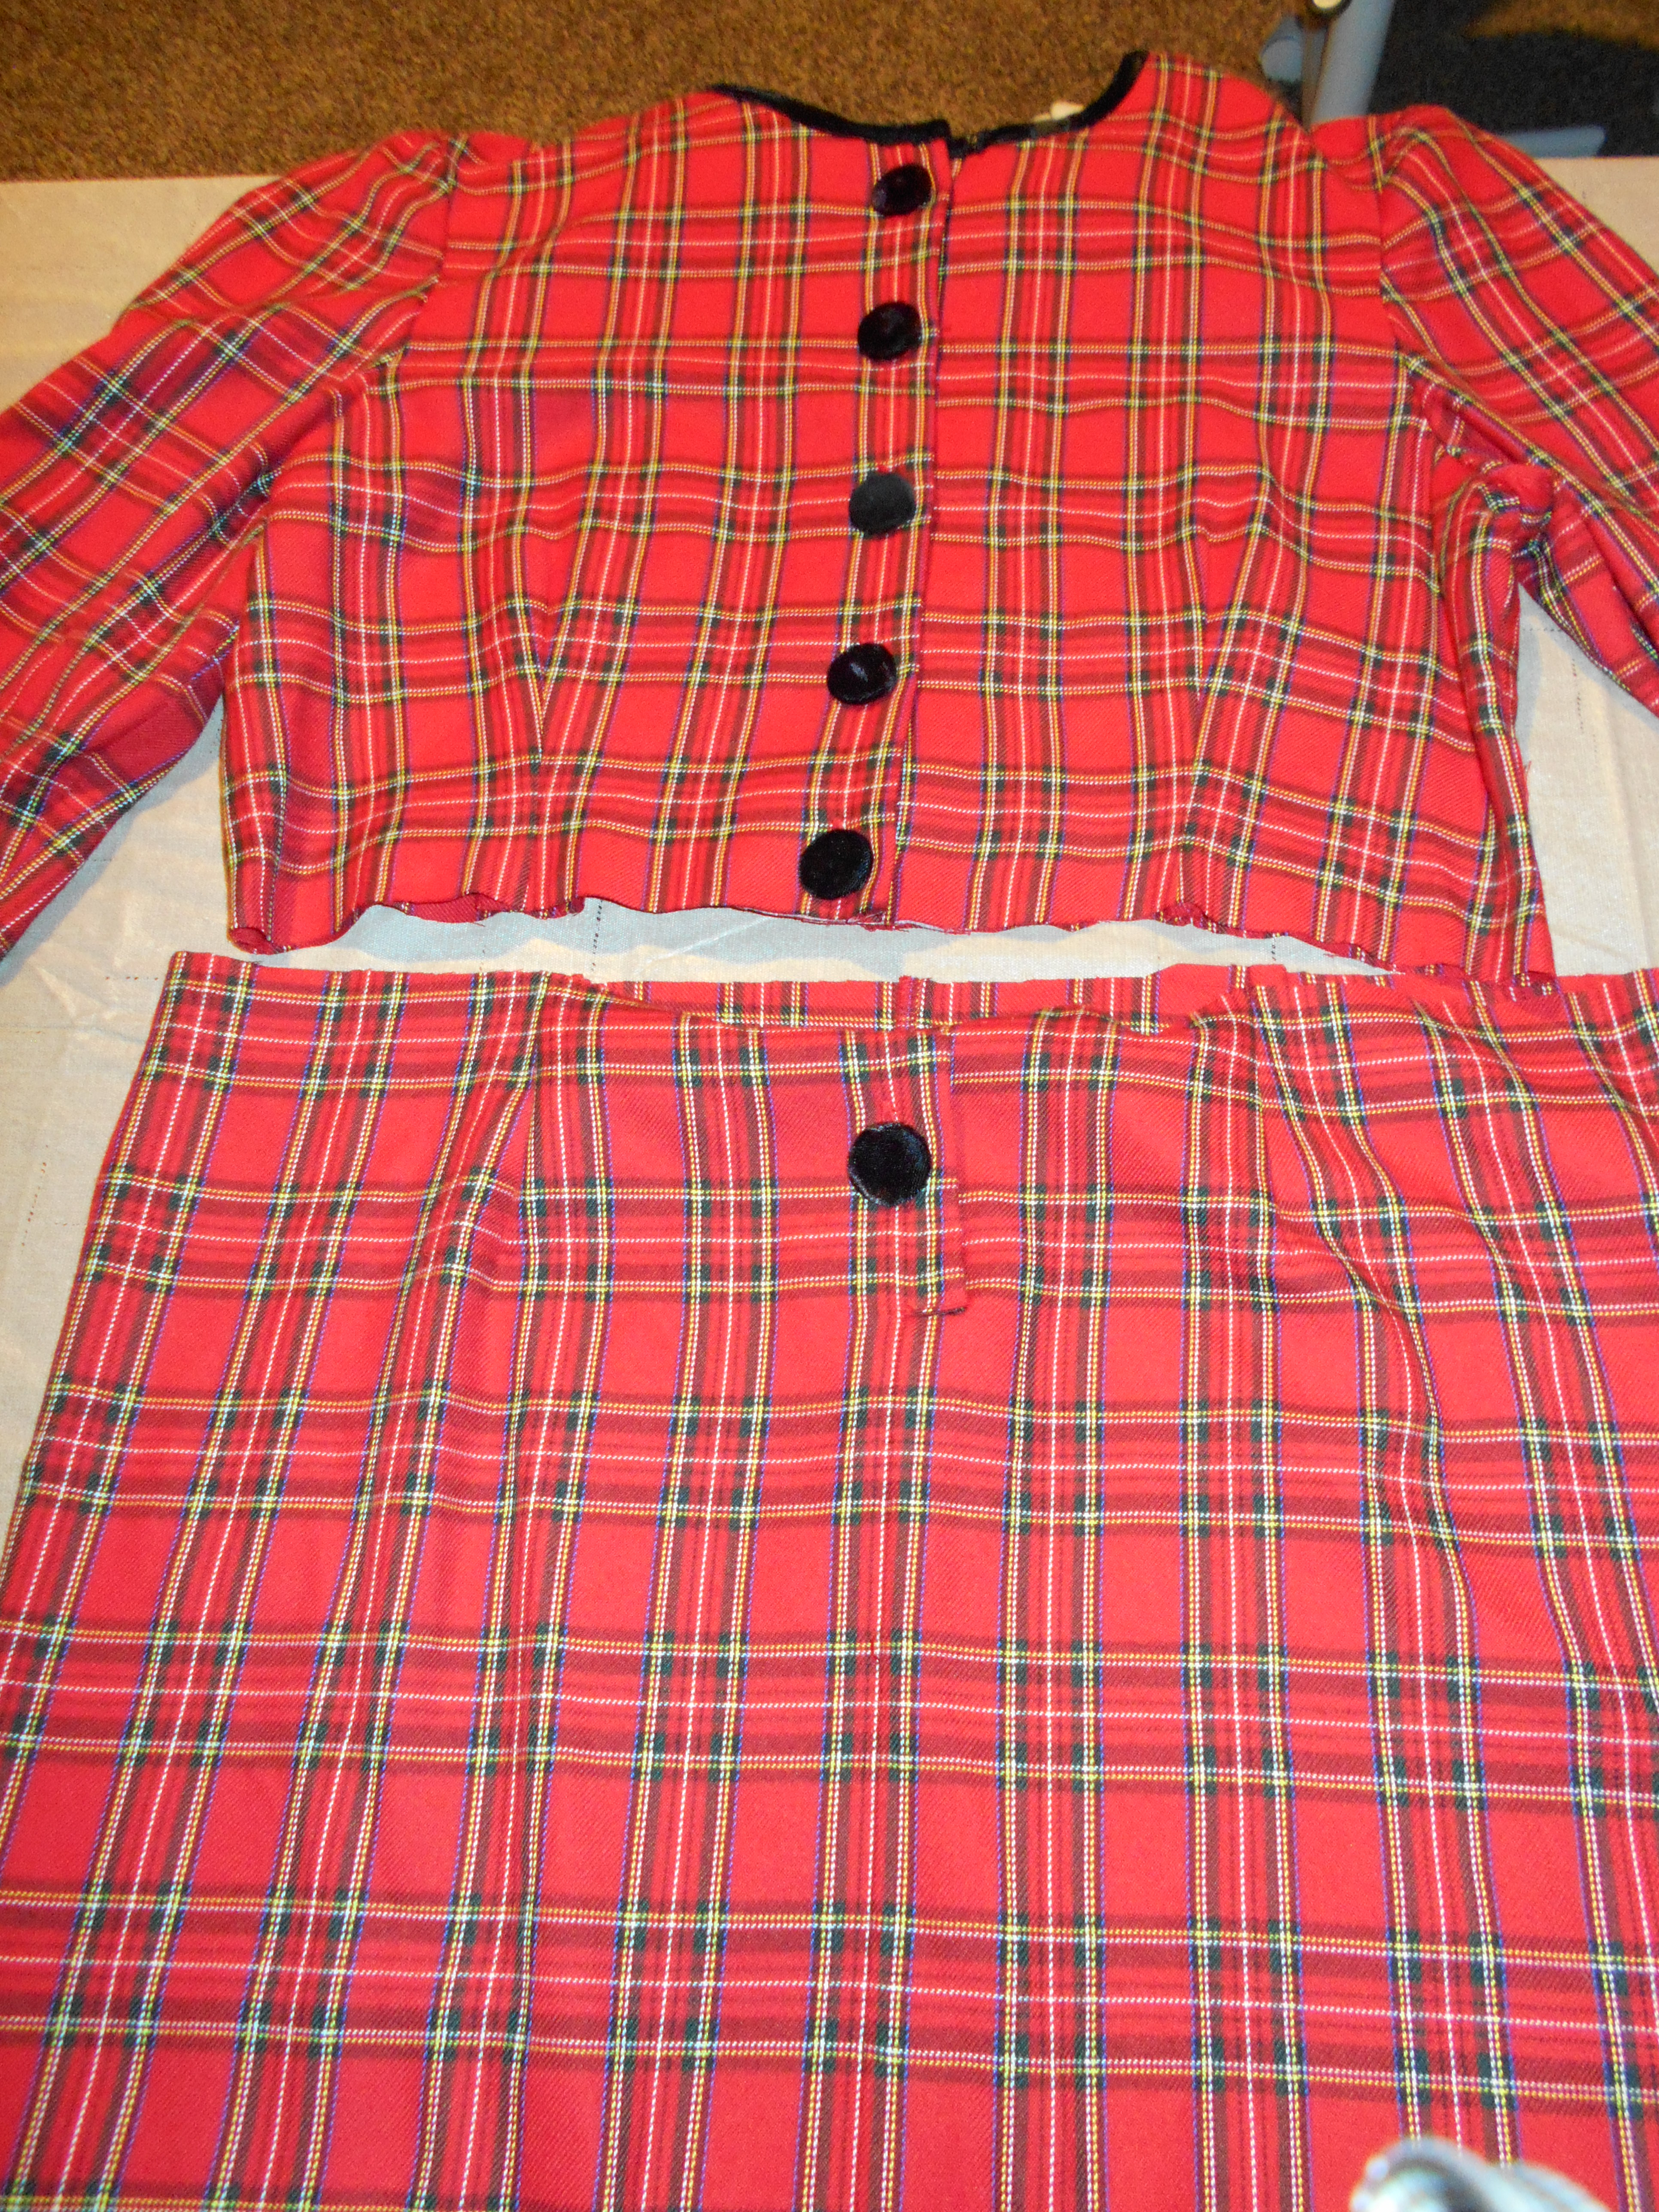
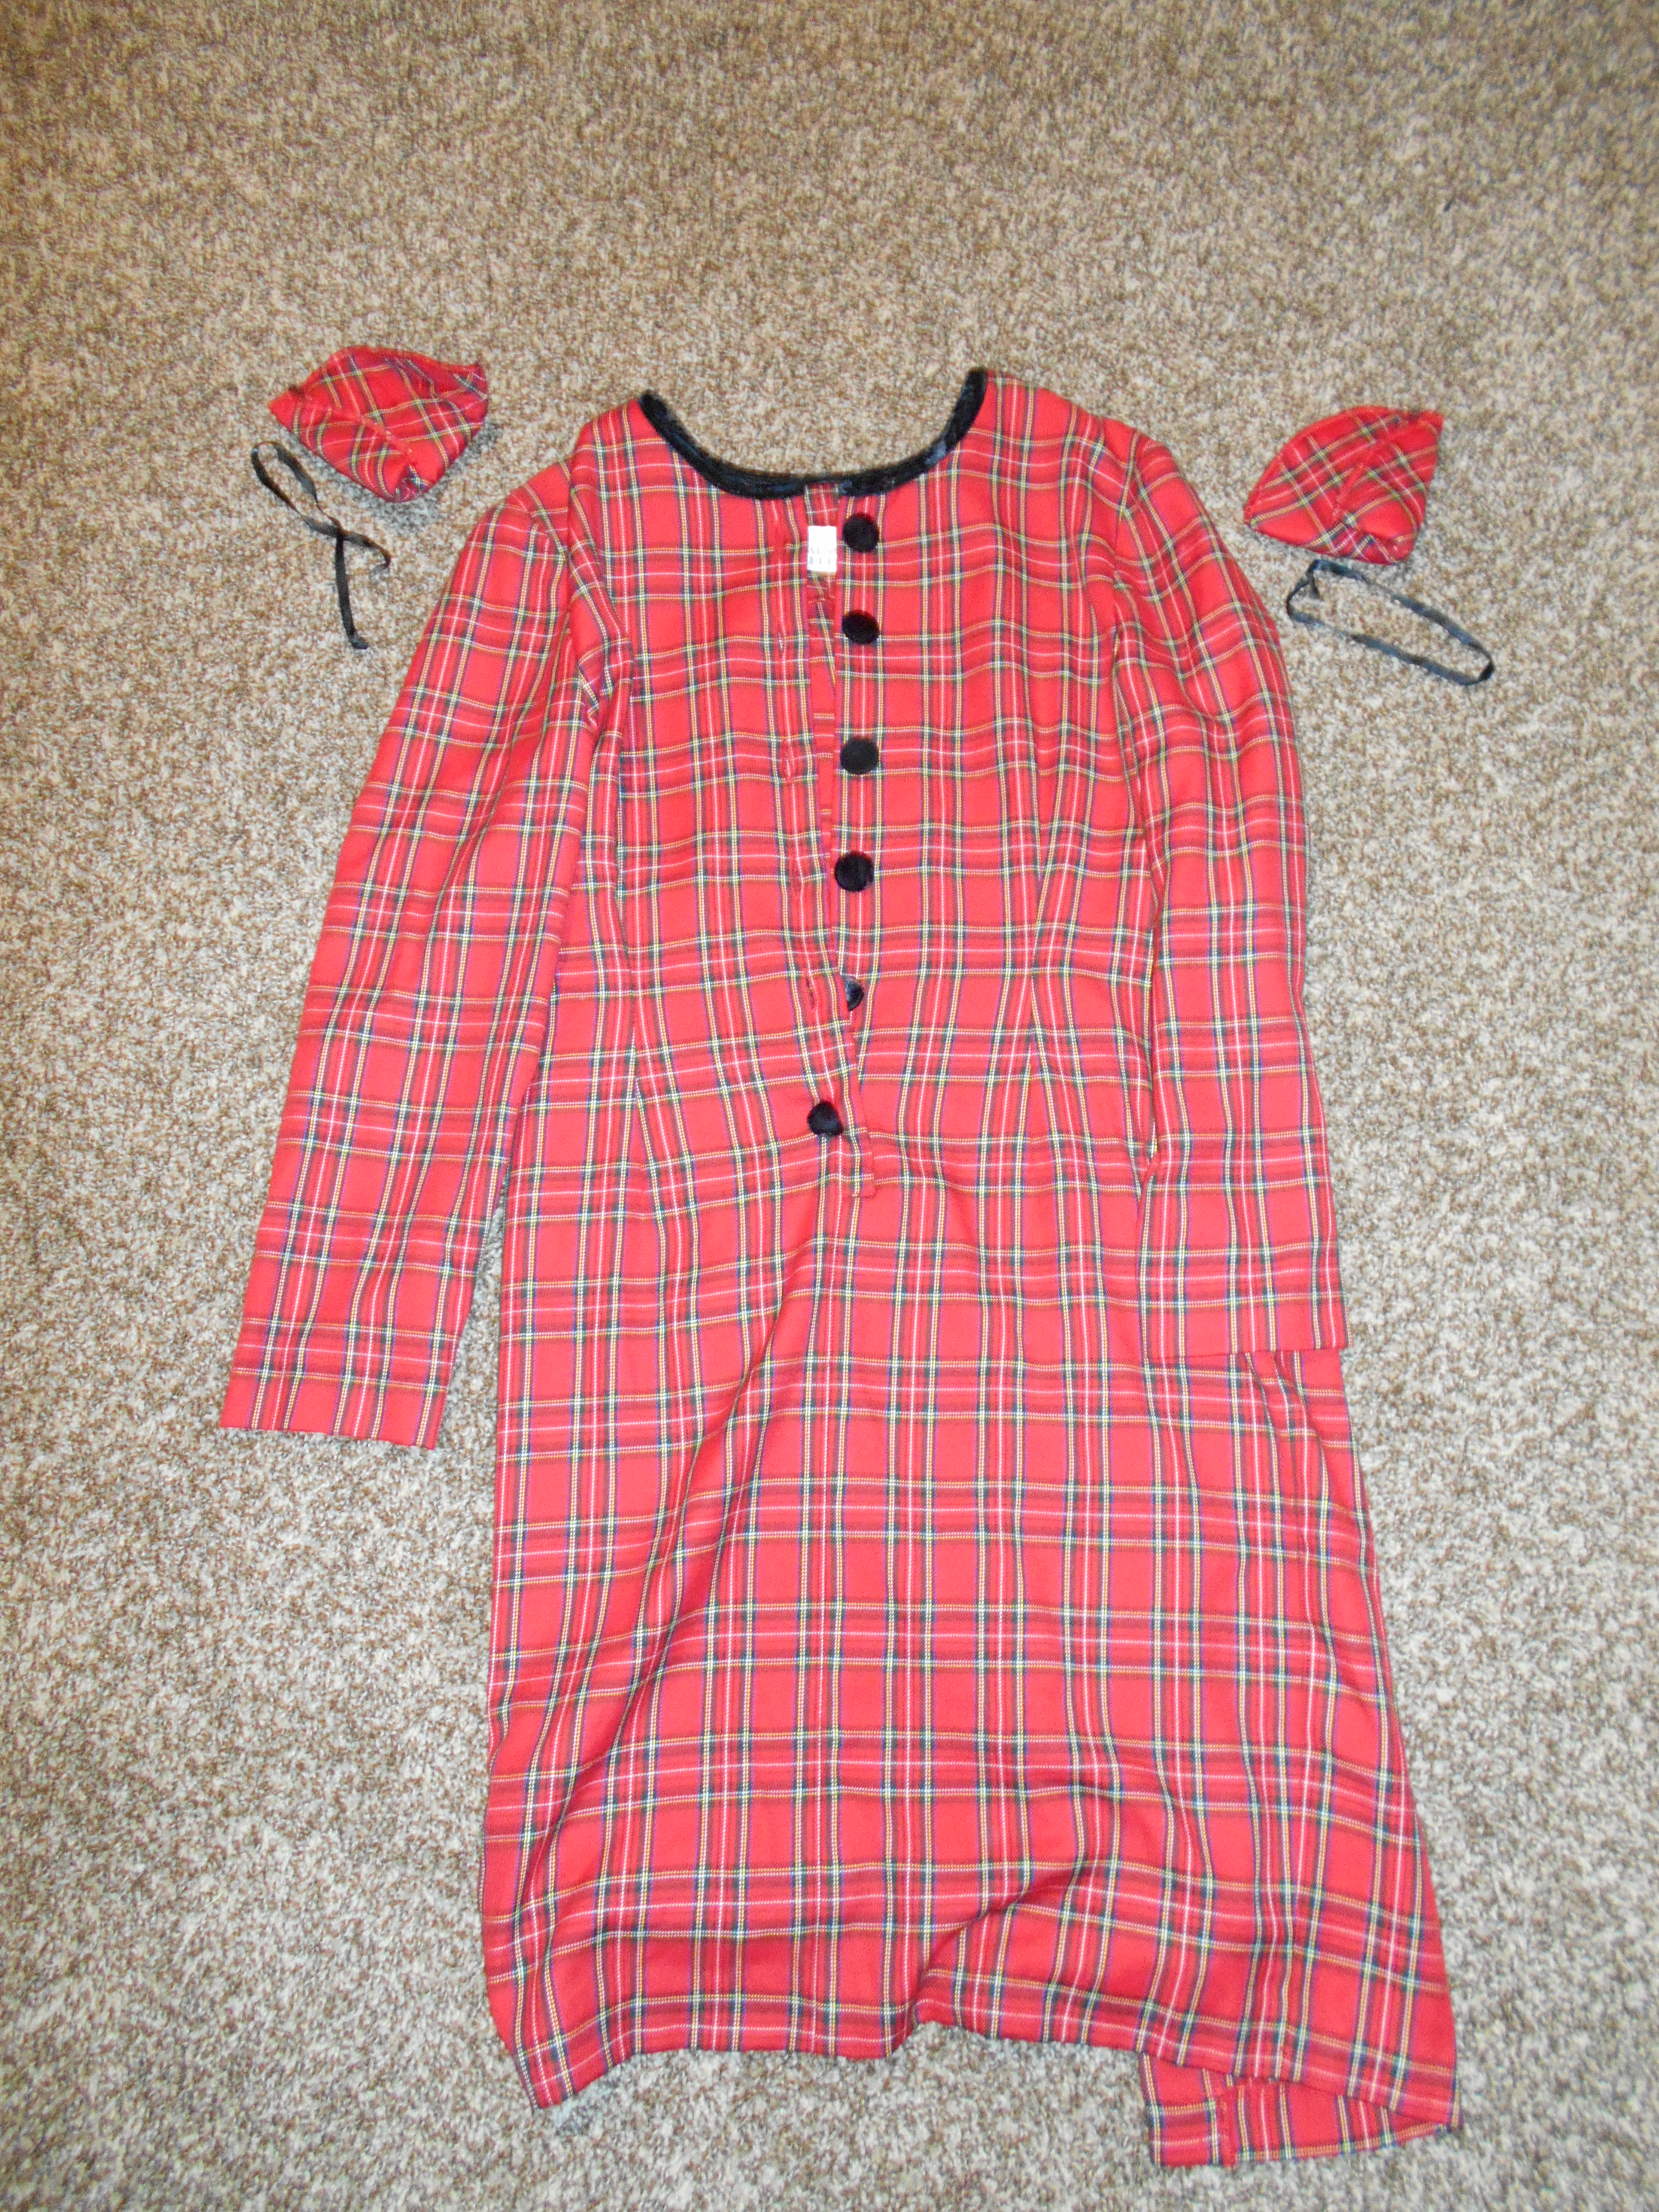
I cut my dress in half, keeping most of the buttons on the top half.

dscn1722
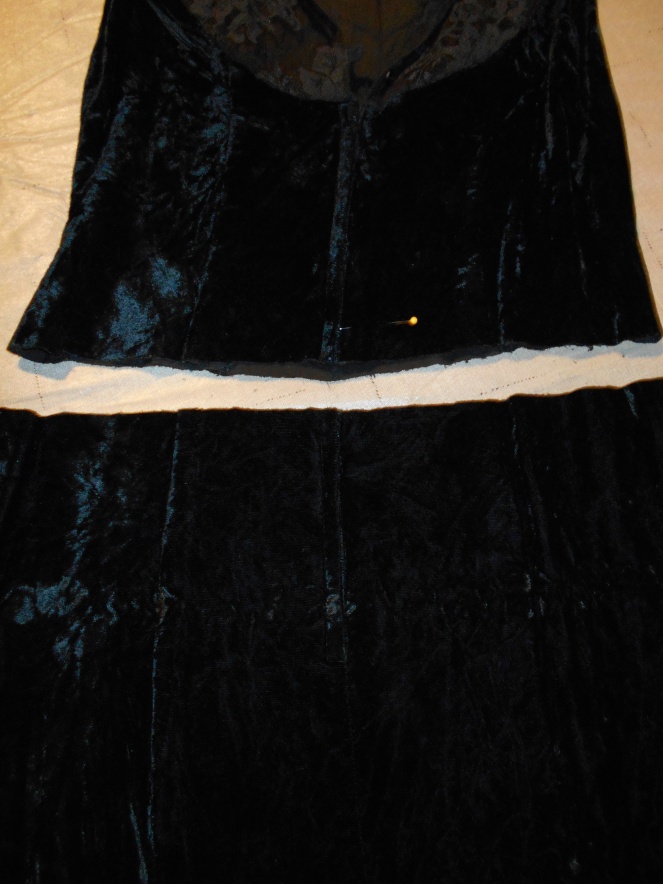
I decided  to make this dress into a crop jacket and skirt! I sewed a new hem on the bottom of the jacket.

dscn1724
For my skirt I folded over the top to make a casing for some elastic at the waistline. (I feel that elastic skirts are more comfortable for me, Yes I am probably getting old!)

dscn1725
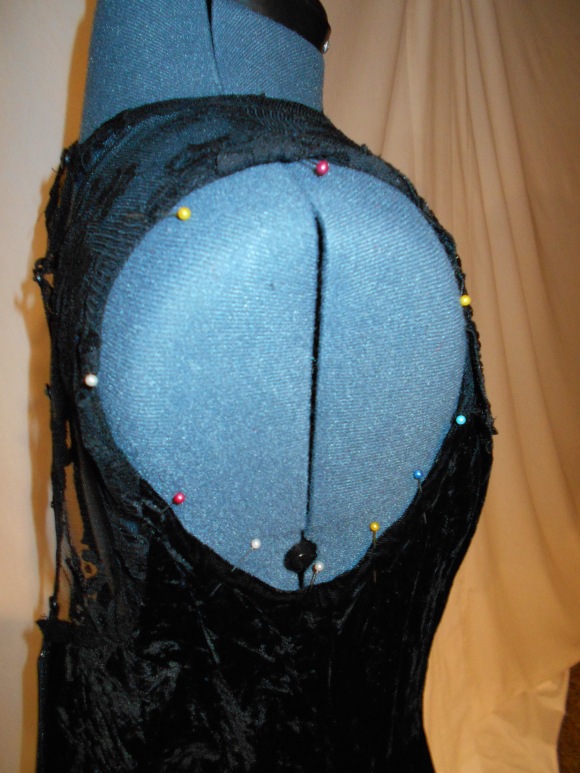
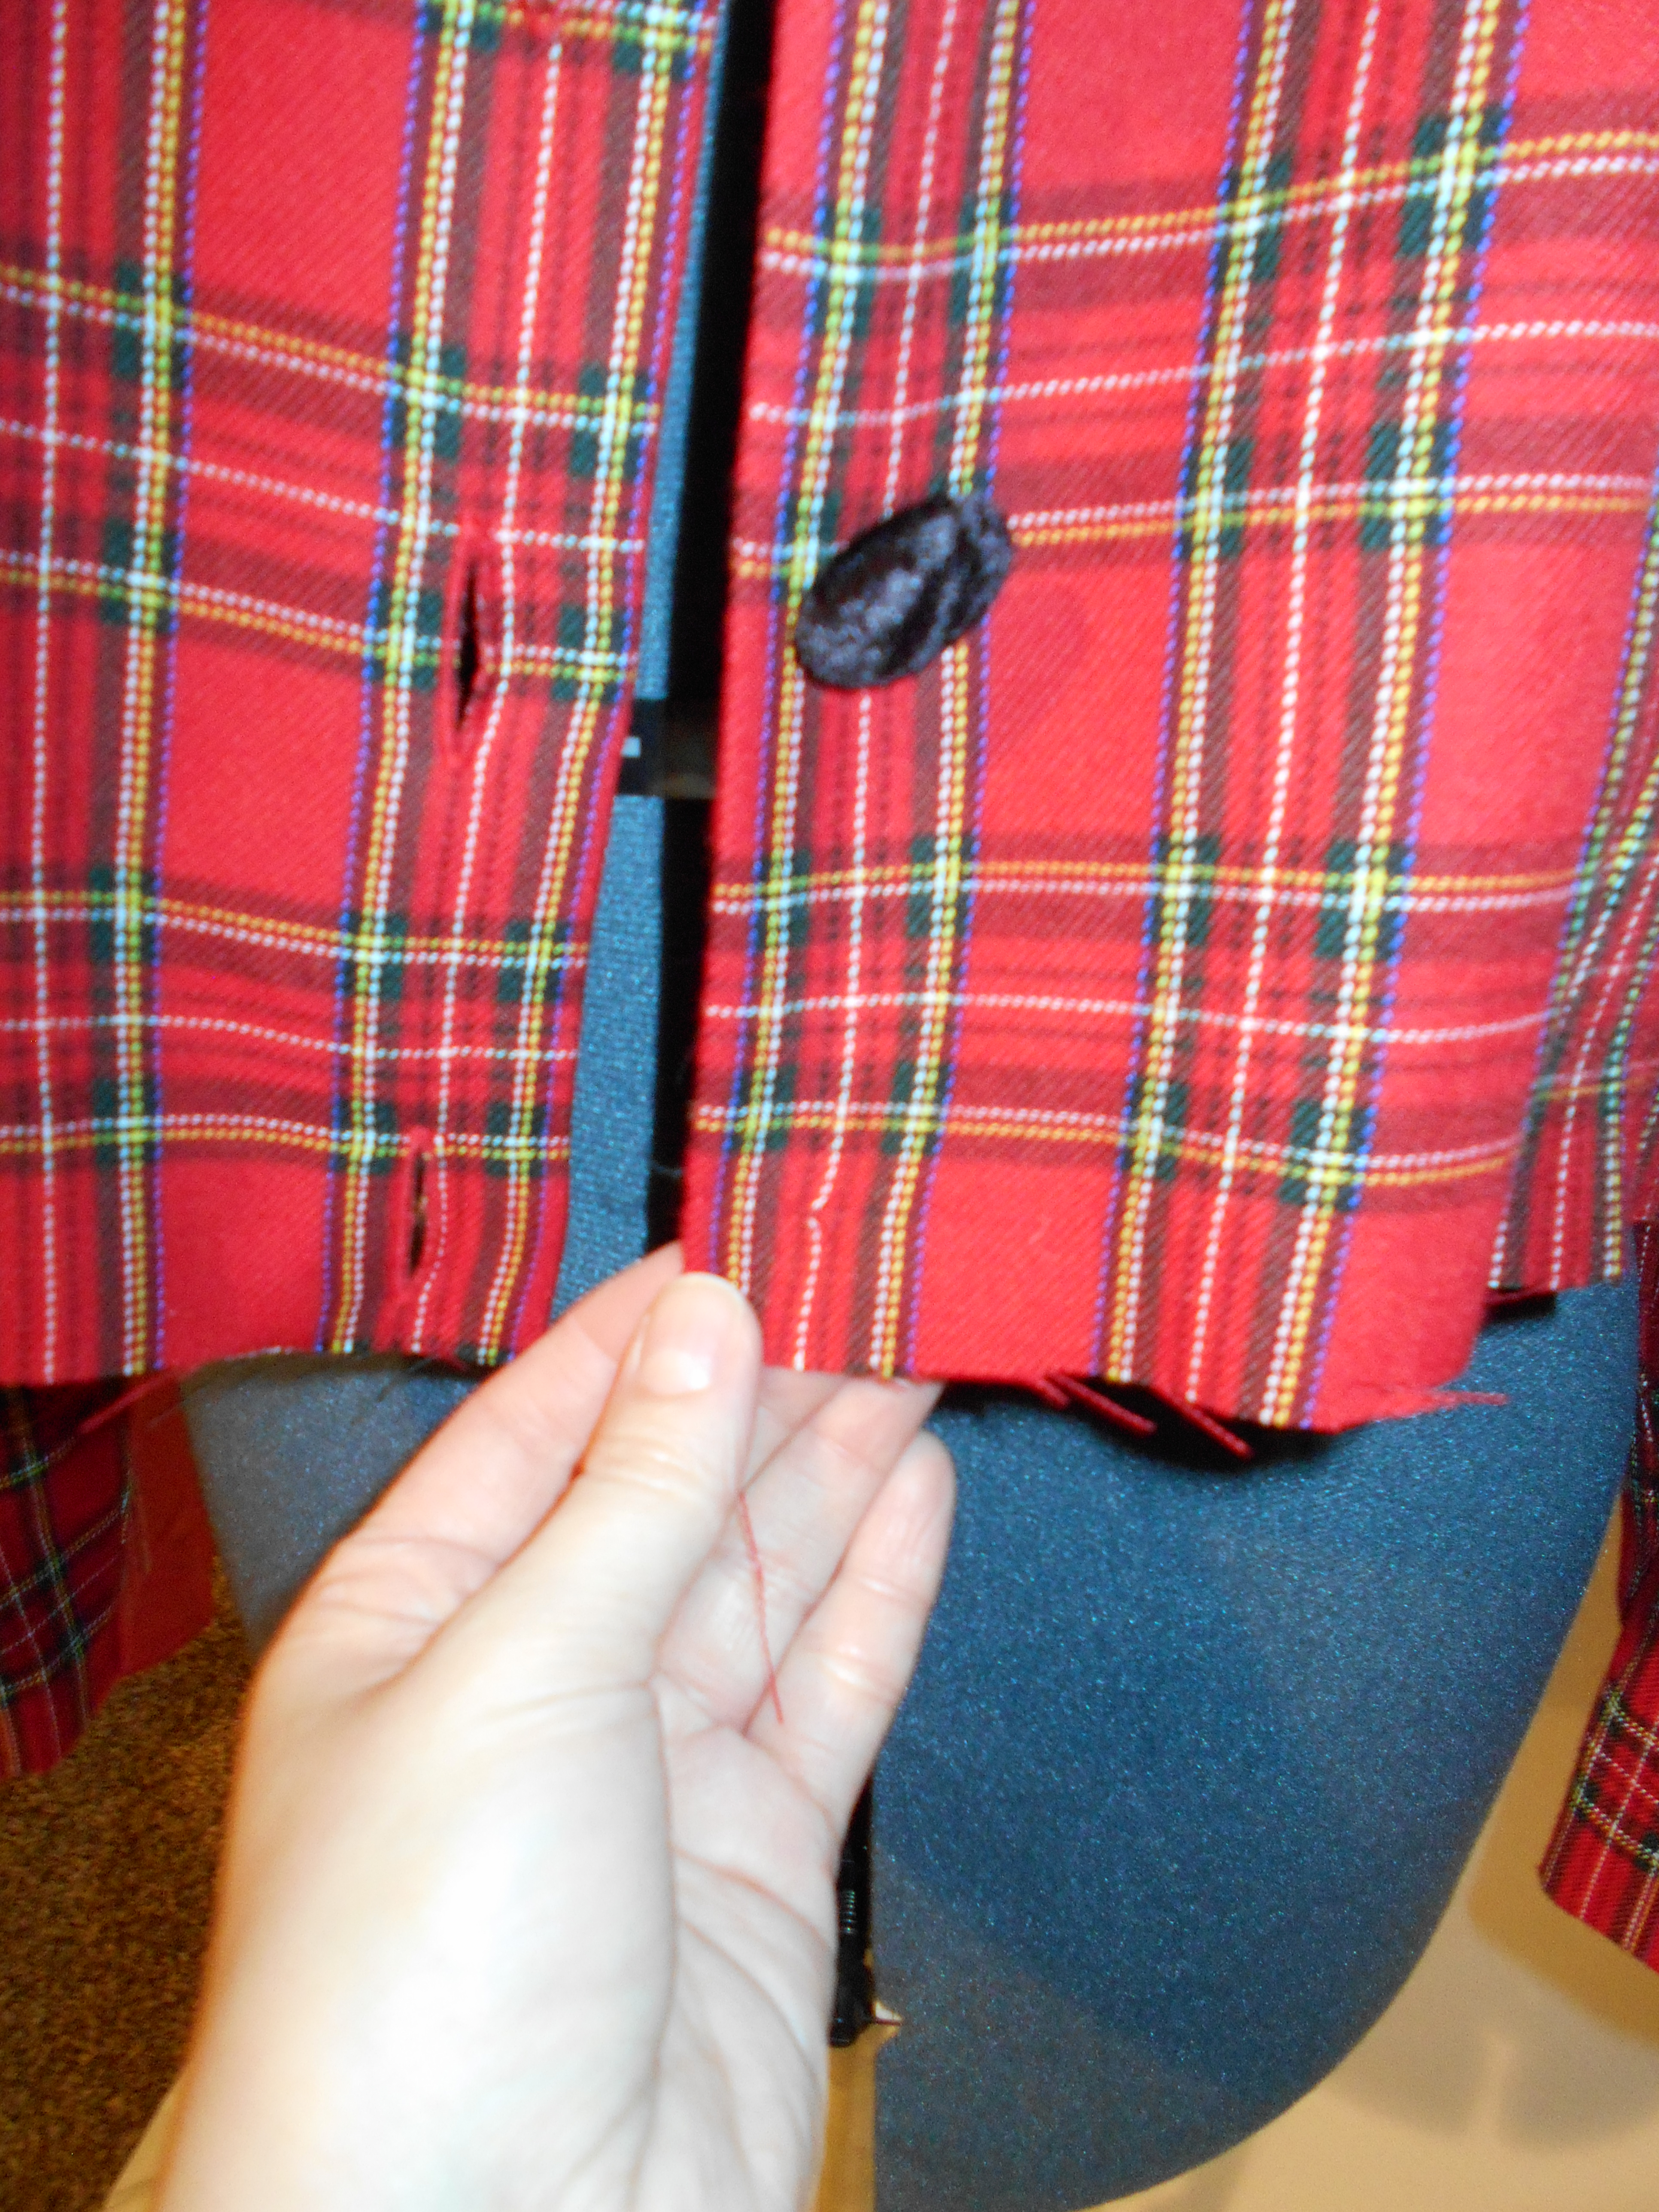
The crop jacket needed a little slimming up so I took it in where the original darts were.

dscn1726
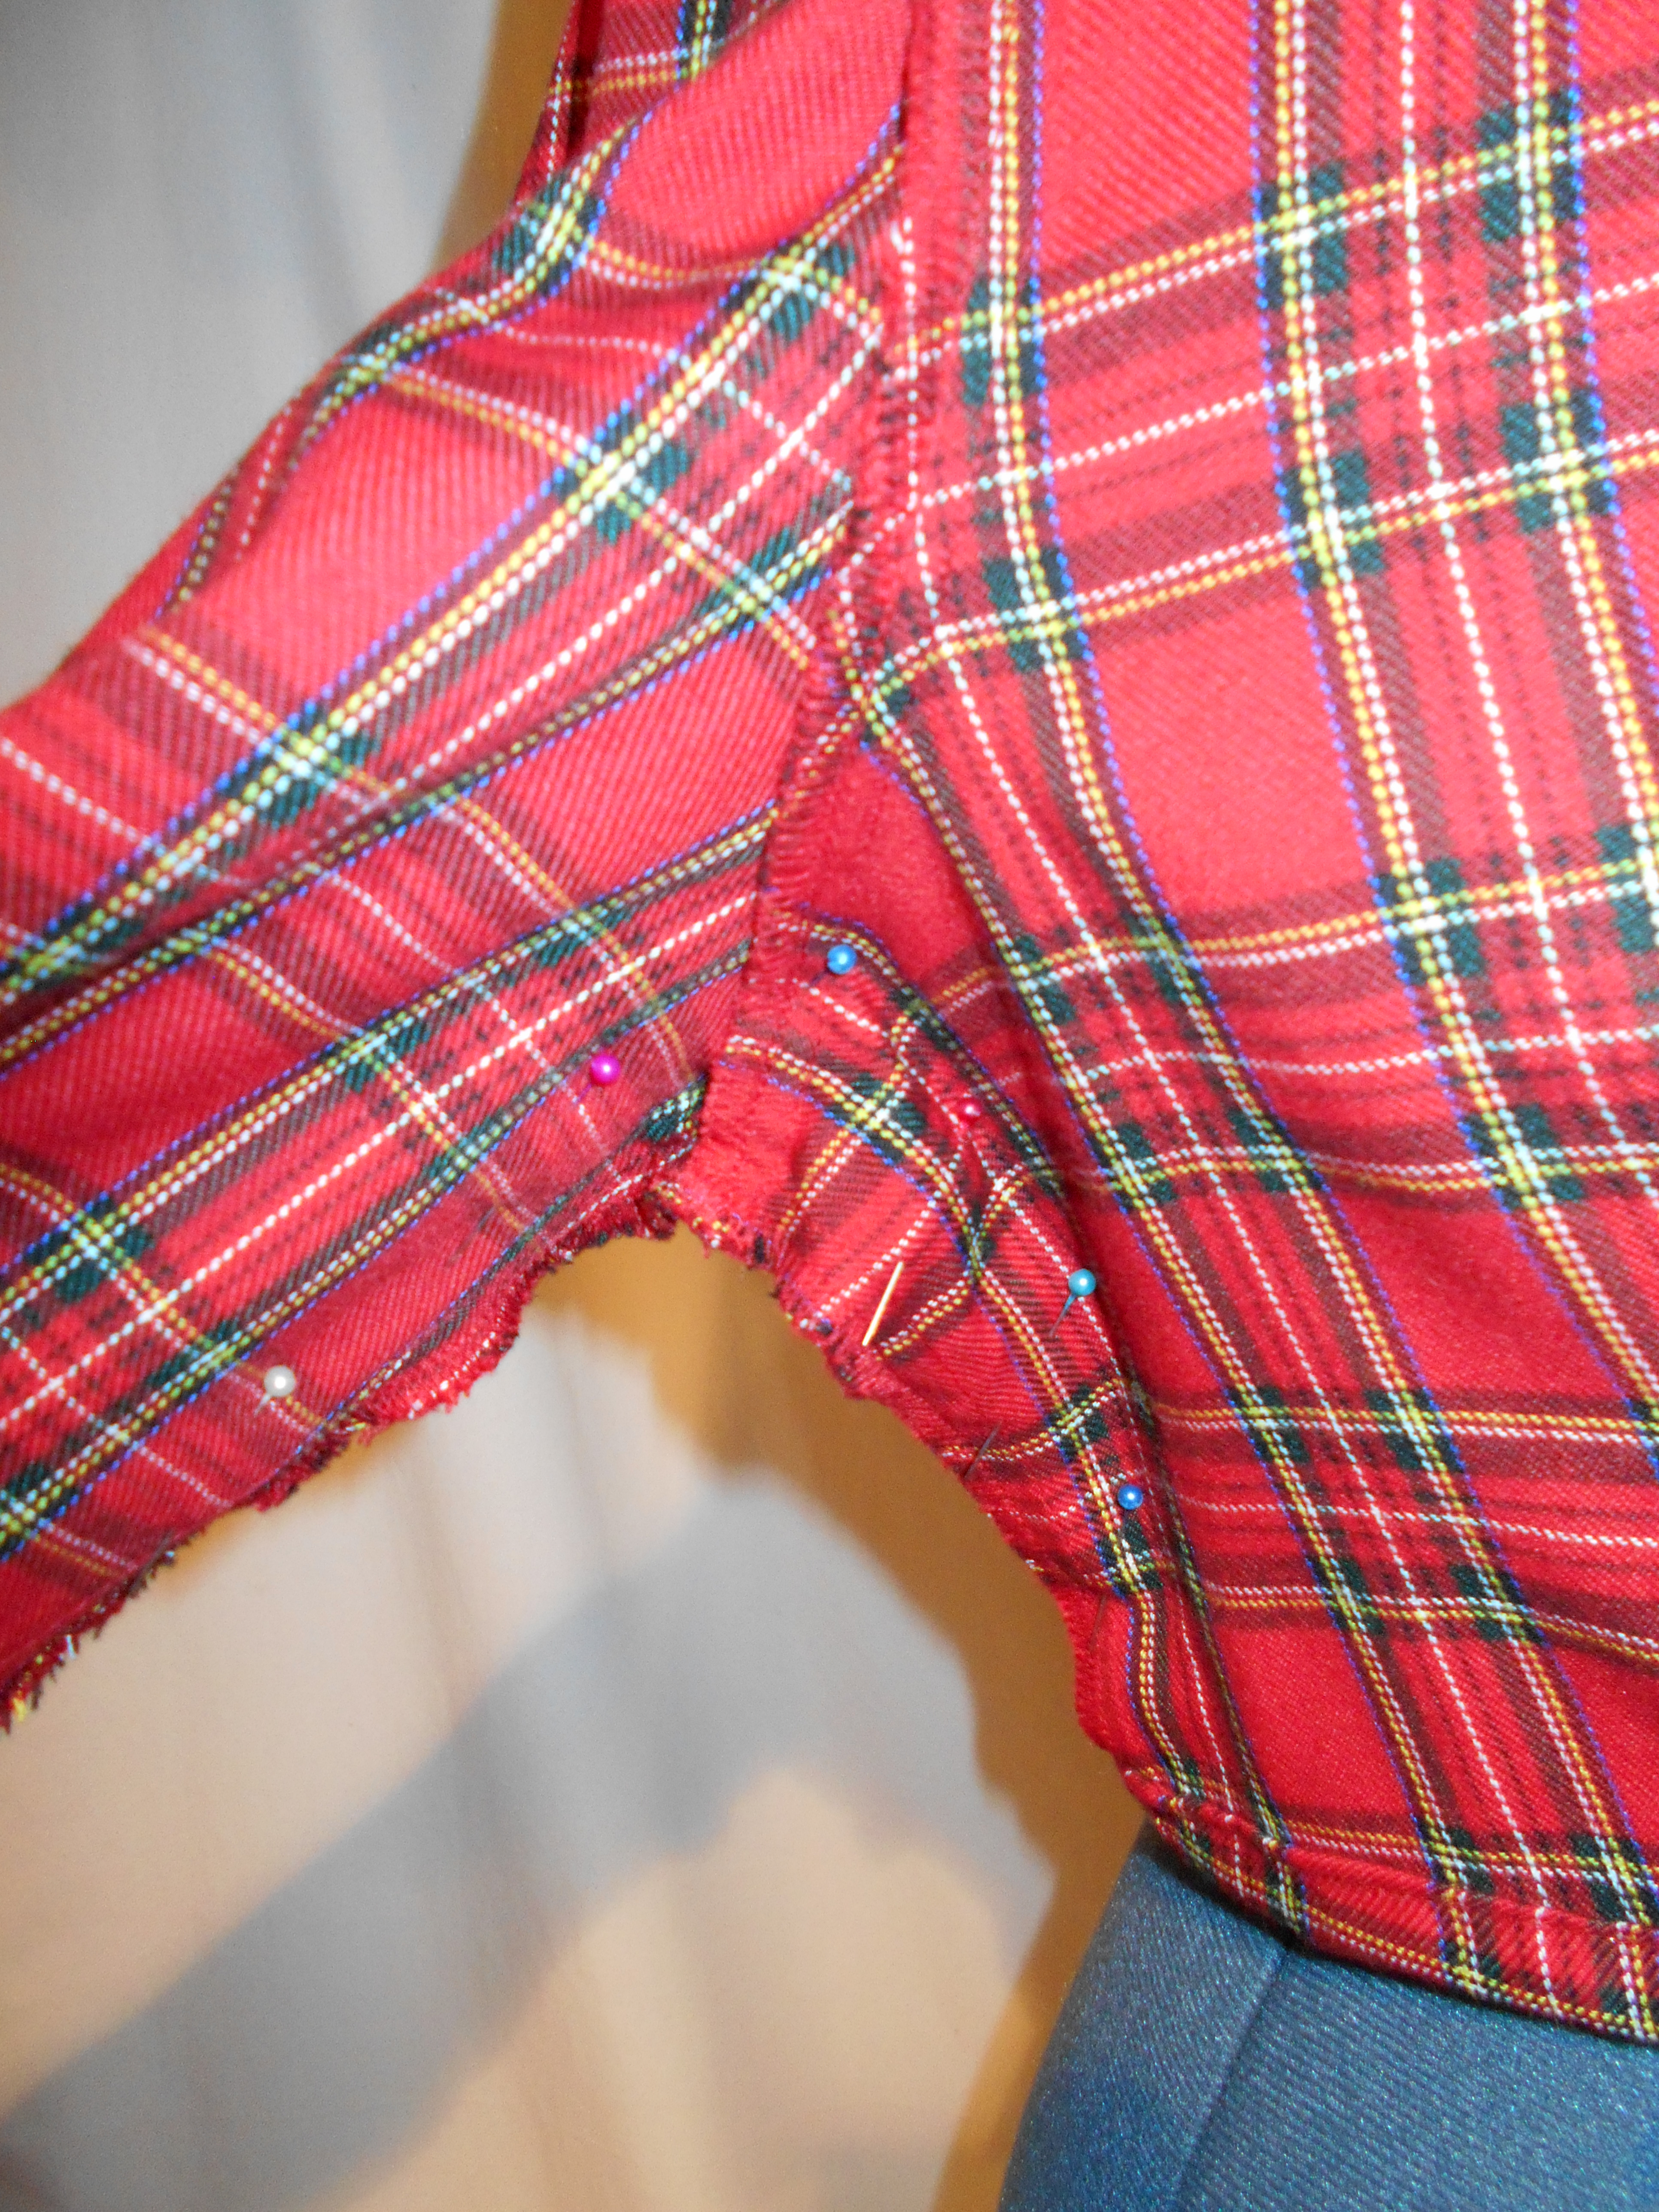
Then I took it in a little more on each side, up around the armpit and little down the sleeves.

dscn1727
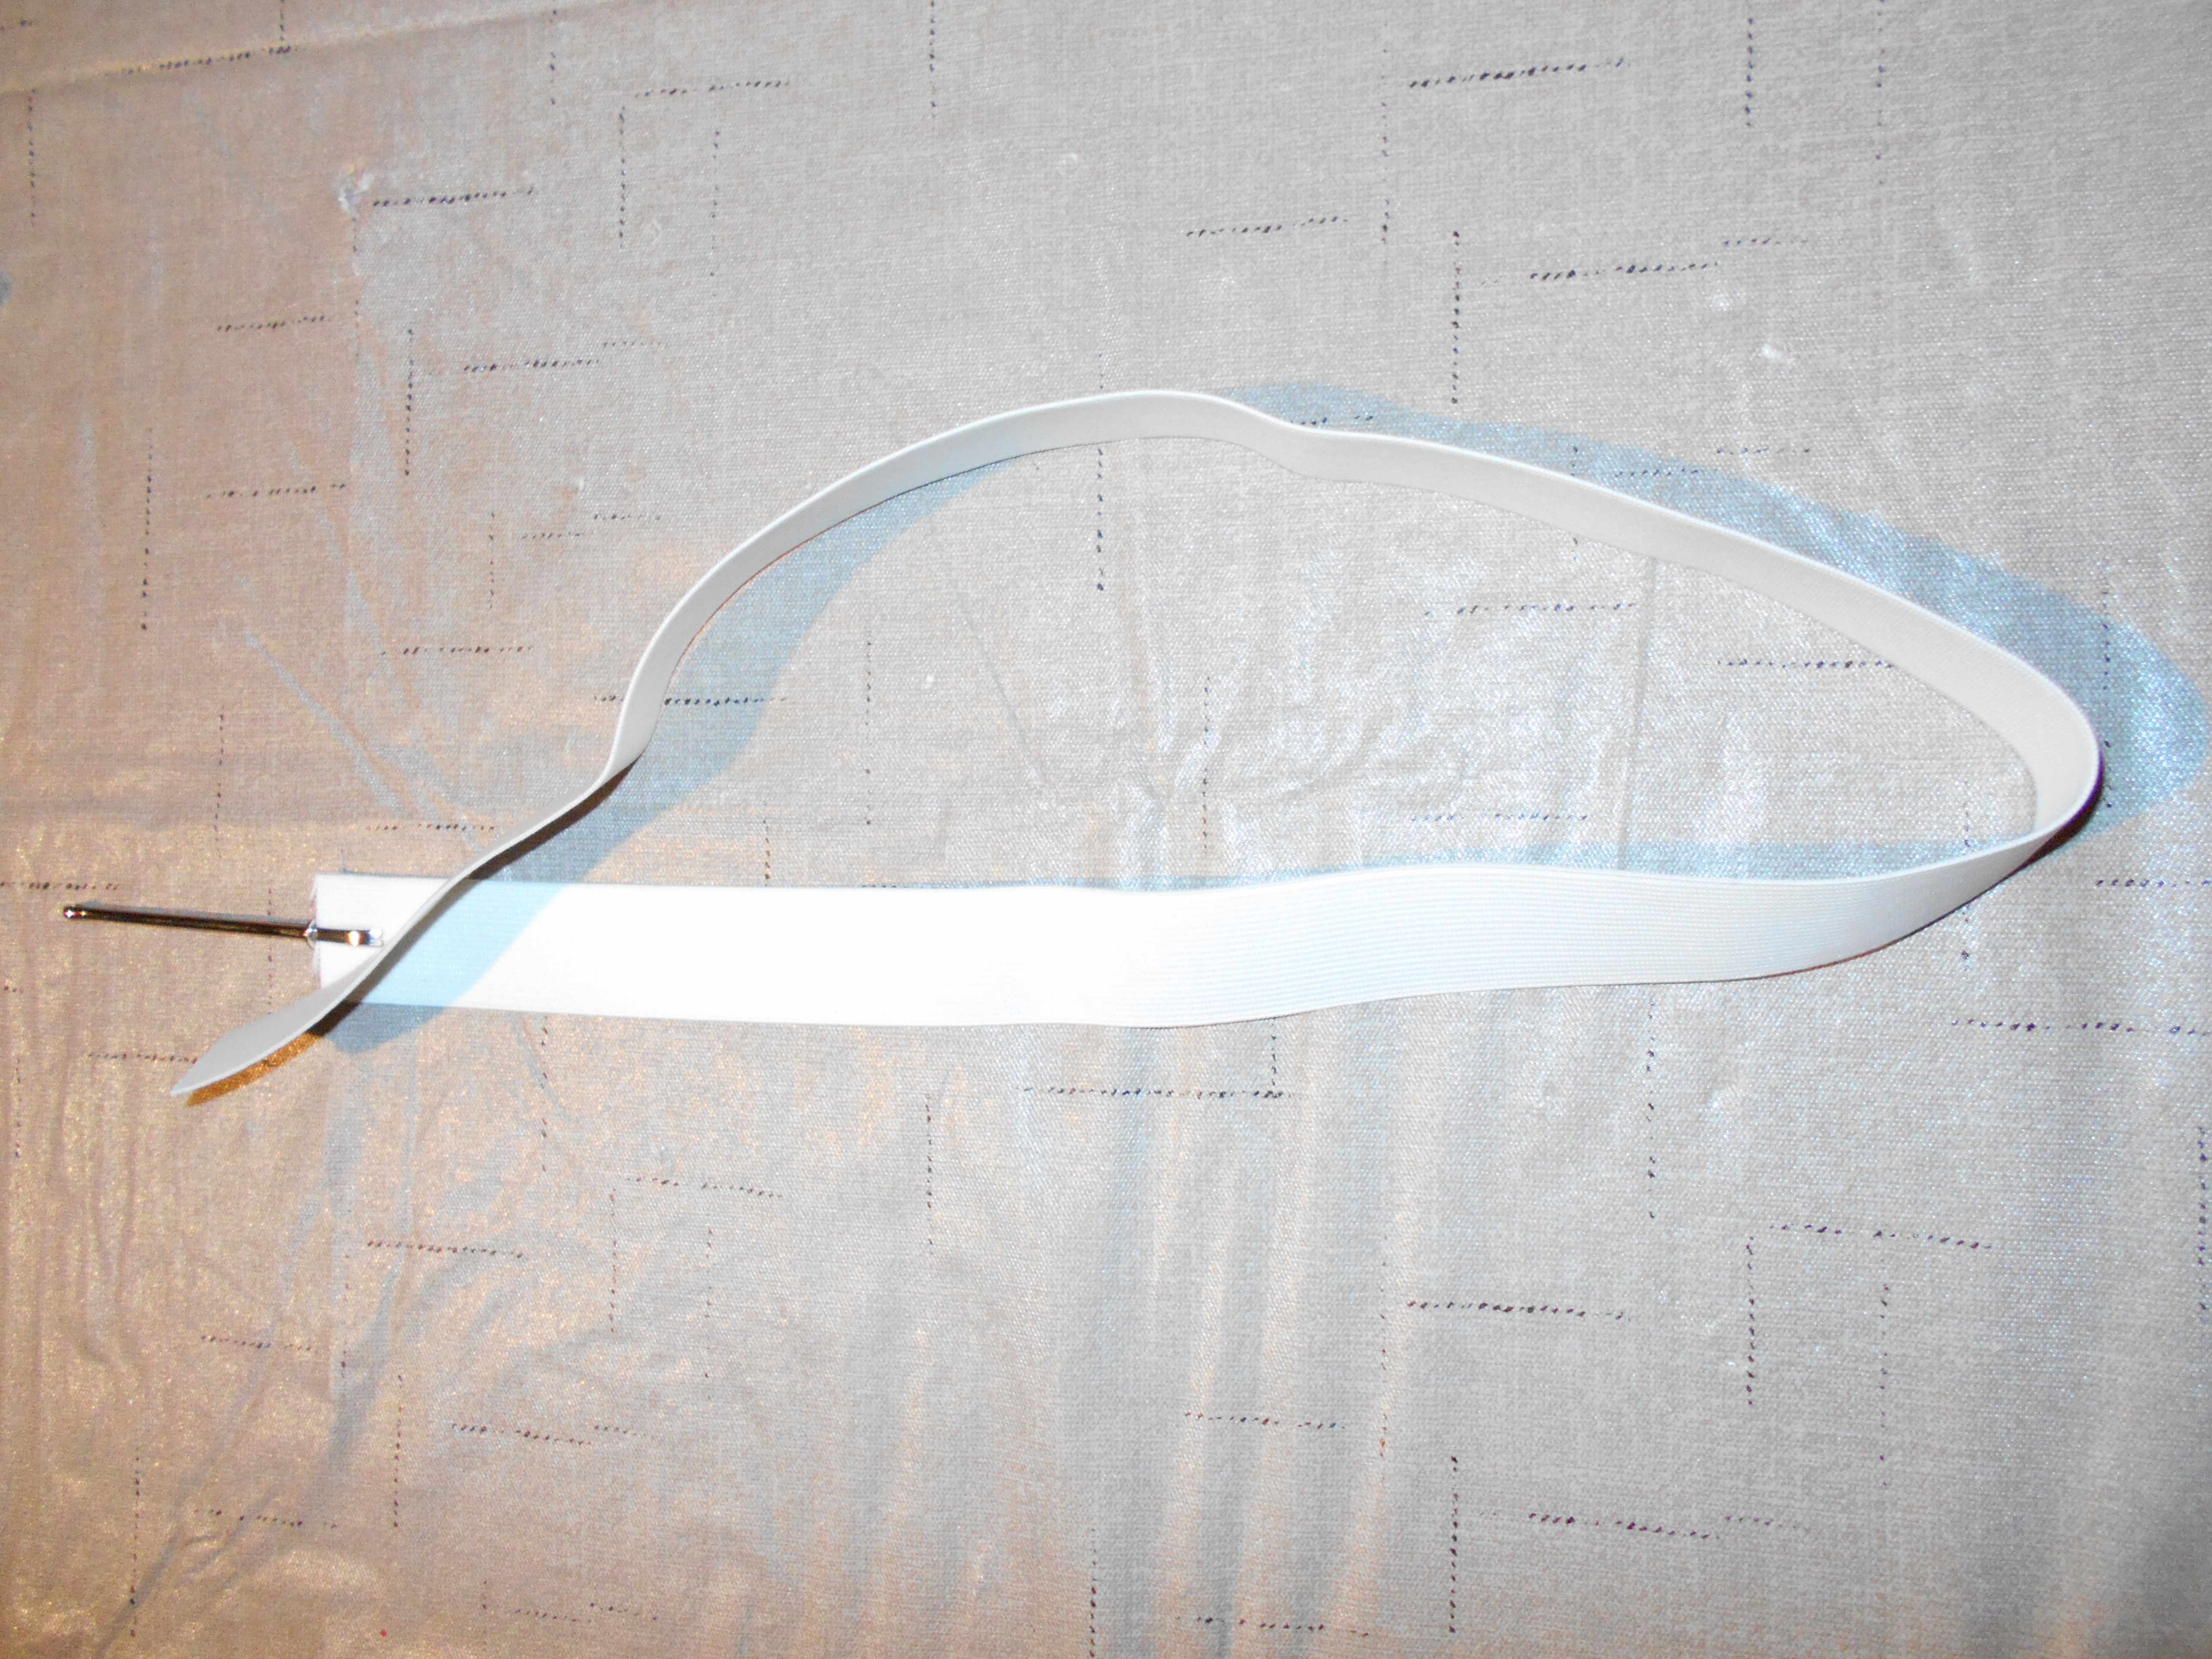
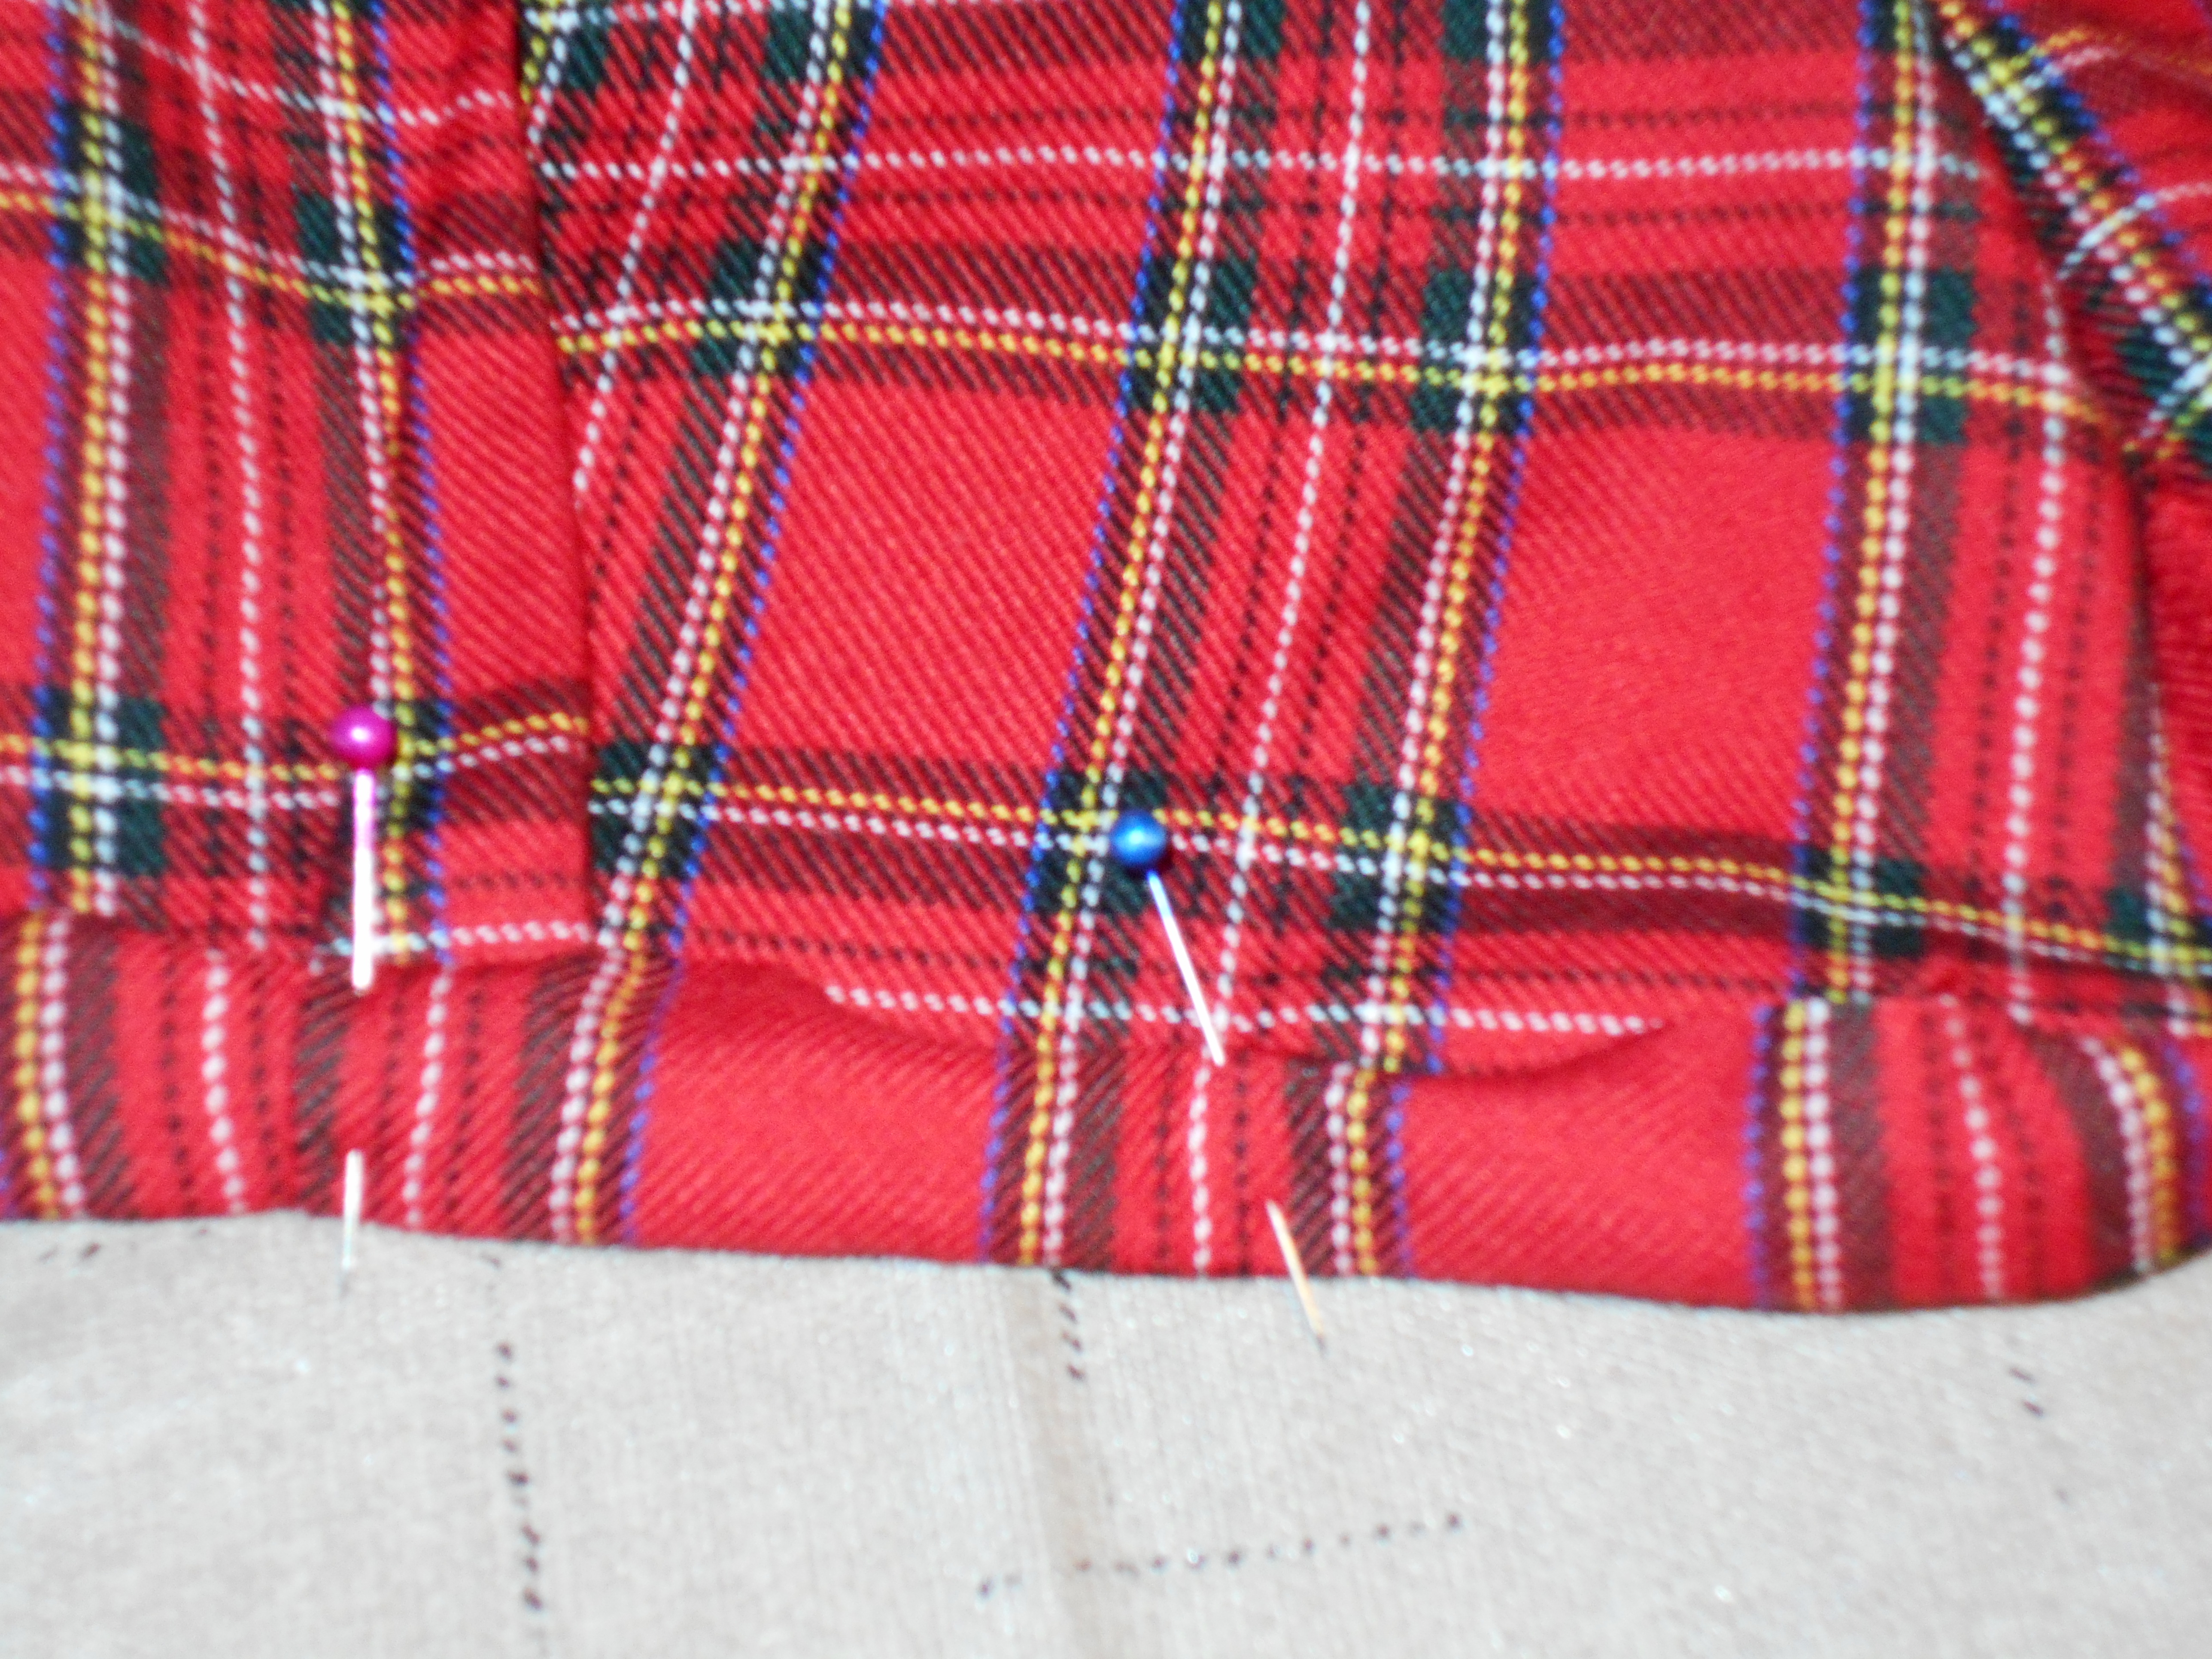
Next, I measured for the elastic around my waist. I left an overlap of 1 1/2 inches so I could sew it together once it was in the casing of the skirt.

dscn1728
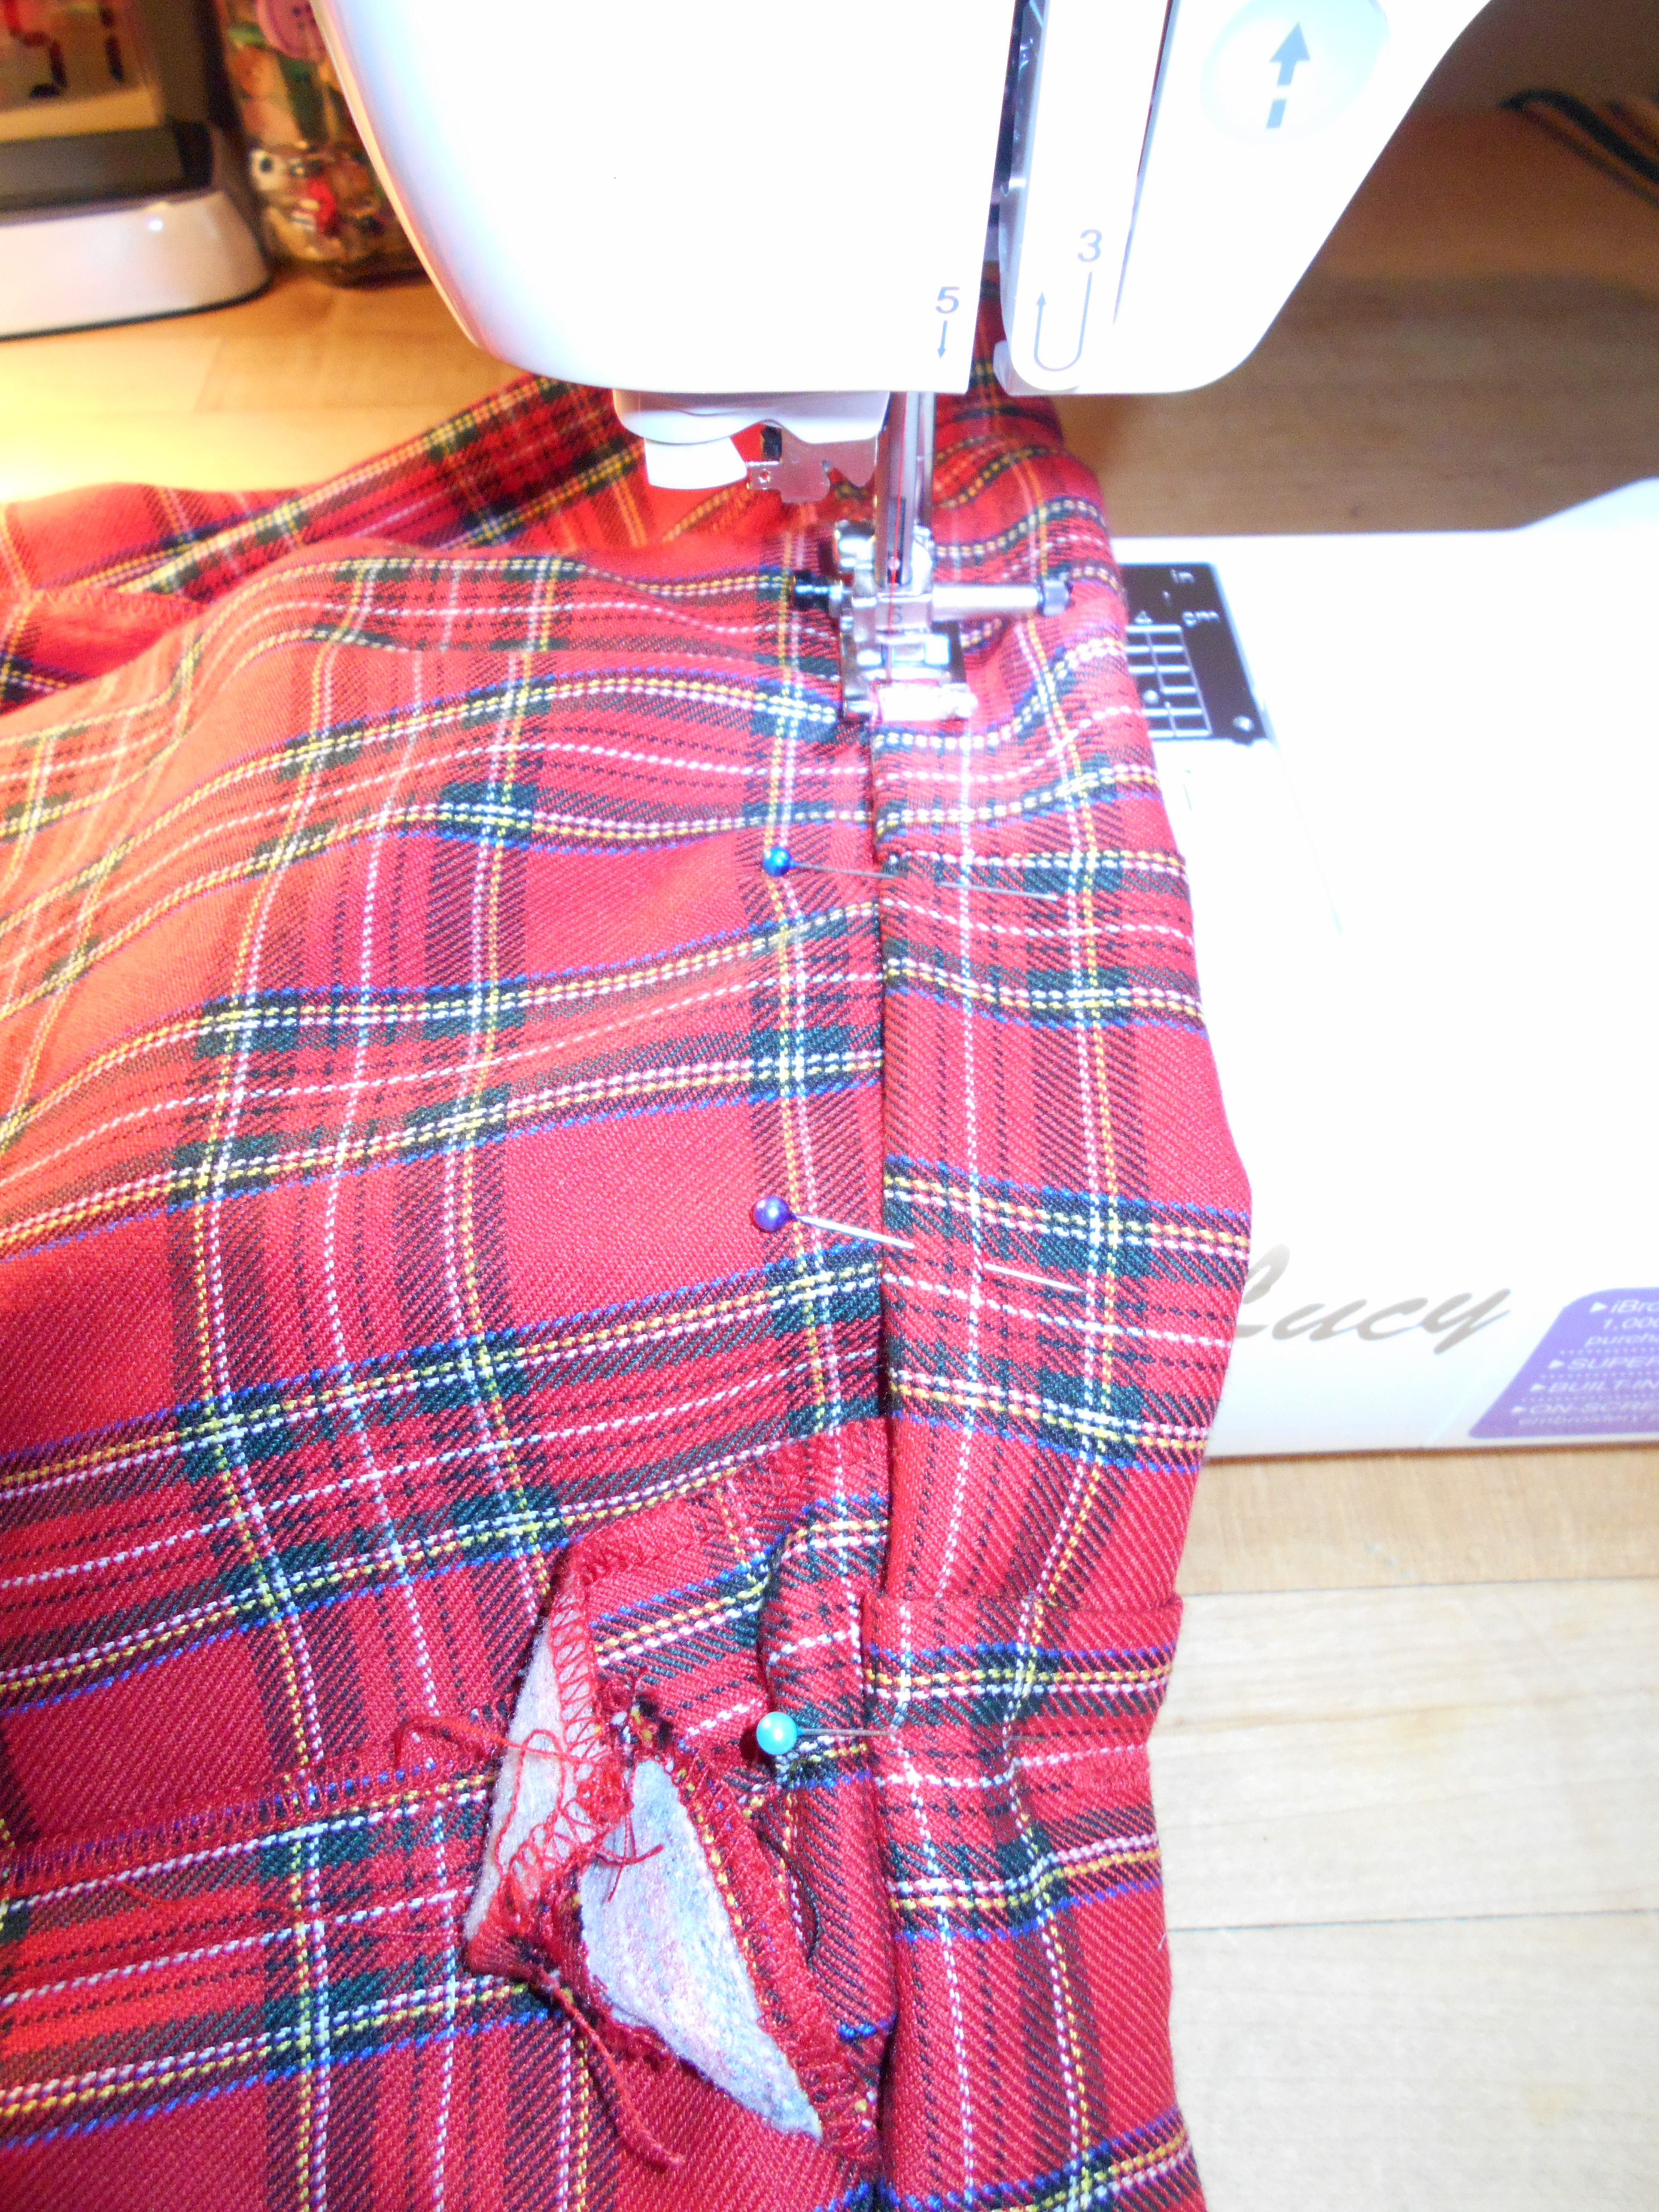
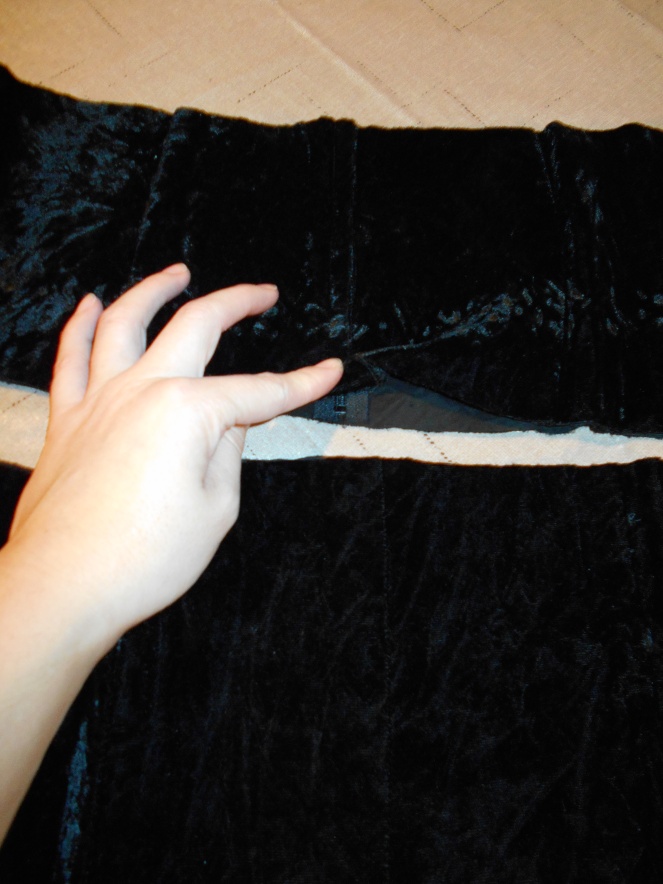
I sewed the casing on the top of the skirt leaving 2 inches open so that I could thread the elastic through.

dscn1729
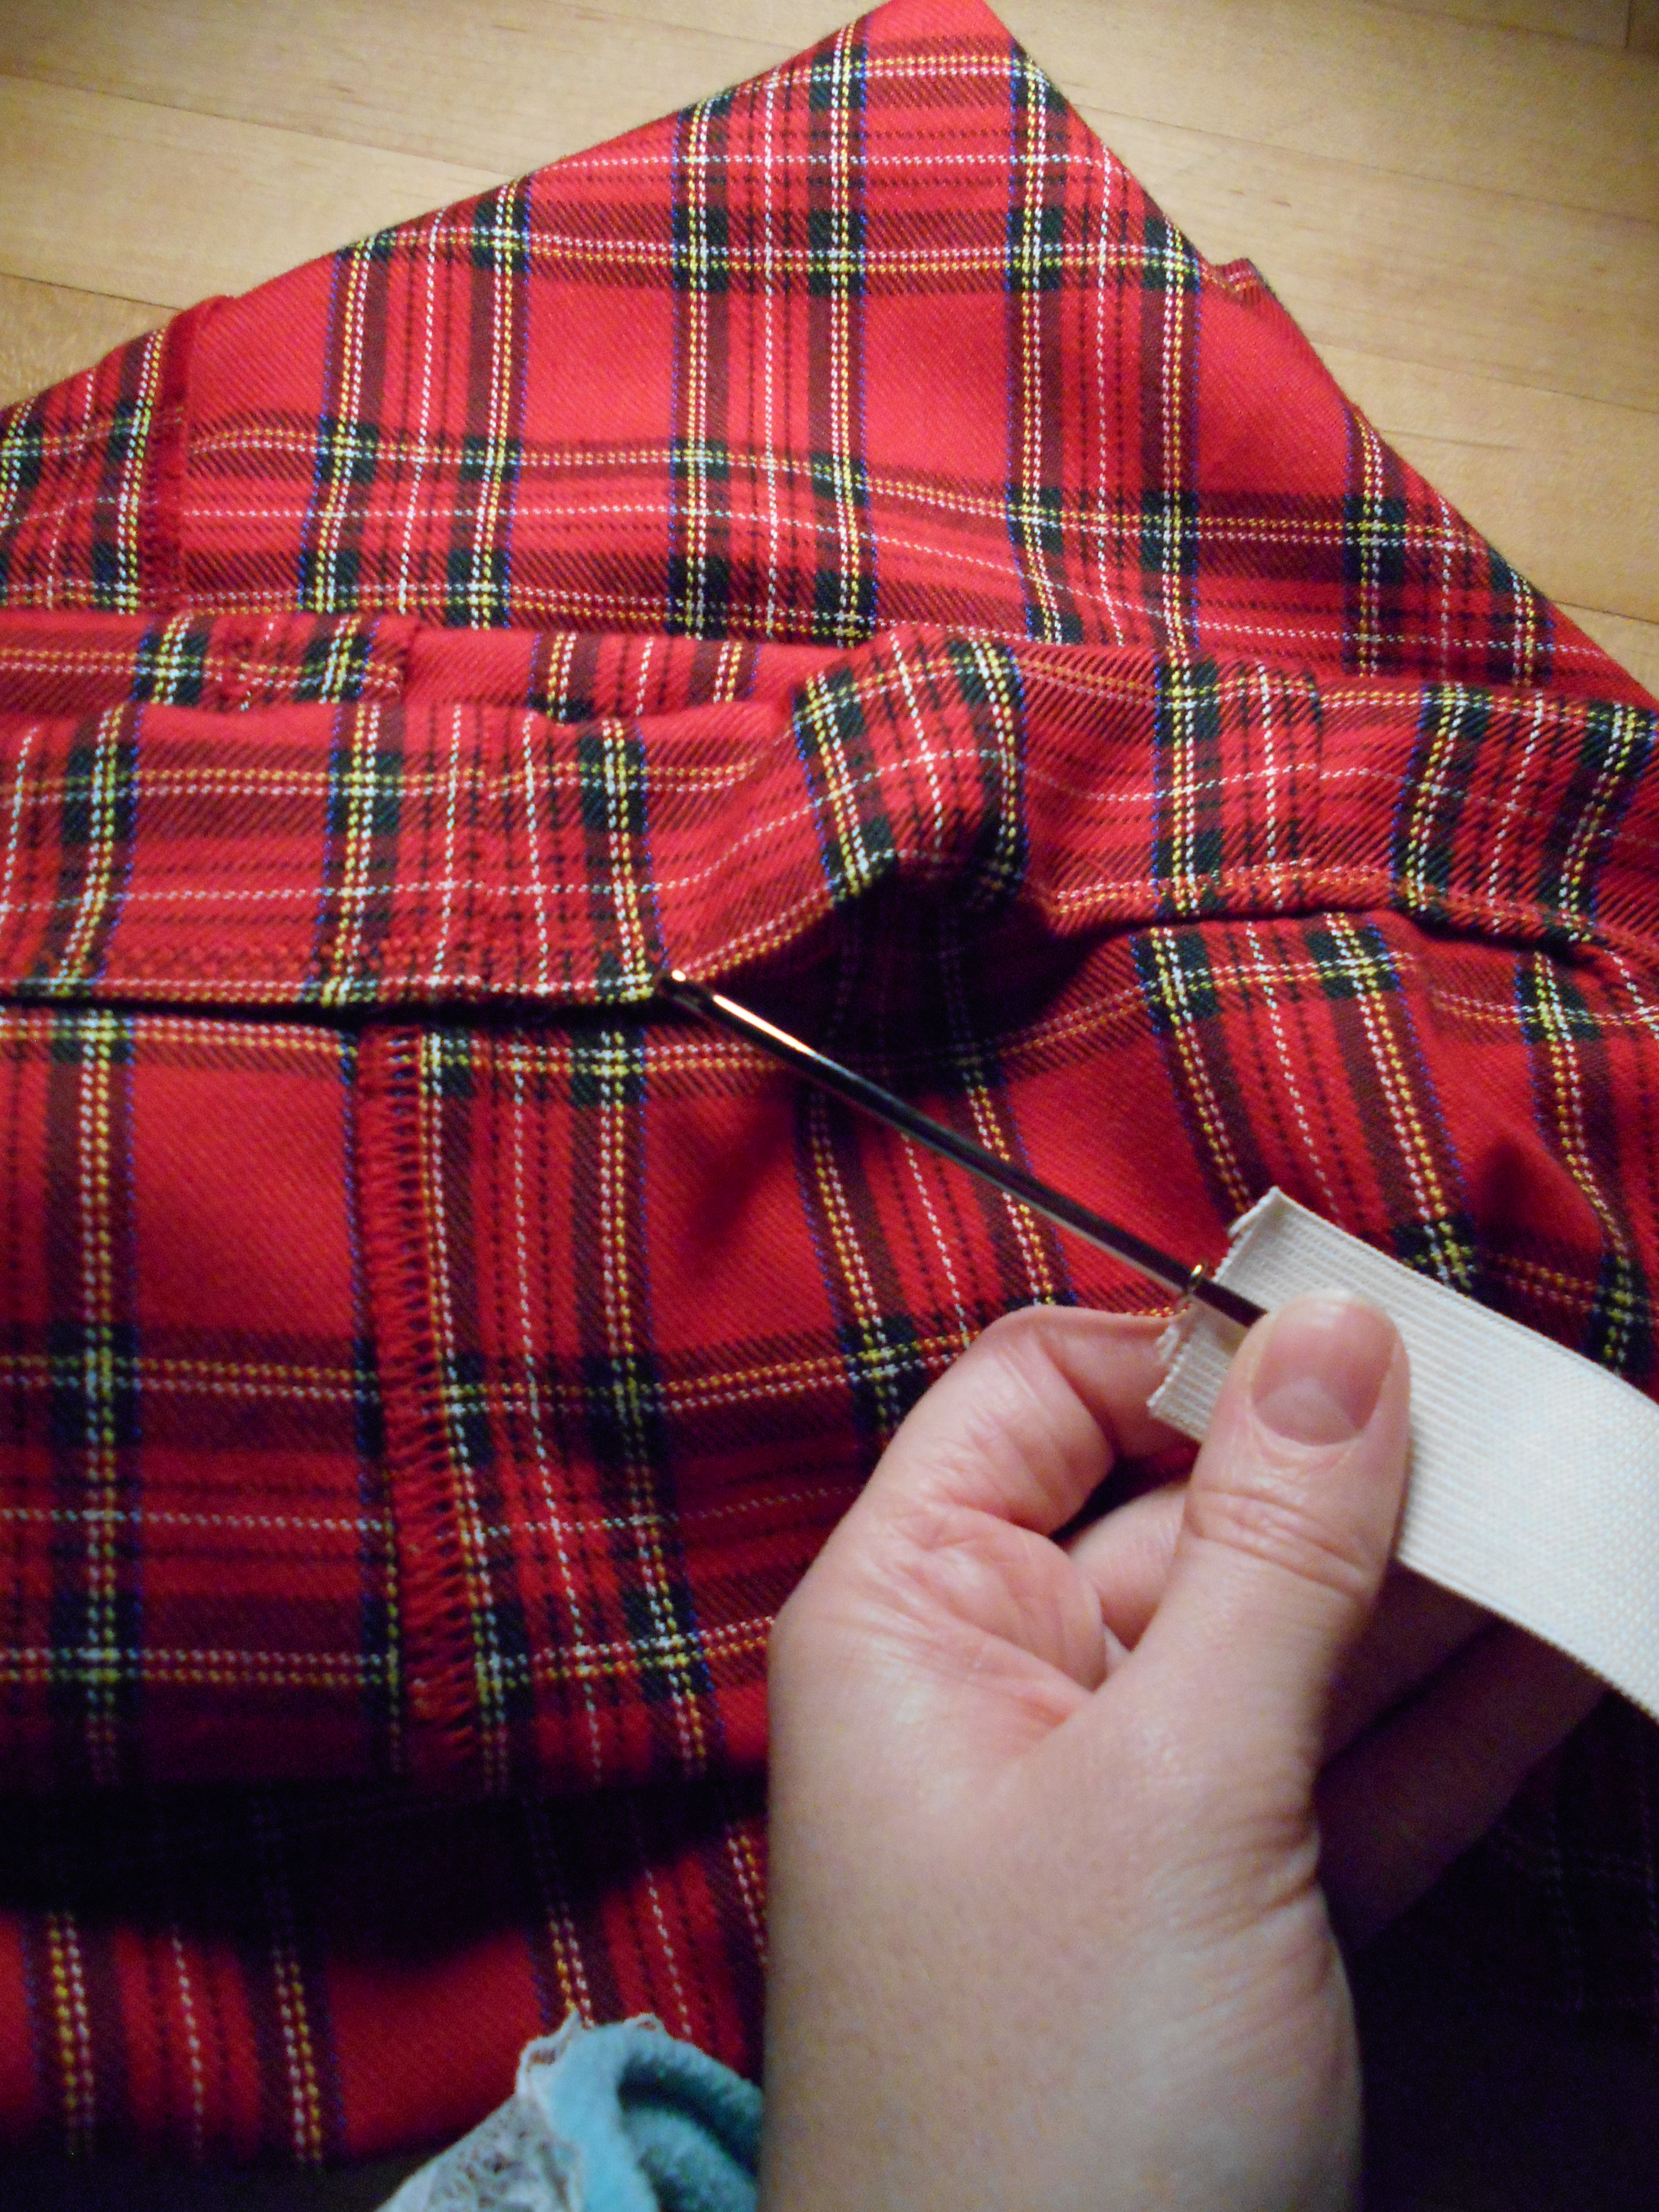
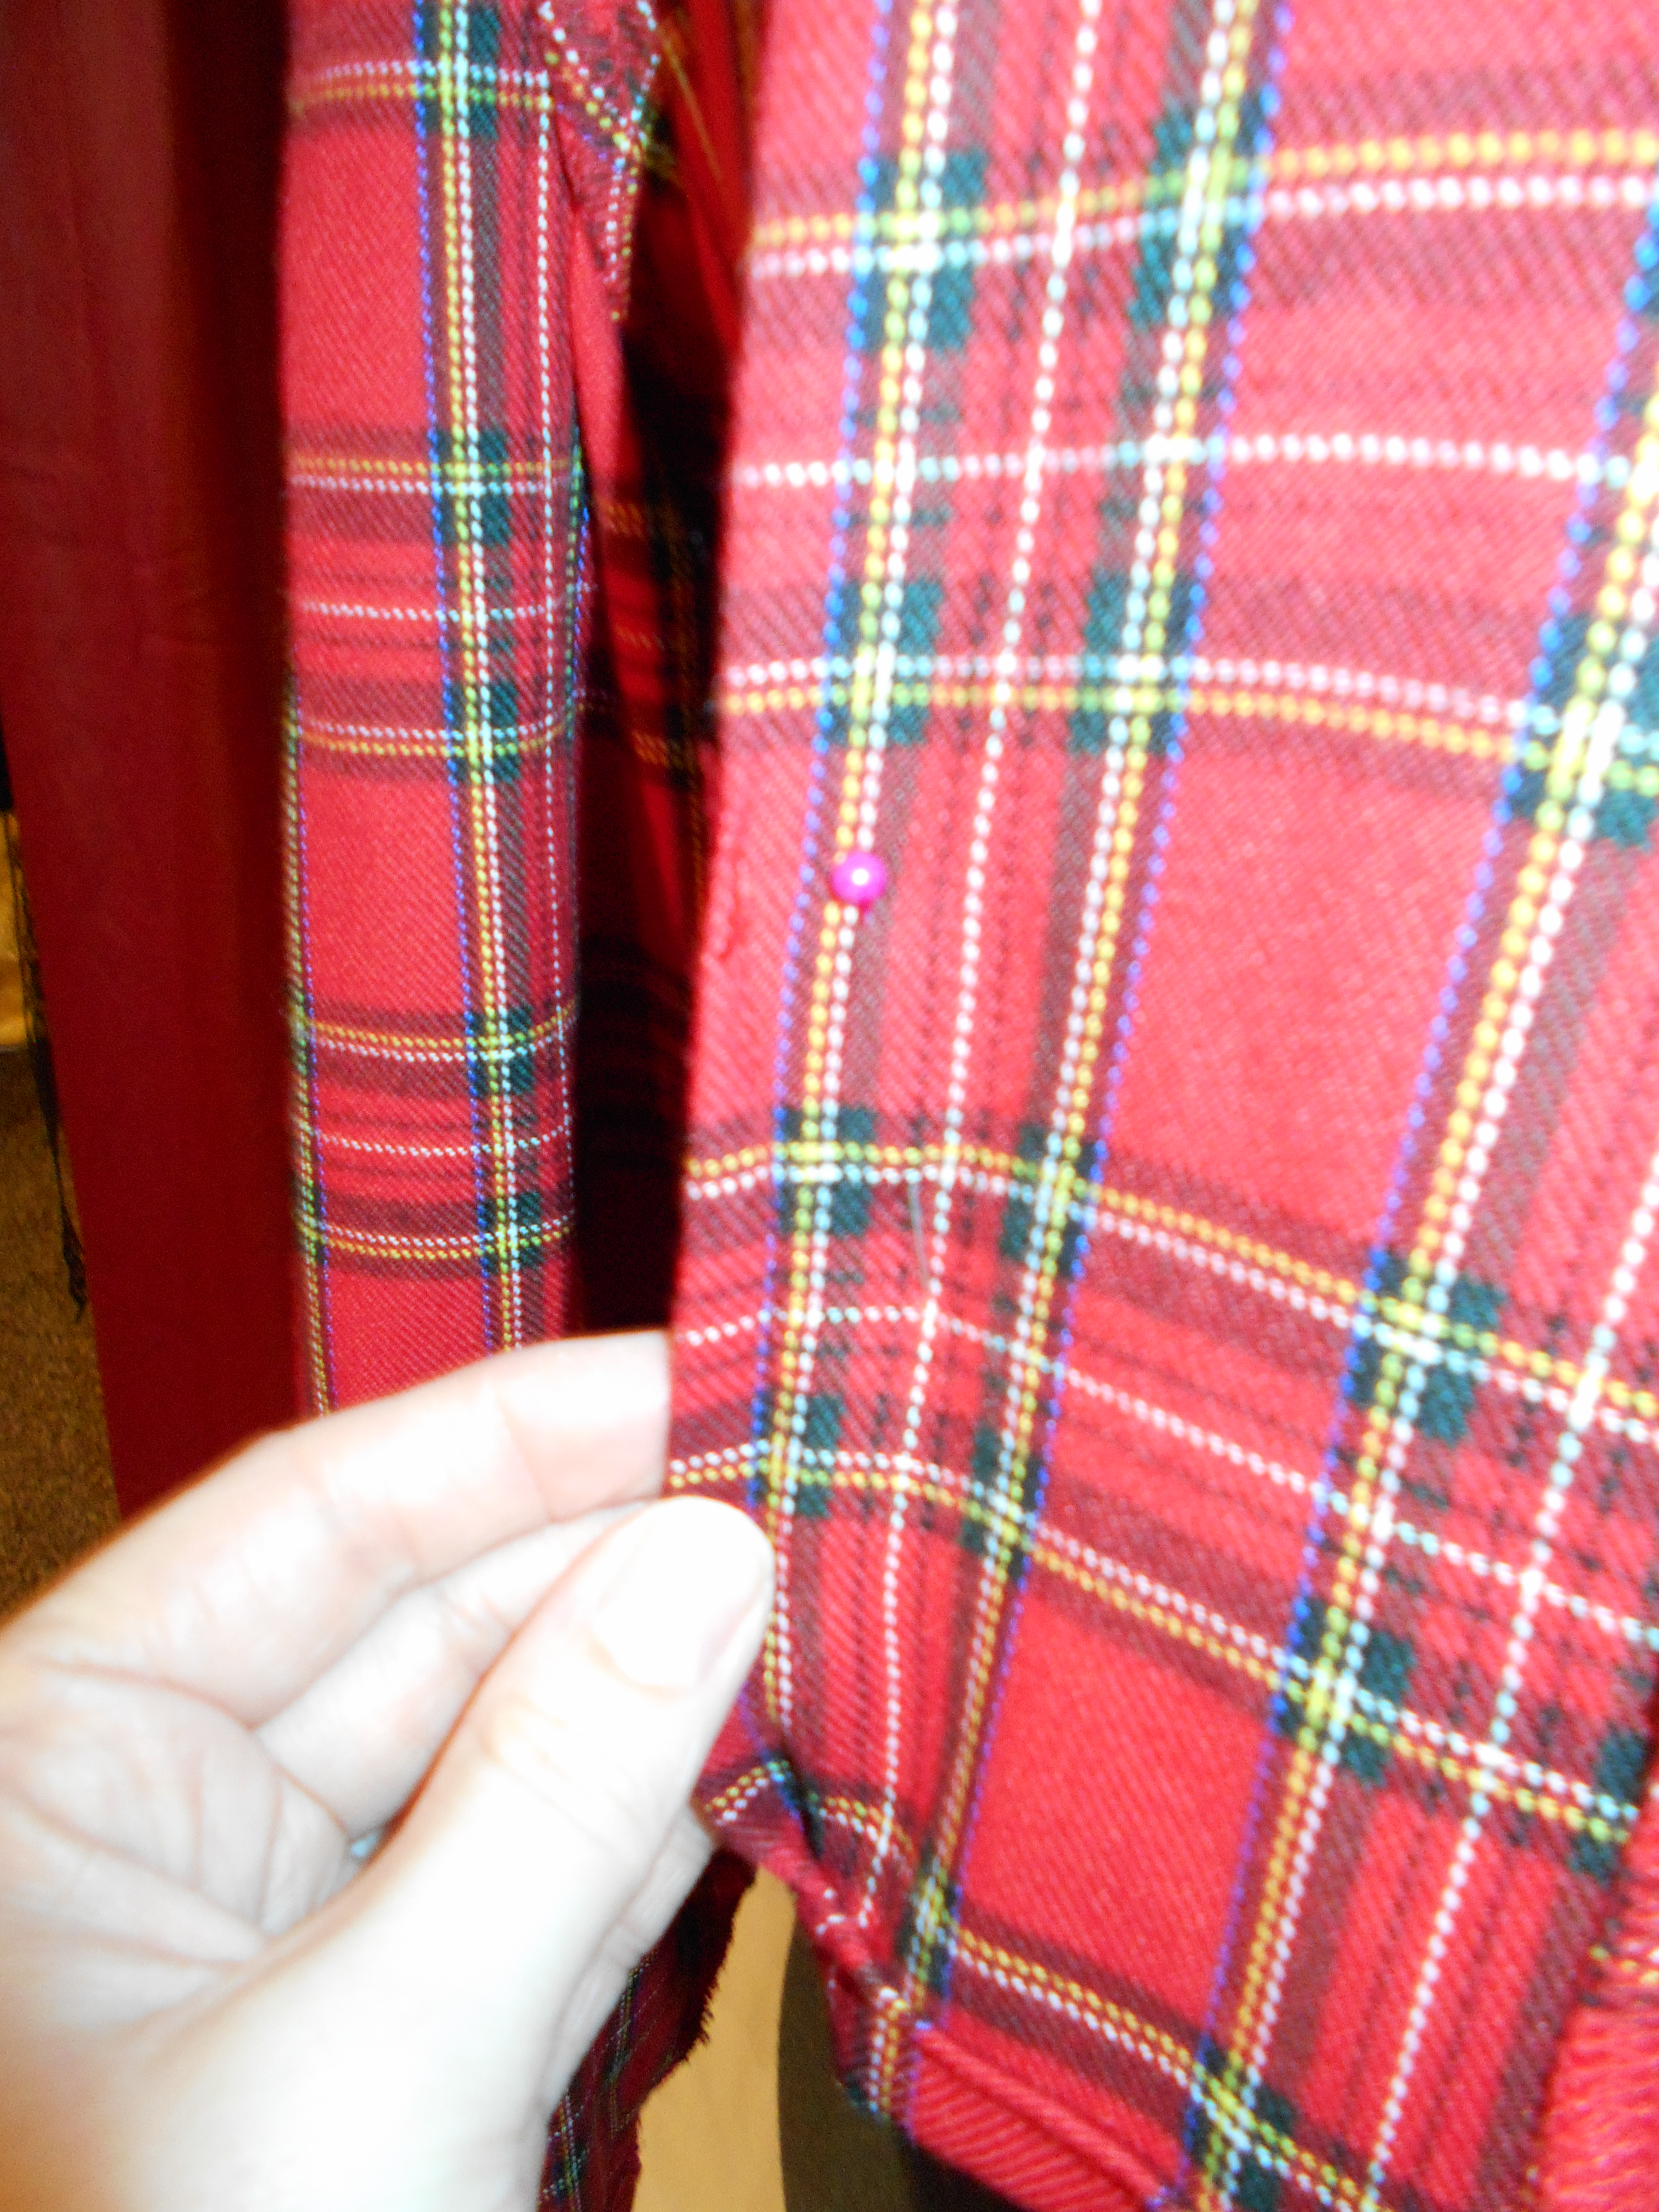
Using my Bodkin to thread the elastic through. (You could also use a safety pin)

dscn1730
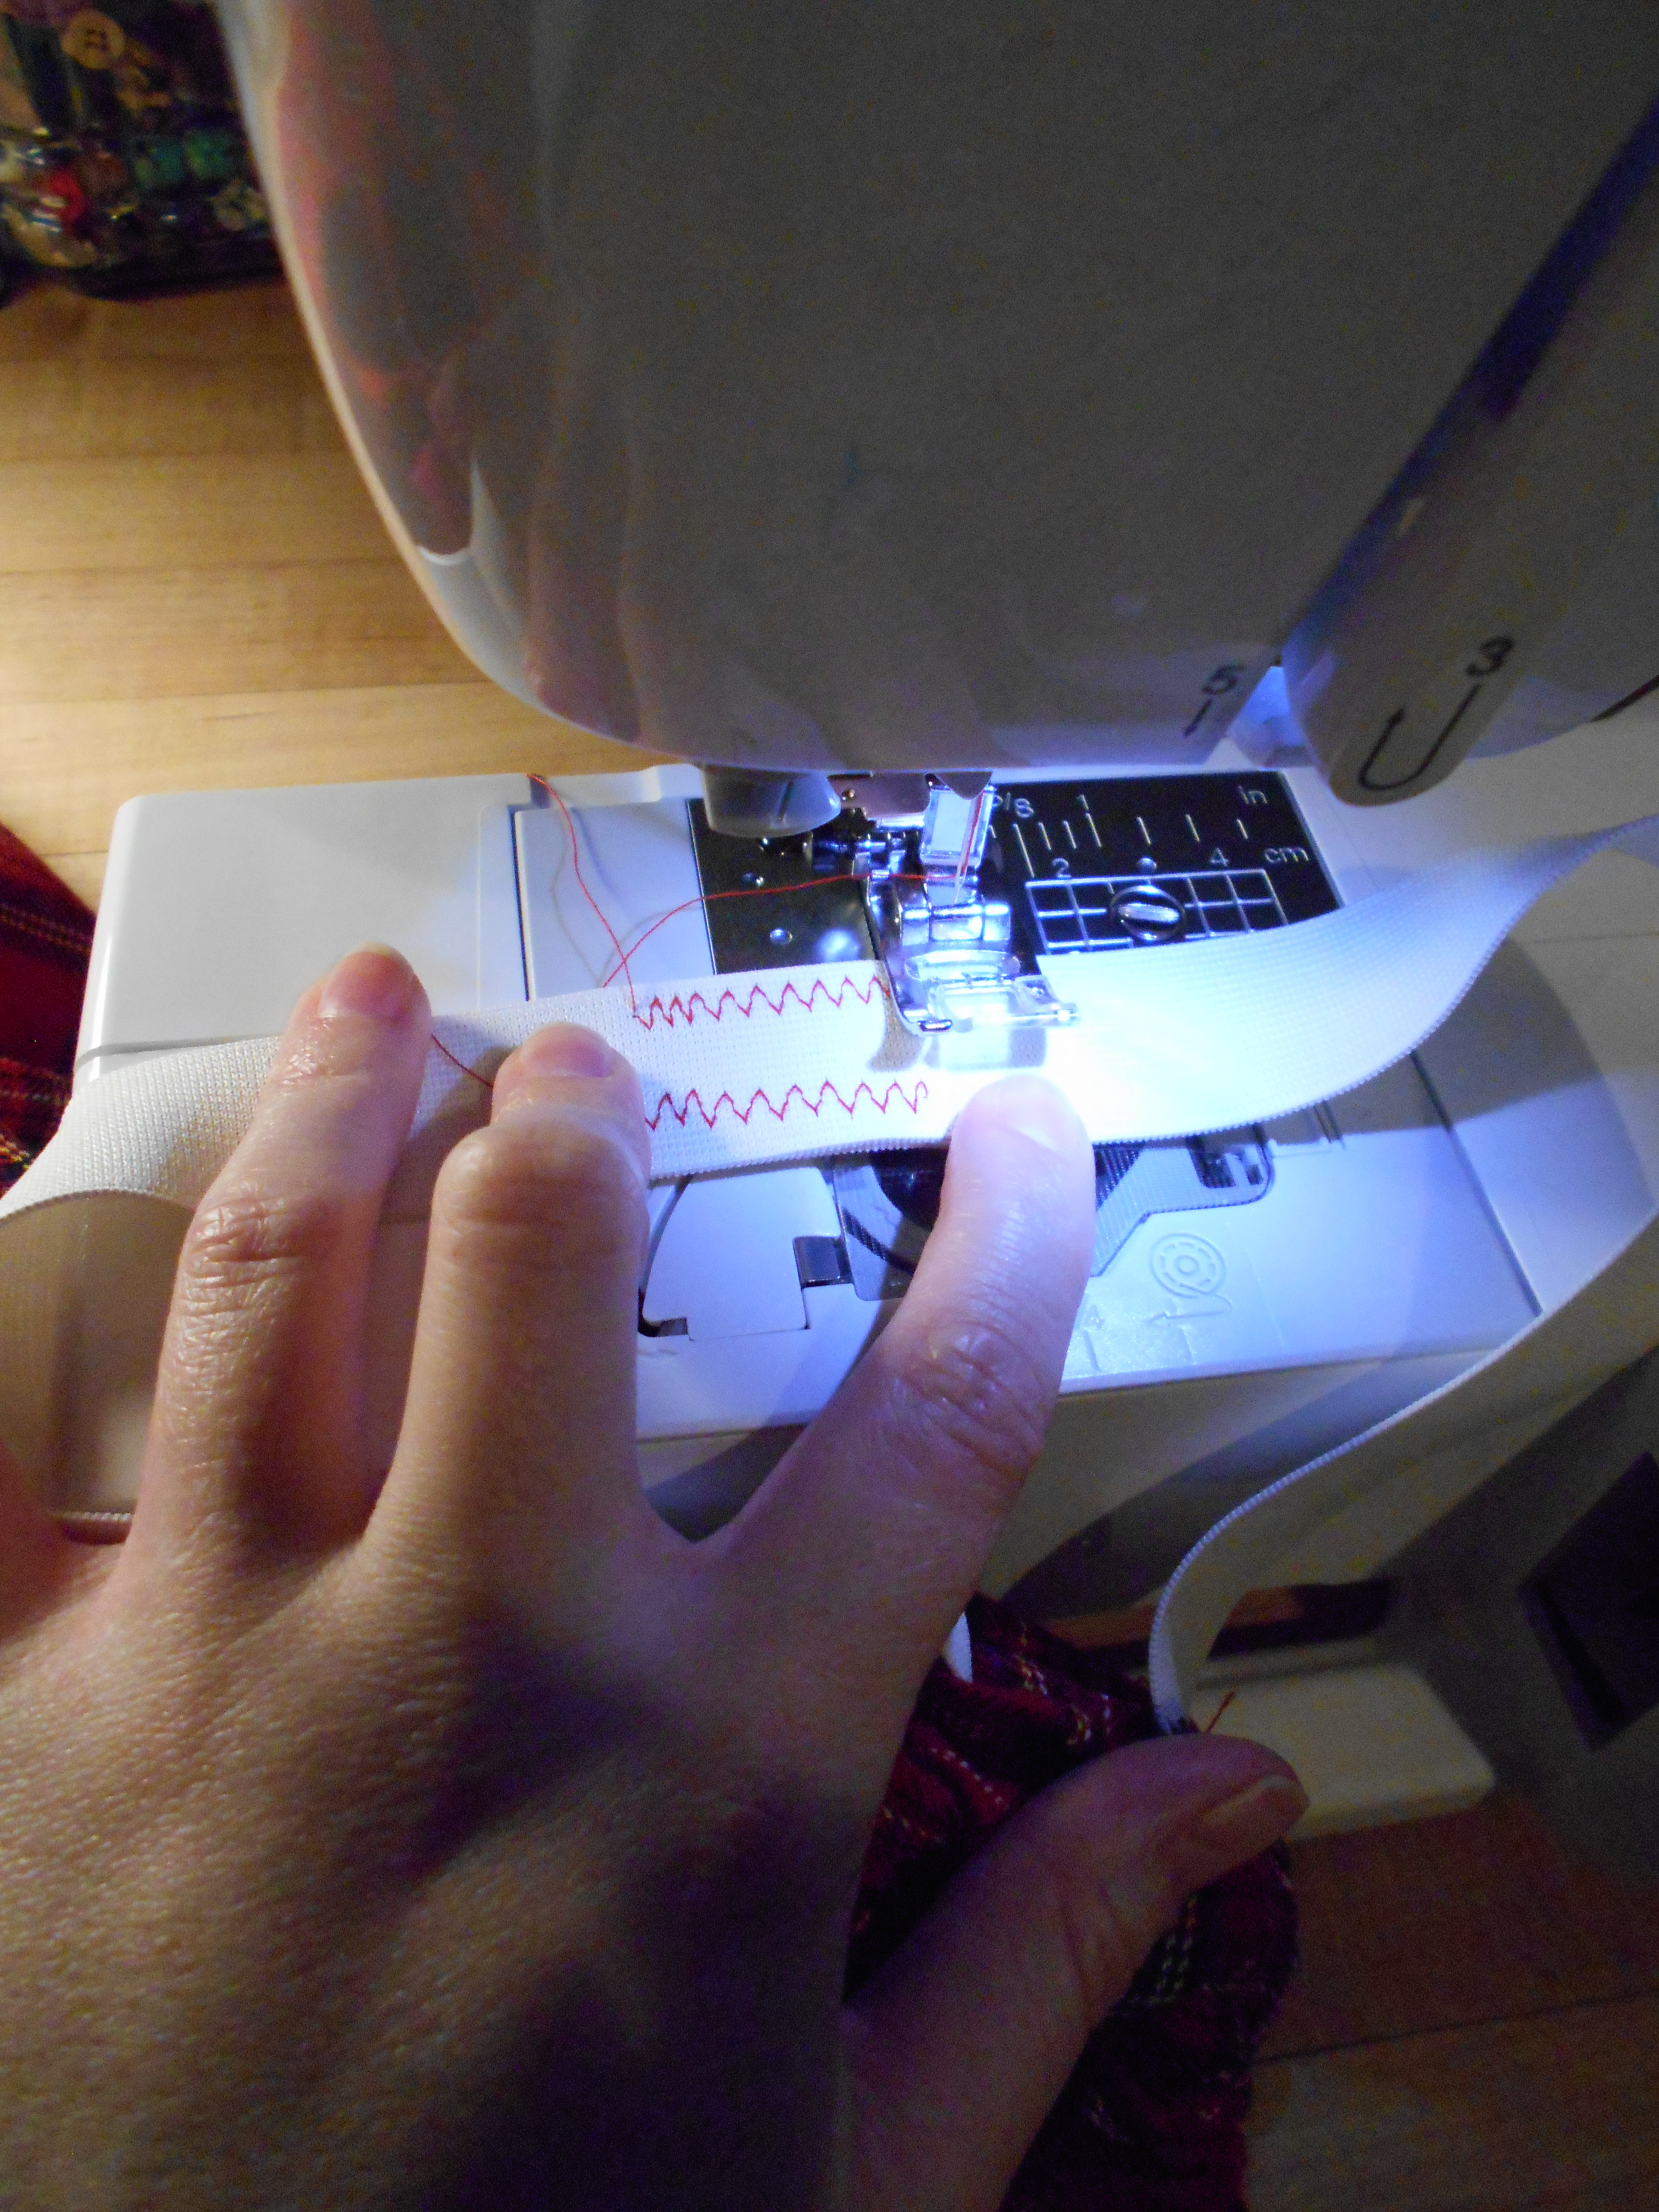
Once the elastic was all the way through, I secured the ends together. This is were the 1 1/2inch overlap came in.

dscn1731
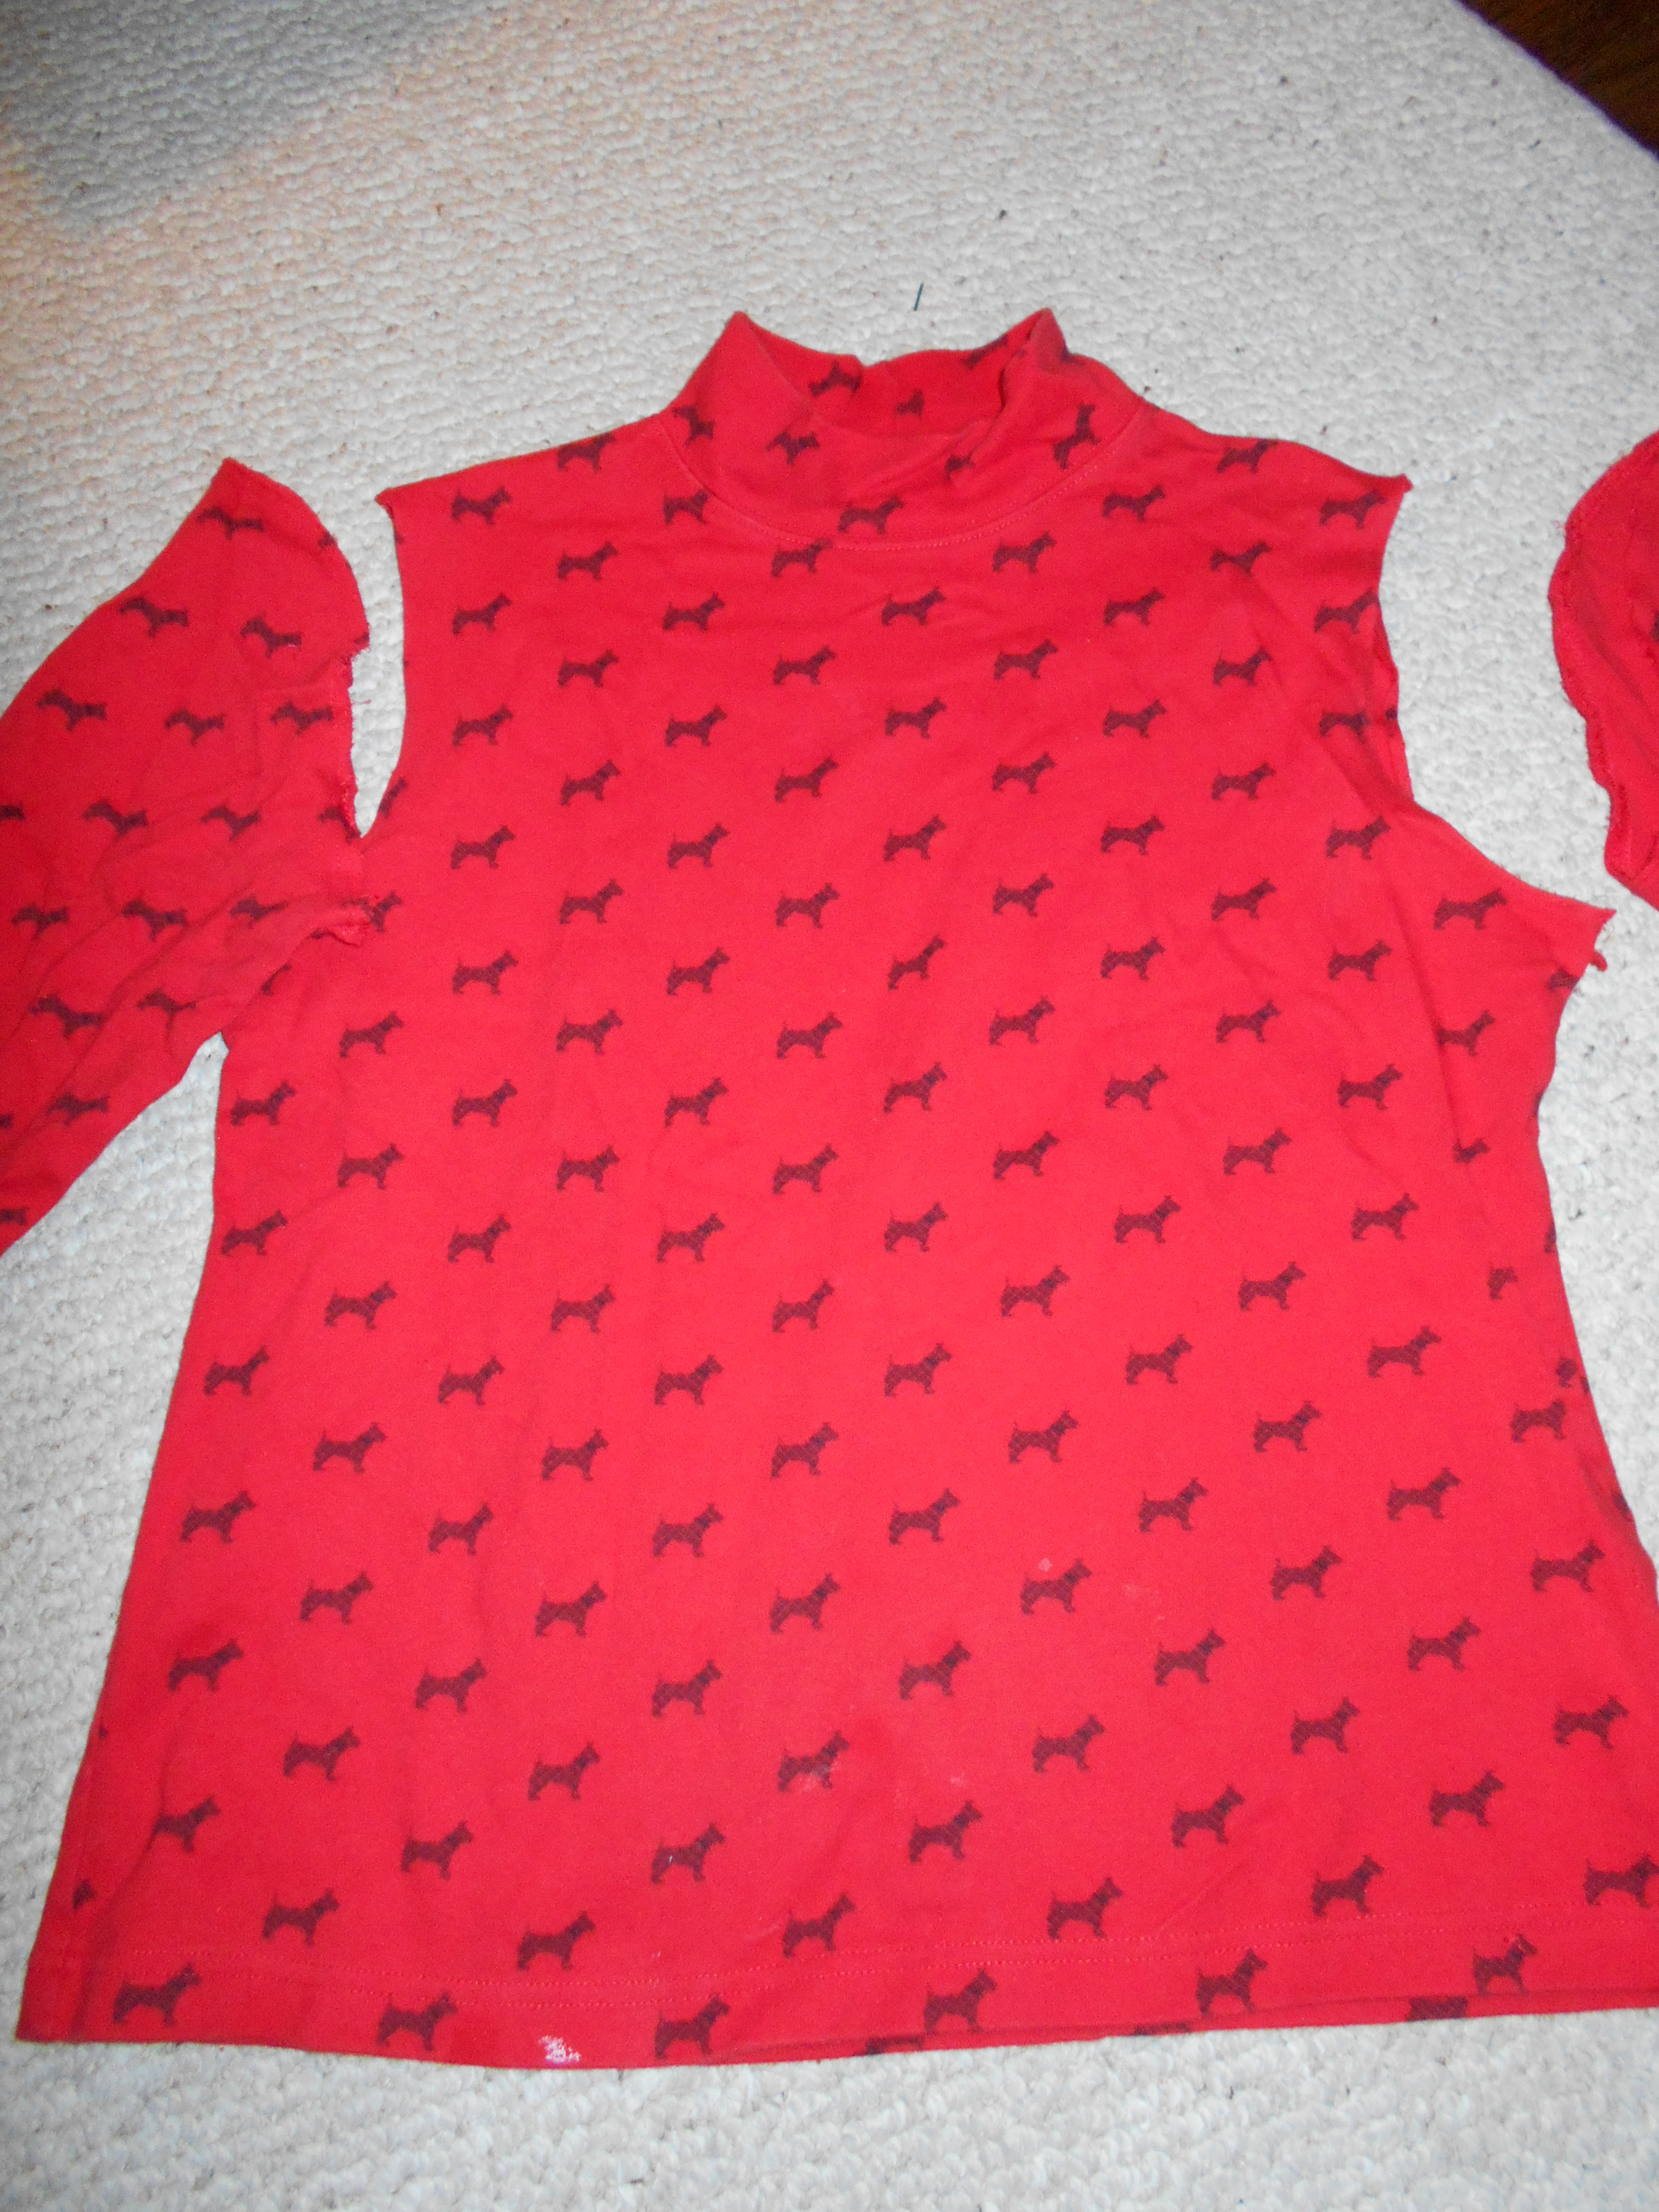
Now for the 3rd and final piece of my outfit!. I began by removing the sleeves. (This is classic Marisa, always removing the sleeves)

dscn1732
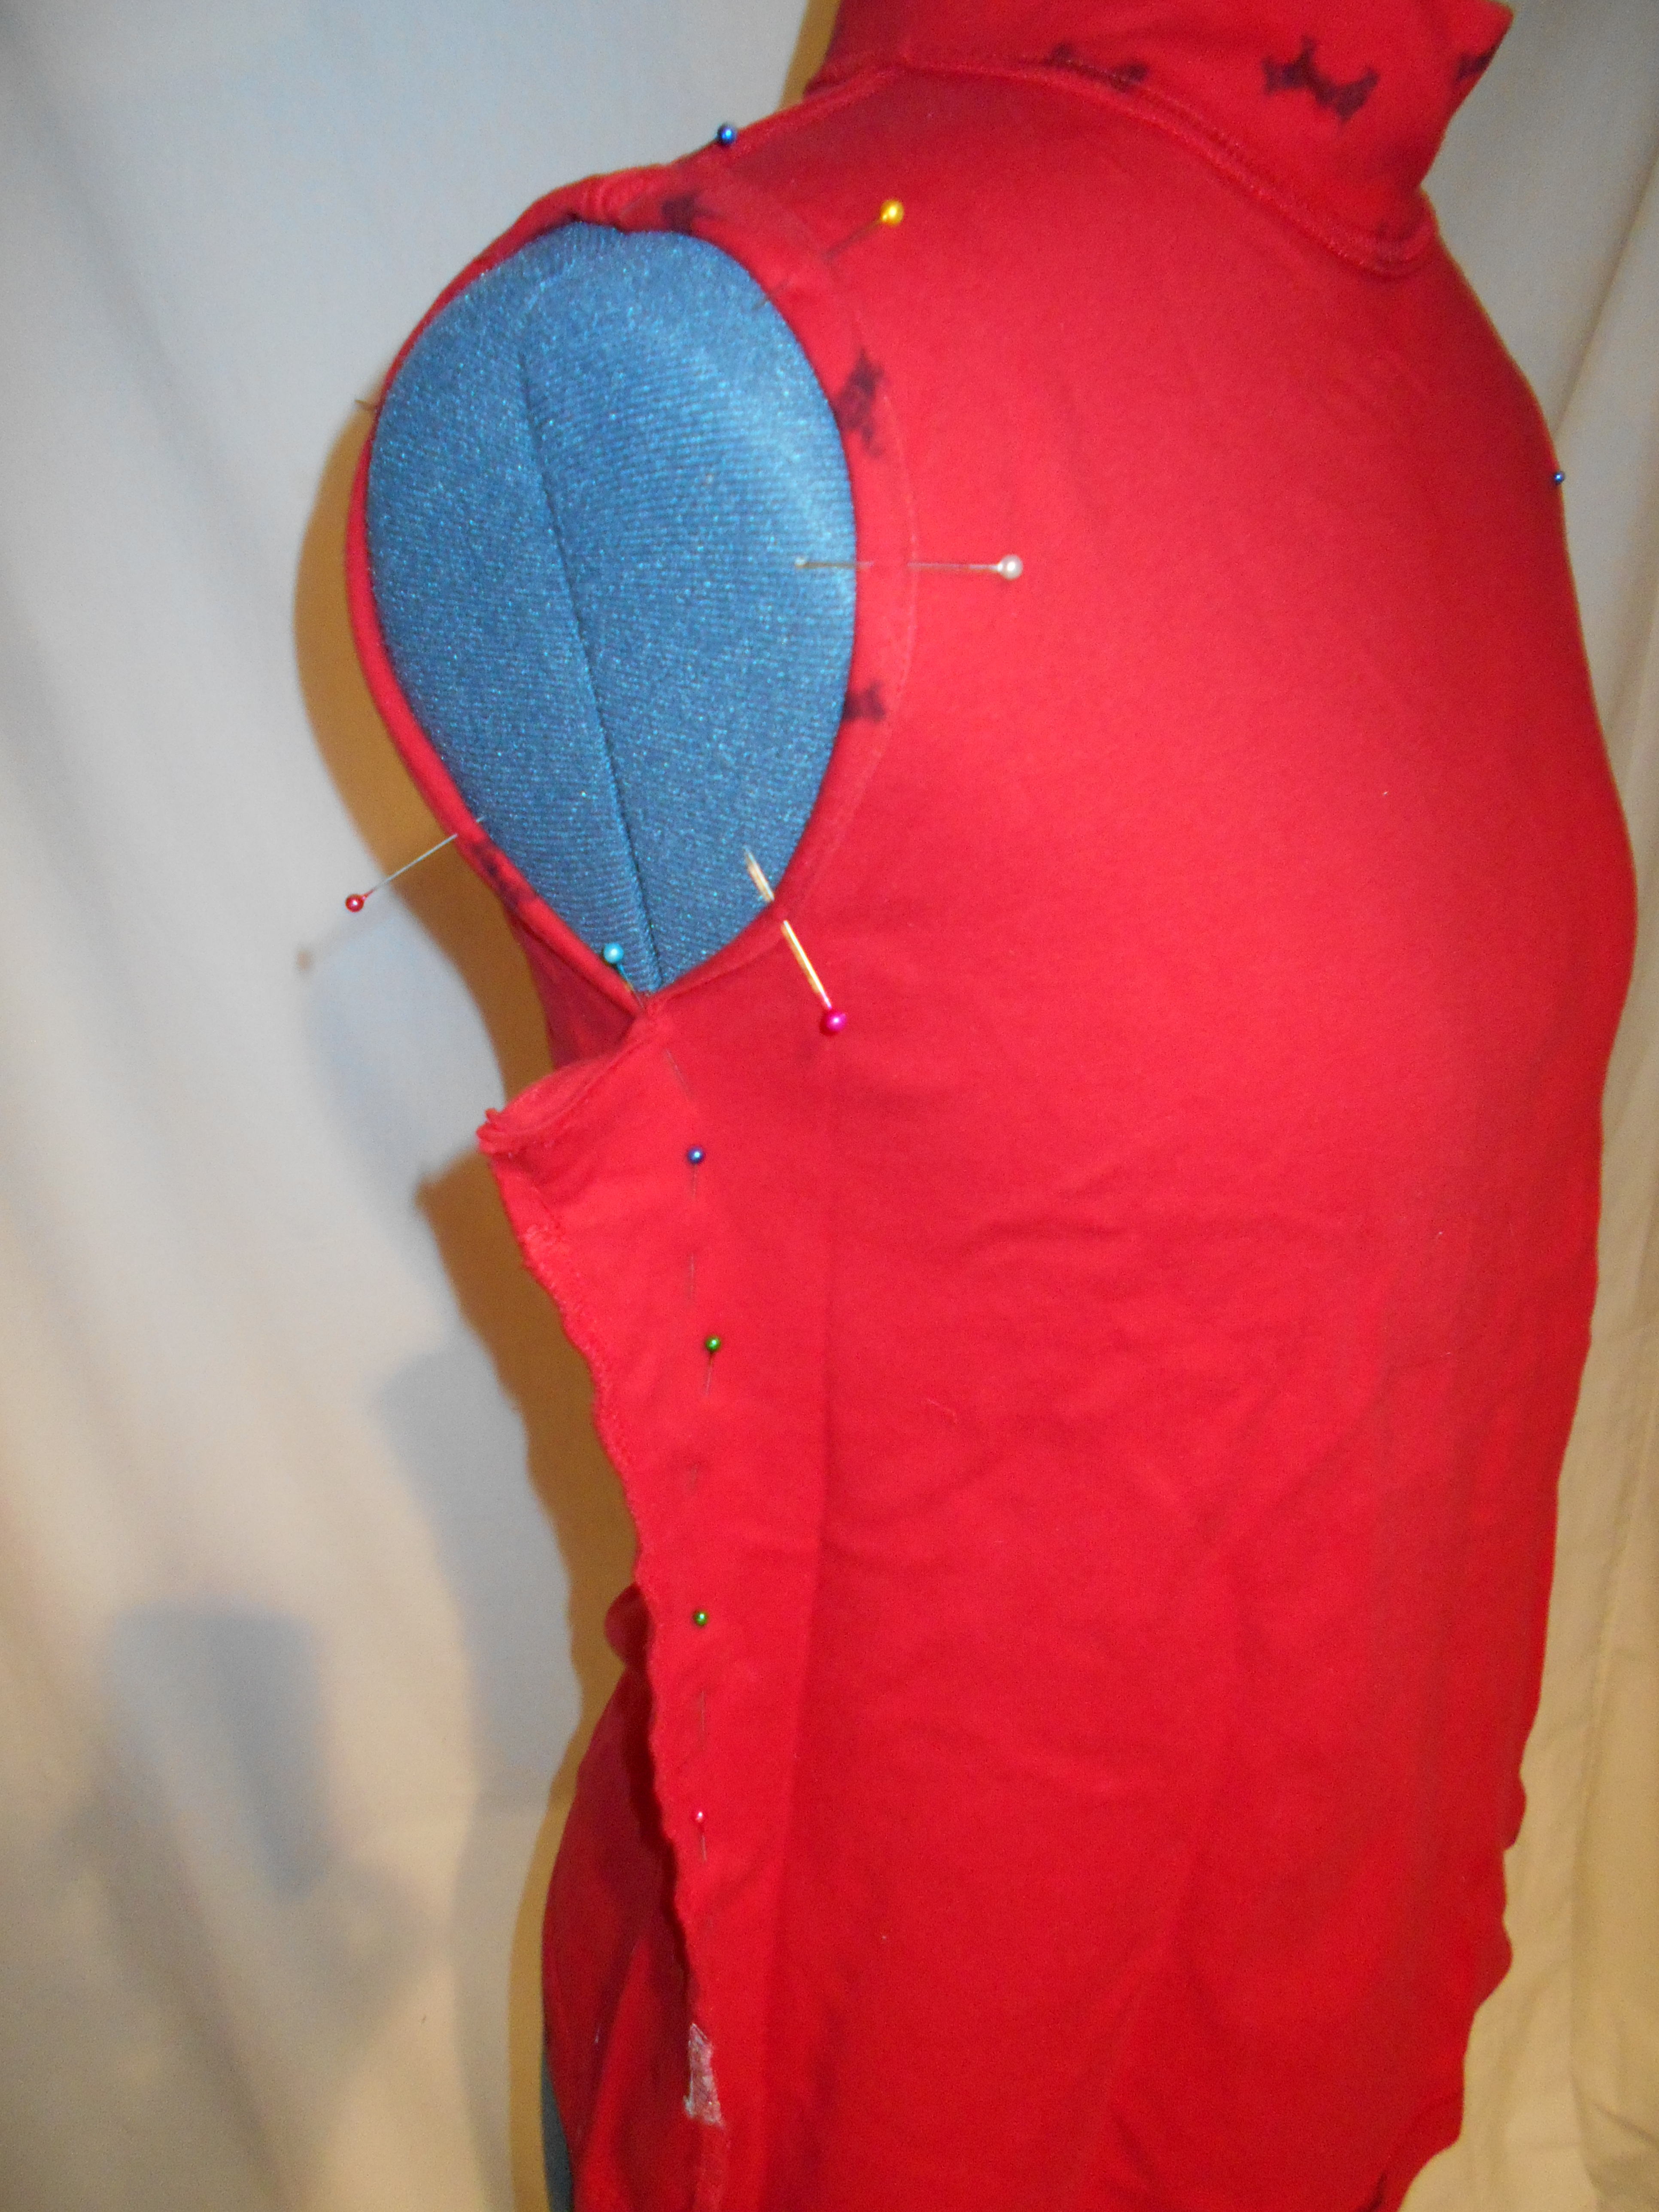
I sewed a new hem for the arm holes and then took the shirt in on each side. (No measuring here, just eyeballed it)

dscn1734
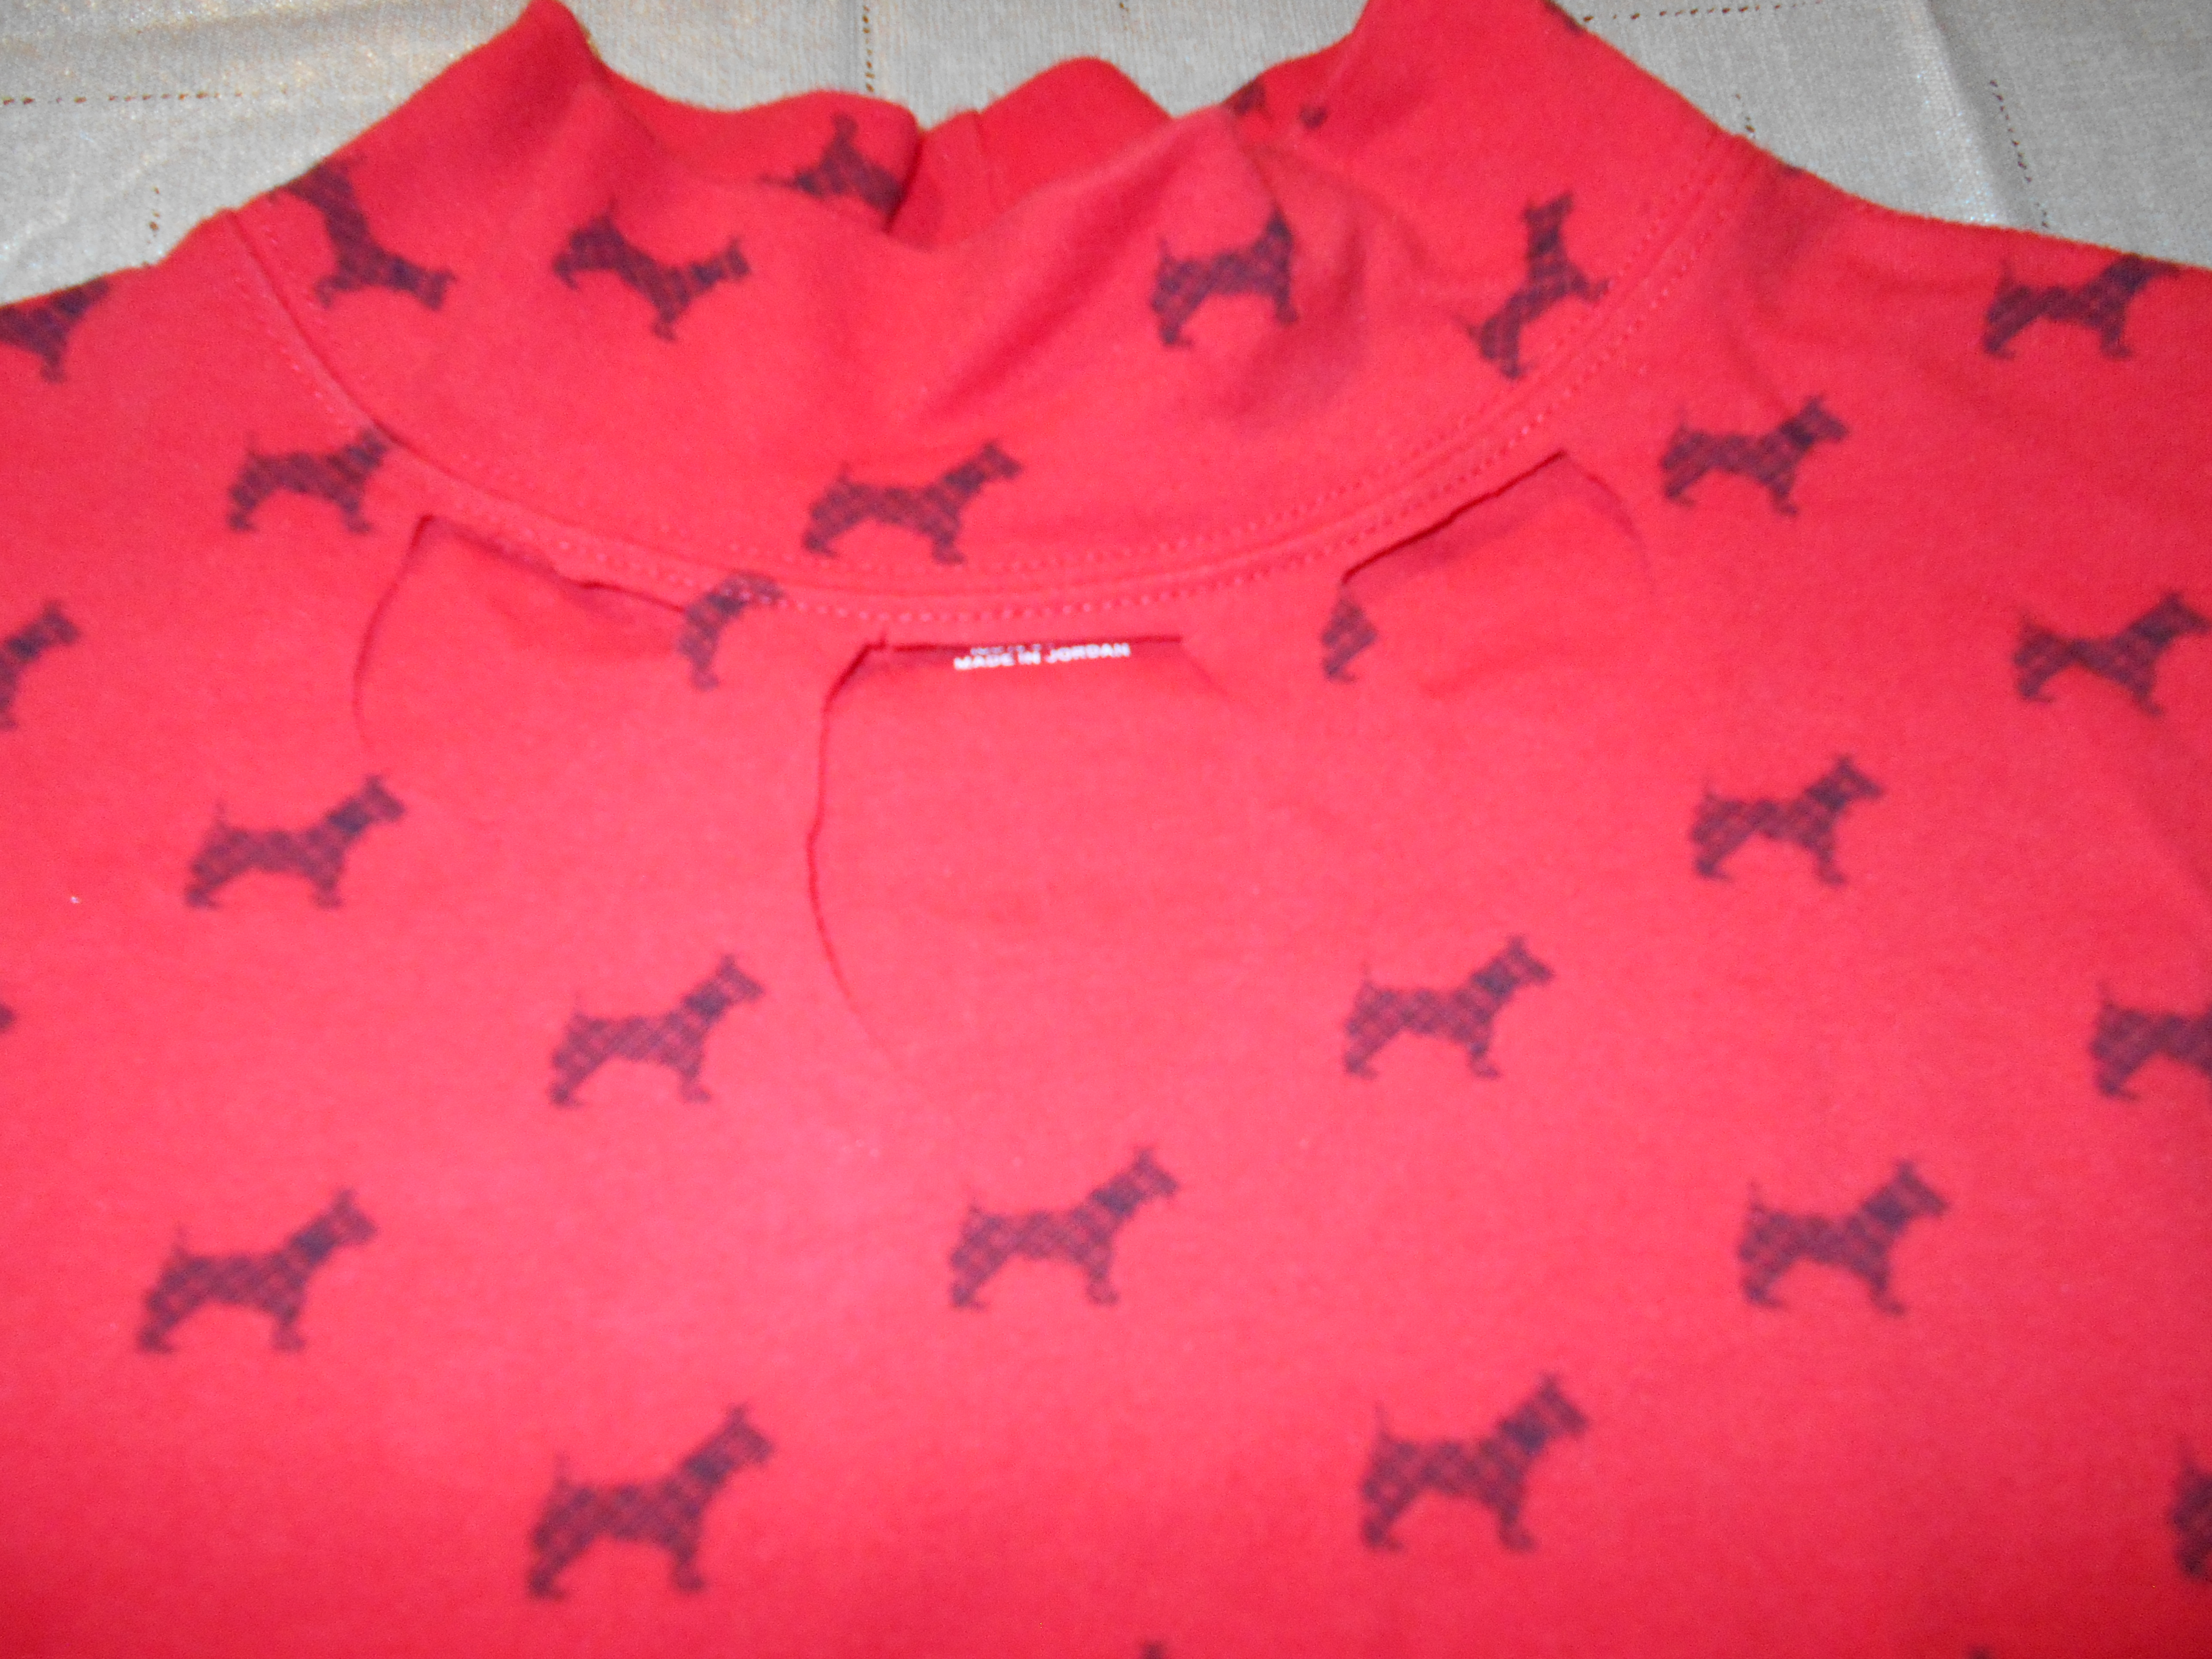
Lastly, I made 3 cutouts around the neckline to add a little more pizzaz! I did not stitch around the raw edges because it was a cotton fabric and I was not worried about it fraying in the wash.

img_1867 (1)
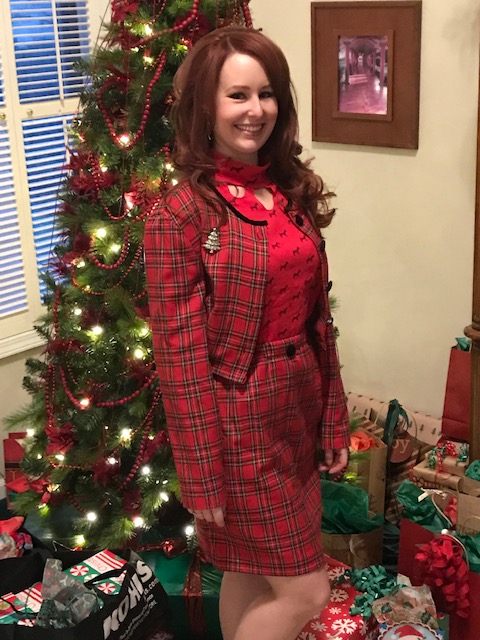
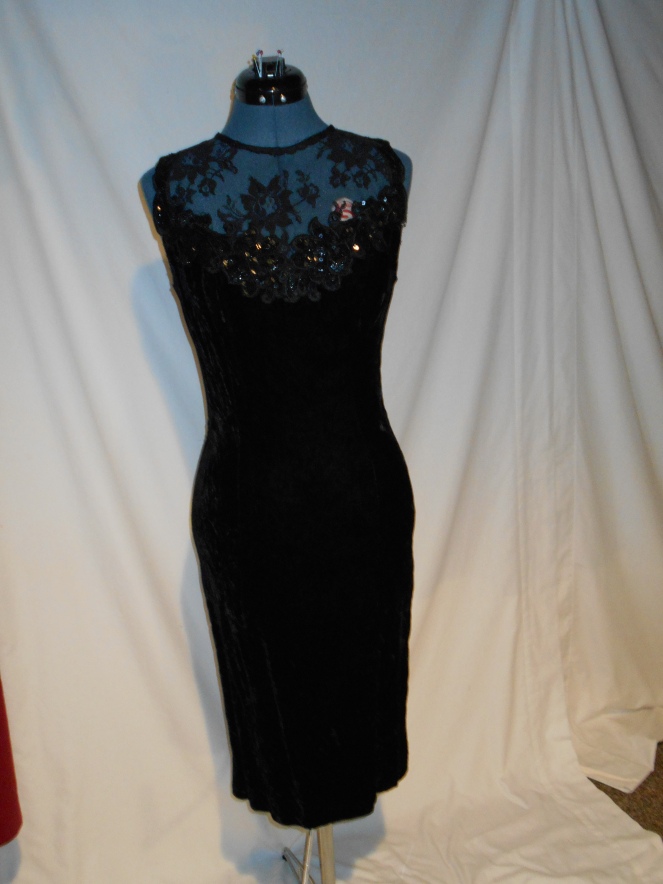
The complete outfit!

img_1873
Modeling pose!
img_1877
Without the jacket!

christmas
Happy Refashioning!!!!
Check out my stash of refashions on my blog!

The Tiny Tunic

A friend gave me this off-white, cinched waist tunic not too long ago, and I was eager to give it a whirl. But it was just a little too small for me in a couple of places, so I made some subtle alterations to make it better-fitting and easier to wear.

Before


After


The first thing I did is give the tunic some side vents to make the bottom half a little looser. It's a subtle change, but you can see that the bottom half now has more of an A-line shape rather than a bubble shape. I think that's a more flattering silhouette.

I also learned that it looks much better on me if I keep the top couple of buttons undone, which was a simple fix that didn't require a single stitch!

The other alteration was just a simple fix to make the shirt more versatile. It had roll-tab sleeves, and the tabs were always dangling out past the cuffs. I sewed a button to the inside of the cuff so that the tab could be held out of sight, but still be usable if I ever choose to wear the sleeves rolled up.


Some more photos over at my blog!

--The Unfashionista

Wednesday, January 16, 2019

The Sleeve Shirt

Hello Refashion Co-op. I made a new shirt because this patterned blouse got a hole in it.


Can you see the hole in the pattern? It was small but it was right in the front of the blouse. I couldn't wear it like that.


I decided to save the sleeves and the little bow at the neckline. I just needed another shirt to put them on.


 I had this great blue mini dress. I cut the sleeves off and made it a little more narrow in the back. It already had a seam down the back so I just stitched along using it as a guide.


I used a t-shirt that fit well to use a pattern and marked the blue shirt. I stitched new side seams and then added the puffy sleeves from the blouse.


You can see the bow so much better now. I liked how the puffy sleeves looked with the fitted blue shirt. 


Thanks for reading along, for more pictures and details go to I Can Work With That.

Tuesday, January 15, 2019

Transformation de tee-shirt

en ce moment je ne pense pas toujours à faire les photos "Avant" , alors comme là je n'ai pas oublié je vous présente une transformation de tee-shirt en sweat ........


J'aime vraiment ce patron (Indigo de LMV) de par sa coupe que je trouve très féminine et en plus qui me permet de recycler......


Pour en savoir plus c'est Ici 
a bientôt , Elisa Elisa