Thursday, July 30, 2015

Green, floral, stripes, and geometric

I am also inspired by the Refashion Runway, and will attempt to sew along (I decided against applying for participating, since I wasn't sure if I would have enough time for it).
So: Floral and Geometric or Stripes.

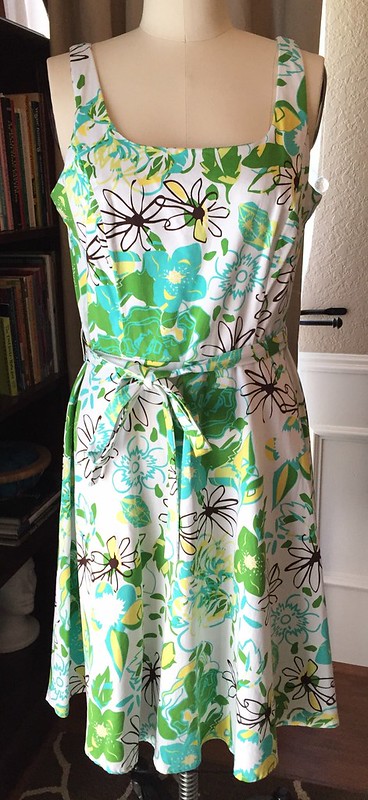
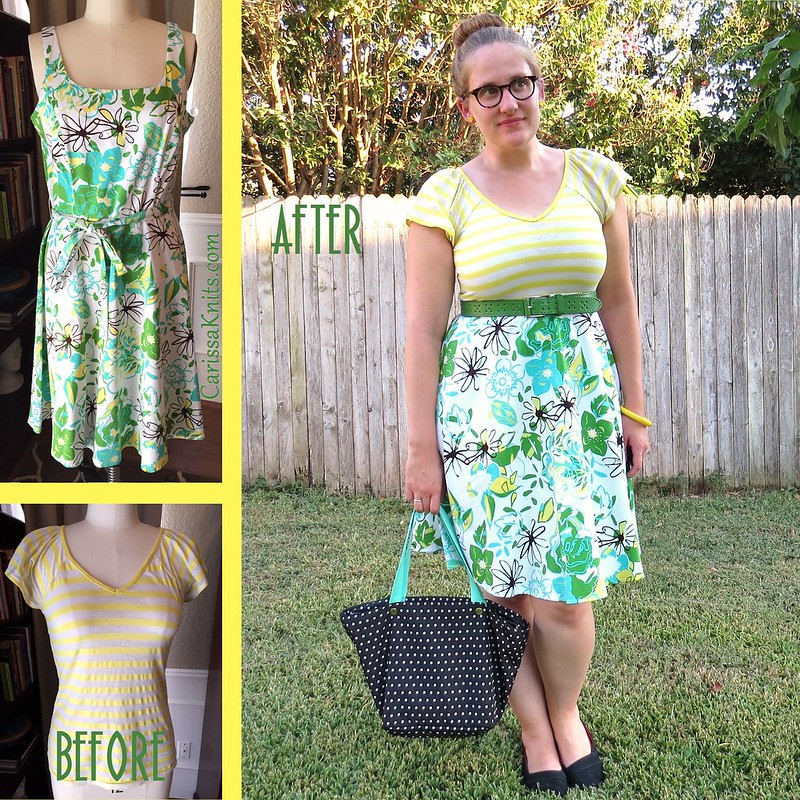
I once refashioned this little dress (that had stilised flowers in a striped pattern). I liked the shape and look of it, but not the colour.

I dyed it with Dylon for washing machine, in the colour Amazon Green. Much better.
(And my camera really don't like green. The colour is shown better in the following photos).

But I wasn't finished. I wanted to go down the geometric route, that only one of the participants partly also had chosen.
I had this cool ribbon in my ribbon stash, that my grandmother gave me. It is supposedly from the 60s or 70s. I sewed it to the neckline, the sleeves and the overskæring (where the bodice and the skirt meet).

I like it better now.
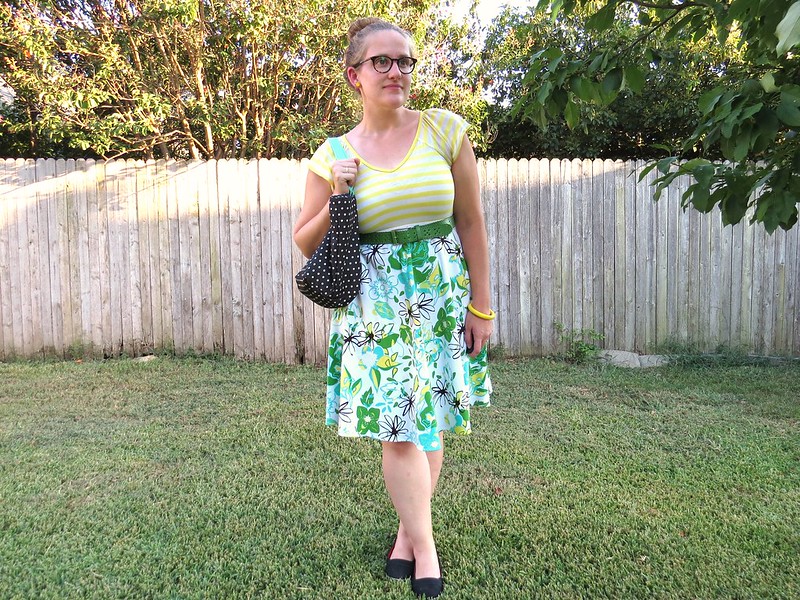
And with a pair of leggins, a thin wool cardigan and laced boots it is just right for the cold, rainy, autumny summer weather, we have had lately.
 (And if you look closely at the fabric, you can still see the flowers).


The Dylon packet had enough dye for 600 g of fabric. So I found some more items of clothing that deserved a freshen up.
All the colours on the clothing are slightly more bright, over into fresh grass green, in real life, but my camera just wont have the green.

A boring floral skirt, now a much more interesting green.

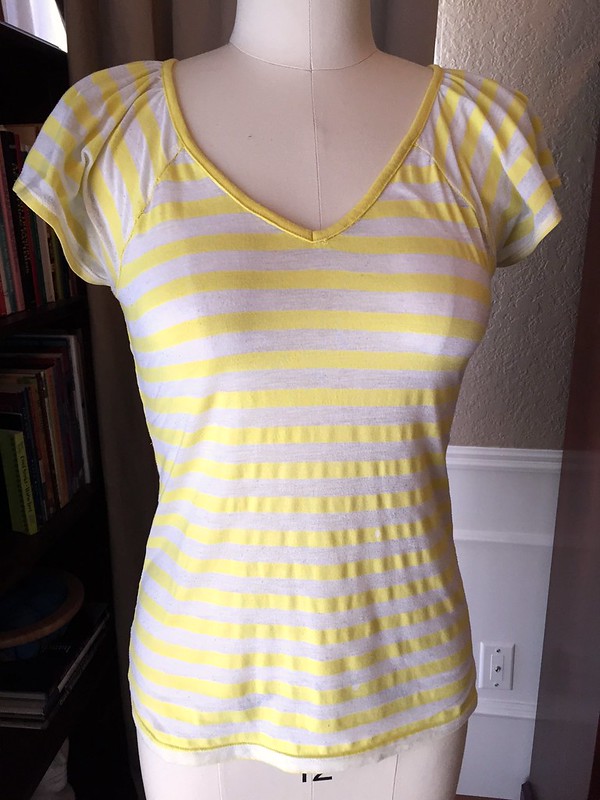
A button up shirt with yellow stripes. Yellow just isn't my colour. But green is.

Long sleeve T-shirt. It is a cotton/polyester mix, and as it turned out, the whites stripes were the polyester - and polyester don't take to the dye.
So now I have a nice green longsleeve with white stripes. Cool.

Short sleeve button up shirt. I liked it, but black/white is too harsh on me. Now a more douche GREEN.

Green green green greeeeeen, oh how I love green :-).

Oversized-cardigan from mens sweater

Meine lieben Refashionistas,
da bin ich wieder, schön wieder da zu sein! I was moving to a different city and because of that there was no time for blogging.

But now I don't want to hold back my latest refashion. I simply transformed a mens sweater to an oversized cardigan. I hope you like it!

http://ninutschkanns.com/2015/07/29/refashion-oversized-cardigan-aus-maennerpullover/

See the hole refashion on my blog on ninutschkanns.com.


CU there :)

Plus one (button).

I found this dress recently and to be honest I didn't hate it as-is, but I knew it could be even better. It had great material and a good basic shape already.
The main thing that I didn't like was the collar and neckline. This dress happened to have a spare button sewn onto the tag (YES!), so I decided to take off the collar and add a button at the top which created a jewel neckline. Then I changed the sleeves to cap sleeve, removed some weird sewn on ties (a bit hard to see in photos), tailored the bodice, and brought up the hemline.

Here she is:


Might be wearing this one everyday. 

Instagram: here
Blog: here

Side by side:


Floral transplantation

Before
After

This ruffly, gathered-just-below-the-waist tank top wasn't doing my figure any favors, but I really loved the pattern, so I uprooted and replaced some of the elastic to make it a better fit for me.

Step 1: Turn inside out and pick out the elastic band that runs around the inside near the bottom.
Step 2: Reattach that elastic to the back of the shirt, near the top.

There were some intermediary steps, mainly a lot of trial and error to determine how much fully-stretched elastic I would have to add to remove 5 inches of fabric when unstretched (apparently it's 6-and-a-quarter for this particular piece of elastic), but you get the gist of it.

By following this fairly simple method, I got a nice comfy tank top that's fitted at the top and flared at the bottom.

But wait, there's more! Head over to my blog to see how I styled it, and, not to be missed, my ... dramatic pose!

Wednesday, July 29, 2015

A super dress

WP_20150727_002
Before: two t-shirts
WP_20150727_005
Ta-Da! A super dress
Superman is our families favorite super hero, so I knew I needed to reuse Joshua's old tee-shirt.  Plus, it had one spot and one little hole towards the bottom, so it was not in  "donate" condition.

This is not my best sewing job, but Gracie thinks it's amazing to have a superman maxi-dress.  (I'm trying to convince her to wear as pajamas, not an actual dress around town.)

I used her brother's outgrown superman shirt and an old red shirt from my stash.   I resized the superman shirt by an inch on each side, kept as much of the length from the red shirt (by request) and then sewed them together.

After I took this picture, I measured around her little waist and then added elastic at the waist seam, hoping it would give the dress a little more shape.  It didn't work.  The dress is still loose around her waist (should I have subtracted an inch or two from her waist measurement?)  Also, the red skirt portion was almost the same width, so there wasn't much room gathering needed.

Any ideas to do a better job next time?

Small change with chain

Hello my friends!

My mother gave me this leather bag which had a very small strap... 
I couldn't wear it as crossbody bag, so...

I added chain in both sides and...


Now I have a convenient and fashionable bag!


Thanks for reading!

My Simple DIY Maxi Dress


Create a fab salute to the 70s maxi dress from thrifted fabric with my quick & easy refashioning tutorial (no pattern required!)


Too Tight Tank Top Refashion

Do you have a tank that is too tight? 
Don't want to give it up though?
You've come to the right place!

I had this cute pink tank with adorable sequin details, but it was too tight. :/
I remembered I had matching chiffon, so it was a no brainer. 


I cut open the sides of the tank, including the part circled.


Next, I cut out two triangles for the two sides of the tank top. 
I just sewed them right in!


TA DA!
For the full tutorial & more photos visit Sew Much Love, Mary 


With Sew Much Love, Mary :)

Monday, July 27, 2015

Floral and Stripes

I had such a blast as a contestant two years ago that I just had to sew along with the weekly challenges for Season 3 of Refashion Runway! The challenge this week was floral and geometric/stripes. So I pulled out this yellow striped t-shirt and a too-big floral dress, and I got to work!

Floral and Stripes Dress - BeforeFloral and Stripes Dress - Before

I removed the skirt from the dress and cut the bottom off the tee. Then I joined the two with a length of elastic at the waist.

Floral and Stripes Dress - After

More details can be found at CarissaKnits!

Floral and Stripes Dress - Before & After

The Bag Lady

Happy Sunday!

Did you know it's only like, 10 more paychecks till Christmas (for us biweekly folks)? You're welcome. I figure this year I have absolutely zero excuses as to why I shouldn't hand make at least a few gifts for some folks. What you see below will be one of those gifts!

When husband and I got married last year, we got a set of towels as one gift. With the towels came these decorative towel-topper things. No offense if anyone's into this, but we 100% are NOT. But they were so cute I knew they had to be something more!

Pin right sides together, sew, etc. Sewing down on the tiny little edge under the pom-pom trim was a right pain. I suppose in hindsight that I could have maybe taken the trim off and re-attached it after... But ain't nobody got time for that! The green fabric is going to be the lining.

I WAS going to serge ALL my edges, but this fabric is thick, and my serger was having none of it. I jammed it, broke 2 threads, had to un-jam, re-thread, and then tried adjusting tension, etc with basically the same result. So rather than risk breaking a 2 week old machine, I just stuck with a zig-zag stitch over the original line. Since this would be a bag (spoiler!), I wanted to make sure all the seams were 100% rock solid.

The outside, in the lining with wrong sides facing so that, once turned inside out, the pretty lining would be facing the right way inside

Fold hem under, pin, sew to attach lining

These corners had to be hand sewn down since they were so thick. My sewing machine is pretty tough, but not THAT tough. I sewed the rough corners nicely under to keep everything tidy

Straps! I chose a different fabric in a similar color scheme to that on the flowers

Sew, serge, and turn the tubes right side out with the help of Mr Safety Pin

I measured the edges of the bag and did some easy math to make sure the straps were even, both on the bag and in their length

The ole 'X in the box' trick. Again, I want this thing to be sturdy. Illy don't make junk!

Annndddd done! Does it look like it came from a factory? No. But is it AWESOME? 100% yes!


The outside

Inside. The lining came out looking 100% pro!

With a quick iron before the holidays, this baby will be ready to give! I'm not 100% sure who I'll give it to just yet; I want it to be actually useful and a person who doesn't use totes for much will probably find it nice, but not all too handy.
Only regret of this project? I should have added a little pocket or something on the lining, but oh well. Next time. This took me two whole evenings of work and I think my brain was a little tired by the end.

Hope you like it!

Illy