Friday, September 30, 2011

Easy Lace Ideas for Tee's

Hello! I don't know about you but I can't stand collars or sleeves being too tight or too close to my neck, it's a pet peeve of mine and I always end up chopping off the neck to my tshirts, the sleeves are nearly always next to go. Only I've been careless and have ruined many of my once favourite tee's by chopping off too much, so I thought to use black lace panels to fix it!

I sewed freehand but a sewing machine would give a stronger stitch. Remember to turn your shirt inside out too!
It came out so nice I went on to do it to a further three shirts of mine. It's so quick, really only a ten minute job and it adds a little bit of chic to your regular tank top like my grey one in the pictures. Now I can wear those old favourites again :) XO

Cross body bag from jeans

I've made this ragged patchwork cross body bag from old jeans.  I used a couple of pairs to get a contrast of shades and added buttons and beads for decoration.  The lining is from an old pillowcase, and I've also used some of it for the reverse applique circle on the front.


Bucket bag from a skirt and dress

I love playing with preloved fabric and creating something that I'd like.

This is a bag that I made out of a skirt.  It was made as a present and the birthday girl was really excited when she received it this morning!


The base and inside of the bag was made from a girl's dress - I love playing with colour and pattern.  As it had a pocket on the dress I added that to the inside too.


There are more pictures of this project on my blog at: http://sewselena.blogspot.com/

Maternity dress from a sheet

Here's my second maternity refashion. I had a shrunken cotton sheet that I couldn't use any more. Because it was light blue, I dyed it black but the white roses still showed on the fabric. I liked the effect so I decided to use the fabric to make a dress. I didn't have a pattern, but I wanted it to be a maternity dress, so I simply tried draping it on the dress form. I think it turned out well.

More details about the draping and photos here.

Thursday, September 29, 2011

Reinventing my Collections xx


My sewing/crafting vibe at the moment is focusing on using up my enormous stash of "collected items". I am a chronic collector/op shopper and a little bit of a hoarder so in order to show respect to my "found things" i am slowly re-purposing my lovelies into functional/practical and pretty items that can be used rather that just "stored" on a shelf.

I got the idea for the table runner from a post i found that someone had made a kitchen rug out of pot holders. OOhh i thought!! ive got a few pot holders.... . I thought a runner would be good because it can be functional and a nice talking point too. I stitched it all together using coloured wool and did naive stitching like cross stitches and little bows and knots. The photo of the runner on its own is pre-stitching and in the photo featuring both tablecloth and runner is completed.

Ive also made a table cloth out of tea towels and doilies (yet another collection i have ). all very shabby chic to fit in with my shabby chic tastes.
The pic of the table cloth and runner ensemble was from a "girlie dinner party" i had recently. So much colour and texture on that table!!! Everything looked so colourful and happy. Even the vegetarian feast and the plates (yet another collection) all worked in well together. What a great night we had!! xx

Now i just need to find a "functional" use for my buckle collection, button collection, tie collection, doiley, fabric.............
xx grin xx Kelly

Mona Lisa Skirt


Hi there.
Here's another fluffnnonsense post.
I've started making this skirt ages ago and then put it down... BIG mistake!! I've had a little bit of time these school holidays so i thought i'd get around to finally finishing it.
Its made from all recycled, upcycled and thrifted materials.
The Mona Lisa was a teatowel which was so beautiful i just knew it had to be featured in one of my skirts. The fabrics, ribbons, fringing and beading are all thrifted. I like to stick to just a few colours and add lots of texture into my skirts. Its wrap around and i use mens ties for the ties for extra cuteness. xx

Simple fix

Hiya...no major refashion to share today just a simple fix...I did another wardrobe clearout the other day & found this old favourite dress of mine that had sadly been unworn for the last few years as the bust was too big on me & gaped horribly:
As the dress is fully lined and the fabric is difficult to work with I decided not to risk the fabric fraying by fiddling round with unpicking. So instead I removed the straps and pinned the top down to fit my bust. I then trimmed off the excess fabric, overlocked, hemmed & reattached the straps:

And now I can finally wear it again :) Isn't it pretty!

Wednesday, September 28, 2011

Tuesday, September 27, 2011

Skirt Refashion

Finally I finished it!
From this...


To this...


Find out more about how I did it and see my other creations on my blog.

Claire.

Wrap dress

In a Make Do and Mend frame of mind I used a vintage bed sheet to make this dress up. I have been coveting a vintage Swirl dress for some time. These dresses are hard to come by (at least where I am from). I finally came to the conclusion that if I wanted one I would have to knock one off.
So this is my interpretation. The trim was salvaged from a vintage dress that was in poor shape. I kind of got stuck on the Swirl project and had to make a couple more to get some design ideas worked out. So I'm over here still making dresses if you've time to stop in and say hi.


Introduction and a maternity refashion

Hi everyone,

I'm Brigita from Slovenia. I've been a member of Wardrobe refashion and I'm delighted to be a contributor to this new refashion blog, so thanks admins for accepting me. This is a great place for new ideas, inspiration and sharing.

On my blog, I mostly post about sewing, crafting and cooking, and lately more and more about getting used to motherhood as I'm expecting my first child. So it's only right for my first refashion to be maternity wear.

I transformed an old pair of ill-fitting pants with too high waist by cutting away that waist and using a stretchy jersey waistband instead.
 

Before
After
For a more detailed description of the refashion and more photos, go here.

Intro and make-up bag made from a skirt and scarf

Hi everyone!!

I'm so excited to be here!  My name's Selena and I'm from the west of England.  I call my own blog Sew Selena because it describes who I am and what I love to do.  I love nothing more than to find new uses for preloved items of fabric.

I had this lovely embroidered brown cord skirt that I adored but didn't wear very often. I didn't want to throw it away so I decided to see if I could create something special out of it; something that I would use more often. So I came up with a make-up bag, added a matching scarf as a lining and here is the resulting bag:


It's so much more useable now!


You can see a tutorial of how I made it on my blog:  http://sewselena.blogspot.com/2011/09/monday-make-make-up-bag.html


Toddler pants to shorts


Hey just want to show off another refashion I just did yesterday, from a pair of toddler boy's pants (with a hole), 
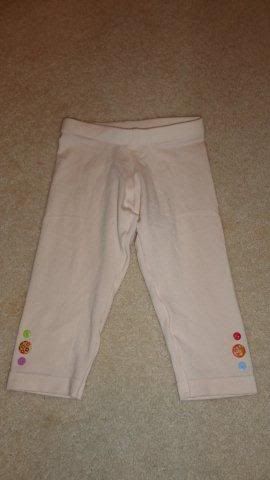
to a pair of baby girl's shorts.

Details at my blog.

Monday, September 26, 2011

Intro and one of my refashion projects

Hi everyone....

I'm so excited...My name is Rowena and I live in Sydney, Australia. I joined Wardrobe Refashion a while ago and since I had my second baby I was away for a while. Now I'm back to my refashion world and noticed that WR was closed. I'm so happy to have found Refashion Co-op where I can still find interesting ideas and inspirations, and share my refashion projects.

I love refashioning, recycling and hate throwing away anything. I used to buy a lot of fabrics but recently my family has been on a tight budget (long story) and I have to refrain from buying anything new and try to use what I have. I have two boxes of clothes that me and DH don't want to wear any more and I've been gradually turning them into something else, a hat, baby clothes, bags, etc. My daughters also have outgrown their clothes and I'm refashioning them too.

One of the most recent refashion projects I've done is a pair of baby leggings that I made from one of my thermos. The thermo was made from a very soft and stretchy fabric, and I really love how it feels. But it was too small for me. I kept it for a long long time and hoped that I could shrink one day to fit into it but finally decided to give up. I was glad that it was big enough to fit my homemade baby leggings pattern. So I made the baby leggings for DD2, which fits her REALLY WELL. I haven't got time to take a photo of DD2 in the leggings, but here is a photo of the finished leggings:You can see the complete project in my blog: http://sewlovesew.blogspot.com/2011/09/adult-thermo-to-baby-leggings.html

blinging up my shoes

I have two friends getting married next month, and am currently working on my outfit for the first wedding. (The second wedding is covered, since I'll be participating in the ceremony as a musician and will therefore be wearing a black dress I made back in the spring.) The dress, which is from scratch and will therefore not be posted on here, is coming along nicely. I was having an issue with shoes, though, since I realized that I really didn't have any that would work with either outfit. So I went out shopping yesterday in hopes of finding something that would work with both dresses and two different levels of formal (I'm playing in an evening wedding, and attending a morning wedding.) But I have a hard-to-fit shoe size, and between all of the shoes being too narrow and the current trend of 4" stiletto heels that I would surely break an ankle if I try to dance in them, I wasn't successful. So I decided that, since the friend I was running errands with needed to stop at the fabric store anyway, I'd just embellish some shoes I already have. This is still in process, but I have one shoe done, so I made a tutorial to share with you all. (Plus this will help me remember when I get to the next shoe!)

I started with these shoes--just a basic brown Mary Jane-style. They're perfectly nice shoes as is, and I didn't want to do anything permanent to them. So I decided to do shoe clips. I had to purchase most of the materials since I knew I didn't have anything on hand that would work this time, but you could easily use things you have already.

I got a pack of clip-on earrings, and after my friend and I were playing around with them, we discovered that bending the curved-in part (the part that goes against the back of the ear) out flat made for a much more comfortable fit inside the shoe. I used three of these for one shoe, but how many you would need would depend on the style.

I took a scrap of thin fleece (to help protect my shoe), and marked the curve of the edge onto it...

...and trimmed that shape out. Then I took the first earring clip and centered it on the front of the shoe, with the side of the clip that the earring would get attached to up.

I sewed this onto the fleece, making sure to go through the lip and also stitch through the bar to the back of the fleece.

Then I took a little ribbon flower and stitched through the back of that to attach it to the earring. I used pre-made ones since I'm on a time crunch, but this could be fun with homemade fabric flowers too!


I repeated this process until I had 3 flowers/earring clips on the fleece. I made sure to start stitching the earrings on while they and the fleece were clipped to the shoe, so I could get the flowers lined up really nicely with the edge.

Then I trimmed the fleece to this oddball shape so that it wouldn't show past the flowers, being very careful not to cut the stitching (which you can't really see in this picture, since it sinks into the fleece enough to make it hard to see.)

And this is my now fancier-shoe! Like I said, I still have to do the left shoe of this pair. And I also have plans to do another clip style for my black shoes, so I'll show those too when it's done. Since I had to buy the stuff, I probably didn't save much money (at least this vs. a new pair from Payless Shoes), but I'm happy to not have to try and fit another pair of shoes into my little closet! Plus I already know these shoes fit and are broken in!

shabby chic hankie curtain


Hi there....

The other week I found these hankies in the oppy shop. They had a big pile of them and they had all been lovingly crochet around the edges. I considered leaving some of them for others but ended up taking the lot! I had a plan!!!! A total bargain of 50c each hankie, the appreciation of the time and effort someone had taken on that edging was not wasted on me! They were coming home to be adored and cherished and displayed.

They were to become a shabby chic curtain for my daughters room. Firstly, I laid out the hankies into a pleasing colour way. Then I joined the hankies together by hand knotting each intersection of crochet. (i later discovered that this was easier by machine). The beaded fringing was new but on special for $9 a meter so that counts as thrifty right??. I had some crochet edging that i bought previously at an oppy and dyed it. I used this for the tabs and the bottom frill. The doileys were also from my embarisingly large stash.
I am soooo happy with how it turned out. Im going to take a picture into the ladies at the oppy where i bought the hankies coz they were curious as to what i was going to do with them.

Sunday, September 25, 2011

T-shirt Ruffle Skirt

Hey refashioners. Erica here (Thursday's Refashion Co-op Editor), I wanted to show you all a project I am doing - making ruffle skirts for little girls out of unwanted t-shirts and jersey tops.

Before


After

Little girl ruffle skirt

I can't take credit for the idea, because I used a pattern and tutorial from LilyGiggle.com, called the Rings of Ruffles Skirt. If any of you are interested in making one of these skirts, I have a giveaway on my blog for a bundle pack of three patterns/tutorials from LilyGiggle.com. Here is the link!

Oh, and there will be be a grown up version of the ruffle skirt coming soon!!

coming soon...

I haven't given up on my refashioning, just got slowed down a little. The Skirt refashion is taking much longer than expected, but will be here soon!

Jeans pocket wristlet!

Been quite a while since I last blogged !  Spent some time tearing my hubby's old jeans apart and I've made a couple of projects.  Now down to the top part. Here's a wristlet I made with the back pockets. Everything is recycled, including the zipper!! Well, may be not the thread - that's new :-)


Hope you like it!