Saturday, January 31, 2015

From Large Shirt To Small Dress!

Hi there! My name is Lolo and I just joined this awesome blog! I just started in the world of refashioning and I can't wait to do so many more. I have been keeping a blog about my DIY and crafting for a little over a year now. I have new special tab for refashions and you can see my blog here: The World of Glitter & Glue Guns. Now off to post my most recent refashion here for you all to see!

I got this 100% silk shirt in size large from the Goodwill. I knew I was pushing my sewing (non) expertise to the limits by doing my first refashion with silk but this piece was too good to pass up!

I just love this color!
You can't see very well in this image but it has a button down front that is really cute- also useful since I wouldn't need to add a zipper in the back.

I didn't have to do much to refashion this piece. I simply cut off the sleeves and brought the sides in a couple inches. I also used the necktie as a sash. You can see images of the changes I made and a better description at my blog here: The World of Glitter & Glue Guns.

Here is the after image:

A belt I had already also works in place of the sash!

Your own, personal style leather bag inspired by Burberry Prorsum

I felt in love with newest Burberry Prorsum leather bags , they look just lovely and ... easy to make;-)
I took little inspiration from fashion show and voila!

 
You can make your perfect bag ,  perfect for you !
On my blog you can see exactly  how to make it


Love 
Aniela


Men's jeans to Women's Jacket

Hubby gave me a few pairs of worn, torn, and stretched jeans.


I turned two of them into a cute jacket for myself:


You can see my journey with this jacket on my blog: http://lovenicky-froufrou.blogspot.ca/

Friday, January 30, 2015

"The Holes" syndrom

_MG_7308Many of my tee shirts have three little tiny holes right around my bellybutton area. Does anyone else have this problem?


This dark blue tee was one of my favorites, but it had “THE HOLES” syndrome.  The thrifted skirt was a couple sizes too big, so I took that in along one of the side seams.  I cut about 6 inches off the bottom of the tee shirt and then sewed it onto the skirt.

It’s not a pretty sewing job , but I’m happy with how it turned out!

This outfit looks like a tucked in shirt with a skirt, but it’s actually one dress.  It hangs on my body just right and doesn’t twist around on me during the day.

That’s one way to deal with “The Holes” !

Come visit The Little Moments to read about my theory of where those little holes come from!

Love,
Amy Jo

Easy Peasy Shirt Dress!

Hello friends!  I've got a simple refashion for you today that I think you'll love and everyone can do! All you need is an over sized men's button up shirt. Like this one...


No, I'm way too excited. It's time to get serious.


This is a super simple refashion, it only takes three seams!  Turn the shirt inside out and lay a dress (or tunic in my case) on top of the shirt.  Outline the dress in chalk onto the shirt and sew your new seams along the chalk outline.  All you need is one seam from the end of each sleeve to the arm pit and down the sides plus a hem to correct the length!  I think this is a classic and who doesn't love a good shirt dress?  Plus they are plentiful in thrift stores so it should be easy to find one on the cheap!  Here's mine!


If you want a tutorial head over to my blog and check out the step by step (with pictures)!  It's a cinch and this only took me about 30 minutes to do!  Happy sewing!

Shawn Elizabeth

Man's Shirt to Girly Top

This week I've been working on making this manly shirt a little more my style. I didn't want to lose the boxy feel.. I kind of like that on me for some reason, but I did want a little more of a girly look to it. Here are the pictures of my entire process and you can check out exactly how I did this by checking out my original blog post.  I just loved creating this look and I adore the pattern. Oh and a sweet hello from my crazy dad! :)


Thursday, January 29, 2015

Tiny refashions

Sometimes pieces of clothing only need a teeny tiny little refashion tweak to be just right. Such two went through my sewing machine today.

I found these jeans in a thrift store. (A day that will be forever remembered by me: The day I found a pair of jeans, that fit me perfectly! Both waist and hips fit my hourglass figure, AND the length was right, even though I only use a size 28 in length.
I am not exaggerating: When I looked at myself in the changing room in the thrift store, wearing the jeans, my jaw dropped. Trousers never ever fit me. But these did. But I digress, lets get back to the refashion).
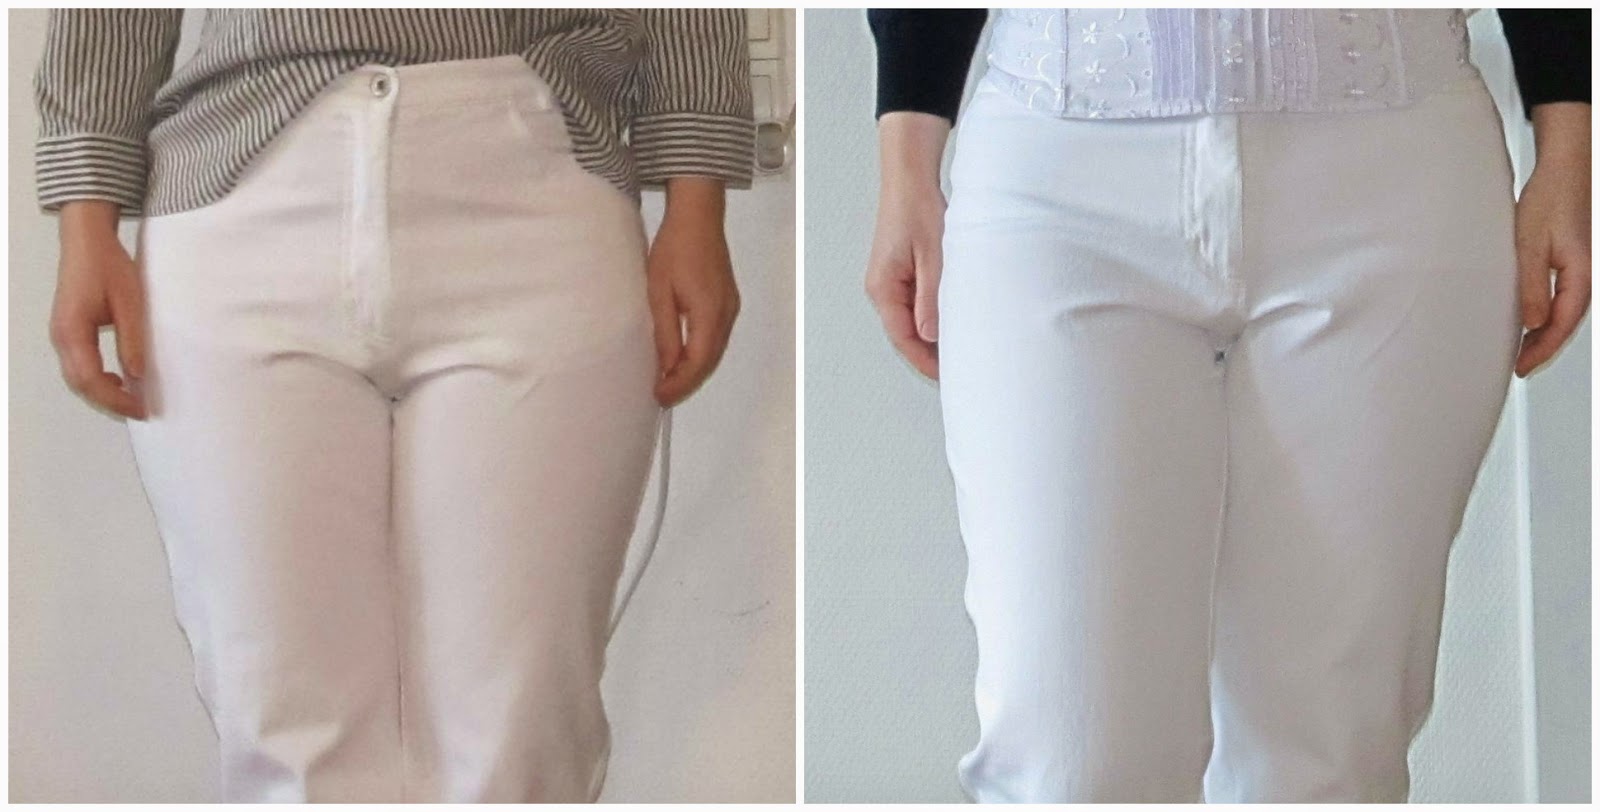
Only one small thing wasn't perfect: The pockes was very visible through the jeans fabric and also made the waist-to-hips area bulky. It is not too visible in the picture, but it was very visible in sunshine.

So I cut off the pockets and closed up the pocket openings. Simple, and did the trick.

I also refashioned the shirt tha I wear in the top picture.
It was just as it should be, except the  3/4 sleeves was 5/6 sleeves on me. Same story as always (I dream of going on holiday somewhere where most people are short like me, like Italy or Hong Kong, and go shopping crazy).
So I simply cut of the cuffs, shortened the sleeves and reattached the cuffs.
After:

Jeans and shirt before and after:


By the way: Is there another word in English, that would cover what I did to these garments? I think that calling them refashions is a bit much. I didn't mend them, they werent't torn. Modified?

Blogpost: http://saga-i-farver.blogspot.dk/2015/01/sma-forandringer.html
Blog: http://www.sagaifarver.dk

Wednesday, January 28, 2015

Flowers on Flowers on Flowers.


'Ello beautiful people!  How are you today? Do you want a laugh? Yeah? Okay check out this outfit and try to keep a straight face:


Wait, it gets better.  This lovely homemade outfit(yep, someone chose this fabric, cut a pattern and sewed it themselves) comes with TWO pairs of shorts. BAM!


You know, in case you happen to spill some coffee on your shorts on Monday and really want to double up on this outfit during the week you've got a spare pair!  How handy.  This creation (which I snagged for $0.50 at the local Salvation Army) got a couple hours of soaking in a dye bath to subdue the in your face flower pattern.  I brought the neckline out, made the sleeves and bodice a few inches smaller, and voila!  I love when something simple like dyeing a piece can make it 100 times more wearable.  


I paired it with a navy pleated skirt I picked up, but had never had the chance to wear and wore it for a fun night out! I'm still not sure what to do with those shorts, I'm thinking a flouncy skirt in the spring?  Any ideas?  If you want to check out the full story head over to my original post!  I hope you have a fabulous day!  


Shawn Elizabeth


Refitted shirt - 52 wks challenge 4/52

This week I did something useful. My white shirts have gotten quite big, and I have decided to re-own them. This one being the first out of several more to come. I know white shirts aren't exciting, but they are a true basic and I can't imagine my closet without them.

So here's my refashion for the week 4:


For this one, I made a little photo guide, I hope you will enjoy!

Love,

Dee

Stripes Are A Good Thing


I picked up this plain navy blue dress the other day for $2.  Since it was polyester with some lycra mixed in, my first thought was to just take it in on the sides for an easy pullover dress.  However, when I brought it home, it happened to match perfectly with a striped polo shirt hanging in my refashion closet.  The wheels in my head started turning and I decided to kick it up a notch with some stripes!

The end result was this....


For more pictures and a step-by-step on how it was done, 
you can visit my blog, Second Chances By Susan!


Rags to 'riches'

I recently attended a workshop on rag rugging, and thought I would share my results on here... as its 'refashioning' in a different way..

You know you get woollen scarves that felt a bit, or clothing that, well, has seen better days and a re-fashion to wear is out of the question? (I expect a barrage from everyone.. 'what, not refashion??')

This is a handy thing to do with all the extra bits of material from the discarded garments, old scarves, clothing, blankets, fleeces.. anything a bit ropey.. Just use hessian and find some rag rug tools, the technique is dead easy, once learned.

 Front

 Back

I've not done a tutorial on this, as I was learning as I was making.. made a rather nice cushion, which I'm really pleased with.. 
This technique could be used to make a rug or bag too.

Some warm slippers version 2015

Yes I'm back again!
I know I haven't been posting a lot these days but I've been saving my back by lying in bed every single afternoon.
So although I've been creating stuff, I wasn't able to upload or even sort out the photo's I've made of the creations...
But here's one you'll like =D

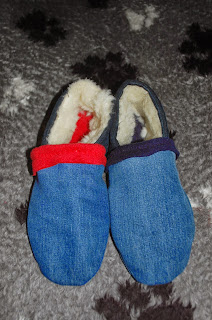
In addition to last year's version I've made new slippers for my clan for this year.
They're made from scraps of jeans, fleece, teddy, fake-fur, wool ánd leather.

My daughter got two

My husband to

And I was not left behind.


Read about them on this post.
Read about my other creations, new and refashioned on my blog.

Greetings from the Netherlands.
Joke Vermanen

A little refashion project of ours needs your vote!

Hey there fellow refashions, we need your help!  We refashioned 2 white shirts (one from Daddy, and one from Mommy!) into this cute little top. (No before photos, but you know what a plain white t-shirt looks like!!)

And we entered the whole outfit into a sewing competition and made it to the top 10!  Now we need your help...this is the last day for voting, and we (Skirt Fixation) are very behind in the vote!  So we'd love it if you had a few seconds to click on this link, scroll down to the end of the post, and vote for Skirt Fixation...that's us!  
And to see the rest of the photos we took, including the fun bubbles and the amazing reflections, see our post here.
Thanks, you are amazing!
Audrey & the gals at Skirt Fixation

Faded Jeans to Kid's (or adult!) Play Crown

It's tricky to get much refashionable fabric out of a smaller size pair of faded jeans, so I thought for a while if this pair was worth keeping. I'm glad I did! I chopped it up and turned it into a play crown for my toddler son.

I shared the tutorial and free pattern; there are pieces to extend it so it would fit an adult easily. I'd love to see this turned into a boho fashion accessory - unfortunately I am hugely pregnant and mainly living in yoga pants and sweatshirts so I can't make it work for myself!
 I normally blog at Swoodson Says but this was a contributor post, so download the pattern and see the tutorial at Creative Green Living!

Tuesday, January 27, 2015

Fifty Shades of Grey Refashion (Minus 47)


This refashion is a combination of three old clothing pieces: a nightgown, a sleeveless tee, and a pair of men's pants. In three different shades of grey. Since the sleeveless tee fit well, I just crafted sleeves from the nightgown and sewed them onto the tee. But because the two shades of grey didn't match, the top looked odd. So I cut out circles from the extra nightgown fabric and a thrifted pair of men's pants to create a more interesting color palette and appliqued them to the top. More info here.

Ooh those denim skirts!

What could be more fun or comfortable for Spring (I'm in TX so spring comes early), than worn in denim combined with a breezy skirt. I see so many cute skirts in the thrift stores & my closet that just don't work by themselves anymore because they are either too small in the waist, or too short. What I have found is that some old denim jeans on top fix those skirts right up! Now they're the perfect size & length for cowboy or moccasin fringe boots!

Pick our your jeans and pick out a skirt & let's begin. I found a beautiful linen Ralph Lauren printed paisley skirt at a thrift store. I think I paid about $4. I knew it would be perfect for this project.

Marking

Start by making all your markings. You need to try on your jeans & mark where you want to cut them. Then measure around your hips at that mark so you can determine the diameter across the jeans & skirt pieces you need to make cutting lines. Ok - now take your pants off & get to work :-)! To get an even cutting line, you need to measure from the waistline down to your cut mark - then use that to create cutting marks around the circumference of your jeans (you'll use the same technique on the skirt)

To mark your skirt - use the diameter of your hip measurement and add 1 " for ease. The diameter is 1/2 of the total hip measurement, so if you have 44" hips, your diameter is 22", plus 1" for ease = 23". figure out where you can get a 23" diameter on your skirt & make a small mark/tick at the side seams. Use the same measure down technique to mark the cutting line all the way around the skirt.

Cutting

Cut your jeans (image #2) without cutting any of the pockets. Pull the front pockets inside out & pin them up & out of your way. Then pick the back pockets with a seam ripper & fold them up out of the way to cut. PS - use some really good sharp shears here - large sewing shears are best. Your hand muscles will thank you!

Sewing

FIRST... put a new, sharp, heavy duty sewing needle in your machine -- I promise you will not regret this step. I stitched mine with regular weight, good quality thread (avoid the $.50 cheapo spools for this project). I also bought heavy weight denim thread to do my top stitching.

Decide if you want a rough denim edge, or a clean stitch line. Line up and pin your skirt to your jeans matching the side seams, center front & center back. I use a 1/2" seam allowance.  Be sure to pin your pockets out of the way for sewing (safety pins work best for this). Straight stitch all around. I like to flip my garment right side out & top-stitch the seam allowance down for added seam strength.

Cuteness

Dress this skirt up with some super cute tops, jewelry & boots. Don't forget to accessorize with belts or scarfs too!


I've made 3 of these so far & each one has it's own personality & lessons learned. The fancy green one decorated with doilies is my last creation. I LOVE that one!


Happy sewing! -- Jill