Monday, June 30, 2014

Cropped Leather Jacket

So I came across this leather jacket in our building's 'giveaway' area.
I really like the cutouts, the simplicity of the design (no lining), and the color. However, it was boxy.
I wanted a more modern look and immediately knew I would crop it.
Leftovers! I'll save that for a later project :). The new cropped length was great, but now I needed to tackle the boxiness of it all. I did so by adding darts in the back. And here they are from the outside.
 Here's the final result.
I love how simple the changes were and what an impact they had! Well, what do you think? An improvement or would you have left it? I can't wait to get to work with the leftovers from this one...I'm thinking a clutch/purse, iPhone case...I'll combine the two! If you want to see more of this project and my process, you can find it here. Happy Monday!

Peace, 
Andrea

Dress Up Boring Rain Boots

I bought this $5 pair of black rain boots for the sole purpose of improving them. 


This no-sew refashion was super simple and quick, here's what you need:
  •  Boring rain boots
  •  Fun ribbon (green for me of course!)
  •  Razor knife
  •  Painter's tape (if you're good at eyeballing measurements you don't need this... I am not)
Detailed instructions can be found on my blog, but the basic steps are measure, slice, weave in ribbon, go jump in a puddle.


More rain boot fun is on probablyrachel.com.


Connect with me? Facebook, Twitter, Bloglovin'


3 refashions skirts + you could win $25 for your refashion!

We have some exciting news, but you'll have to wait for the end of the post!  To celebrate the 4th of July, we have 3 skirt refashions for you in Red, White & Blue!
The first was a blue and white skirt we refashioned:
You can read all about it over at Skirt Fixation.  (It's also included in our ebook!)
Next is a white skirt refashion:

You can see how we did this one here.
And then there is the red one (it's not really ALL red, but the red is what makes it pop!):
You can read all about this leather skirt refashion (with the red POP!) over on Skirt Fixation!
Okay, now the excitement we alluded to earlier and in the title!  We have a sewing contest going on over at Skirt Fixation, and you can sew along to win $25 from Fat Quarter Shop!  All you have to do is link up anything you've made that is Red, White &/Or Blue.  Pretty easy to get a chance to win $25 to spend at Fat Quarter Shop, huh?  
Audrey

50s Halterneck from a Long Sleeve T-Shirt, & Hello!

Hello, I'm Jeni and this is my first contribution to Refashion Co-op. Sewing is a big passion of mine, and I got into refashioning clothing a few years ago because I can never find clothes in the store that I like. A lot of my refashions involve giving clothing a faintly 50s twist as I simply adore the fashions of that era! True to that sentiment, my very first entry to this blog is a long sleeved t-shirt that I have turned into a 50s style halterneck top.

To begin at the beginning, here is the before photo, just a plain and simple long sleeved, high neck t-shirt.


I love the hot pink colour but it was a bit plain for my taste. Plus, as it's summer I wanted to make it into something a bit more suitable for the lovely warm weather.


And so the halterneck top was created! The sleeves have been tucked into the side seams to create the neckline, the full step by step instructions can be found on my blog Lola Nova where I have photographed the whole process.

I plan on wearing this with a circle skirt, denim jeans and a pencil skirt (not all at the same time though, that would be mad!).

Until next time,

Jeni

Camo pants to shorts. And Introduction.

This is my first post. I posted on Wardrobe Refashion and have followed Refashion Co-op since the beginning. I learned to sew and refashion from my mother who made and refashioned clothes passed between cousins when I was growing up.
I posted on Wardrobe Refashion and have followed Refashion Co-op since the beginning.
I have just semi-retired to the Ranch House. My goal is to daily record on a calender the mending and refashion work I complete over the next year. Some days it is just a button, a hem, or a patch. I also recycle for cloth napkins, cleaning rags, pot holders, and other household goods.
Most sewing this summer will be for home and ranch wear and for the days I help out at the family flower shop.
There are no before pics. These were long Camo jeans bought for 25 cents at a charity sale. I planned to cut just enough off of the hem to patch them for Charlie's ranch work. The patches were serged and placed outside the pants. There was a larger amount to patch than thought so we now have Camo shorts for Charlie to wear out to the garden. Scraps were used to patch other ranch jeans.


Hello, I'm Selene

hi
I introduce myself. I'm Selene on the web. I 'm French and like many French, I suck in English ... but I promise you to make a lot of effort to be understandable.
I apologize in advance for my language mistakes. And I bless google translation ...


I am the mother of a little girl of 4 years. she was born during my studies...it was a real motivation to succeed. Since the birth of my daughter, I sew lot for her (and a little for me too ...). And I love to recycle. It is more economical, imaginative, ecological.
I'm happy to be among you!

You can follow me on 2 blogs:

Ban'anna'frip  (my future business)
La marre à bout de ficelle  (with my sister)

They are written in French, but you can click translate ;-)

To start, here is the first recycling made ​​for my daughter:
Before,
a T-shirt with long sleeves:

After, a dress and leggings size 6 months:
 the dress is made ​​thanks to this book

see you soon!

Sunday, June 29, 2014

Making 'Easy' Complicated

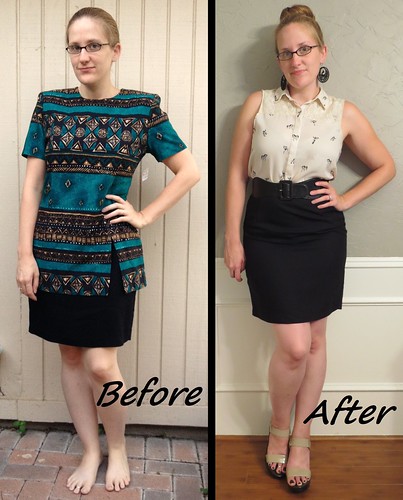
I'm gonna start off with my before and after pic...I know, I know, that's crazy talk! ;) But there's a reason for this. Take a gander:

Looks like a long fitted t-shirt turned into a shorter fitted t-shirt that can also be worn as a crop top. And that's what it is! However, the process looks nothing like what it should have. Simple chop and hem, right? WRONG! I went through three different versions of a refashion before settling on the final 'after'. 

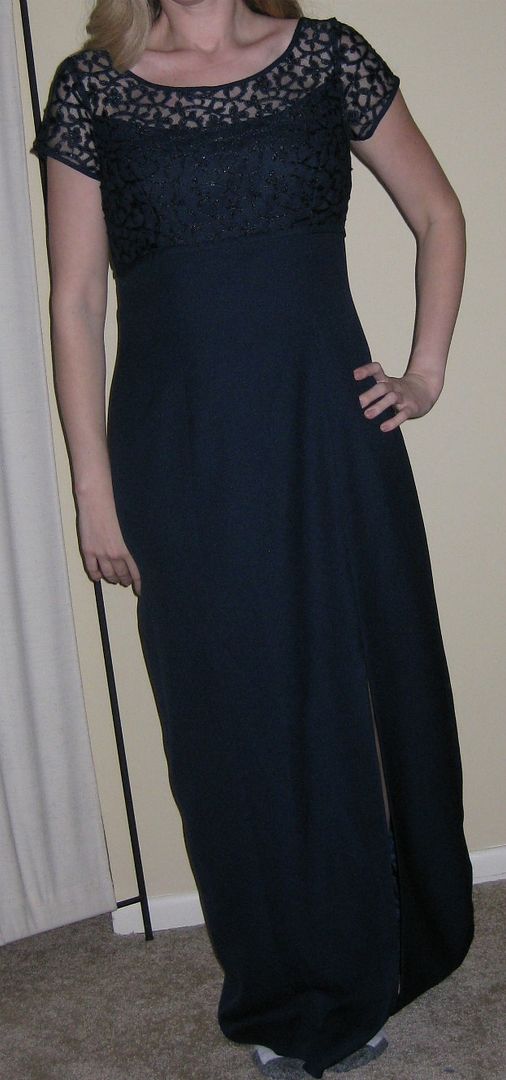
First, a two piece crop top and skirt set...easy enough! Chop, add elastic and hem.

Then, I thought, no, this is too tiny for me and I would never wear it...maybe I'll make a peplum!

I tried gathering...

I tried pleating...

And I didn't like it.

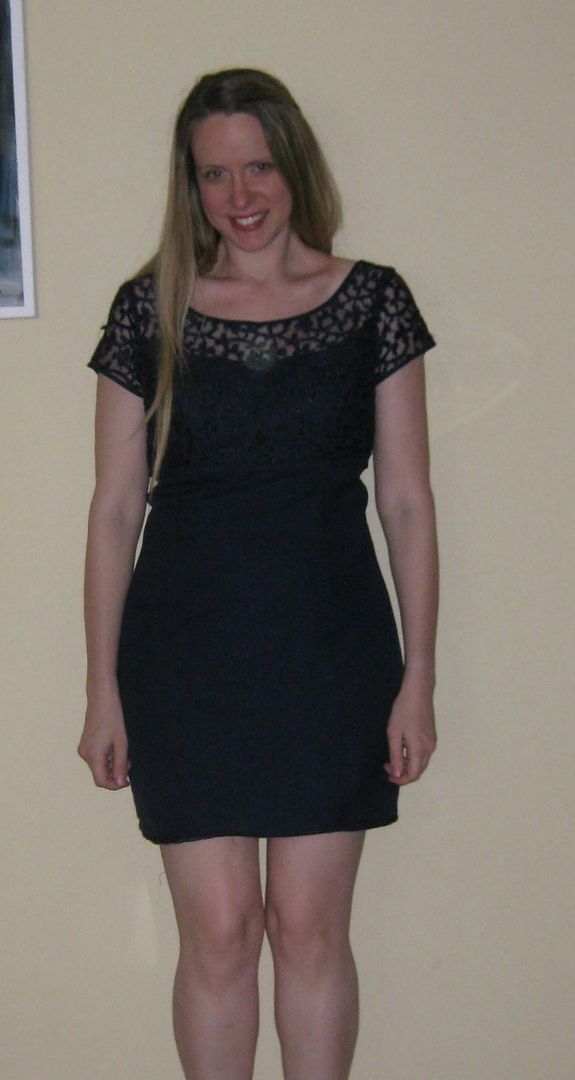
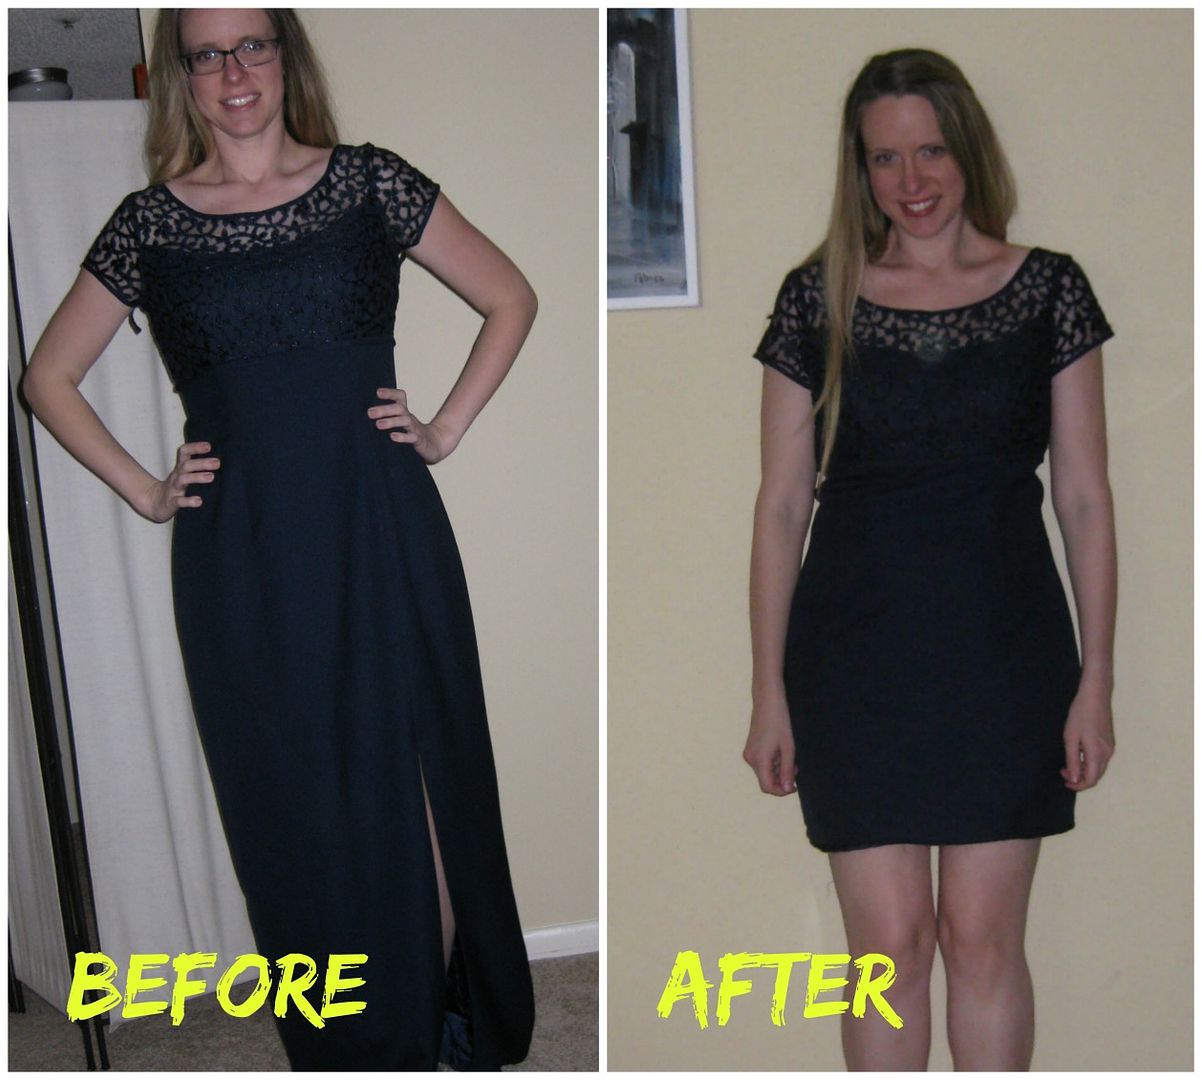
So, I cut the 'peplum' part back down to size and reattached it to the cropped top, threw in some elastic and there you have it. That's how you make 'easy' super complicated :-D

Here's that before and after one more time for good measure:

Haha, hope your recent refashions have had fewer personalities than my own...for more info on this crazy project, hop on over here. Happy Refashioning!

Peace,
Andrea

Saturday, June 28, 2014

Upcycled Top


Look What Amamda made this Top out of
 from watching this #Upcycle #sewing #video #DIY
http://www.youtube.com/watch?v=BXD56NN1TNs&list=PLlhJMC_7RMEn8L9Wvv6DzAs9TdvEUv2cP&feature=share&index=3

Pretty good eh!!


Five Minute Maternity Skirt Refashion

I've been digging through some of my archives for projects to share because I know how expensive maternity clothes can be! This is probably my favorite maternity refashion because it is so insanely quick and could easily be done by someone without a sewing machine.

The project's success is a little dependent on finding the right style sundress with shirring; a more advanced sewist could simple buy a bigger t-shirt and shir it themselves! A few (bad, old) pictures and instructions on my blog.

Friday, June 27, 2014

Upcycled : Tablecloths to a mullet skirt for party

Last year, I made this mullet skirt from tablecloth.


I've got this tablecloths from nearby local flea market. At first sight, I know it would become my new skirt and I will wear it to the summer party.


This sheer, oval shape fabric came with ruffle lace hem. The seller told me that it will perfectly charm on the rectangle or oval shape table... I don't think so, it would look better hanging on my waist. :)


Read more about how I transformed the tablecloth to this skirt for party at my blog here

Happy refashion!
Penya

Denim Refashion: Jeans to Vest

Hello, everyone!


I transformed this ratty, ill-fitting pair of jeans into a tailored denim vest. 
Visit adifferentfashionmm.blogspot.com for the tutorial if you're interested, and thank you for reading!

Sincerely,

Maria M.

Skirt to Top


 I found this skirt while on a thrifting adventure. The elastic waist was no longer stretchy and was too big for me to wear as is.


I self drafted a pattern for a top that has some pleating around the neckline. I also made removable ties that I can use to wear it more form fitted or loose                                      
removable side ties

Navy lace dress refashion

Found this formal dress, probably from the 90s, and needed some help.


Recap

More information here.

Basic Black

Quick! What's the first thing you think of when you see this dress?

Black Pencil Skirt - Before

I'm guessing it was not "black pencil skirt," was it? Well, it wasn't my first thought either, but I got there eventually.

I removed the outer print fabric and flipped the zipper to the inside of the skirt since it had been sandwiched between the two fabrics. Then I took in the darts and gave it a new waistband.

And now I've got a wardrobe basic I was so sorely lacking before.

Circus Blouse Refashion- AfterCircus Blouse Refashion- AfterCircus Blouse Refashion- After

No, you're not going insane. Yes, you already saw these pics when I posted about the blouse a few days ago.

More details and pics at CarissaKnits!

Black Pencil Skirt - Before & After

Thursday, June 26, 2014

Luxe sweatshirt, take 2, and Workshirt, part 2

Last fall, I made this lace front sweatshirt. At the time, my computer was acting up, so I couldn't post the pictures of the process. Well, I made a similar sweatshirt using the same method, so I thought I would post it again. This time, I started out with this Rock & Republic top I got at a yard sale.


I liked the silver studs at the shoulder seams, but the whole lion/crest thing wasn't really doing it for me. So I cut out the entire front panel. 


I used that piece as a guide to cut out my replacement fabric, a sheer, shiny silver/black material.


Then I pinned the shear fabric in place, again using the front panel as a guide.


I removed the lion panel and stitched the sheer fabric all the way around along the existing seams. Here's how it looks now.


Much improved, I think. 


I also wanted to share an update to this blue workshirt I made in May. I thought it needed a patch. My dad, a Harley guy, was kind enough to let me peruse his stash of patches. I picked out this cool Harley Officer Training (HOT) one. It adds just the right touch.


 Thanks for reading.
-Amy