Wednesday, March 30, 2022

Scrub Dress Refash

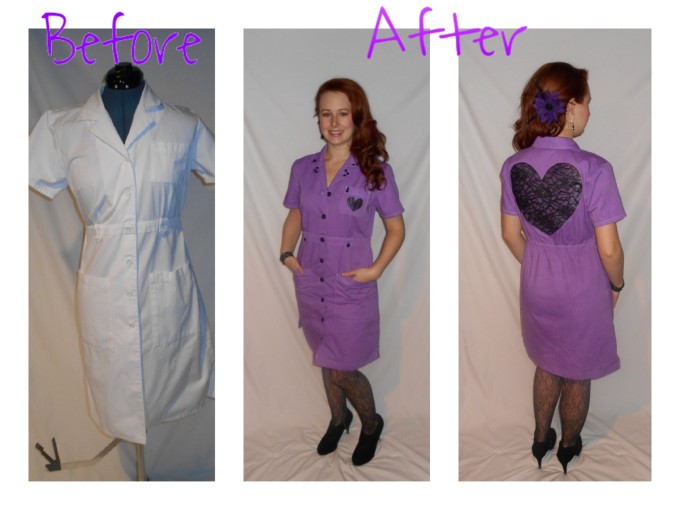
 I picked up this white scrub dress because it was a total blank canvas! It was also in my size! Perfect! But what to do with it?! Should I dye it? Make it into a nurse's costume for next Halloween?!?

dscn1162
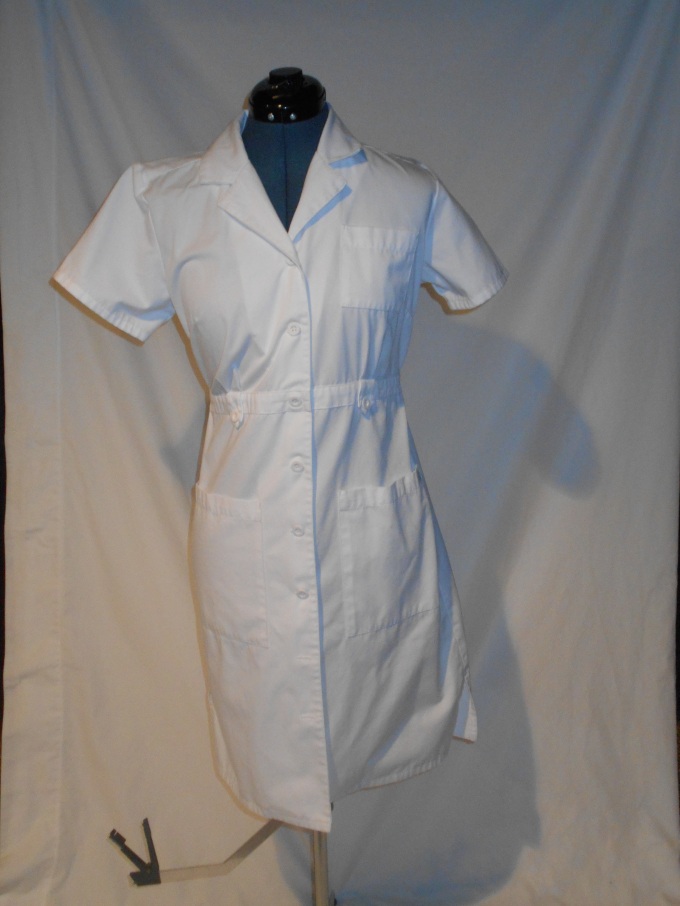
I decided to dye it!!! I went to my stash of Rit Dye and selected purple! A color I really like but don't wear enough of it.
dscn1163
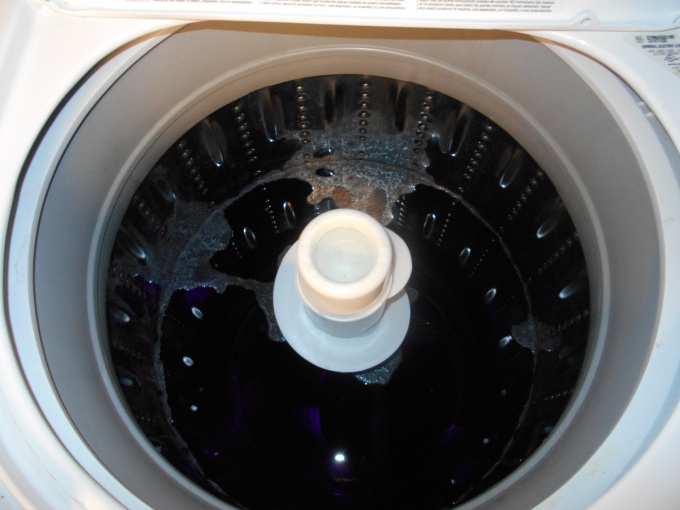
I followed the directions on the box of dye. I let my dress soak in the dye bath for 30 minutes. After I checked on it I decided it needed to soak more. I left my dress in the dye bath 1 1/2 hours before turning on the wash cycle. This left the dress a rich purple color, which I was super happy with!
dscn1171
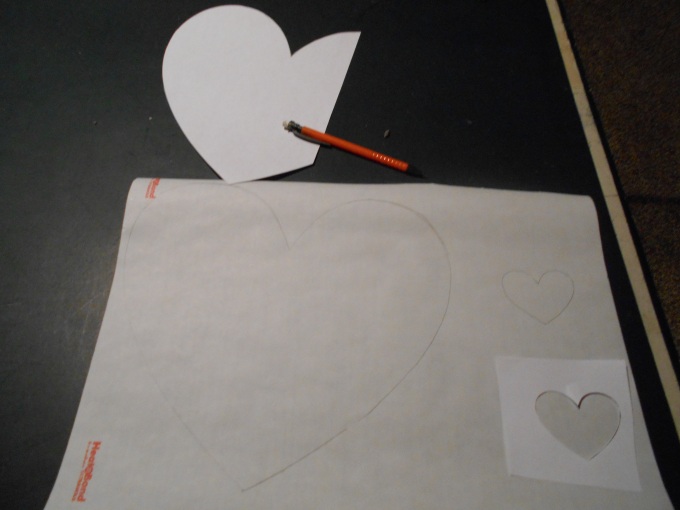
I wanted to add some details to the dress to break up the solid color. My idea was to add appliques made of black lace. I drew 2 hearts on the back of some heat n bond.
dscn1172
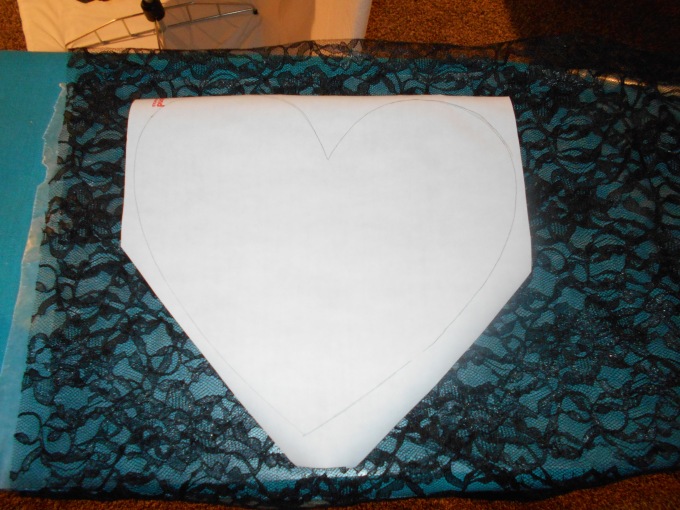
I took some lace that I had leftover and folded it once. I ironed the heat n bond onto the lace. I placed a sheet of wax paper down underneath the lace so the heat n bond wouldn't melt on my ironing board.
dscn1173
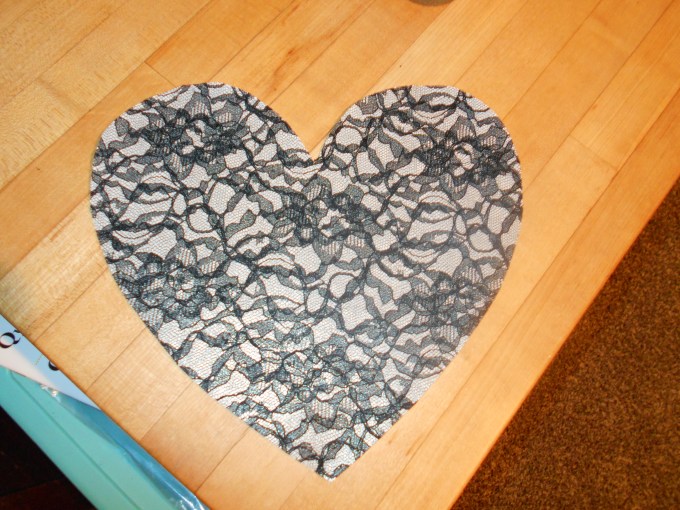
I cut out my heart design. Peeled off the white backing. Ironed it onto the back of my dress. I also did the same with a smaller heart and ironed that onto the small pocket in the front of my dress.
dscn1175
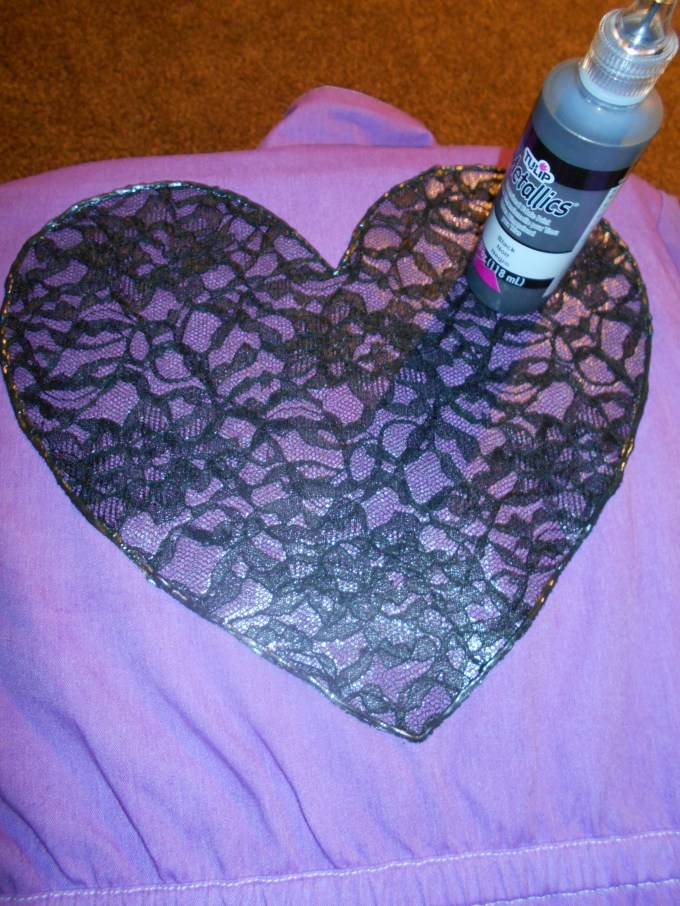
I used black fabric paint to finish off the appliques.
dscn1178
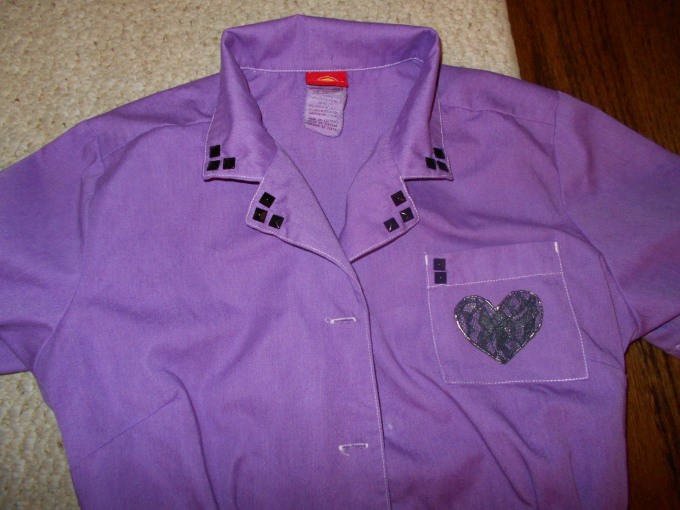
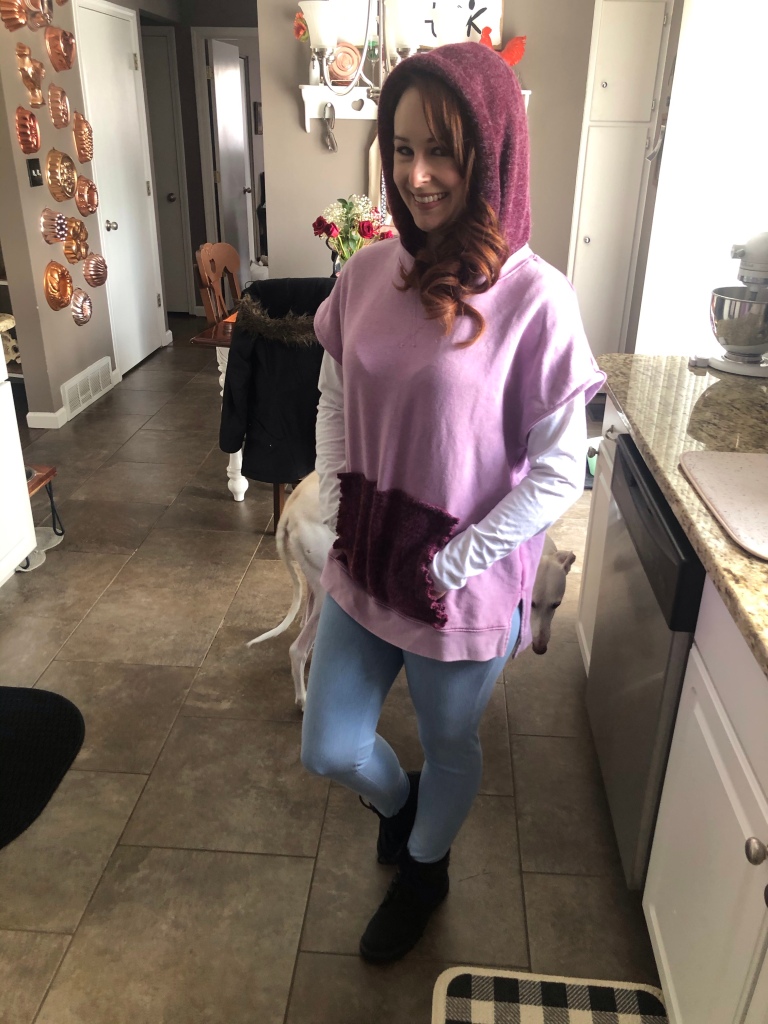
See the heart on the pocket?! I also added pyramid spikes into the collar and changed the white buttons to black ones!
dscn1179
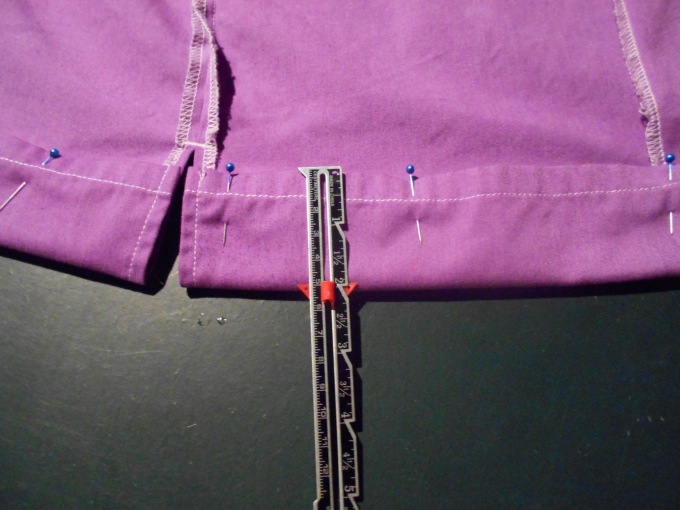
I hemmed the dress by 2 inches to bring it up above the knee.
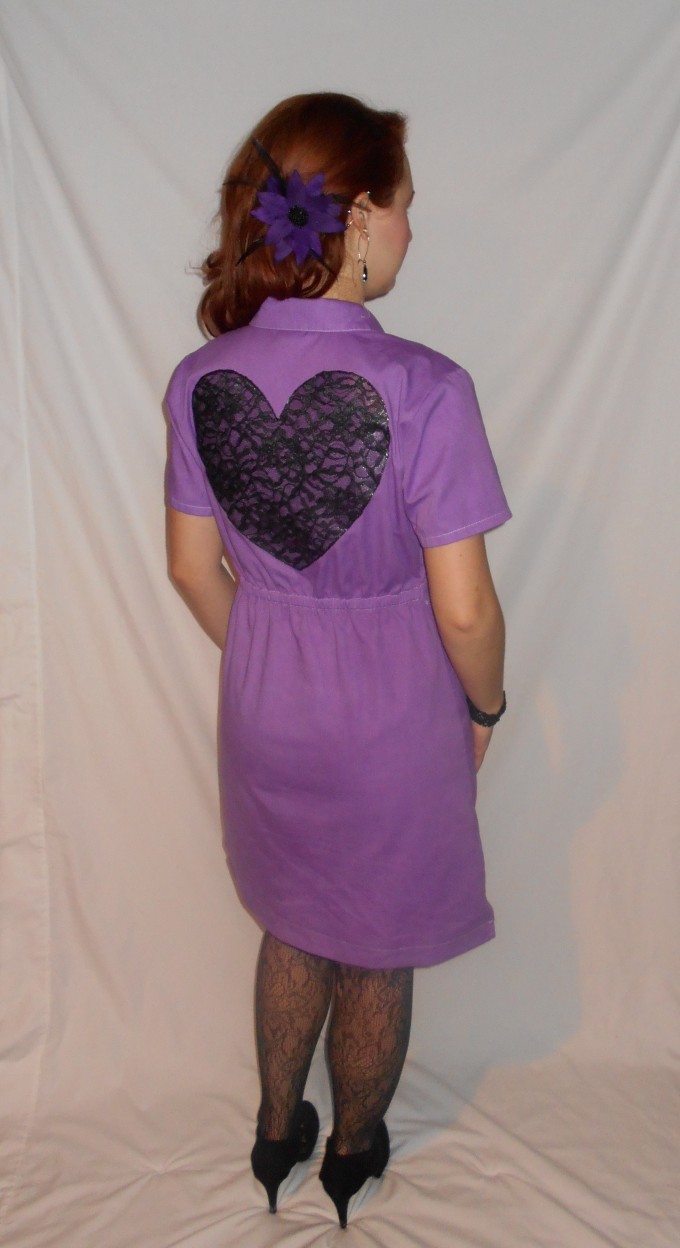
dscn1182The back!
dscn1184
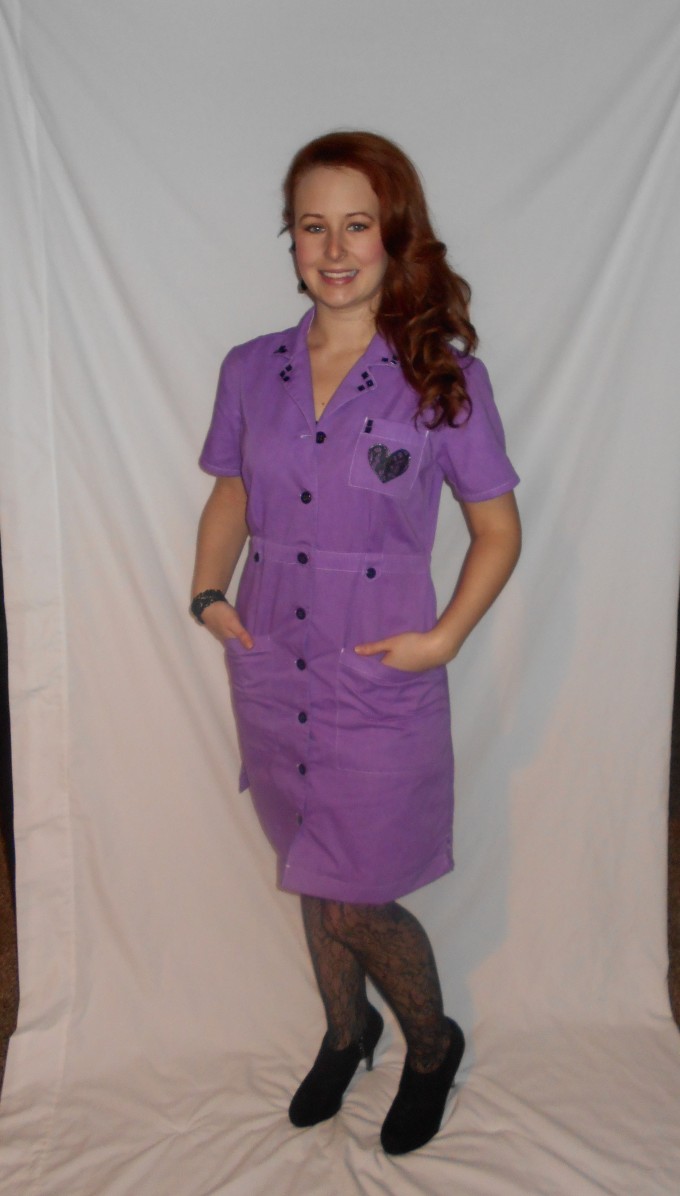
Better than just a plain white dress!
2017-23-1-10-55-18
Happy Refashioning!!!

Check out my stash of refashions on my blog!

50s Inspired Cocktail Dress Refash


DSCN1974

I started with this strapless dress, I loved the fullness of the skirt reminds me of a 1950’s cocktail dress! And a lace shirt, compliments from my mom!

DSCN1975

I dressed my dress form with the lace tee and the dress ontop. Wanting to use the top of the lace shirt I pinned it in place on the dress.

Once the 2 pieces were stitched together, it was ready for some sparkle!

I harvested these shiny black decorative buttons from a sweater and positioned them onto the dress.

Once I liked the pattern I hand sewed them in place!

img4

Happy Refashioning!!!

Check out my stash of refashions on my blog!

Tuesday, March 29, 2022

Summer Wrap Dress


 Hello๐Ÿ‘‹๐Ÿ˜€, in this thrift flip video I sew wrap dress with sleeves .I show you step by step tutorial on how to upcycle fabric scraps and refashion it into totally new feminin dress . To sew it you don't need elastic fabric ! In first part of this video I draw pattern which later I use to sew this summer dress . See for yourself how super easy it is to create new clothing for comming summer .

Whole Tutorial with Pattern  CLICK


  My blog

 and 

You Tube


Thursday, March 24, 2022

Long to shorts

Cleverly, while sorting and clearing my photos, I deleted my last two refashions so it's been a while...


These are / were some uniform pants that were no longer required. In the course of their uniform life they ended up with a glue blob? Varnish blob?  Something blob that was never coming out right on the knee (where the safety pin is in the photo).  

That combined with the hot and humid weather at the time said - shorts!


So they would be long enough I chopped the legs below the blob and folded that into the hem. And they were done, and I wore them like that a few times.  

The shorts have pockets already, one with a zip, but they are not particularly deep and I had quite a lot of left over fabric - so more pockets.


Just 'because' I decided to add the cargo pockets at an angle. No problems with the first one, but I flipped them over and sewed the second one at the same angle instead of mirrored. Which looked daft. Sigh. Unpick, resew, flaps and recycled buttons - done again!  And now they have phone pockets for long walks.

Happy sewing!

Mimi

Knit jeans bath mat DIY


About a year ago, I came across inspiring ideas involving 'knitting with jeans yarn'. I saw several home accessories knitted with jeans yarn, such as cushion pillows, small rugs etc. It was all in a period of a week and it felt like I was getting a sign: 'Try knitting with jeans!'. So I saved the idea for the winter. Unfortunately, a small impingement got in the way (impingements and knitting don't go well together...) and delayed the project a little bit. But now it's finished! And in this post I'm showing you the steps I took and how it turned out!


Want to try it out yourself? For this project I needed:

  • 4 or 5 pairs of old jeans
  • knitting needles (I used nr. 9)
  • scissors
  • sewing machine
  • patience and strong arms

It took about 4,5 jeans to create this bath mat. I used old trousers from myself, my other half and from my mother. I think it's a beautiful way to reuse old jeans and the result is a very unique bath mat. Definitely worth the effort! 


You're welcome to check out more details and my do's and dont's on vermaakster.blogspot.com. You'll find the detailed explanation in Dutch and English. 


from 1 shirt 2 piece set


Hello๐Ÿ‘‹๐Ÿ˜€, in this thrift flip video I sew Two Piece Set Wrap Top With Ruffle Skirt .

I show you step by step tutorial on how to upcycle 100 % cotton men's shirt and refashion it into totally new feminin two piece set . To sew it you don't need elastic fabric ! In first part of this video I draw pattern which later I use to sew this summer set . See for yourself how super easy it is to create new clothing for comming summer .

 Diy Two piece set Wrap Top With Ruffle Skirt CLICK


  My blog

 and 

You Tube


Thursday, March 17, 2022

Upcycled Bustier blouse


Hello๐Ÿ‘‹๐Ÿ˜€, in this thrift flip video I sew Deep V-Neck Balloon Sleeve Blouse .I show you step by step tutorial on how to upcycle linen trousers and refashion it into totally new feminin blouse . To sew it you don't need elastic fabric ! In my ealier video ๐Ÿ˜๐Ÿ‘‰https://www.youtube.com/watch?v=ngHA4... I show how to make bias tape so sewing will be even easier . This lovely blouse will be just perfect for spring and summer. I hope this video is easy to follow and you have fun watching it ❗ 

tutorial and pattern CLICK!


  My blog

 and 

You Tube


Monday, March 07, 2022

DIY bustier dress


Hello๐Ÿ‘‹๐Ÿ˜€, in this thrift flip video I sew Bustier Dress . I show you step by step tutorial on how to use fabric scraps and refashion it into totally new feminin dress. In my ealier video ๐Ÿ˜๐Ÿ‘‰CLICK


 I show how to create block pattern for Bustier with Cups and I made special for you free printable PDF pattern ๐Ÿค—๐ŸŽ‡ to make your sewing even easier ❗ . It will be perfect dress for summer..


  My blog

 and 

You Tube


Friday, March 04, 2022

Using LLR Leggings

 Hello Refashion Co-op. I was putting away laundry and realized that I had way too many pairs of leggings. I decided to use them to make underwear. That's right, underwear. 

Before and after.

I cut the waistband of the leggings off and saved it for later. 

I cut the leggings open and used the Megan Neilsen underwear pattern. (*Not an ad.) This pattern is easy to follow. 

I put all the pieces together and put the waistband back on. I added random elastic to the leg openings. I just wanted to used up some odds and ends I had. You can see more pictures and details at my blog, I Can Work With That.


Tuesday, March 01, 2022

A Dress and a Coat

 I was rummaging through my things to refash pile and found this amazing green dress! It looks pretty plain but it in fact has beautiful embroidery on the front which blends in with the color of the dress.

Ian: the photobommer
Ian had to lend a helping paw

I removed the sleeves!

Now you can see the beautiful embroidery on the front!

I pinned a new hem for the armholes.

I colored the fabric embroidery with a black fabric marker. I wanted to make a subtle difference between the dress and the embroidery.

Since it was still winter when I refashioned this and I was crazy to take the sleeves off the dress, I needed something to keep me warm.

Introducing this lovely houndstooth coat! This was so very generously gifted by Neighbor Sandy!

Ian- making another helpful appearance

I decided to shorten this coat by chopping the whole bottom off and making it a crop jacket: (which I can’t get enough of these cropped jackets)

I pinned a new hem on the bottom of the jacket. I widened the stitch width to 4.0mm to help the material stay flat.

Once I had the new hem sewn, I took in the sides as well as the width of the sleeves.

I just HAD to pin on one of my vintage brooches onto my new coat!

Happy Refashioning, Crafting and Upscaling!!!

Check out my stash of refashions on my blog!

Hooded Poncho

I have been seeing ladies around town with these hooded ponchos made of sweatshirt material. I haven’t been able to find these in the stores but that won’t stop me!

I was gifted this beautiful purple sweatshirt from my boyfriend’s mom’s neighbor, she’s such a gem!

Among the mountain of clothes my boyfriend’s mom’s neighbor gifted me was this hooded scarf, a pretty genius winter must have!

I separated the hood from the scarf. Then I pinned and sewed the hood onto the collar of the sweatshirt.

I cut a square from the leftover scarf and stitched each edge, which left a fun ruffles look!

I sewed the square onto the front of the sweatshirt to make a pouch pocket!

Then it was time to cut off the sleeves.

I turned the sweatshirt inside out and rolled the armholes back and pinned a new sleeve hem.

The finished product! Paired with a long sleeve shirt underneath!

With the hood up!

Happy Refashioning, Crafting and Upscaling!

Check out my stash of refashions on my blog!