Saturday, February 28, 2015

A colorful shirt enlargement

After reading a few stories on this blog about enlarging clothes, I was inspired to try it out on something of my own!
This adorable T-shirt was too small to wear as it was, but with the addition of some bright-colored panels on the sides and top, I was able to make it fit me. A step-by-step description of how I did it is on my blog if you've got the time for a long read.... or just enjoy the before and after pictures below!

Before:

After:

Ready for spring blazer refashion

Happy weekend everyone.  I have another blazer refashion to share.  I took this number from what resembled more of a lab coat than a blazer to something much more stylish and ready to be added to my spring wardrobe.


I also lined it (completely wrong I'm sure) but it looks really cute open as well.

You can check out this rehash here

Have a great day!
Ashlee
Whyknotmom 


Keeping up with the Coaches

I have this wool jacket that I want to refashion for work


I reattached the sleeves to make it fit and added some flare.


To see it all, come check out my blog!


Thrifted Leather Jacket - from Unwearable to Wearable

I thrifted this very soft and very warm leather jacket from my local thrift store last year for only $9.99! It fit me fine above the waist, but it fit poorly at the waist and below due to my short waist and sway back. I had never sewn with leather before so I was nervous and excited as well in trying to fit this jacket on me.
Note how the jacket bunches up at the back due to my short waist and sway back.
I took the jacket apart and almost went blind ripping out the very securely sewn and glued down seams. I put the jacket back together after cutting off 6cm at the waist. And the result is this:
Note the big gap between the last and the 2nd last button because I had cut off the original at waist button hole.
Note that the back doesn't bunch up anymore! Yay!
I know that the jacket doesn't really look very much different from the original. But it now fits me and it was my first time sewing with leather! It was just a relief that I didn't mess up the jacket and I can actually wear it. I'm not scared of sewing with leather anymore.

The only thing I am not sure is the big gap between the last and 2nd last button. I'm not sure if I should add something there to balance it out. But if I put something there then perhaps it would draw attention to the gap. What do you think? Should I do something to hide the gap or should I just leave it alone?

You can see my entire journey for this project on my Blog.

Sweater Refashion.

Hi everybody!! I want to show you another super simple refashion!
This is the swater before:


And this is the dress after!!!


For more photos this is my facebook page : Restyling & Refashion

Have a nice day!! :)


Recycling a Torn Blouse

Today I scored this cute (but torn) blouse from my local consignment shop.  The owner didn't want to donate or toss the item since it was ripped so she gave it to me for free!


I cut the body of the shirt below the waist and used the fabric to make a quick infinity scarf!


Today's refashion was the first installment of a seven day (I-need-inspiration-to-get-off-the-couch) refashion challenge!  If you want to join in (or check out the original post for this refashion) head on over to my blog and leave comments with your daily refashions!  Happy sewing!

Shawn Elizabeth


Friday, February 27, 2015

It's a Cinch 4 in 1 Skirt Refashion


Hi All,

I had this maxi skirt that I decided to play around with.  Believe it or not I used a ball point pen and a few other things to make these alterations.  More info here.


Happy Refashioning,
Cindy @ Upcycled Design Lab

swatches and trousers to skirt.....

swatch skirt refashion upcycle
Hi, thanks you for letting me join your group, my name is Eimear, and I have been sewing and making since primary school (and before) and in the last year have been remaking …. a lot (after I bought 6 coats in 6 weeks for less than 6 euro each in charity shops and it went from there)

I am not too sure exactly what my intentions were with my project but I figured if I could document/blog it as I went along, it would figure itself out.  I also decided to aim to post a remake once a week to keep my focus and see where it went.  I was to tackle my small stash, or upcycle. (which was just as well as we had just bought and are living in an old house that needs loads of work so clothes shopping was out).  I also wanted to make these items really well, so as to give them further genuine years of wear, and I thought if I tried to use vintage patterns or make my own patters using vintage inspired looks, then it would make them look timeless and would not date.

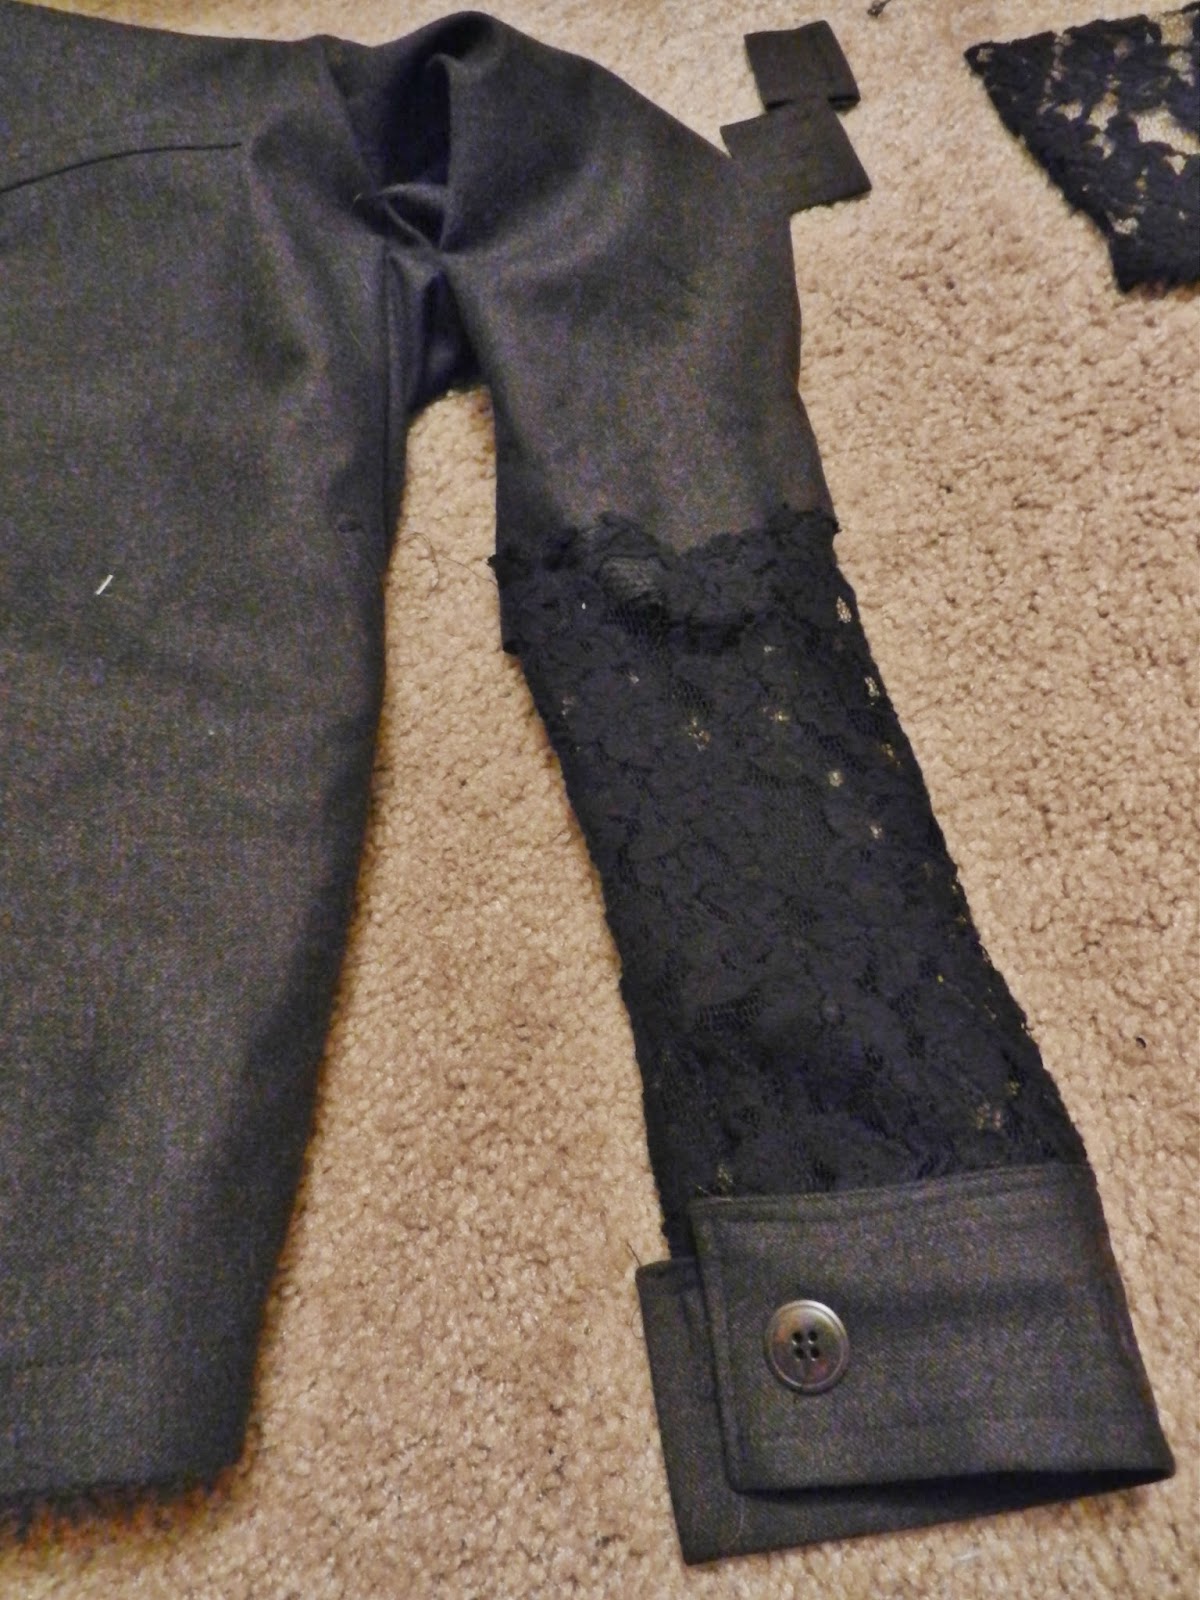
This last month has been ‘swatch’ month and I am posting some skirts I made from skirts/trousers and a swatch.  I adapted a vogue pattern and I have yet to wear the skort, but have been wearing the black skirt and love it. I tend to take any remake item apart fully and re-cut as I can establish grain line effectively, and there is some black fabric from the trousers left over which will go on to another project. 


My blog is rudai-deanta.blogspot.ie if you want to see any of the other remakes.  

Thursday, February 26, 2015

Long skirt refashion.

Hi! I'm Cristina, an Italian seamstress with the passion for refashion!! 
I'm so glad to share with you my work and I hope you like it! 

This is my first refashion! From skirt to asymmetrical dress! 

This is the skirt before the refashion..


...And the asymmetrical dress!


For more photos this is my facebook page : Restyling & Refashion

Have a nice day!! :)

Tuesday, February 24, 2015

The Crafty Disaster: Refashioned Prom Dress

This week I posted a little throwback to my high school prom, where I refashioned a prom dress before I even knew what refashioning was! Check out my blog for more pictures and a quick how to.

Before & After

This super easy refashion can be found here.


-Lindsay 

Another hood gone

I really don't like hoods on children's clothing. Too big of a safety hazard. 

But I couldn't pass on this lovely knitted hooded cardigan, that I found in a Red Cross thrift shop.

Snip snip. I left about 10 cm (4") of the hood.

Then i folded the remaining piece and stitched it to the neckline.

It looks like it has always been like that.

It can also be a stand collar.

Blog: http://www.sagaifarver.dk

Tim Burton inspired

This was the inspiration:


and this is what I got:

you can take a better look...

and CLICK HERE for more photos and info. 

Monday, February 23, 2015

Two pieces for a new refashion

Hi,

In France some seamstress organize sewing challenges. This is to satisfy two of them that I realized that refashion.


For details is HERE

Plus Size Refashion - Making Tiny Clothes Fit (and Flatter)


As a plus size girl I was feeling locked out of the reFashion craze.  What's an amateur seamstress to do!?  I know, i'll create a way to remake clothes so they'll fit me.  Along the way maybe i'll spark a little inspiration in you!

This dress started out as a size Petite Small.  Today, it's a cute (size 16/18) skirt that I can wear to the office!  Visit my blog for step by step instructions and tips on upsizing smaller clothes.

I hope to continue my plus size refashion journey.  This is just the latest step!

Thanks!
Kathy

The UGLY Skirt Challenge Strikes Again!!

Dear Refashioners,

The UGLY Skirt Challenge has struck again, and this time it was a two-fer all the way around.  First there was this hideous, reversible skirt (two sided=the first two-fer!)
So who was on the receiving end of the lovely piece of work?  It was one of our own...the amazing Carissa!  And here's a teaser photo of Carissa's handiwork...
So where's the second two-fer?  Well, you're going to have to go check it out over at Skirt Fixation where you can find not only this amazing transformation, but also all the other pieces in the UGLY Skirt Challenge series!  


In and Out

I started with this denim jacket


I chopped off some appendages, some length, and added some lace.


To see the whole thing, come visit my Blog!


Sunday, February 22, 2015

Blue Floral Nightie Refashion

Back with another refashion, and this one is a sweetie :) I started out with this nightie...pretty blue floral on a gray sweatshirt material. Comfy and cute...but not so cute as it was! It definitely needed a change.
I started by making a couple of mistakes attaching the waistband... ;-)
But apart from that it was pretty smooth sailing. Wanna see the tutorial? Hop over to Little Did You Know to check it out!
Now I just need some warm spring weather to be able to wear this for more than just doing my laundry and cleaning on a Sunday off...

Peace,
Andrea

Make It Mini!

So I have this dress that is just a little too big and a little too long and a little too conservative for me. But I love the print and the colors. Also the material is a stretchy fabric that doesn't fray. Win!


Hi Presley and Riley and Oysters backside!
I took the sides in about an inch and a half and cut about 6 inches off the bottom and hemmed that. I used a zig-zag stitch on the hem so it could stretch easily. I like how it turned out but it's a little bit short now. Sooooo- do I make it shorter and call it a shirt? Or should I add leggings and keep it as a mini dress? What do you think I should do?


This is one of those headless pics because it was a bad hair day!

WOAH! Thats short!

I will update with a new full body image once I decide if Im going to do more work on it or wear it with leggings! For more process images and more details check out my blog entry here!

UPDATE! Here it is with leggings! 


SKIRT REFASHION: Two new khaki skirts!

In search of more khaki pants or skirts, I found a pair of shorts for $8. The length was a little long as shorts but would be perfect as a work skirt. I'm pretty sure this is the first time I've refashioned a pair of shorts into a skirt, and the process was pretty simple.

SKIRT897345
SHORTS TO SKIRT REFASHION

I simply cut up the inside seams, smoothed out the fabric, and sewed new front seam to create a skirt! Although the process was simple and took me about an hour to complete, I have a few issues with making the old seams and new seams look natural. But I think the skirt looks OK.

Z.2SKIRTSA
SUPER UGLY TRIANGLE PIECE

For the second khaki skirt -- which was refashioned from  super big capris -- I thought I needed extra material in the front. In reality, the triangle piece was amazingly ugly and totally not needed! I guess the capris were wide enough that I didn't need more fabric -- so, I removed the triangle.

Z.2SKIRTSG
AH, MUCH BETTER! SO MUCH BETTER!

For more details about these simple refashions, click here or here.

Come on over to my blog and peek at some pictures that make me happy at jenniferelliott14.com.