Tuesday, January 30, 2024

bustier dress with faux shirring and basque waistline


 Do you want to learn how to sew a bustier dress with faux shirring and basque waistline? This dress is easy to make, comfortable to wear, and flattering to any body shape. Plus, you don’t need a zipper, because the faux shirring technique creates a stretchy and snug fit. And the best part is, you can get a free PDF pattern in 5 sizes and a step-by-step video tutorial . Click here to watch the video and here to download the free pattern. And don’t forget to leave a comment and let her know what you think. This is a great opportunity to learn a new sewing skill and make a beautiful dress. Don’t miss it!


My blog

 and 

You Tube


Monday, January 29, 2024

Fake collar blouse with cat


A few years ago, I joined a local clothing loop. For those of you who are not familiar with the concept: enormous bags (often IKEA) with 20 to 30 garments are passed around in a group of women. If you see something you like, you can keep it, and in return you put in a garment of your own. Preferably a garment that is good enough for a second round, not something that is so worn out, you would throw it away yourself (I've noticed that occasionally opinions differ on this...:)). As in everything, tastes differ, but every once in a while you come across a gem! 

That's how I found this blouse / bodysuit. I liked the neckline and collar but unfortunately, the blouse was just a little too small. With a few alterations it would be perfect as a fake colour blouse!

Brown is not really my color, but that was easily fixed with purple Dylan cold dye:).


Next, I used another fake collar to cut out the shape. If you don't have one yourself and would like to make a fake collar out of an old blouse, for the lengt you cut just below your breast and as for the width, make sure your arms can move freely. I added an elastic strap to keep the collar in place under your arms.


Now that the 'practical' part was finished, I wanted to add something creative to the collar tips. So I spent a few days browsing on the internet and came up with.... a cat, cut in half... Well yes, why not;)? The plan was to place the front and back of a patch on each collar tip.

Nail polish to the rescue! (Don't tell your sewing teacher!)

To keep the edges of the patch from fraying, I carefully applied some nail polish on the edges. Worked like a charm!


And this is how it turned out. I really like the collar combined with the light blue jumper! 


If you're in for some more
fantastic examples of fake collars, you'll find a link for more inspiration on vermaakster.blogspot.com. And of course more photos and details of the process in Dutch and English. 


Friday, January 26, 2024

Dress to Apron Upcycle

 Hello Refashion Co-op. I love going to thrift stores and clothes swaps but I can not try things on to check the fit. I have to guess. And if I guess wrong?

Before and after.

This wrap dress was so pretty but it was way too small. Oops! I still liked that fabric. I decided to make an apron because I am a very messy cook.

I cut off the skirt and cut the top piece from the back of the dress.

I gathered the skirt.

I added trim. 

I put it all together.

And I stayed in my house during the arctic blast we had. My husband and I made cookies everyday. It was fabulous! For all the how-to details and pictures of this apron go to I Can Work With That.


Friday, January 19, 2024

A Quick & Easy Shrug

 Hello Refashion Co-op. It is really, really cold in most of the U.S. this week, even parts that are not usually cold. Some of us are are struggling. I am layering up with as many clothes as possible. I made this shrug to stay warm. 

Before and after.

This baby blanket was made by hand and that always appeals to me. It was beautiful, it was in great shape and it was a rectangle. That is what I needed. If I put it across my shoulders lengthwise it could be used as a shawl but shawls always slip down and I hate fussing and fixing things like that. If this blanket were made into a shrug with sleeves, it would stay on and that would be easier to wear.
 
I used ribbon to connect the outer parts of the scalloped edges to make sleeves. Yarn would have been better but I didn't have any. It was going to be hidden inside so I did not worry about it.

From the back you can see the pretty design of the crochet pattern. 
 
This shrug is warm and cozy and only took about 15-20 minutes. Thanks for reading along, for more pictures and all the how-to details go to I Can Work With That.


Wednesday, January 17, 2024

How to Sew a Raglan Dress with Free Patterns | Easy Sewing Tutorial


Are you looking for a new sewing project that is fun, easy, and versatile? Do you want to learn how to sew a ruffle raglan dress with long sleeves and pockets, using free PDF patterns ? If yes, then you will love this video tutorial that I have created for you!

A ruffle raglan dress is a stylish and cozy garment that you can wear in any season. It has a flattering raglan sleeve that can be customized to different shapes, such as puff sleeves or balloon sleeves. It also has a ruffle hem that adds some flair and movement to the dress. And of course, it has pockets,.

In this video, I will show you how to sew this dress from scratch, using free PDF patterns that I have created for you. You can download them from the link here.  You can also adjust the length of the dress to make it mini, midi, or maxi, depending on your preference.

This video is perfect for beginners who want to learn how to sew a ruffle raglan dress, or for experienced sewists who want to try a new project. You can use any woven fabric that you like, such as cotton, linen, or rayon. You can also mix and match different colors and prints to create your own unique dress.

So, what are you waiting for? Grab your fabric and patterns, and let’s get sewing!

step by step video here


My blog

 and 

You Tube


Saturday, January 13, 2024

Separates From a Dress

 Hello Refashion Co-op. I found this dress at a thrift store and fell in love with the fabric. It looked like an Impressionist painting. But did it fit well? No, no it did not. 

Before and after.

I separated the top and the skirt. I wanted 2 pieces I could wear more often.

I used a straight skirt that fit well and used it as a "pattern". I thought a less full skirt would work for me so I cut out the pieces. The hem was already there so this was a fast skirt.  

I added an elastic waistband.

The dress had a zipper down the back so I sewed the back shut. I can put it on over my head.

The neckline gaped a little so I made 2 little pleats and added a couple buttons to jazz it up. 

I can wear these 2 pieces together or separate. Thanks for reading along, for more pictures and details go to I Can Work With That.


Monday, January 08, 2024

The Eternal Wardrobe: Prolonging the Life of Your Clothes

 Let's face it; we all wish our favorite T-shirt or pair of jeans would last forever, but unfortunately clothes, like good times, don't last. Today we will explore an invaluable treasure trove of "cloth-care" knowledge in an effort to extend their lifespan as much as possible!

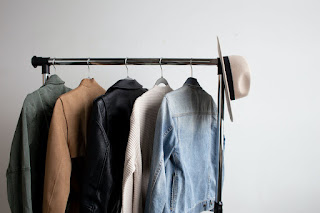
Photo by Amanda Vick on Unsplash

A Gentle Reminder: Washing Matters!

While you might not realize it, how you wash your clothing has an enormous effect on their lifespan. Not only are clothes cleaner when washed this way; more importantly, their fabric integrity remains protected as a result. One friendly laundry law: treat your clothes like you would treat your skin. While hot water may seem preferable for some fabrics and colors, delicate ones often benefit more from cold water for washing; it's less harsh on fabric fibers and keeps colors from running! And finally, overloading your washing machine is strictly forbidden! Just a reminder: don't rush through your laundry - doing so can cause unnecessary friction and stretching, which will shorten its life span. And please, don't ignore those laundry symbols on tags! Those little symbols are your clothing's own wash-care manual - consider it like Rosetta Stone of laundry care! Washing matters. It may not be rocket science but certainly it is an art form. So when next you do your laundry remember: be mindful and gentle as this will do wonders for both yourself and your clothes!

Heat Is on: But Not for Your Clothes! 

While a dryer might seem like the ideal place for wet clothing to dry quickly and comfortably, the truth is it's anything but. Think of the dryer like the sun on a scorching summer day; its warmth won't exactly be kind on delicate apparels! Heat can cause fibers to over-dry, leading to shrinkage or deformation - particularly cotton and wool fabrics - while color fade may occur as a result of overexposure. If you love vibrant colors and want your patterned clothes to stay looking newer for longer, air drying may be your savior. Air drying allows clothes to maintain their integrity - keeping their original size, shape and hue while making them appear like new again! Yes, air drying may take longer. But isn't that worth the wait in the grand scheme of things? So keep the heat on in your relationships rather than on your clothes - use less heat from a dryer and let your garments enjoy the natural, gentle caress of air drying - they'll certainly appreciate it and show it!

Custom Embroidery: A Tribute to Longevity

Custom embroidery can help extend the longevity of clothing you love, especially pieces you just can't bear to part ways with. This technique not only adds personal flair to your clothing but also strengthens fabric, increasing resistance against wear and tear. Think of it as giving them some flair while equipping them with extra durability armor! Be mindful that embroidery quality matters! Skimp on thread quality or the embroidery process and your newly embellished garment may turn into an eyesore with just one wash cycle. So invest in high-quality custom embroidery to ensure your favorite pieces continue looking their best. After all, these clothes represent you and should reflect quality and flair - thread lightly yet thread wisely!

Ironing: A Necessary Evil

Although ironing may be seen as a tedious chore, it plays an essential role in clothing longevity. Done correctly, ironing can serve as a rejuvenating spa for your clothing! Ironing clothes correctly can remove wrinkles and restore their crisp appearance, but requires finesse and delicacy for optimal results. Excessive heat or poor techniques could damage fibers, leading to faded appearances and potentially shortening their lifespan. To protect yourself against this, always check a garment's care label before beginning ironing, and set your heat setting appropriately. Ironing directly over embellishments or prints could damage them and peel or discolor, so use a press cloth or turn your garment inside out to protect these areas. Remember, ironing isn't your enemy in this clothing longevity endeavor - it can actually be used as an ally with proper knowledge and technique! So when picking up that iron next time, remember you're doing more than simply ironing out wrinkles; you're ironing in longevity!

Storage: The Art of Hanging and Folding

Proper garment storage can help prolong its life span. Proper storage techniques can preserve their structure, color and quality while prolonging their use. As members of "the storage club" will tell you: the first rule is always hang or fold. Division is key. Certain garments like blouses, dresses and suits tend to enjoy hanging, which allows airflow while helping reduce wrinkles. But not all clothes can benefit equally: heavier sweaters may sag out of shape on hangers. Don't forget about seasonal wear; give it the care it deserves in a cool, dry place where the sunlight doesn't reach. Make sure the garments are clean to avoid inviting bugs into your storage, and add cedar balls for good measure. Follow these storage tips and you will soon outwit your wardrobe woes, with clothes thanking you with lasting style and quality that they owe you in kind - as people appreciate good care of their belongings too.

The DIY Repair Kit: A Stitch in Time...

No matter how carefully you care for your clothes, they may eventually wear down over time. That is where a DIY repair kit becomes indispensable: providing essential tools in the fight for clothing longevity. This essential kit should include needles, thread in various colors, buttons and sharp scissors - everything needed to stitch quickly at home. Such as loose buttons and small tears which could otherwise lead to fabric catastrophe. Mending clothing can be both practical and fulfilling; it's an activity which brings tremendous satisfaction and mindfulness. Mending is like sewing love into each garment in your wardrobe; strengthening not only its fabric but also your relationship with it. Consider how one stitch could mean the difference between keeping an item of clothing you love or saying farewell to it, so embrace its power - your clothes, wallet and planet will thank you. Sustainable fashion isn't simply about buying less; rather it is about making what we already own last longer.

Photo by ROCCO STOPPOLONI on Unsplash

Conclusion: Make It Last, Make It Count

Clothing may not improve with age like fine wine does; but with these tips in hand, you can certainly give them a fighting chance to stay in your wardrobe longer and save both money and memories by making these garments last as long as possible. So let's make our clothes last, let's make them count, and let's make these memories count too.

Sunday, January 07, 2024

How to Sew a Linen Bolero Shrug with Long Puff Sleeves and Cuffs from Fabric Scraps | Video Tutorial


 Do you have a lot of fabric scraps lying around and don’t know what to do with them? Do you want to learn how to sew a stylish and versatile bolero shrug that you can wear with any outfit? If yes, then you will love this video tutorial!

In this video, I will show you how to sew a linen bolero shrug with long puff sleeves and cuffs from fabric scraps. This is a great way to use up your leftover fabric and create a unique and fashionable piece of clothing.

I will guide you through the whole process, step by step, with clear instructions and tips. You will also get access to free PDF patterns of the sleeves and the bodice that you can download and print at home.

This bolero shrug is perfect for spring and summer, and you can pair it with any outfit. It’s easy, fun, and satisfying to make. Plus, you will be able to use up your fabric scraps and reduce waste. How awesome is that?

So grab your sewing machine and your fabric scraps and let’s get started!


My blog

 and 

You Tube


Thursday, January 04, 2024

How to Sew a Lace Bolero Shrug in Less Than an Hour (Free PDF Pattern Included)


I have a new  video tutorial on how to sew a lace bolero shrug with a free PDF pattern. A lace bolero shrug is a beautiful and elegant accessory that can add some flair to any outfit. It’s a short, open-front jacket that covers the shoulders and arms, leaving the chest and waist exposed. You can wear it over a dress, a top, or even a swimsuit for some extra coverage and style.

In this video, I’ll show you how to sew a lace bolero shrug with a free PDF pattern. You don’t need any fancy skills or tools, just a basic bodice pattern that you can hack a little bit to create the bolero shape. Click here to learn how to do it ! You can use any lace fabric that has a good drape and stretch, such as cotton, rayon, or nylon. You’ll also need some matching thread and a sewing machine. This project is super easy for beginners who want to learn how to sew, and it can be done in a few hours.

You’ll also get some tips on how to style your bolero shrug with different outfits and accessories. You can customize your bolero shrug with different fabrics and embellishments, and have fun with your wardrobe.

So what are you waiting for? Click here to watch the video and download the free PDF pattern. And don’t forget to subscribe to my channel . Happy refashioning! 😊


My blog

 and 

You Tube


Tuesday, January 02, 2024

Ruffles

 Hello Refashion Co-op and Happy New Year! May 2024 be full of peace and joy. I wanted a fun outfit for New Year's Eve and this ruffled skirt was it. 

Before and after.

I cut the top off this dress because it did not fit well. I left some extra above the waist seam so I could use it to make an elastic waistband.

I made a casing and threaded some elastic through. 

This was an easy skirt to make and i loved the ruffles SO much. Thanks for reading along, for more pictures and details go to I Can Work With That.