Friday, December 31, 2021

A Wintery Refashion

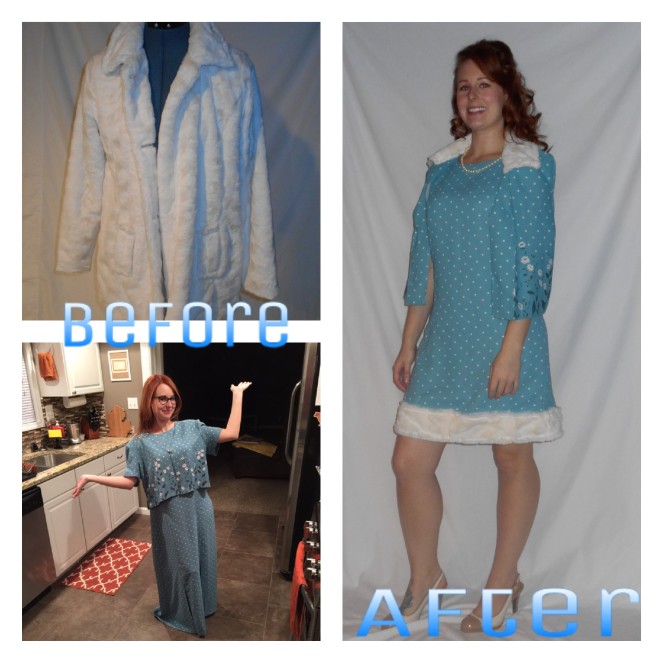
Here we have a lovely floor length 2 piece dress.

When I finally came up with my idea for this dress I came into a road block..

I had wanted to add faux fur accents to the dress and it’s matching jacket. I searched high and low for the perfect faux fur, every fabric store, every thrift store for MONTHS! Until finally one day at the Salvation Army .50 cent sale I stumbled across this beauty…

 dscn1186

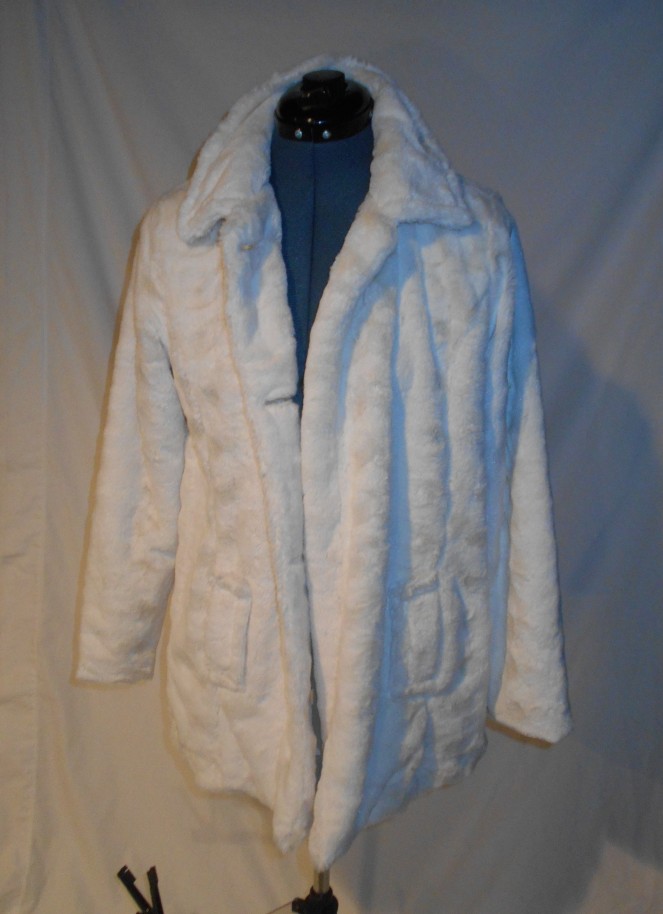
I really hated to cut up this poor jacket, but it was the perfect type of faux fur!

dscn1187

I snipped off those annoying hanger ties and shoulder pads!

dscn1188

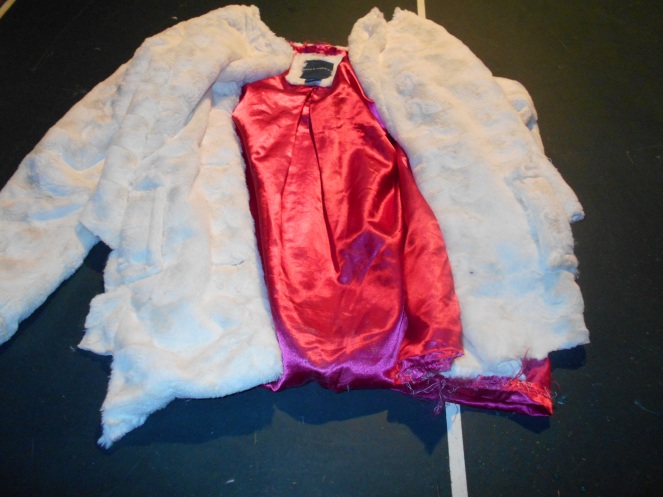
I wanted to keep the jacket because I loved the flowers on the material. However, I did not want to keep the oversize jacket. So I decided to make the jacket into a cape. I sewed up the sleeves.

dscn1189

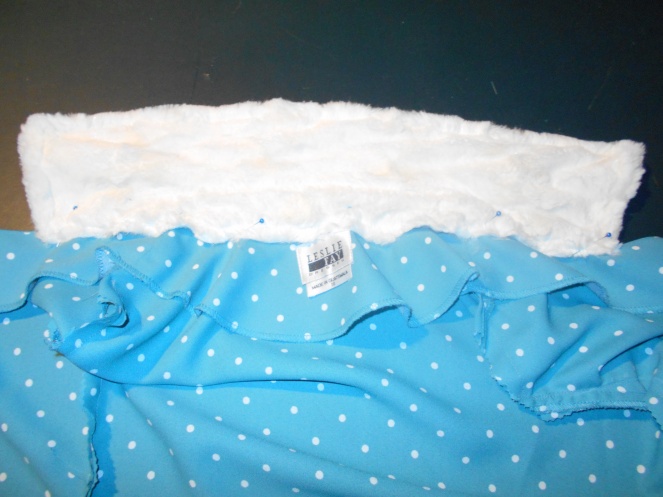
Added the fur collar from the jacket into the cape.

dscn1190

I took in the sides of the dress.

dscn1191

Decided on how much length to take off.

dscn1192

Pinned and sewed a new hem.

dscn1193

After I took the collar off the jacket. I cut 2 strips off the bottom of the jacket to piece together.

dscn1194

After sewing a new hem on the dress I added the strips of fur.
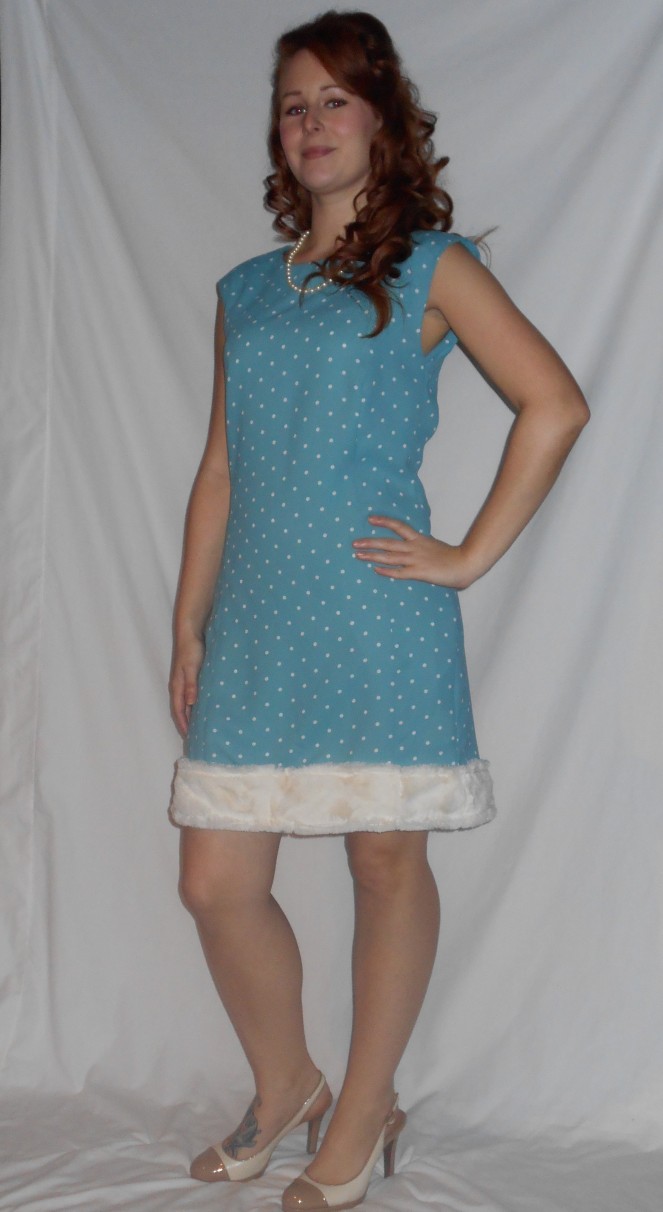
dscn1196

Pretty fancy!!!

dscn1201and with the cape! Ohh lala!

2017-05-3-14-39-39

Check out my stash of refashions on my blog!

Crushed Velvet Christmas Refash Flashback

Unfortunately, I do not have a new Christmas Refash and that is because I wore the  same outfit I refashioned a few years ago! I love it so much I figured I would share it again!

 I hope all of you had a very Merry Christmas and spent time enjoying time with family! I wish you all a very Happy and Healthy New Year!

DSCN0653

This is the dress I had used last year to refashion for Refashion Runway Season 4: All Stars. I used the top half back then and I had kept the bottom scrap for a later date.REPORT THIS AD

Well, that later date was Christmas this year! Crushed velvet seems to be a hot item this year, so I decided to use this scrap and jump on the bandwagon!

DSCN1436

Here is the bottom half of the dress. It was perfect to finish in to a skirt, it just needed some elastic for the waist.REPORT THIS AD

DSCN1437

I folded over the top of the skirt just enough to be able to cover the elastic. I left a 1 inch gap so I could thread the elastic through. I sewed it up later.REPORT THIS AD

DSCN1439

Used my trusty Bodkin to thread through the elastic. I know I have said this before, but this is just the handiest little tool!

DSCN1441

I sewed the elastic together, overlapping by about 1 1/2 inches.

DSCN1442

I stitched up the 1 inch hole I left open to thread the elastic through.

IMG_0612[785]

I am so thankful that I was able to spend such a wonderful Christmas with my hubby and amazing parents! I hope all of you had a wonderful Christmas holiday filled with family and friends!

Happy Refashioning!!!

Check out my stash of refashions on my blog!

From basic to party proof cardigan


A few years ago, I bought this grey basic cardigan. Unfortunately, the cardigan turned out to be a little too basic, I hardly wore it... I decided to give it a upgrade so it could go with my new sequin top (can't resist a good sparkle) on New Year's Eve. 

This post is not so much a refashion as it is about a change of style. I was going for a party proof style and a few simple and effective alterations made all the difference! 


Need more sparkling inspiration? Check out last years' post on DIY glitter shoes


Happy New Year to everyone!


You're welcome to visit vermaakster.blogspot.com where I explained the steps in English and Dutch and you can simultaneously learn the Dutch terminology on sewing:).


Thursday, December 23, 2021

How to sew a quilted coat step by step sewing tutorial


Hello👋😀, in this thrift flip video I sew oversize quilted coat jacket .
As my fabric I used pretty pink blanket. 
I show you step by step beginner friendly tutorial on how to use my pattern from previous video 😀 👉 CLICK and how to sew oversize quilted coat .
I hope this video is easy to follow and you have fun watching it ❗ 


  My blog

 and 

You Tube


Wednesday, December 15, 2021

Denim on Denim

 Hello Refashion Co-op. I hope you are well. I love denim and this denim dress seemed perfect for a refashion. 

Before and after.

I did a lot of cutting. These flowers were not working for me. 

I also cut off a lot of length from the bottom. It was too long and frumpy on me. 

I used some big pockets from men's jeans to cover those flower covered pockets. 


I left all those cut edges alone. I didn't sew them down or hem the dress. I wanted the edges to fray for a fun casual look. Thanks for reading along, for more pictures and details go to I Can Work With That.

Wednesday, December 08, 2021

No-Sew Party Dress

 Hello Refashion Co-op. It is time for holiday parties right? I put together a quick no-sewing party dress. It was fast and easy. 

 
All you need is a big men's t-shirt and a button up blouse. The bigger the t-shirt is, the longer and fuller the skirt of your new dress will be. 
 
Put the neck around you just above your chest. It will stay up well. Those sleeves need to be tucked in as if they were pockets. 
 
You will have a dress that looks like this when you are done. It is big and shapeless so it has plenty of room for every body shape and size. (If you are tall just add tights or leggings for more coverage.)
 
Now you can add the blouse on top and tie it at the smallest part of your waist. It will accent your smallest area and it gives the big t-shirt a nice shape. 

Have a fun party! 

Thanks for reading along, for more pictures and details go to I Can Work With That.


Tuesday, November 30, 2021

Turn sweater into muff (or the perfect DIY Christmas gift!)


Is it too soon to throw in DIY Christmas gifts? Nah... you need time to collect ideas, get inspired, choose your projects for this year... right? And by then you won't have much time left. So this muff might be a good choice! It won't take up much time (leaving out the inside pocket helps:)) and could be the perfect gift for someone who regularly has cold hands. And who doesn't in this time of year?


I'd like to dedicate this refashion to Jillian Owens, the Refashionista, who sadly passed away, she suffered from ovarian cancer. It was a sad, sad day when I found out in October. Her refashions have been a big inspiration to me and, I'm sure, to lots and lots of other creatives all over the world. And if I'm correct, she was also one of the early contributors to this blog. She will be missed!


You're welcome to visit 
vermaakster.blogspot.com where I explained the steps, my blog is in English and Dutch. You can also find a detailed explanation on the zipper pocket there. 


DIY silk satin French knickers


Hello👋😀, in this thrift flip video I sew silk satin French knickers. 

I sew them from silk satin bed sheet , very body friendly fabric.

 In my ealier video I show how to design perfect pattern for them using your own body 

measurements.

 Today I show you how to use this pattern and sew best French knickers for your perfect figure .

 I hope this video is easy to follow and you will have fun watching it ❗


  My blog

 and 

You Tube


Sunday, November 28, 2021

Thanksgiving Peplum with Bell Sleeves

This is not a new refashion but I love it so much I wanted to share it again in light of the Thanksgiving holiday! This was such a fun refashion!

 I love the holidays because it always gives me inspiration for some refashions! I purchased this pumpkin turtleneck back in the summer in preparation for Thanksgiving!  This shirt has been burning a hole in my re-fashioners pocket!

DSCN1396

I love this simple pumpkin pattern!

DSCN1397

My idea was to add the pumpkin turtleneck and this shirt together. Then I thought about a peplum shirt, how cute would that be?!

DSCN1398
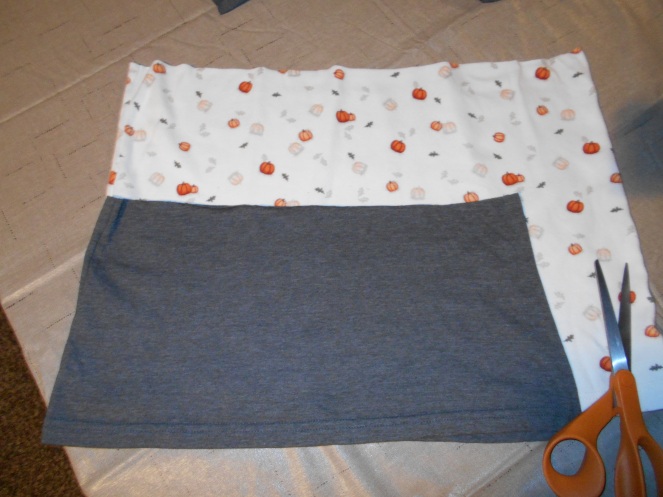
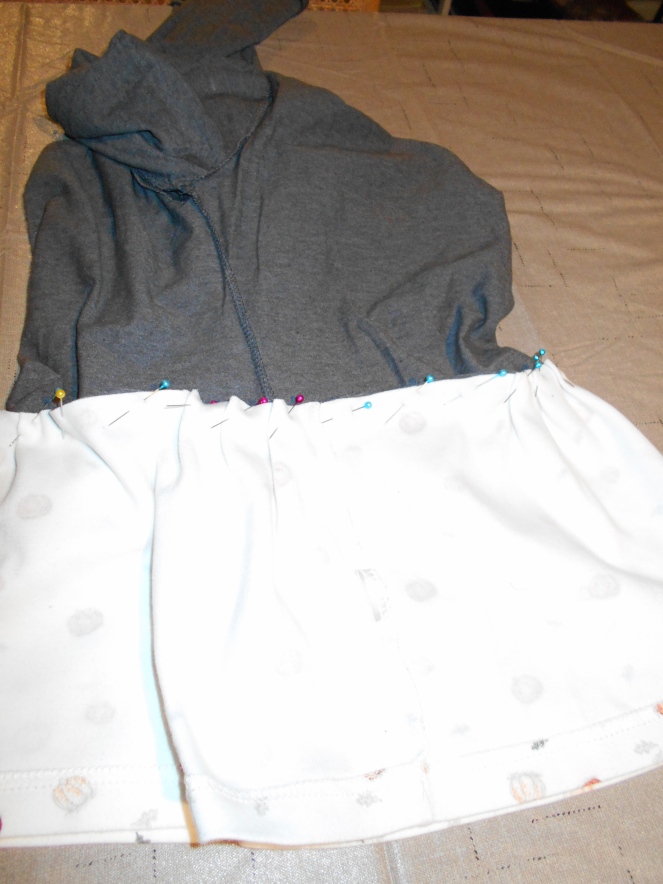
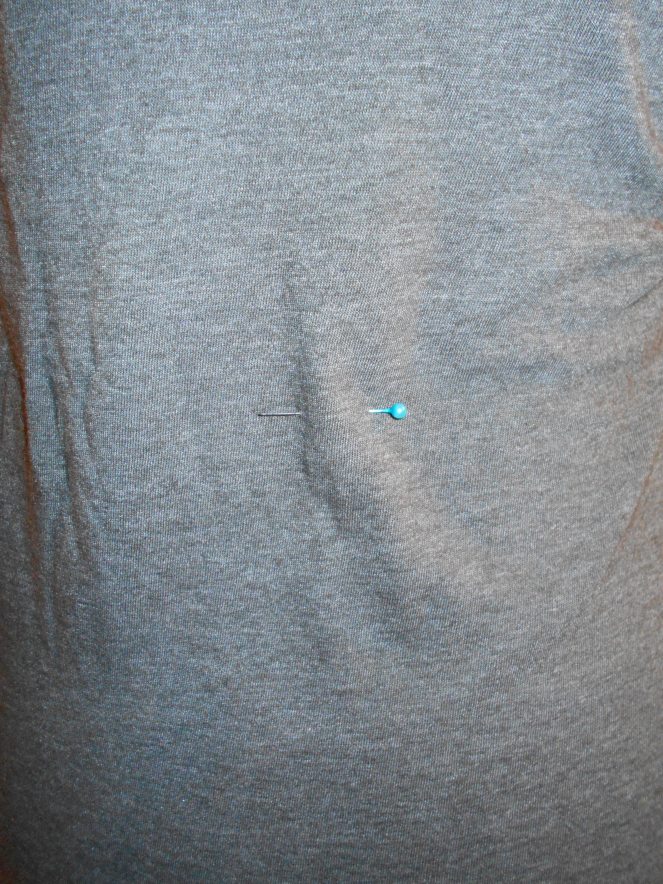
I marked where my bellybutton was, which is where I wanted to start the peplum part of this top.

DSCN1399

I cut the pumpkin turtleneck just under the armpits.

DSCN1400

I placed the scrap of the gray shirt on top of the pumpkin shirt so I could measure the length. Then I trimmed thee pumpkin shirt to size.

DSCN1401

I pinned the pumpkin fabric to the top of the gray shirt.

DSCN1402

Once the body of the shirt was done, it was time for the sleeves. I was playing around with adding part of the pumpkin sleeves to the gray shirt. During my trial and error process I came upon the idea to make them bell sleeves!

DSCN1403

I cut the bottom section of the pumpkin sleeves. Then cut the same length off of the gray shirt sleeves.

DSCN1404

I pinned the original hem of the pumpkin sleeves to the bottom of the newly cut gray sleeves. I folded under the bottom of the pumpkin material to make a new hem for the sleeves.

IMG_0510

Happy Thanksgiving!!!

IMG_0515

Happy Refashioning!!!

Check out my stash of refashions on my blog!