Sunday, November 30, 2014

Ablazin'

I decided to add a little flare to this blazer today.

I cropped it down to size and added some color from my scrap fabric pile to the lapel.


 For the details and the fun you're welcome to swing by my blog!


Toddler Sweater to Women Beanie and Mittens

I refashioned this too small Toddler sparkly sweater:


Into a sparkly beanie and mittens for me:


You can read about the details of this project on My Blog.

Saturday, November 29, 2014

Maxi Dress to Tunic

Happy Holidays!  This post is short and sweet. Lots of coughing and sleepless night around our place. This would explain why there's no before photo. 


This super comfy tunic was a strapless maxi dress. 

Friday, November 28, 2014

Upcycled Wrap Sweatshirt


This is a version of the Coppelia Wrap Sweatshirt that I made using all old XXL sweatshirts and one knit maxi skirt. I love all the colors together- purple cuffs, black and green front, blue sleeves and back, pink neckline. It turned out well and the fit is almost spot on. Come see more projects on my blog, Hoopes Park Studios.


From a skirt to a...backpack?

My little boy really, really wanted a backpack!  It needed a lining, so I used a denim skirt.


To see how I did it and more (cute) photo, go to Skirt Fixation!

BEFORE: Red Satin Formal AFTER: Flannel and Satin PJs


BEFORE: Too small red satin formal made of good washable satin. Options from a net search: 
1. Holiday top from top section.
2. Holiday skirt from skirt section.
3. PJ set: LaLaLauren Refashion Co-op Jones of New York Dress to PJ! 


Great options, but I do not need any of those items to wear at the RanchHouse this winter.

AFTER: Overized, warm, comfy pj / lounge pants. Pants are made from an old red flannel sheet from the stash. The red satin lines the pants. 
BONUS: Snack Napkins.

  • Not for the table. For coffee cups, lunch boxes, snacks around the house.
  • Odd red flannel scraps and white pillowcase fabric (100 yards in the stash). No red satin was left.
  • Rotary cut width of  ruler, stitched together, serged. 
  • Easy to put together at the end of  the project. 
  • Red thread was in the serger from the main project.

Some New Friends

Hello all !

Here is one of my latest refashions.

I am a BIG fan of the show Friends.  So when I came across this large t-shirt, I could not pass it up.


So a couple of snips and draping seams later, and it became this:


I really love it and I will be getting a lot of wear from it.

I have a lot of refashions done but I still need to organize a space to take pictures by myself.  Hopefully I can get it done soon.

Oh, and here is my newest roomie:


She is my niece's cat and I am taking care of her for the next year.  She is the sweetest cat and she has rabbit fur, so soft !  I am so happy to have another cat in the house.

Hopefully, I can post a bit faster next time !


Peace !

Claudia

Thursday, November 27, 2014

Time management and my new shiny cardi

I feel like I have finally started catching up with my 'to be refashioned' stash. There are all sorts of things in it - from those I have no idea what to do with, those I have an exact plan with and finally those that need to be fixed. The latter type is the most boring one, it just needs to be dealt with and they are not really 'refashions' but rather 'fixations'.

However, I feel like I am getting better at this, and it usually takes me a day to finish a project, but with a full time job, a load of other things on my plate I just seem like I cannot afford a whole day to finish a project. Hence, my projects take days to be finished. Nevertheless, I really like what I am doing and therefore persist in finishing a project at a time. Blogging, however comes a little later. And writing step-by-step tutorials is a thing I still have to master.

Nevertheless, my poor time management hasn't deprived me of the desire to spread the word about importance of refashioning as a part of a larger 'reuse, repurpose and recycle' movement to help the planet survive us.

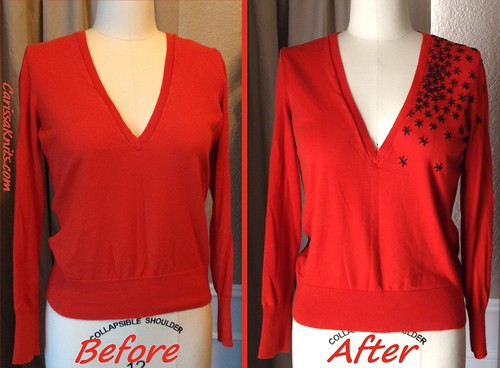
Here is my latest shiny cardigan refashion, which I really hope you'll like. The sweater or blouse (not sure what was it made as) I refashioned dates back from mid-nineties when my mother purchased it. She used to wear it with black outfits to formal occasions, and stopped using it at least a decade ago. For the past ten years it was mostly sitting in the closet pretty much forgotten. And as I feel compelled to first deal with the piles of clothes my family collected and kept for years - my refashions are (and judging to the amount of stuff we have, will be for a long time) the go-to material for my projects.

So, please, meet my new shiny cardigan - perfect for chilly Mondays and lack of inspiration days:


If you have a similar piece you would do the same with, please proceed to Curvy Girl for a few tips and the process.

Love,

Dee!

Blue Infinity Scarf


New Infinity Scarf
Infinity Scarfs in the shops are pretty and tempting. Prices make them not so tempting. Skirts and dresses from the stash have become Infinity Scarf candidates.

Pre-retirement, I wore this shirt and sweater in the college classroom and office. Today, a new infinity scarf  perked them up for work in the family flower shop.

I have several scarfs planned to change the look during the season.


Skirt Before
Depending on the starter garment, each scarf I make goes together differently, resulting in a slightly different scarf.
This skirt was not very full, so had width for only two fabric lengths. Length was enough for a shorter infinity scarf. Fabrics tend to be lightweight, so surging each piece prevents ravels and strengthens seams.
STEPS:
Cut off the elastic band and ties.
Cut open side seams.
Sew the waist right sides together, to make center seam of the scarf.
Fold right sides together into a long tube and stitch.
Turn right sides out.
Stitch the remaining open end, right sides together, leaving a few inches open.
Hand slip stitch this opening closed.
Enjoy!
Mary @ RanchHouse


Wednesday, November 26, 2014

Kristina's Challenge Dress

On a thrifting adventure with one of our editors and writers, Carissa, at the very end of the trip our friend Kristina challenged this dress. I took on the challenge. BTW hopefully if I can get some sewing time (!!!) there will be more information about our little shopping trip.
This dress was navy and white complete with a gold/black metal embellishment on the pointed collar all coupled with a built in peak-a-boo bodice. I used pink poly iDYE since the fabric was 100% polyester. I got a purple and fuchsia mix in the fabric. I used a pattern and converted the bottom skirt into a new long-sleeve top, something simple I could wear to work.

More pictures and information on the blog here.

Cheers,
Lauren

Sweatshirt refashion

I have had this picture on my refashion Pinterest board for a long time. I finally got around to trying it. I started with this shapeless 3XL sweatshirt.


I cut off the neckband, waistband, and cuffs. Then I sliced it up the front, a few inches off center.


To take out some of the bulk, I took it in on the sides and under the arms. I also folded the back panel in half from top to bottom and took out a slice there, narrower at the bottom edge to sit right over my hips.


I added some gathers on the front "lapel" and trimmed it a bit to get the neckline shape I wanted. I reinforced the lapels with iron-on interfacing, then added buttonhole and buttons. 


I love how it turned out! Comfy and chic!

Thanks for reading.     -Amy


Tuesday, November 25, 2014

Shirt dress to shirt

Hi everyone!

This is a khaki shirt dress I bought for 2 euros. It's truly ugly.


I just shortened the hem by keeping its curve...and now I have a khaki shirt.


Thanks for reading!  Have a nice day and happy refashioning time.

No More Sleeves Refashion

Before | After

After letting this dress collect much dust while it hung in a dark corner of my closet (because I hated the sleeves), I finally solved the issue. Head on over to the blog for details on the project!

Monday, November 24, 2014

Holey Moley!

This was my favorite sweater last autumn until my puppy snagged a tooth on it.

Embroider Sweater - Before

I remembered seeing this embellished sweater on Pinterest and thought it would be the perfect Pinspiration for this project. First, I darned the hole using the closest matching thread I had on hand. Then I grabbed some leftover yarn from another project and started embroidering flowers, one directly over the darned hole to cover the not-quite-matching thread and the rest scattered all over the top right shoulder. I even did a few on the sleeve and back.

Embroider Sweater - After

I have a feeling this sweater will become a favorite once again.

For more details, visit me at CarissaKnits!

Embroidered Sweater - Before & After

the WTF skirt

That was the only phrase that I could describe this skirt. When I got the skirt, I did not fully look at the skirt to see the craziness in the design. When I got home my jaw dropped. OMG what did I get myself into?? Seriously!!!!

The skirt had hook and eyes all down the center of the skirt and they were NOT for decoration- they were functional! EEK!!! Then it had an asymmetrical front and back hem! I sewed out the hook and eyes. I will never run out of hook and eyes for the rest of my life because of this skirt. I fixed the waistband and then evened out the hem. Done! Now the skirt is wearable and I won't get any odd looks!

For more pictures and more information on this process check out my blog here.

Cheers,
Lauren
(btw today is my bday!) Wahoo!

Sunday, November 23, 2014

SHIRT FIX: Shorter sleeves

I found this lovely navy blue striped shirt in the men's department for just a few dollars, knowing all I need to do is shorten the sleeves. I normally don't go for stripes since they show off my bad curves, but the solid block of blue above the stripes caught my eye. Despite shortening sleeves on three other shirts, I still haven't perfected that specific art because I prefer to keep the original width of the shirt.


sleeve234

So the problem? Matching the measurements of the new sleeve and the original width of the shirt is a bit tricky. Somehow with the three previous shirts, I managed to connect everything and the three shirts look somewhat decent. Not perfect, but decent. And decent is the perfect word to describe my new refashioned blue shirt. *sigh* Where do I begin? I should've been more careful reattaching the first sleeve.


sleeve34

The seam looks a little messy, but I don't think I have any room for corrections. Maybe when I have time and patience, I'll fix the sleeve but for now I'm leaving it as is. Reattaching the second sleeve was more successful because I was more careful and semi more patient. The only slight issue I have are the side seams, where I had to sew a few new stitches. The side stripes don't match perfectly, but again for now, I'm OK with imperfection.


sleeve1


Take a few minutes and wander over to my blog at jenniferelliott14.com.

Jennifer Elliott

Saturday, November 22, 2014

Wool Sweater Remake

I'm new here. My name is Patti. I live in upstate New York near Lake Ontario. I teach elementary math, grades 1-5. I bought a 100% wool sweater at my very (3 blocks from my house) thrift store. It had a JCrew label, but the quality of the wool is not so great. 
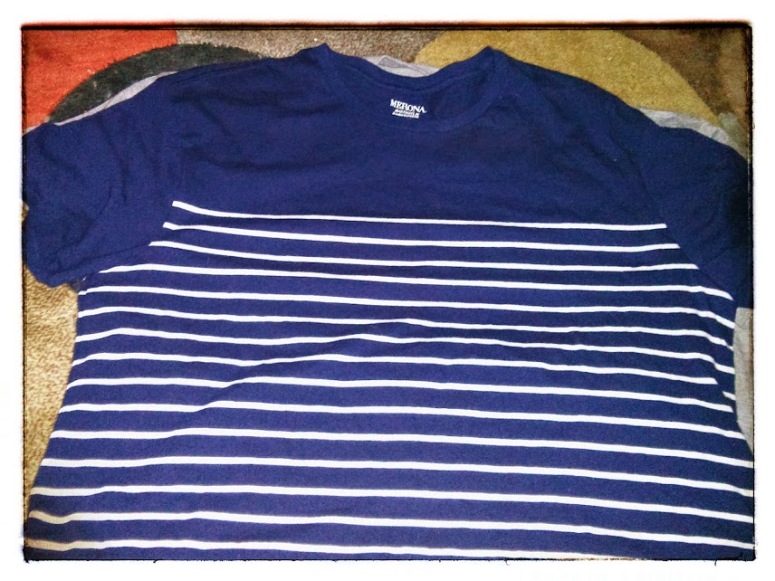
It was XXlarge. I put it through the hot water wash cycle and dried it on high heat with the hopes that it would shrink to fit with a boiled wool look. It didn't come out so well, I decided to cut it apart and remake it into a more feminine shape. 
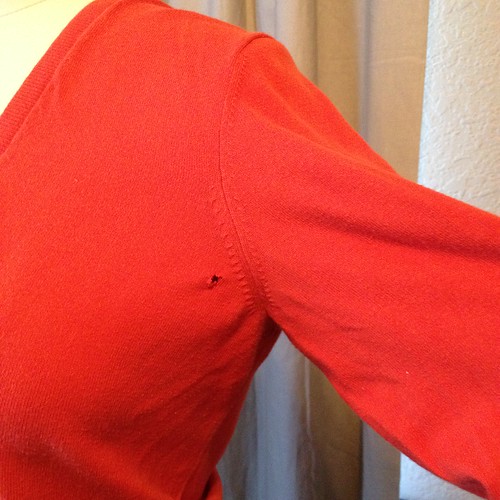
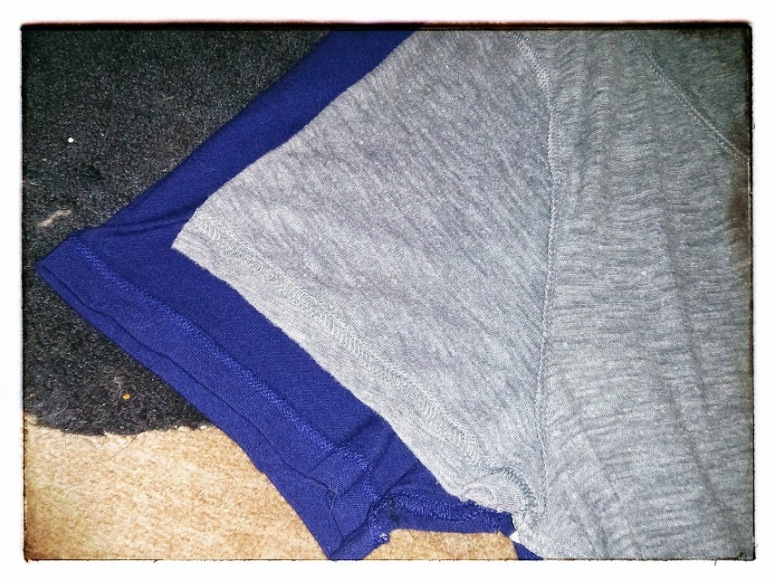
There was another major issue, the elbows were shot, and some moth holes appeared. I patched the elbows and darned the moth holes. 
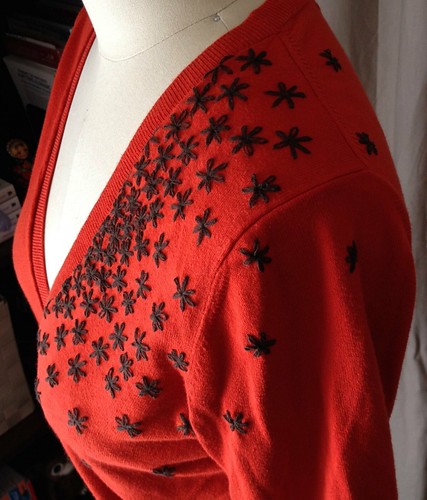
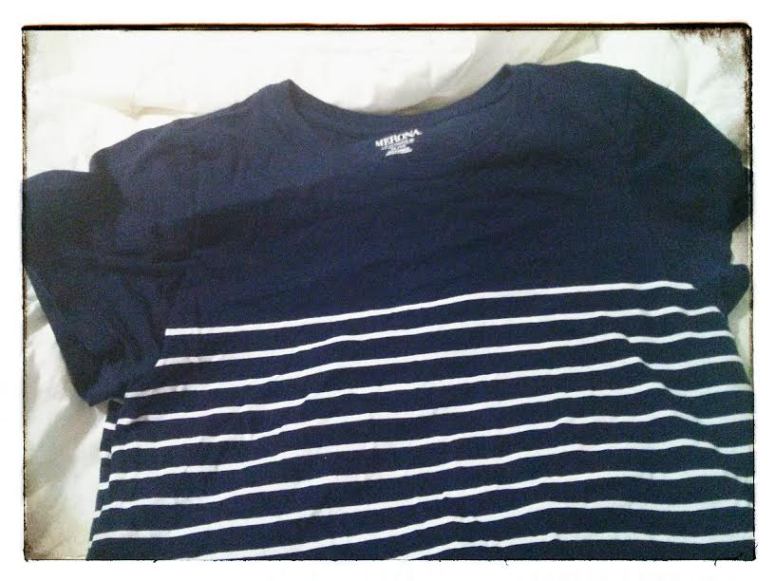
I used lace to finish the neck line. I seriously love this sweater!


Friday, November 21, 2014

Paisley cord skirt to pants!

I scored these paisley corduroy pants at the Goodwill by the pound when I went to Alabama. These pants did not work for me- too big. I converted the pants to a skirt with pockets! Love pockets! Yeah!


The bonus is the skirt is really warm since it is corduroy! More information on this process here on my blog.

Cheers,
Lauren

Refashioning for my baby boy

The best thing about having babies and sewing for them, is that any little piece is enough to make whatever we want to. I created this outfit for my little man refashioning a plain onesie, to which I sewn a green moster into, and using denim leftovers from a pair of jeans my sister cut into capris. 


you can read more about it HERE


A "fitting" refashion for the baby!

Don't you think it's "fitting" that I refashioned my maternity shirt into a cute little button up for the baby?


(That's not me in the before picture, but I forgot to take one!  And it looked just like that shirt anyway!)  Read about how I did this on our blog, Skirt Fixation!