Saturday, April 30, 2016

Too Tiny to Pretty in Pink!

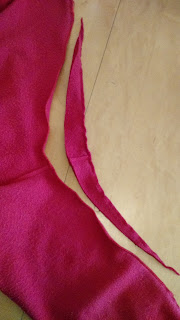
I found this dress that was a really pretty pink color. But it had one tiny problem... it didn't zip up at all.


I let out the seams in the top and then cut out the middle to make it short but full. 


I love the way it turned out! 
Happy Sewing!
XOXOX
Katie

a new shirt !

Hi,

I made a refashion with my friend Elisabeth.

We turn a shirt into a  gorgous jaket.

BEFORE

https://blogger.googleusercontent.com/img/b/R29vZ2xl/AVvXsEieZGZp4ivdkKUCnP2HnOEiHUx-jy2g40doRb7Yowp-iR7lPazIyBCnstmZEj4LZQhO0pb4Jh8xZ0uubUY0W0P5KRq1sbZ4ThzpEiuMjY27HK3OHfqhxJi5zAma58iuDpQ3N4bowgcGNeZ6/s640/PicsArt_03-27-08.40.27.jpg


AFTER

https://blogger.googleusercontent.com/img/b/R29vZ2xl/AVvXsEiTrh0uBs9Z8KZirGlKsMp-sb5ZAIJ_A-sDqD8EVwA8-69mDKVzTfwPT2kgSk5ev94fJw_8LNLLGoepyG1YzxLtg7KqWHyuDBYu2sSMy-5jBND8Yo-kiZngUHijPYYDCUJ_OGgcJ6vhOFUy/s640/PicsArt_04-26-08.43.05.jpg


Fo more, it's HERE

Sweater to Pillow Refash

This is a pretty easy yet functional refash!
I recently picked up a sweater at my local thrift store during the .50 cent sale.
I have been hanging onto a purple pillow for the last 5 years, waiting to recover it.
Before: just a sweater and a pillow.
DSCN0384I cut the sweater across just under the sleeves.
DSCN0385Then I ended up with this square of fabric. To cut down on sewing I kept the original sode seems of the sweater.
DSCN0387Pinned and sewed the top and the bottom but leaving a hole at the bottom for the stuffing.
DSCN0388See: hole for stuffing.
DSCN0389Stuff, stuff, stuff!
Then I hand stitched the hole.
DSCN0397My new pillow!
DSCN0398Our wonderful friend, Karl, modeling my new pillow for me! Thanks Karl :)
Happy Refashioning!!!

Check out my stash of refashions on my blog: http://therefashstash.wordpress.com

Friday, April 29, 2016

The higher the shoulder pads...

Today's refashion was quite the looker upon purchase. I found this amazing piece at the Salvation Army and made it mine for just $0.69. I think you will agree that it is worth every penny, just for the before pictures:

Red silk - befores

There was much to be done to get this dress up to date. First step, tackle those shoulder pads.

Oh, what's this: 
Red silk - double pads
Yup, that's a second set of mini shoulder pads under the first set of large ones. Frankly, this could have 5 sets of pads and they'd all end up in the trash.
Then, it was time for the sleeves. Much like previous refashions, I prefer to seam-rip the sleeves off, rather than cut them, because it leaves behind a 1/4" hem that is already permanently folded and easy to pin.
Red silk - removing sleeve
It is incredible how time consuming this is. Seriously, I'm talking hours! Delicate material and heavy duty serging make the process even more slow-going.
I took the sides in and had to say a sad farewell to the pleated skirt as it was just too long and I didn't trust my skills to relocate it higher. However, the end result is quite lovely!
Red silk - afters
Head over to my blog Hems and HaHa's  to see the whole seam-ripperiffic process and to weigh in on whether it looks better forwards or backwards. 
Happy refashioning! 

Woo Hoo, A two for one!

I have to say, I am seriously happy with my newest refashion... for once it went fairly smoothly, and as an added bonus I discovered by accident that I got a two for one! :)  
I started out with my usual thrifted and donated items (including a piece from a previous ReFashion Flop).  
Here is the "finished" project -- Intentionally a skirt and happily also a top! ;)


For all the details and pics, just pop over to my blog at: https://repurposefulblog.wordpress.com/2016/04/28/wow-a-skirt-and-a-shirt/

Thanks for taking a peek at my newest, and as always, any and all feedback is greatly appreciated!


Thursday, April 28, 2016

A birthday T-shirt

A girlfriend gifted me this from her closet. I actually really, really liked it as-is.


I just needed to take it in a little bit.

 Pin, cut, sew. No big whoop.

This refashion took no time at all. 


I wore this to my (step) Grandson's birthday party.

His mother took this picture and has her own photography business. (Maybe I should hire her to take ALL my blog pics!) :)


This was simple and FREE... 2 of my favorite things :)

To see my post, click here.

Happy Refashioing!

~Laura


I'm blue...

Sadly, that title is one of those double meaning things. I'm sharing two refashions of dresses which happen to be blue, but also; I'm very, very sad.
I've been a little overwhelmed with projects lately and usually that means crafting/blogging is the first thing to be put aside so I can catch up on Etsy listings, household chores, etc. I've got the week off from school for April vacation, giving me time for all of those little tasks that pile up--but I haven't been all that concerned with them.
Last Tuesday, a car accident took the life of my 17 year old cousin, Jesse. When I tell people this, I keep stressing that he wasn't just some kid I happened to be related to; he was a very important person in my life. When he was little, I used to take him out and spend time with him any chance I could. He was so fun to be around and always so well behaved.
And as he grew into a teenager, not much changed. No teen angst here, just a happy kid who was never too cool for hugs and "I love you's."
I digress. I'm here to post pics of outfits, but I'd be remiss to ignore the overwhelming grief I feel at the moment. I know; death of a family member is hard, but...this one? I think the loss of this particular one is going to hurt for awhile.
Well, this seems a little anti-climatic but here's the "before" picture. I thought this big, thick knit dress would make a good "no-sew."
So, cut the length, cut the sleeves, cut the turtleneck, make a sash out of the cut off length...the standard drill of a basic no-sew. Here it is:
And here's the side by side:
 This post is from early in the month when we had a cold snap, hence the reason I was able to wear this flannel thing I'm about to show you. 
This one was hardly a refashion. All I did was deflate those balloon sleeves by removing the cuffs then trimming/hemming them a bit. I also added a belt. Here:
How do you feel about the wideness of the sleeves? I actually left them like that on purpose.
Anyway, here's the full blue dress post on my blog, Craft, Thrift, or Die.
This is the first post (these sad stories are usually multi-part) of my story of Jesse.
Hey, thanks for reading! Writing and blogging really seems to help with that whole grieving process!

Button Down Three; The Striped One

Hello Refashion Co-op. This is my third button-down re-do and it was the easiest and fastest too. It is my favorite by far because it is so comfortable to wear.


I cut these two shirts about 1/4 inch under the arms. Then I put the stretchy black top and the striped body together. I stretched the black top as I attached it to the striped shirt. When I was finished the striped shirt was nicely and evenly gathered all around. Easy as pie! 

I have to say that without a belt it looks like a maternity top. So, I plan to wear a belt with it every time I wear it. But if you need a maternity top, this could work for you.
Thanks for reading, for more details go to I Can Work With That.

Sparkles, Owls, and Wagon Wheels: Skirt to Dress Refashion

It was a sister day. Just me and my little sister. A trip to the fabric store, the library, and finally the thrift store. Thread for me from the fabric store, a couple dozen books for my sister from the library, and then there was this skirt at the thrift store.


My sister found it, fell in love with it, and begged me to get it for her and turn it into a dress. I agreed.


The sparkles and owls perched on wagon wheels were just too much for a girl to say no too.
Thus the skirt came home. My sister suggested I just add ribbon straps to it, but no. I had another plan. The waistband of the skirt got chopped off.


I cut out a yoke for the dress from what was left of the not-gold-lace shirt, sewed it together, and attached it to the skirt.


Then my sister had her dress!


For the step-by-step process and more pictures, check out my blog!

Alyssa,


Wednesday, April 27, 2016

How to Upsize a Playsuit

I had my fingers and toes crossed that this adorable polka dot playsuit I thrifted online would fit...


Of course not as apparently my torso is abnormally long and my bosom simply too ample to be contained in the very general size of “M”.


This is not my first refashion of a short-waisted, chest restricting garment so I thought I’d try to come up with a new idea and figure out just how to upsize a playsuit - get the tute right here.

Tuesday, April 26, 2016

Red sweatshirt refashion

Once again, I started out with a sweatshirt that was too big on me and set about to give it some shape.


I started by removing the front pockets and the zipper through a lot of careful, tedious seam-ripping.


I stitched the zipper edge back together once the zipper was removed. Then I set about taking in the sides a bit. I basted it where I thought it needed to be stitched then used my serger to finish the seam. Alas, these pictures only show the first round of taking in the sides - a second round was also needed.


Once it was finally slim enough, I added some large buttonholes to the left front flap and folded under the right front flap at an angle before adding my big red buttons. 


And here it is - warm and cozy. 


With this up and down weather, I'm sure to get some good use out of it before it gets too hot. Yay!


Thanks for reading!  -Amy