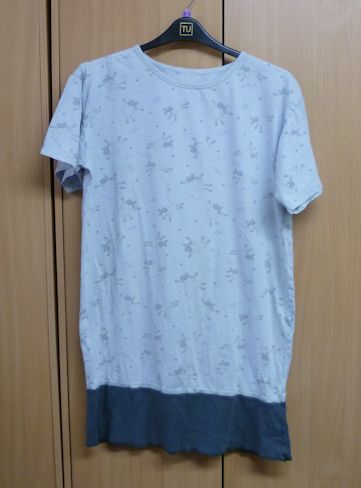
This lengthy winter is really causing problems with my leg muscles hurting. I like nightshirts to wear for bed, but these t-shirt type creep up through the night with tossing and turning...then I wake with cold hurting legs.
So, I took some excess t-shirt fabric and stuck a bit on the bottoms of a couple of the nightshirts.
Just enough length to wrap round your knees and keep them in place!
For another one not pictured, I chopped an old t-shirt across under the arms and stuck the bottom bit onto the bottom of the night shirt. It is much longer and works great for the nights that are even colder!
Saturday, April 27, 2013
Skirt to...skirt!
I know, not the most imaginative of changes to be made here taking a skirt and making it into, well, a skirt. However, the shape and style of the skirt is dramatically different...in my eyes. Here we go. I started with this floral print skirt I picked up for $2.50 at Goodwill. It fit perfectly in the waist and nowhere else...what is up with all of the volume around the tummy?!? Not flattering on ANYBODY!
I had pinned a photo of a pencil skirt that buttoned all the way up the back, and planned to take this skirt down that road, after considering a peplum top at first. So I used one of my pencil skirts as a guide...I picked the waistband off, then chopped up the skirt to the desired size and shape, leaving it the same length. I wanted to try out a longer length and thought that it would compliment the print. Sewed it all up and here's how it turned out!
In the end I actually prefer it with the buttons up the front...I'll try the other route with a men's shirt I found the other day :) The print is kinda crazy, but I like it and think that the solid top helps keep it in balance...what do you think? Well, I'm off to do some more sewing and refashioning! Enjoy the day!
Peace,
Andrea
LittleDidYouKnow
I heart my sweatshirt
Greetings refashioners!
It is still a little chilly out here in DC and the weather is up and down. So I can still wear wintery clothes one day and then more springy-summer ones another. Got to love the weather here!
First I started off with this sweatshirt.
Now the problem with the grey one is there was a bit of discoloration. The problem with the red sweat jacket was it had several holes on the back. So I needed to take the best of both worlds and make them 1!
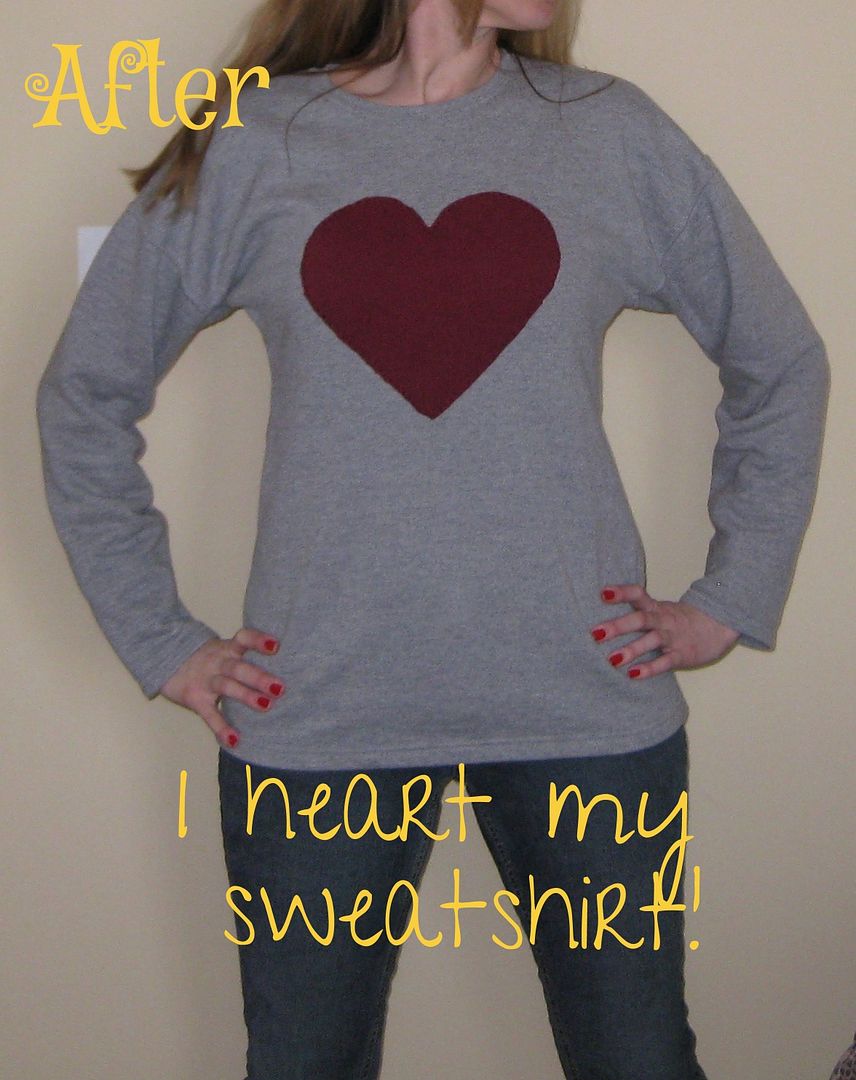
I took in the grey sweatshirt and then I cut out a heart on the red sweatshirt-embroidered that on the sweatshirt! Here is my end sweatshirt!
I really HEART my new sweatshirt!
For more about this refashion click here!
XOXOXO,
LaLaLauren
It is still a little chilly out here in DC and the weather is up and down. So I can still wear wintery clothes one day and then more springy-summer ones another. Got to love the weather here!
First I started off with this sweatshirt.
And this sweat jacket
I took in the grey sweatshirt and then I cut out a heart on the red sweatshirt-embroidered that on the sweatshirt! Here is my end sweatshirt!
I really HEART my new sweatshirt!
For more about this refashion click here!
XOXOXO,
LaLaLauren
Technicolor Tunic
Today's project has been in my possession all of twelve hours. I found it today at my favorite local thrift store, where you can fill a paper bag with clothes for $10. This particular store is not a good place for brand name or vintage finds, but if you're looking for ugly clothes to refashion it's the place to be. I was able to score 17 items on today's trip, including this bright, colorful top.
Don't I look impressed?
The colors and print reminded me of a Chagall painting, so I had to get it. After running it through the washer and dryer, I got to work. First I removed the sleeves and set them aside to use later. Then I put the shirt on my dress form and pinned under the arms to fit. I wanted to keep the flowiness of the original top, so I only sewed about 3 1/2 inches down from the armpit, and then cut away part of the excess fabric.
Taking in the top.
I folded the remaining excess onto itself, and sewed it down. (This created what looks like an inverted box pleat under each arm hole.) Next I sewed bias tape to the outside of the arm hole, trimmed around the hole, folded the bias tape in, and sewed it to the inside of the arm hole by hand. I also sewed the edge of the cap sleeve by hand.
Finishing the arms.
I was done with the shirt, but I wasn't quite done with the project. (I'll do anything to avoid washing the dishes.) I'd seen another blogger make a bolero out of leftover sleeves, and I wanted to give it a shot. I pinned the tops of the sleeves together (lucky for me, they were already cut straight) and sewed a straight seam. The edges of the sleeves were starting to come undone where they had once joined the armpit of the original shirt, so I sewed a few stitches across each seam to prevent them from coming undone. I thought about finishing the entire edge, but decided against it. (I'm so lazy sometimes.)
Bolero!
I was finally done! After a few hours, I'd created a bright, flowy tunic and matching bolero from one top. Not a bad deal for $0.64.
$0.32 each!
I'm really happy with my new top(s), and I can't wait to wear them tomorrow. I hope you all have a wonderful weekend!
- Elizabeth
aka The Hungry OctopusHow to Make an Easy Nursing Top
This is an easy top to make out of a few items you probably have laying around. Because of the shape of this nursing top I think it is a perfect one to make with one of your old maternity tops. With this you can turn a maternity tank into a nursing tank that will cover your belly right after delivery.
This top can be lifted up or pulled down to nurse
This nursing top is refashioned out of a few items. This is what I used plus a few sewing supplies.
When you are finished with this simple refashion you will have a nursing top that will look so cute, this is how mine looked. You can choose to make it in different colors. I would love to see what yours looks like.
If you want to see the step by step directions then check out my blog. My Life on the Divide, I have a whole section of nursing and maternity items that I hope you will enjoy.
One of my most popular nursing tops is a "no-sew" nursing top that I just LOVE!
Thank you so much for looking at my post