Showing posts with label t-shirt embellishment. Show all posts

Thursday, December 29, 2022

Happy New Sewing Year for 2023!

Do you make sewing resolutions for the year?

I do, usually overly ambitious ones for the amount of time I really have to sew.  This year I thought 4 x significant refashions was a sensible amount, but the year somewhat got away from me in the second half.

So I'm rounding out the year with two mends and two refashions of the simpler variety - but whatever saves an item from landfill and makes it useful in the closet again right?


Mend #1 - The very much liked jacket

A favour for a family member, who caught the pocket on a cupboard handle and tore the jacket right across the front.  The check design meant there was no way to match the pattern over the tear 


I sewed a strip of black fabric over the mend and added a hook detail to make it look like it was meant to be there.  The teen approves (which almost never happens).


 Mend #2 and Refashion #1 - Back in service

These could not be simpler - a very good laksa left a shadow of soup stains on the t-shirt that were never coming out - and cut-offs.

The circles are scraps of t-shirting fabric left over from various projects.  I bulk fused doublesided interfacing to the scraps and cut out a range of circles using different size lids as templates.  I arranged them over the stain shadows then elsewhere to round out the design, and ironed them on.


To make sure they stayed put after repeated washing I hand stitched around the edge with embroidery floss.

Sorry, I forgot to take before photos but I am sure you know what a stained t-shirt and jeans with holes look like.

Refashion #2 - The better than before dress to skirt

This was a new dress from Shein, tags still on.  Although a large size, the design of the dress put the first tier exactly where it was least flattering ( I bet you can figure out where) and the fabric is tissue thin and completely see-through.  You get what you pay for... (and yes, I did jump in again without taking photos so this is a reconstruction).


Cut off the unflattering bodice under the armpits, salvaged waist elastic (leaving it pre-sewn from previous garment saves time - whoo!) and some very thick white stretch material that's been in the stash (mumbles) long time.

Because the dress fabric is so flimsy I sewed the 'lining' which is heavier to the seam at the top of the first tier.  Then I measured and overlocked the top edge and made a fold over waistband over the elastic.


At this point there was a lot going on so I hand stitched the overlocked edge to the top tier seam as these were the strongest parts.  The lining is to the knee but the now skirt is maxi length.  And wearable.


Happy 2023 sewing!

Mimi-made


Friday, November 04, 2016

Moth attack rescue

This is more a rescue than a refashion, because the clothes are about the same before and after.  Apart from the holes... A year or so ago, we moved out of our house while it was being gutted and renovated.  Unbeknownst to me, the house we moved into was infested with clothing moths.  I found out when I pulled my winter clothing out of storage 6 months later and found all the holes.  And the moths had great taste - the cashmere and pure wool items only, none of your cheaper acrylic blends...
 
It's taken a while, and I'm still slowly working through the repairs.  Some I've been able to mend invisibly (Yay!) but then there were some other favourites like these.  I like them too much to just give up and go straight to felting so - into the chest freezer for a few days, washed and dried outside in the UV light, then time to find the holes:


This one has safety pins marking the holes, and is a WIP. 

For some reason only the right arm was damaged on this grey cardigan, so the left side embellishments are just to even it up (sorry the detail is oriented the wrong way).  I used scraps of fleece material to secure and reinforce the biggest holes, then doodled the rest of the planetary orbits in cotton embroidery thread until it looked right:


And this one had tiny holes but the knit is so fine I didn't like the way it looked after mending.  Now it has autumn leaves falling over it.


Happy refashioning (and rescuing)!

Mimi

Wednesday, February 05, 2014

Refashion a Faded T-Shirt Into a Heart Cut-Out for Valentine’s Day

Valentine's Day is coming up so I wanted to remake myself a t-shirt to commemorate the day. The original design doesn't matter, but I thought that the faded-out part actually made the final result nifty. I don't think I'm going to wear this on Valentine's Day date-night because it's too casual, but I'll be sporting it all day!


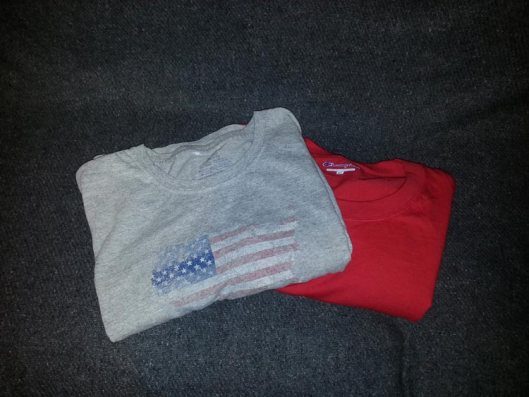
I used one faded-out t-shirt that didn't fit right, and a man's XXL t-shirt that I grabbed from Salvation Army for $2:


Head over to my original blog post to see how I refashioned a t-shirt into a heart cut-out for our day of love.

Friday, July 27, 2012

Logo Applique T-Shirt

My husband has been in dire need of a new Mets shirt (he had worn his old favorites to death), only I couldn't justifying spending $30-40 on a t-shirt. Thrift store run!

This is what I found (less than $10).


I made a logo from the extra shirts (PTL for freezer paper!), and this is what I got:


Hubs is pretty happy (so I am too!). Come visit me at Wunderbar for details about the applique process.